
1. Introduction
Thank you for choosing the AVID POWER AEP176 Dual Action Polisher. This tool is designed for efficient and safe polishing, waxing, and buffing of various surfaces, including automotive paint, furniture, ceramic, wood, and metal. Please read this manual thoroughly before operation to ensure proper use and to maximize the lifespan of your tool.
2. Safety Instructions
Always follow basic safety precautions when using electrical tools to reduce the risk of fire, electric shock, and personal injury.
- Work Area Safety: Keep your work area clean and well-lit. Cluttered or dark areas invite accidents. Do not operate power tools in explosive atmospheres, such as in the presence of flammable liquids, gases, or dust.
- Electrical Safety: Power tool plugs must match the outlet. Never modify the plug in any way. Do not abuse the cord. Never use the cord for carrying, pulling, or unplugging the power tool. Keep cord away from heat, oil, sharp edges, or moving parts.
- Personal Safety: Always wear eye protection. Use hearing protection when operating the polisher for extended periods. Dress properly; avoid loose clothing or jewelry that can get caught in moving parts.
- Tool Use and Care: Do not force the power tool. Use the correct power tool for your application. Disconnect the plug from the power source before making any adjustments, changing accessories, or storing power tools.
- Maintenance: Maintain power tools and accessories. Check for misalignment or binding of moving parts, breakage of parts, and any other condition that may affect the power tool’s operation.
3. Package Contents
Verify that all items are present upon unpacking:
- 1 x AVID POWER Dual Action Polisher (Model AEP176)
- 2 x 5-inch Foam Pads
- 2 x 6-inch Foam Pads
- 1 x 5-inch Foam Disc
- 1 x 6-inch Foam Disc
- 1 x Detachable D-handle
- 1 x Spanner
- 1 x Hex Wrench
- 1 x User Manual

Image: Included 5-inch and 6-inch backing plates with corresponding foam pads.
4. Product Features
The AVID POWER AEP176 Dual Action Polisher offers several features for effective and user-friendly operation:
- Dual Action Orbital Movement: This polisher utilizes a random orbital motion, which minimizes the risk of paint damage and swirl marks compared to traditional rotary polishers. It is effective for removing swirls, scratches, and defects.
- Variable Speed Control: A 6-level speed dial allows precise control over the polishing speed, ranging from 2700 to 6500 OPM (Orbits Per Minute). This enables adaptation to various tasks:
- Low speed: Ideal for waxing and buffing.
- Medium speed: Suitable for general polishing and cleaning.
- High speed: Recommended for removing paint defects and oxidation.
- Ergonomic Design: Features an adjustable D-handle that can be set to 5 different positions for comfortable grip and control. The rubberized body provides a non-slip surface during use.
- Versatile Application: Equipped with both 5-inch and 6-inch backing plates and pads, making it suitable for a wide range of applications beyond automotive detailing, including furniture, ceramic, wood, and metal surfaces.

Image: Illustration of the 8mm random orbital polishing action.

Image: Internal motor components of the polisher.
5. Setup
Before operating the polisher, ensure it is properly assembled.
5.1 Attaching the D-Handle
- Align the D-handle with the mounting holes on the front of the polisher.
- Insert the provided screws and tighten them securely with the hex wrench.
- Adjust the handle to one of the 5 available positions for optimal comfort and control during use.

Image: The polisher shown with and without the adjustable D-handle.

Image: Diagram demonstrating the D-handle's adjustable positions.
5.2 Attaching Backing Plates and Pads
- Select the appropriate backing plate (5-inch or 6-inch) for your task.
- Attach the backing plate to the polisher spindle. Use the provided spanner to hold the spindle while tightening the backing plate.
- Choose a foam pad suitable for your application (e.g., cutting, polishing, finishing).
- Align the foam pad with the hook-and-loop surface of the backing plate and press firmly to secure it.

Image: The polisher configured with both 6-inch and 5-inch backing plates and pads.
Video: Official AVID POWER demonstration of the AEP176 5-inch/6-inch Dual Action Buffer Polisher, showing assembly and basic features.
6. Operating Instructions
Follow these steps for effective and safe operation of your polisher.
6.1 Preparing the Surface
- Ensure the surface to be polished is clean, dry, and free of loose dirt or debris.
- Mask off any trim, rubber, or sensitive areas that you do not wish to polish.
6.2 Applying Compound/Polish
- Apply a small amount of compound or polish directly onto the foam pad.
- Dab the pad onto the surface in a small section (e.g., 2x2 feet) to distribute the product evenly before turning on the polisher.
6.3 Operating the Polisher
- Plug the polisher into a suitable power outlet.
- Set the desired speed using the 6-level variable speed dial. Start with a lower speed (1-2) for spreading product, then increase to a medium (3-4) or high (5-6) speed for correction, depending on the product and desired outcome.
- Place the pad flat against the surface before turning the tool on.
- Press the trigger to start the polisher. You can use the lock button for continuous operation.
- Move the polisher slowly and evenly across the surface in overlapping passes, maintaining light to moderate pressure. Avoid tilting the polisher, which can concentrate pressure and cause uneven results.
- After completing a section, turn off the polisher before lifting it from the surface.
- Wipe off any residue with a clean microfiber towel.

Image: Close-up view of the 6-speed adjustment dial.

Image: Diagram illustrating the 6-speed settings on the polisher.
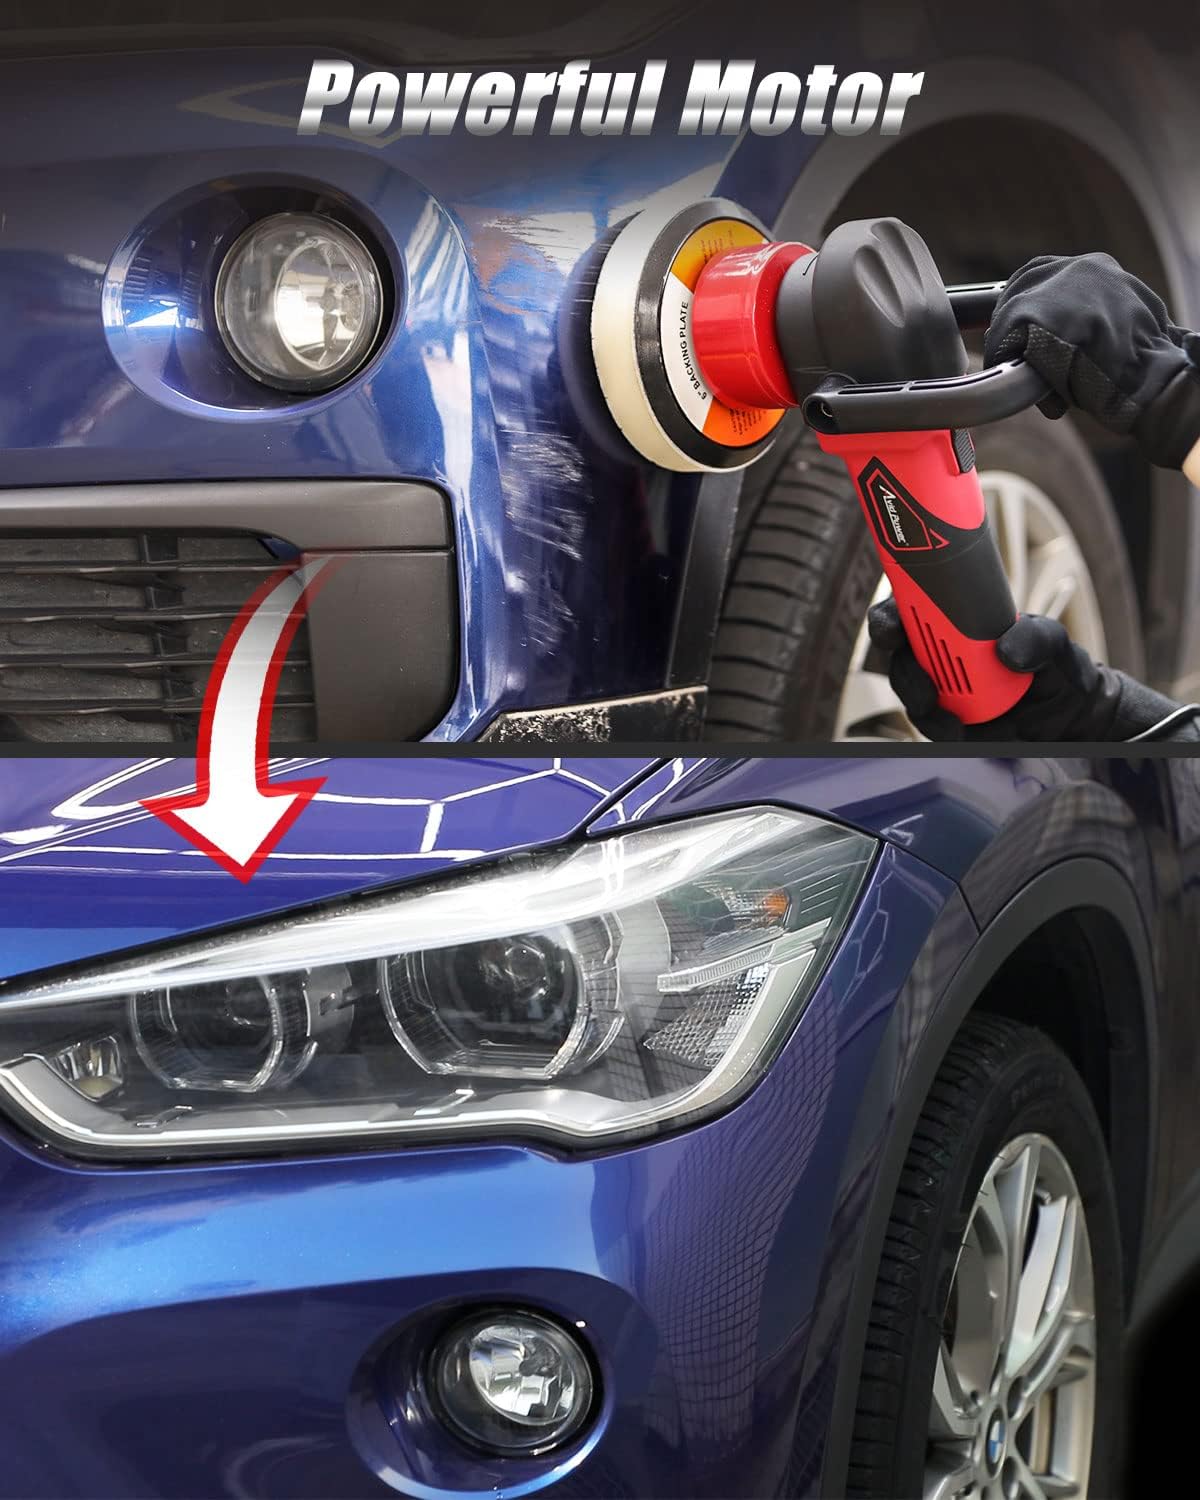
Image: Demonstration of the polisher removing scratches from a car bumper.

Image: Polisher in use on a car hood, applying compound.
7. Maintenance
Regular maintenance ensures optimal performance and extends the life of your polisher.
7.1 Cleaning
- After each use, disconnect the polisher from the power source.
- Remove the foam pad and clean it thoroughly according to the pad manufacturer's instructions.
- Wipe down the polisher body with a clean, damp cloth. Do not use harsh chemicals or abrasive cleaners.
- Ensure ventilation openings are clear of dust and debris.
7.2 Carbon Brush Replacement
The polisher is equipped with carbon brushes that may wear down over time. Replacement brushes are included with your kit.
- Unplug the tool from the power source.
- Locate the brush caps on the sides of the motor housing.
- Unscrew the brush caps using a flathead screwdriver or coin.
- Remove the old carbon brushes.
- Insert the new carbon brushes, ensuring they are seated correctly.
- Replace and tighten the brush caps.
8. Troubleshooting
If you encounter issues with your polisher, refer to the following common problems and solutions:
| Problem | Possible Cause | Solution |
|---|---|---|
| Polisher does not start | No power supply; Faulty power cord/plug; Worn carbon brushes | Check power outlet; Inspect cord/plug for damage; Replace carbon brushes. |
| Excessive vibration or noise | Loose backing plate/pad; Damaged pad; Internal component issue | Ensure backing plate and pad are securely attached; Replace damaged pad; Contact customer support if issue persists. |
| Polisher overheats | Blocked ventilation; Prolonged heavy use; Worn motor components | Clear ventilation slots; Allow tool to cool down; Reduce pressure during use; Contact customer support. |
| Ineffective polishing/swirl marks | Incorrect pad/compound; Insufficient product; Too much pressure; Uneven application | Use appropriate pad/compound for the task; Apply sufficient product; Use light, even pressure; Ensure flat pad contact with surface. |
If you cannot resolve the issue using this guide, please contact AVID POWER customer support.
9. Specifications
| Feature | Detail |
|---|---|
| Brand | AVID POWER |
| Model Number | AEP176 |
| Power Source | AC |
| Amperage | 5 A |
| Voltage | 12 volts |
| Speed (No Load) | 2700-6500 OPM (Orbits Per Minute) |
| Material | Metal |
| Included Components | Wrench, Detachable D-handle, Foam Pads, Foam Discs |
| Specific Uses | Automotive, Furniture, Ceramic, Wood, Metal |
10. Warranty and Support
AVID POWER products are manufactured to high-quality standards. For warranty information, technical support, or service inquiries, please refer to the warranty card included with your product or visit the official AVID POWER website. Keep your purchase receipt as proof of purchase.