1. Product Overview
The Desview P5II is a 5.5-inch field monitor designed for DSLR cameras and camcorders. It features a Full HD 1920x1080 IPS display, 4K HDMI input/output, and various professional monitoring tools. This manual provides instructions for its proper use and maintenance.

Image: Front view of the Desview P5II Camera Monitor, showcasing its 5.5-inch display.
2. Package Contents
Verify that all items listed below are included in your package. If any items are missing or damaged, please contact customer support.
- Field Monitor Body
- Mount holder
- Sunhood
- HDMI Cable (Mini HDMI and Micro HDMI cables are included)
- USB Flash drive
- User Manual
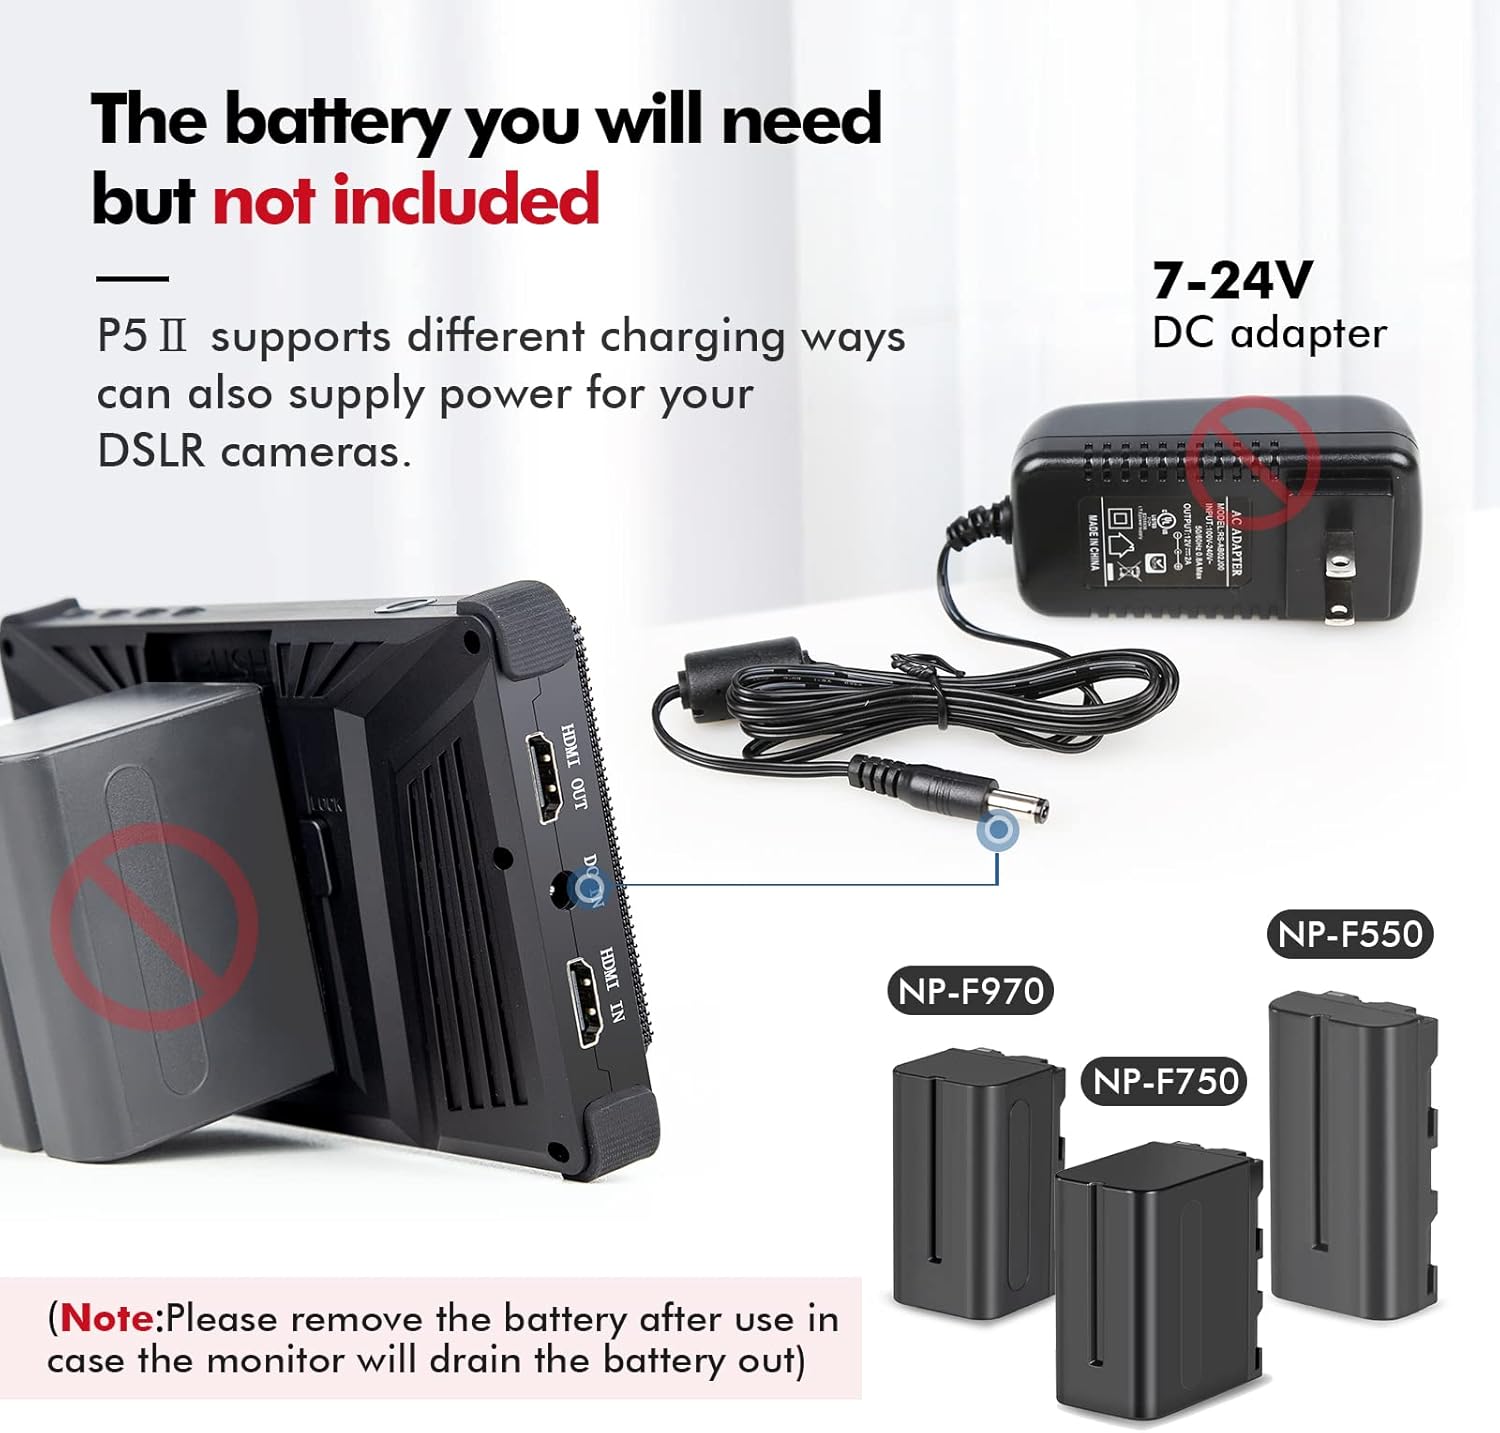
Image: Desview P5II Camera Monitor with its included sun hood attached, ready for outdoor use.
3. Key Features
The Desview P5II monitor offers a range of features to enhance your camera monitoring experience:
- Display: 5.5-inch Full HD (1920x1080) IPS display, daylight-viewable with 500 Candela brightness.
- 4K HDMI Support: Supports up to 4K UHD 3840x2160p (24/25/30Hz) and 4096x2160p (24Hz) input/output.
- Advanced Monitoring Tools: Includes Histogram, Vectorscope, Waveform, False Color, Peaking Focus Assist, Zebra Exposure, Zoom, HDR, and more.
- 3D LUT Support: Allows users to import and apply custom 3D LUT files via a USB drive for color correction and creative looks.
- Flexible Power: Compatible with standard NP-F series batteries and a DC 12V adapter (not included).
- Audio Monitoring: Real-time audio monitoring via a 3.5mm headphone jack.
- Durable Design: Features an anti-drop design with rubber bumpers for protection.

Image: Comparison demonstrating the monitor's 800 Nits high brightness, showing improved visibility in bright conditions compared to a 450 Nits display.

Image: Illustration of the Desview P5II monitor's anti-drop design, highlighting the protective rubber bumper on its corners.
4. Setup Guide
4.1 Attaching the Mount Holder and Sunhood
- Screw the mount holder onto the 1/4" mounting hole at the bottom of the monitor.
- Slide the sunhood frame onto the monitor's edges.
- Attach the fabric sunhood to the frame using its fasteners.
4.2 Powering the Monitor
The P5II can be powered by an NP-F series battery or a DC 12V adapter (not included).
- Battery Power: Insert a charged NP-F series battery (e.g., NP-F970, NP-F750, NP-F550) into the battery plate on the back of the monitor.
- DC Power: Connect a 12V DC power adapter (not included) to the DC IN port.
Note: Please remove the battery after use to prevent battery drain.

Image: Diagram illustrating power options for the Desview P5II, showing compatible NP-F series batteries and the connection point for a 7-24V DC adapter (not included).
4.3 Connecting to a Camera
Use the provided HDMI cables (Mini HDMI or Micro HDMI) to connect your DSLR camera or camcorder to the monitor's HDMI IN port. The monitor supports 4K HDMI signals without delay.
The monitor also features an HDMI OUT port, allowing you to send the video signal to another monitor simultaneously.

Image: Side view of the Desview P5II monitor, highlighting the HDMI In, HDMI Out, DC In, and DC Out ports.
5. Operating Instructions
5.1 Power On/Off
Press and hold the ON/OFF button located on the side of the monitor to power it on or off. The monitor may take a few seconds to start up.
5.2 Menu Navigation and Quick Buttons
The monitor features a menu button and directional buttons (Left, Right, Exit) for navigating settings. Quick shortcut keys can be set for fast adjustments.
- Menu Button: Press to access the main menu.
- Directional Buttons: Use Left/Right to navigate menu options.
- Exit Button: Press to go back or exit the menu.

Image: Diagram illustrating the quick button controls and port layout of the Desview P5II monitor, including ON/OFF, menu navigation, headset plug, USB, DC Out, and 1/4" mounting holes.

Image: Example of the Desview P5II monitor's on-screen menu interface, showing options for various monitoring functions.
5.3 Audio Monitoring
Connect headphones to the 3.5mm headphone jack to monitor audio in real-time.
6. Advanced Monitoring Tools
The Desview P5II integrates several professional tools to assist with accurate exposure, focus, and color analysis:
- Histogram: Displays the tonal distribution of your image, helping to prevent under or overexposure.
- Vectorscope: Shows the color saturation and hue of your video signal.
- Waveform: Visualizes the luminance and chrominance levels across the image.
- False Color: Assigns false colors to different exposure levels, making it easy to identify overexposed or underexposed areas.
- Peaking Focus Assist: Highlights sharp edges in the image, aiding in precise manual focusing.
- Zebra Exposure: Displays stripes over areas that exceed a set exposure threshold.
- Zoom: Magnifies a portion of the image for critical focus checks.
- HDR: Supports High Dynamic Range display for a wider color gamut and dynamic range.
- Safe Area: Helps ensure critical elements are within broadcast-safe zones.
- Aspect Ratio Markers: Provides various aspect ratio guides (e.g., 4:3, 2.35:1, 1.85:1).
- Anamorphic De-squeeze: Corrects the aspect ratio of anamorphic footage.

Image: Icons representing various monitoring features available on the Desview P5II, including False Color, Single Color, Brightness Histogram, RGB Histogram, Safe Area, RGB Waveform, Luminance Waveform, Center Mark, Peaking, Zebra, HDR, LUT, Audio Meters, Image Flip, Battery Notification, Grid Lines, Aspect Ratio, and Zoom.

Image: Example of the False Color function in use, showing different colors indicating exposure levels in a landscape scene.

Image: Example of the Histogram display, showing the distribution of tones in an image of wheat stalks.

Image: Example of Peaking Focus Assist, highlighting in-focus areas with a distinct color on an image of a swan.

Image: Example of Zebra Exposure, showing striped patterns over areas of an image that exceed a set exposure threshold.

Image: Comparison between HDR (High Dynamic Range) and SDR (Standard Dynamic Range) display modes on the Desview P5II, demonstrating enhanced detail in highlights and shadows with HDR.

Image: Examples of Safe Area and various Aspect Ratio markers (e.g., 4:3, 2.35:1, 1.85:1) displayed on the Desview P5II monitor.

Image: Illustration of the Anamorphic De-squeeze function, showing how compressed anamorphic footage is correctly displayed on the monitor with various de-squeeze ratios.
7. 3D LUT Support
The Desview P5II allows you to import and apply 3D Look Up Tables (LUTs) to preview your footage with specific color grades or conversions (e.g., Log to Rec.709).
- Save your desired 3D LUT files (.cube format) onto the provided USB flash drive.
- Insert the USB flash drive into the monitor's USB port.
- Navigate to the "Look File" function in the monitor's menu.
- Select and apply your desired LUT.
Image: Diagram showing the process of importing 3D LUT files into the Desview P5II monitor using a USB flash drive.
8. Powering External Devices
The Desview P5II features an 8V DC OUT port, allowing you to power your DSLR camera directly from the monitor's battery (NP-F series) or DC input.
- Ensure a charged NP-F battery is installed or a DC adapter is connected to the monitor.
- Connect a compatible DC power cable from the monitor's 8V DC OUT port to your DSLR camera's power input.
Image: Illustration demonstrating how the Desview P5II monitor can power a DSLR camera using its 8V DC output, drawing power from either an NP-F battery or an external DC adapter.
9. Maintenance
- Cleaning: Use a soft, dry cloth to clean the monitor screen and body. For stubborn smudges, use a screen-specific cleaning solution applied to the cloth, not directly to the screen.
- Storage: When not in use, store the monitor in a cool, dry place, away from direct sunlight and extreme temperatures.
- Battery Care: Always remove the battery from the monitor when not in use for extended periods to prevent over-discharge.
- Avoid Impact: Despite its anti-drop design, avoid dropping or subjecting the monitor to strong impacts to prevent damage.
10. Troubleshooting
- Monitor does not power on.
- Ensure the NP-F battery is fully charged and correctly inserted, or that the DC power adapter is properly connected and supplying power.
- No video signal on the monitor.
- Verify that the HDMI cable is securely connected to both the camera's HDMI OUT and the monitor's HDMI IN ports. Check the camera's video output settings to ensure it is sending a signal. Confirm the monitor's input source is set correctly.
- Image is distorted or incorrect aspect ratio.
- Check the aspect ratio settings in the monitor's menu. If using anamorphic lenses, ensure the anamorphic de-squeeze function is enabled and set to the correct ratio.
- Monitor takes a few seconds to turn on/off.
- This is normal operating behavior for the Desview P5II monitor.
- Cannot hear audio through headphones.
- Ensure headphones are properly plugged into the 3.5mm jack. Check the audio settings on both the monitor and your camera. Verify that your camera is outputting audio via HDMI.
11. Specifications
| Feature | Detail |
|---|---|
| Screen Size | 5.5 Inches |
| Resolution | 1920 x 1080 (FHD 1080p) |
| Aspect Ratio | 16:9 |
| Image Brightness | 500 Candela (Nits) |
| Item Weight | 1 pound |
| Package Dimensions | 7.2 x 4.6 x 3.4 inches |
| HDMI Support | Up to 4K UHD 3840x2160p (24/25/30Hz), 4096x2160p (24Hz) |
| Power Input | NP-F series battery, DC 12V adapter |
| DC Output | 8V |
| Manufacturer | Desview |
12. Warranty and Support
For warranty information and technical support, please refer to the official Desview website or contact your retailer. Keep your purchase receipt as proof of purchase.
For further assistance, please visit the Desview Store on Amazon.


