Introduction
Thank you for choosing the Northair Crescent Ice Maker. This manual provides essential information for the safe and efficient operation, maintenance, and troubleshooting of your new appliance. Please read it thoroughly before first use and retain it for future reference.
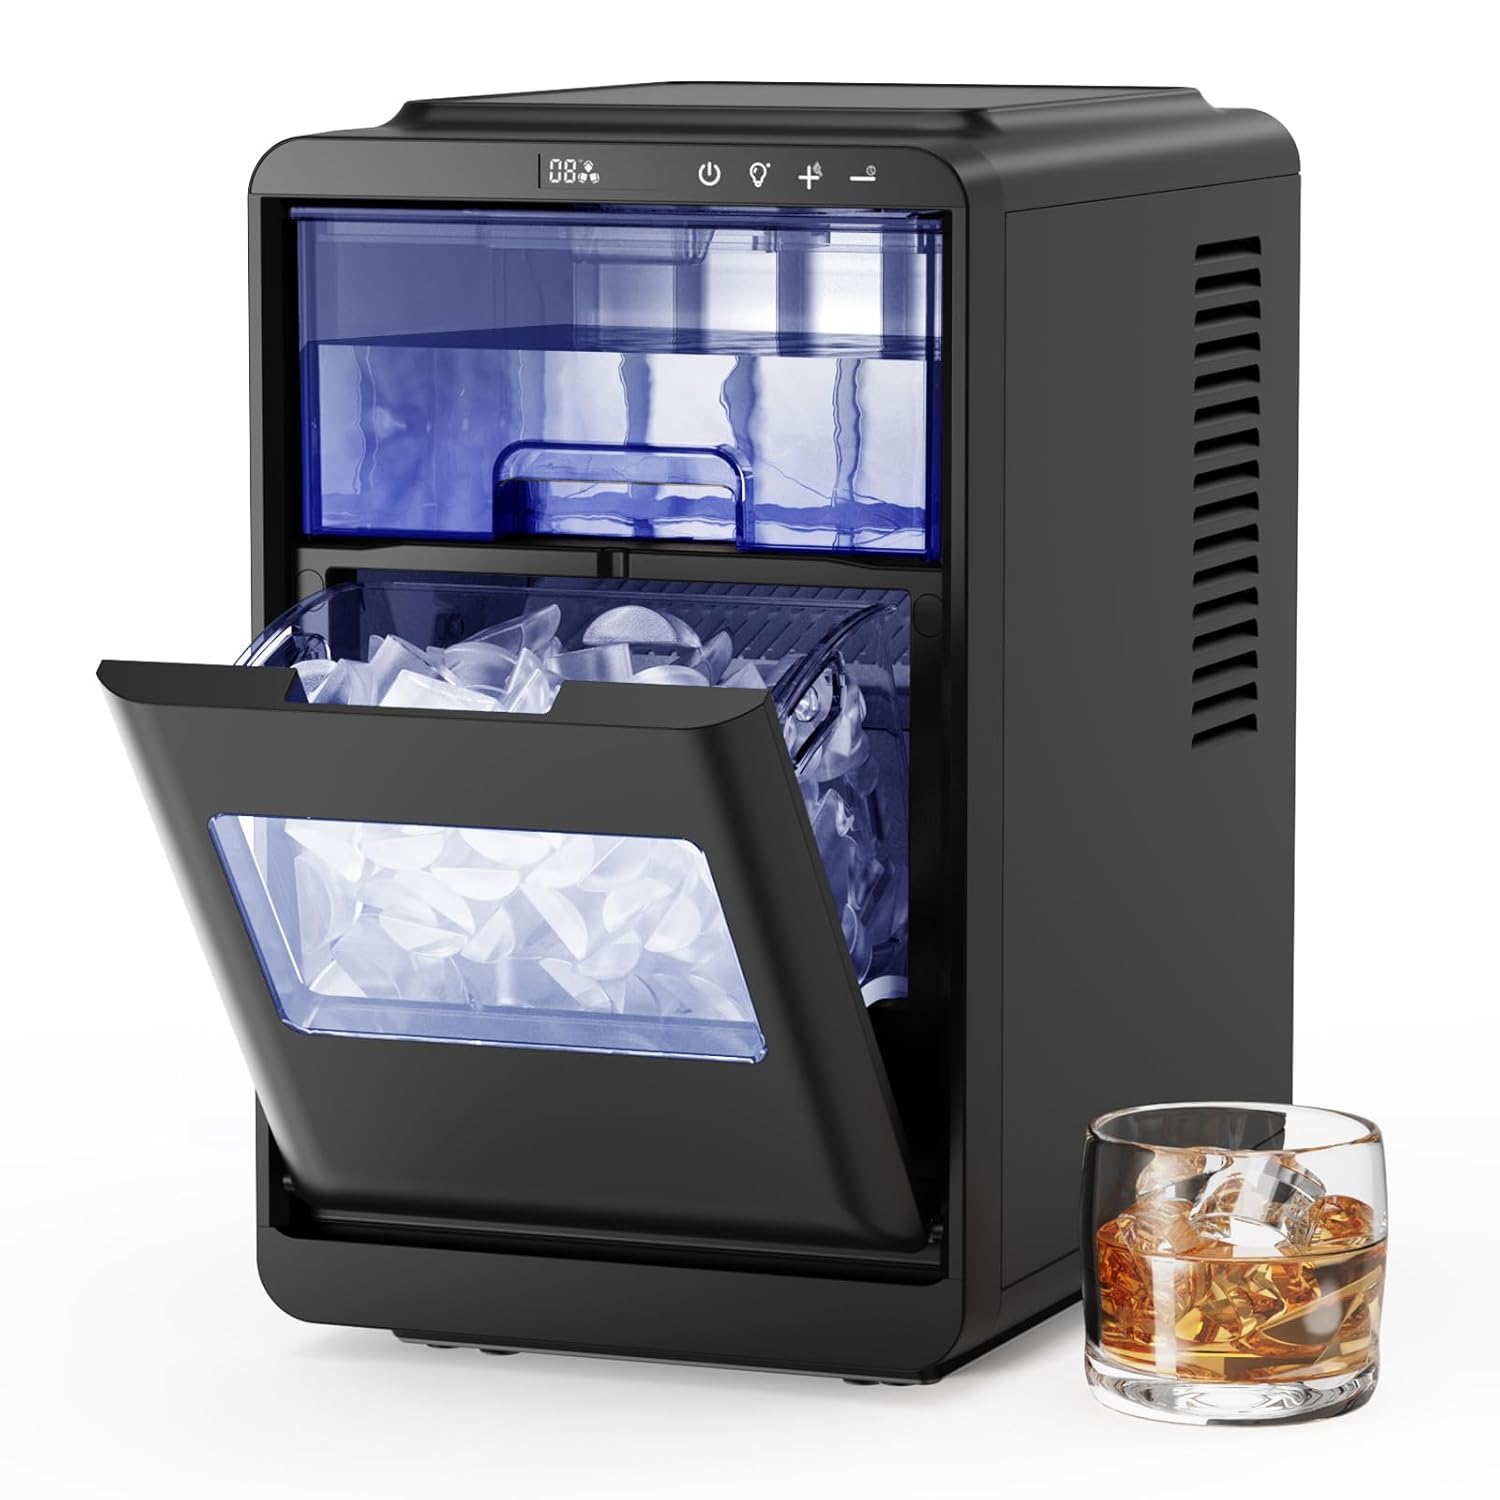
Image: The Northair Crescent Ice Maker in black, featuring its open ice basket filled with crescent ice, accompanied by a glass of whiskey with ice.
Important Safety Instructions
To reduce the risk of fire, electric shock, or injury, always follow these basic safety precautions:
- Read all instructions before operating the appliance.
- Do not touch the evaporator or ice basket when the unit is operating to avoid frostbite.
- Never immerse the power cord, plug, or the appliance itself in water or other liquids.
- Close supervision is necessary when any appliance is used by or near children.
- Unplug the appliance from the outlet when not in use, before cleaning, or before performing any maintenance.
- Do not operate any appliance with a damaged cord or plug, or after the appliance malfunctions or has been damaged in any manner. Contact customer service for assistance.
- Use only potable (drinkable) water in the ice maker.
- Ensure the appliance is placed on a stable, level surface with adequate ventilation (at least 4 inches of clearance on all sides).
- Do not block any ventilation openings.
- This appliance is for household use only. Do not use outdoors.
Product Components
Familiarize yourself with the parts of your Northair Crescent Ice Maker:

Image: Labeled diagram illustrating the various parts of the ice maker for easy identification.
- Operation & Display Area: Control panel with buttons and indicators.
- Water Tank: Reservoir for water used in ice production.
- LED Light: Illuminates the ice basket.
- Ice Basket: Removable container for collecting produced ice.
- Drain Outlet: Plug at the bottom for draining water.
- Ice-Making and Defrosting Indicator: Shows when ice is being made or defrosted.
- Ice-Full Indicator: Lights up when the ice basket is full.
- Water Shortage Indicator: Lights up when the water tank needs refilling.
- On/Off Button: Powers the unit on or off.
- Light and Ice Thickness Adjustment Button: Controls the LED light and adjusts ice size.
- Time "+" and Auto-Clean K Timer Setting Button: Increases timer setting and activates self-clean.
- Time "-" and Timer Setting Button: Decreases timer setting.
Setup Guide
1. Unpacking and Placement
- Remove all exterior and interior packaging materials.
- Place the ice maker on a flat, stable, heat-resistant surface.
- Ensure there is at least 4 inches (10 cm) of space around the unit for proper air circulation. Avoid placing near heat sources or in direct sunlight.
2. Initial Cleaning
- Before first use, clean the interior of the ice maker. Remove the ice basket.
- Wipe the interior with a soft cloth dampened with warm water and a mild detergent.
- Rinse thoroughly with clean water and drain any remaining water through the drain outlet.
- Dry the interior completely before use.
3. Filling the Water Tank

Image: Demonstrates the process of filling the water tank with potable water.
- Open the top lid of the ice maker.
- Fill the water tank with potable water up to the indicated MAX fill line. Do not overfill.
- Close the lid securely.
Operating Instructions
1. Power On/Off
- Plug the power cord into a grounded electrical outlet.
- Press the On/Off button to turn the unit on. The indicator light will illuminate.
- Press the On/Off button again to turn the unit off.
2. Selecting Ice Size

Image: Visual representation of the three crescent ice sizes and the ice maker's production capabilities.
- After powering on, use the Light and Ice Thickness Adjustment button (often labeled with '+' and '-' or a lightbulb icon) to cycle through the available ice sizes: Small, Medium, or Large.
- The selected size will be displayed on the control panel.
3. Starting Ice Production
- Once the desired ice size is selected, the machine will automatically begin the ice-making cycle.
- The first batch of ice typically takes 12-15 minutes. Subsequent cycles may be faster.
4. Timer Function

Image: Overview of the control panel buttons, including the timer and self-cleaning functions.
- Press the Timer Setting button (often combined with '+' or '-') to activate the timer function.
- Use the '+' and '-' buttons to set the desired delay time (up to 24 hours) for the unit to start or stop.
- The timer indicator will light up when the timer is active.
5. Indicators
- ICE FULL: When the ice basket is full, the "Ice Full" indicator will illuminate, and the ice production will automatically pause. Remove ice to resume production.
- ADD WATER: If the water level in the tank is too low, the "Add Water" indicator will light up. Refill the water tank to continue ice production.
6. LED Lighting
- Press the Light button (lightbulb icon) to turn the interior LED light on or off, allowing you to view the ice production.
7. Product Demonstration Video
Video: A demonstration of the Northair Crescent Ice Maker's features and operation, including water filling, ice size selection, and ice production.
Maintenance and Cleaning
Regular cleaning and maintenance ensure optimal performance and longevity of your ice maker.
1. Self-Cleaning Function
- Ensure the water tank is filled with clean water.
- Press and hold the Auto-Clean button (often combined with the 'Time +' button) for approximately 3-5 seconds to activate the self-cleaning cycle.
- The unit will perform an internal cleaning process, circulating water. This cycle typically lasts several minutes.
- Once the cycle is complete, drain the water from the unit.
2. Regular Cleaning
- Exterior: Wipe the exterior surface with a soft, damp cloth. Do not use harsh chemicals or abrasive cleaners.
- Interior: Remove the ice basket. Clean the water tank, ice-making components, and the interior walls with a soft cloth and a solution of warm water and mild detergent. Rinse thoroughly with clean water.
- For stubborn mineral deposits, a solution of water and vinegar (10:1 ratio) can be used, followed by thorough rinsing.
3. Draining Water
- Always unplug the ice maker before draining water.
- Locate the drain plug at the bottom or back of the unit.
- Place a container under the drain outlet and remove the plug to allow water to drain completely.
- Once drained, securely replace the drain plug.
Troubleshooting Guide
If you encounter issues with your ice maker, refer to the table below for common problems and solutions.
| Problem | Possible Cause | Solution |
|---|---|---|
| Ice maker not turning on | No power supply Power cord not properly connected | Check if the unit is plugged into a working outlet. Ensure the power cord is securely connected. |
| "ADD WATER" indicator is on | Water tank is empty or low | Fill the water tank with potable water up to the MAX line. |
| "ICE FULL" indicator is on | Ice basket is full | Remove ice from the ice basket. |
| No ice production or very little ice | Insufficient water Ambient temperature too high Poor ventilation Ice-making cycle interrupted | Check water level and refill. Ensure the unit is in a cool environment. Provide adequate clearance around the unit. Do not open the lid frequently during operation. |
| Ice cubes are too small or cloudy | Water quality Ice size setting First few cycles | Use distilled or filtered water for clearer ice. Select a larger ice size setting. The first few batches may be smaller or less clear. This is normal. |
| Unusual noise during operation | Unit not level Internal components vibrating | Ensure the ice maker is on a flat, stable surface. This is often normal during the ice-making process. If excessive, contact support. |
| Water leakage | Drain plug loose Water tank overfilled | Ensure the drain plug is securely in place. Do not fill water above the MAX line. |
Product Specifications
Key technical details for your Northair Crescent Ice Maker:
| Feature | Detail |
|---|---|
| Brand | Northair |
| Model Name | HZB12M092801 |
| Product Dimensions (D x W x H) | 10" x 15" x 17" (25.4 cm x 38.1 cm x 43.2 cm) |
| Water Tank Capacity | 2.2 Liters (1.8L usable) |
| Voltage | 115 Volts |
| Ice Production Capacity | Up to 35 lbs (15.9 kg) per 24 hours |
| Ice Production Per Cycle | 16 pieces |
| Ice Making Cycle Time | Approximately 12-15 minutes |
| Ice Shape | Crescent |
Warranty and Customer Support
Northair products are manufactured to high-quality standards and are warranted against manufacturing defects. For specific warranty details, including duration and coverage, please refer to the warranty card included with your purchase or visit the official Northair website.
If you experience any issues or have questions regarding your Northair Crescent Ice Maker, please contact our customer support team:
- Website: Visit the Northair official website for FAQs and support resources.
- Email/Phone: Refer to your product packaging or the Northair website for current contact information.
Please have your model number (HZB12M092801) and purchase date ready when contacting support.
