Introduction
Thank you for choosing the Ejoyous Automatic Sensor Faucet. This touchless mixer tap is designed for convenience, hygiene, and water conservation in both kitchen and bathroom environments. Featuring an infrared sensor, it provides automatic water flow, preventing cross-contamination and reducing water waste. This manual provides detailed instructions for installation, operation, maintenance, and troubleshooting to ensure optimal performance and longevity of your faucet.

Image: The Ejoyous Automatic Sensor Faucet, showcasing its sleek chrome finish and integrated sensor.
Safety Information
- Always turn off the main water supply before beginning installation or maintenance.
- Ensure all connections are secure to prevent leaks.
- Do not use abrasive cleaners or harsh chemicals on the faucet's surface, as this may damage the chrome finish.
- Keep the control box dry and away from direct water exposure.
- Use only the specified battery type (4 AA batteries, not included) for the control box.
- If you are unsure about any installation steps, consult a qualified plumber.
Package Contents
Please verify that all components are present before proceeding with installation:
- Sensor Faucet Body with Cable
- AC and DC Control Box
- Flexible Connection Hose
- Mounting Hardware (screws, anchors)
- User Manual (this document)
- Conversion Plug (if applicable)
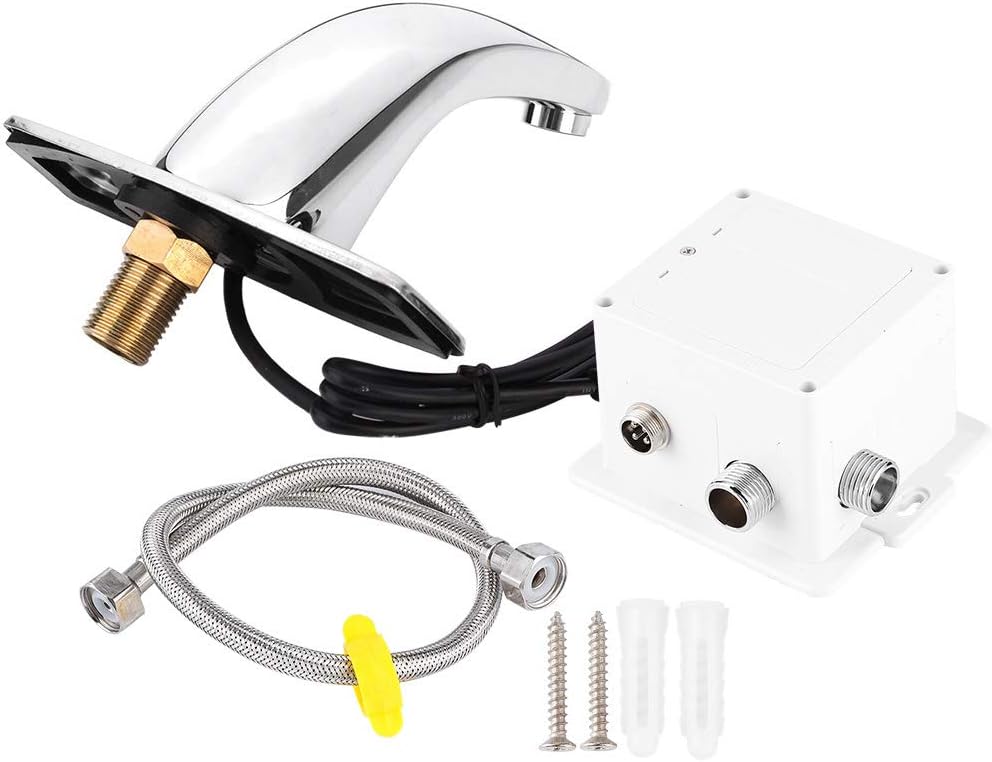
Image: All components included in the package: the faucet, control box, flexible hose, and mounting hardware.

Image: Illustration showing potential variations between new and old types of components that may be shipped randomly.
Specifications
| Feature | Description |
|---|---|
| Brand | Ejoyous |
| Model Number | a8bf39ac-d14b-4ea9-b118-f81ab85dd950 |
| Material | Brass Faucet Body, ABS Plastic Control Box |
| Finish | Polished Chrome |
| Installation Type | Deck Mounted (Single Hole) |
| Sensor Type | Infrared Sensor |
| Detection Zone | Preset 30cm (Adjusts automatically to environment) |
| Power Supply | 4 AA Batteries (not included) or AC power (via control box) |
| Battery Life | Approx. 2 years (based on 200 uses/day) |
| Water Pressure | 0.1 MPa - 0.6 MPa (Optimal: 0.1 MPa - 0.3 MPa) |
| Dimensions | 33 x 24 x 13.5 cm (Product); 1.1 Kilograms (Weight) |
Setup and Installation
Follow these steps carefully for proper installation:
- Prepare the Installation Area:
Ensure the main water supply is turned off. Clear the area around the sink or basin where the faucet will be installed. If replacing an old faucet, remove it and clean the mounting surface.
- Mount the Faucet:
Insert the threaded pipe of the faucet body through the mounting hole on your sink or countertop. Secure the faucet from underneath using the provided mounting hardware (washer and nut). Ensure the faucet is firmly in place and oriented correctly.

Image: View of the faucet's underside, showing the threaded pipe and sensor cable for mounting.
- Connect the Control Box:
Mount the control box in a dry, accessible location under the sink, away from direct water spray. Use the provided screws and anchors if necessary. Connect the sensor cable from the faucet to the designated port on the control box. Ensure the connection is secure.

Image: Close-up of the control box, showing the "Water Out" connection and the port for the sensor cable.
- Connect Water Supply:
Connect the flexible hose from the faucet to the "Water Out" port on the control box. Then, connect your hot and cold water supply lines to the appropriate inlets on the control box. Ensure all connections are tightened securely to prevent leaks. It is recommended to use thread sealant tape on all threaded connections.
- Install Batteries (if using DC power):
Open the battery compartment on the control box and insert 4 AA alkaline batteries, observing the correct polarity. Close the compartment securely. If using AC power, connect the AC adapter (not included) to the control box and a power outlet.
- Test for Leaks and Functionality:
Slowly turn on the main water supply. Check all connections for any signs of leaks. Place your hands within the sensor's detection zone to activate the water flow. Remove your hands to stop the flow. The sensor will automatically adjust its detection distance based on the environment.
Operation
The Ejoyous Automatic Sensor Faucet is designed for simple, touchless operation:
- Automatic Water Flow: To activate water flow, simply place your hands or an object within the detection zone of the infrared sensor, located at the base of the faucet.
- Automatic Shut-off: Water flow will automatically stop once your hands or the object are removed from the sensor's detection zone. This feature helps conserve water and prevents accidental overflow.
- Temperature Control: The faucet includes a hot and cold water mixing valve within the control box, allowing you to set your desired water temperature during installation. Once set, the faucet will dispense water at this pre-set temperature.
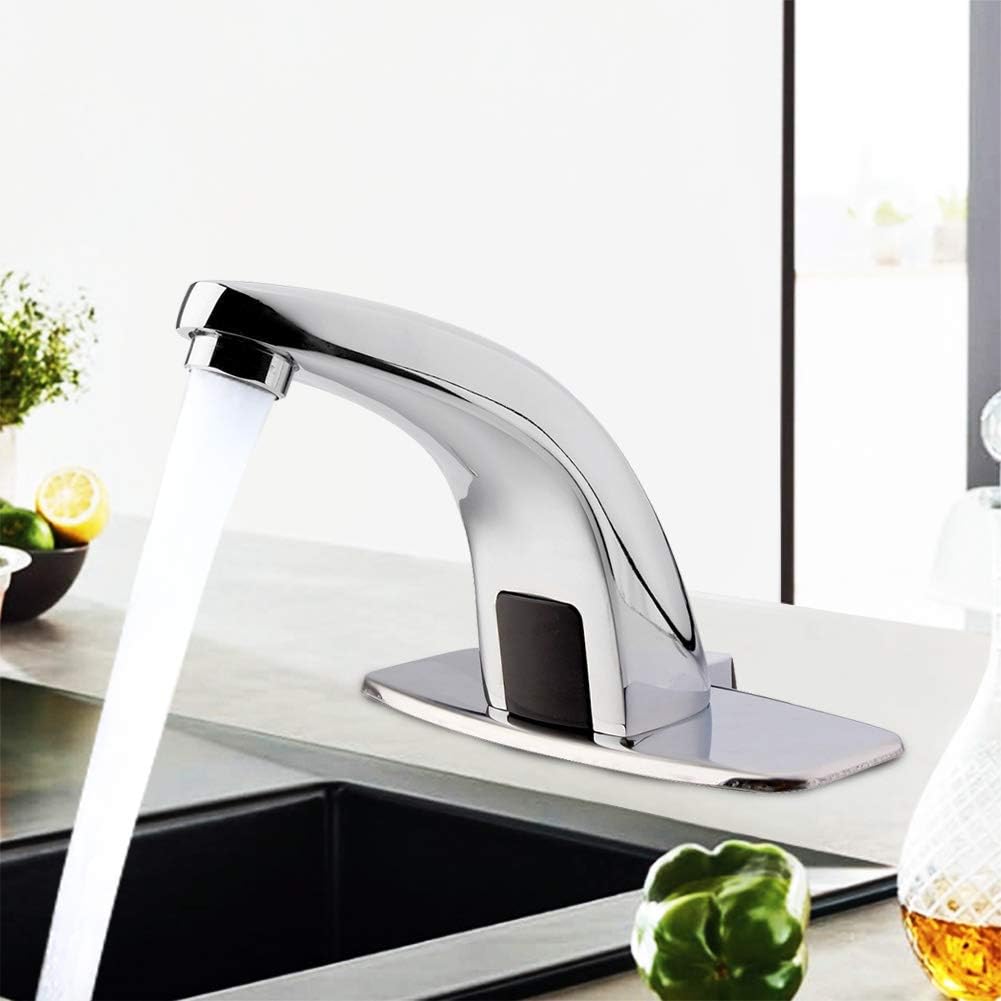
Image: The sensor faucet in operation within a kitchen sink, demonstrating water flow.

Image: The sensor faucet in operation within a bathroom sink, demonstrating water flow.

Image: A close-up view of the infrared sensor located on the body of the faucet.
Maintenance
Regular maintenance will help prolong the life and maintain the appearance of your Ejoyous Automatic Sensor Faucet:
- Cleaning the Faucet: Clean the chrome surface regularly with a soft cloth and mild soap or a non-abrasive cleaner specifically designed for chrome finishes. Rinse thoroughly with water and dry with a soft cloth to prevent water spots.
- Do Not Use: Avoid using abrasive cleaners, scouring pads, ammonia-based cleaners, or bleach, as these can damage the finish and internal components.
- Sensor Maintenance: Keep the sensor window clean and free from obstructions. Wipe it gently with a soft, damp cloth if it appears dirty.
- Battery Replacement: If the faucet's response becomes sluggish or inconsistent, it may be time to replace the batteries in the control box. Ensure the water supply is off before opening the control box.
- Aerator Cleaning: If water flow becomes weak or uneven, the aerator at the spout may be clogged. Unscrew the aerator, clean any debris, and rinse it before reattaching.
Troubleshooting
| Problem | Possible Cause | Solution |
|---|---|---|
| No water flow when sensor is activated. |
|
|
| Water flows continuously. |
|
|
| Weak or inconsistent water flow. |
|
|
| Leaks from connections. |
|
|
Warranty and Support
Ejoyous products are manufactured to high-quality standards. For warranty information or technical support, please refer to the contact details provided with your purchase documentation or visit the official Ejoyous store on Amazon:
Visit the Ejoyous Store on Amazon
When contacting support, please have your model number (a8bf39ac-d14b-4ea9-b118-f81ab85dd950) and purchase date ready.


