1. Introduction
The Walfront WT130A Ultrasonic Thickness Gauge is a precision instrument designed for measuring the thickness of various materials quickly and accurately. It utilizes ultrasonic technology to determine material thickness by measuring the time it takes for an ultrasonic pulse to travel from the transducer through the material and back to the transducer. This device is suitable for materials that conduct and reflect constant sound velocity, such as metals, plastics, ceramics, and glass.
Its compact and portable design, coupled with a durable ABS shell, ensures reliability and ease of use in diverse environments.
2. Key Features
- Fast Measurement: Microprocessor-controlled for quick and accurate thickness readings.
- Ultrasonic Velocity Testing: Capable of determining the speed of sound in various materials without affecting ultrasonic measurement.
- Wide Application: Ideal for measuring thickness of metals, plastics, ceramics, and glass.
- Reflection Recognition: Distinguishes reflected waves for accurate results, especially when transmitting at a constant speed.
- Compact & Portable: Features a wear-resistant ABS material shell for durability and easy transport.
- 1500 Data Storage Records: Large capacity for storing measurement data.
- Upper and Lower Limit Alarm: Allows setting of measurement limits with an alarm function.
- Micro-USB Interface: Compatible with standard Micro USB for connectivity.
- Silicone Keypad: Soft silicone buttons with clear labeling for simple operation.
3. Product Components
The WT130A Ultrasonic Thickness Gauge package includes the following items:
- 1 x Thickness Gauge (battery not included)
- 1 x Manual
- 1 x Plastic Box
- 1 x USB cable
- 2 x Probe cables
- 1 x Adapter

Image 3.1: WT130A Ultrasonic Thickness Gauge with its accessories, including the main unit, probes, cables, USB cable, and power adapter.
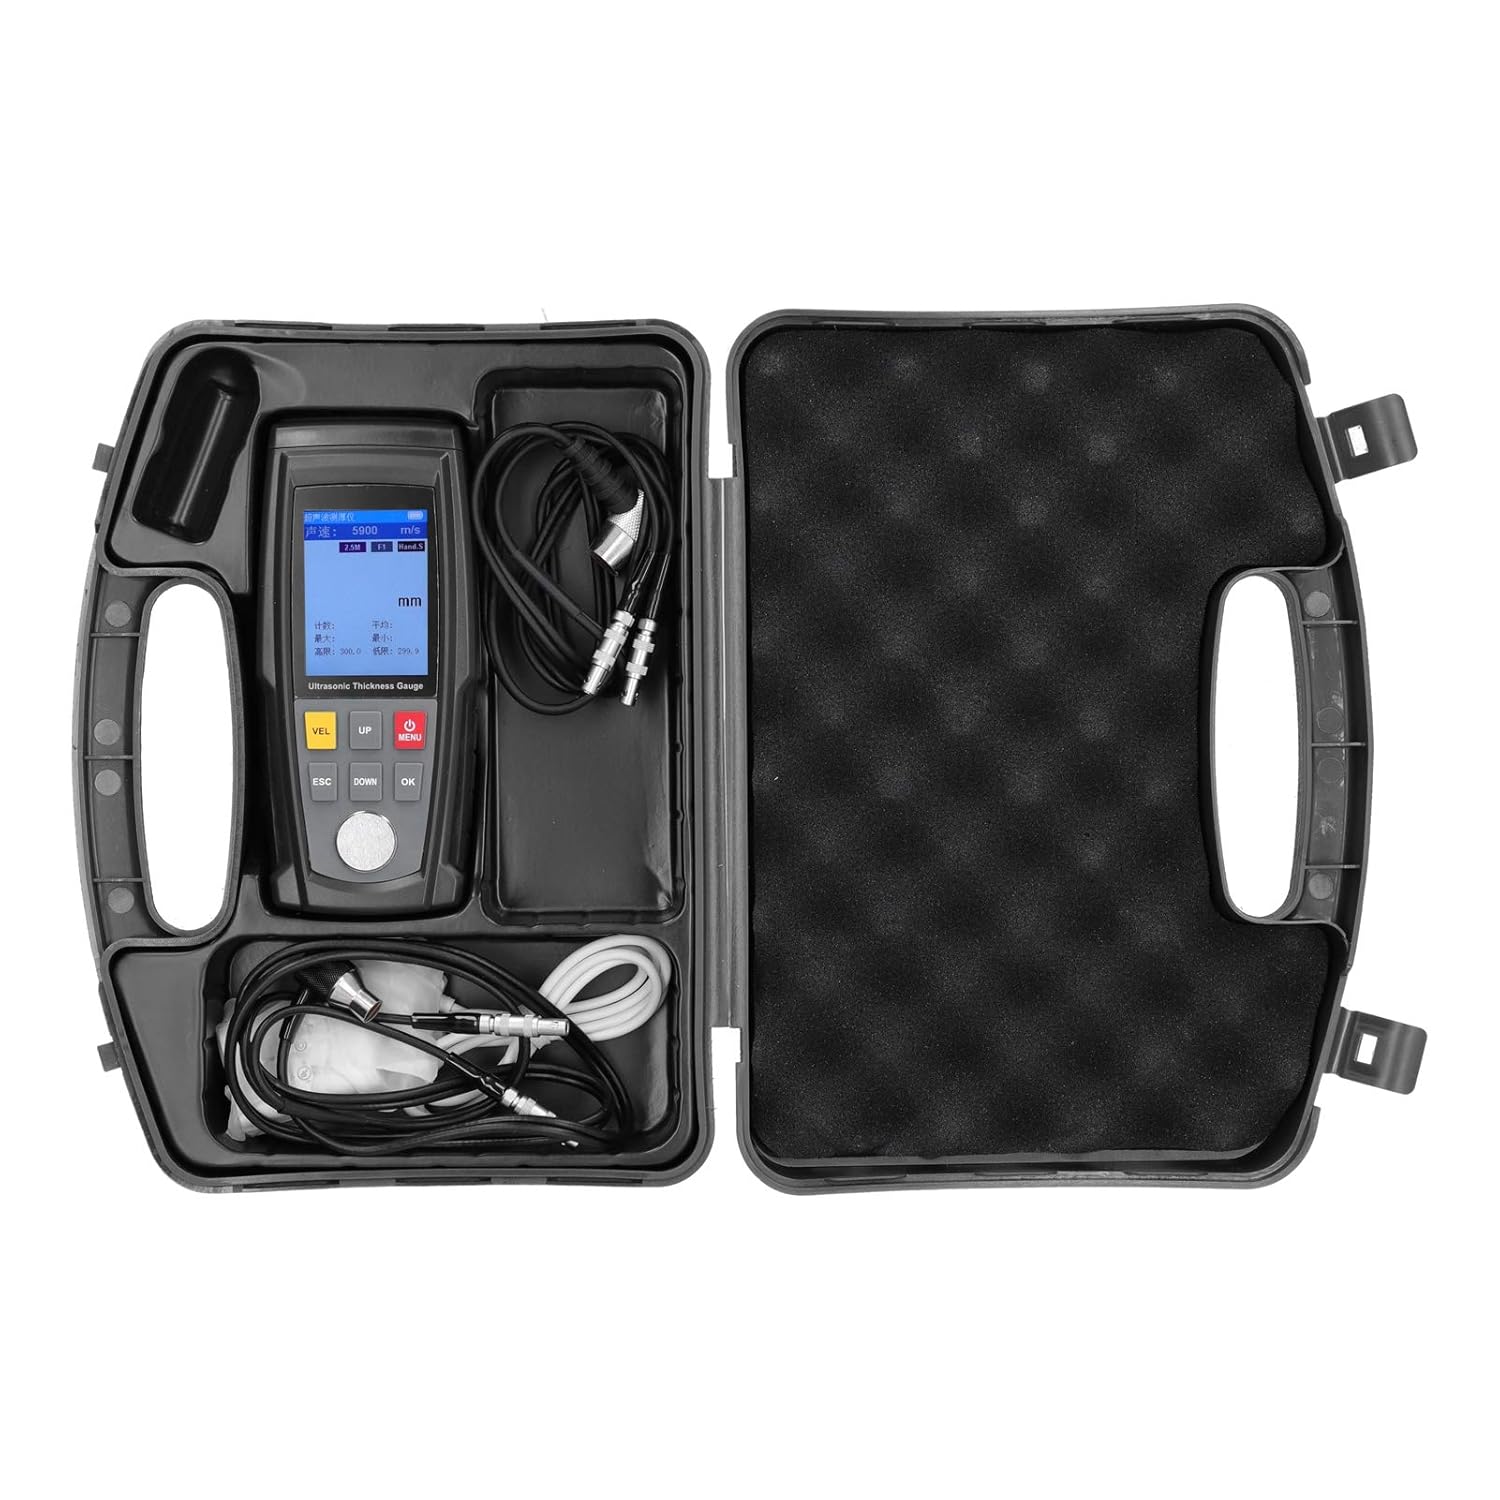
Image 3.2: The WT130A Ultrasonic Thickness Gauge and all its components neatly packed in the provided plastic carrying case.
4. Setup and Initial Operation
4.1 Powering On the Device
To power on the WT130A Ultrasonic Thickness Gauge, follow these steps:
- Open the back cover of the device.
- Insert 3 x 1.2V AAA batteries (not included) into the battery compartment, ensuring correct polarity. Alternatively, connect the device to a power supply using the provided USB cable and adapter.
- Press and hold the MENU button (power button) to turn on the device.
To turn off the device, long press the MENU button again.
4.2 Understanding the Control Buttons

Image 4.1: Front view of the WT130A device highlighting the control buttons and probe connection points.
- VEL (Velocity): Sound speed adjustment button.
- UP (▲): Up selection button / Adjustment button.
- MENU (⚙): Power On / Shutdown / Menu access button.
- ESC (Escape): Exit button.
- DOWN (▼): Down selection button / Adjustment button.
- OK (Confirm): Confirmation button.
4.3 Connecting the Probe
The WT130A supports two types of probes. Connect the appropriate probe to the "Transmission socket" and "Receiving socket" on the top of the device as shown in Image 4.1.

Image 4.2: Detail of the robust metal external interface for probe connections, designed for durability.
5. Operating Instructions
5.1 Understanding the LCD Display

Image 5.1: Detailed breakdown of the LCD display, showing the measurement interface and main menu options.
The LCD display provides critical information during operation:
- Title bar: Displays "Ultrasonic Thickness".
- Sound speed bar: Shows the current sound velocity (e.g., 5900 m/s).
- Coupling icon: Indicates proper coupling with the material.
- Selected probe: Displays the type of probe in use (e.g., 5M, 2.5M).
- Measured value: The primary thickness reading in mm.
- Battery power: Battery level indicator.
- Selected storage method / file: Indicates data storage settings.
- Unit: Measurement unit (mm).
- Measurement information: Includes count (Num), average (Avg), maximum (Max), minimum (Min), high limit (High), and low limit (Low).
5.2 Basic Measurement Procedure
- Ensure the device is powered on and the probe is correctly connected.
- Apply a small amount of coupling gel (not included) to the surface of the material to be measured. This ensures good acoustic contact between the probe and the material.
- Place the probe firmly and flatly on the prepared surface.
- The thickness reading will appear on the LCD display.
- Adjust the sound speed using the VEL button if measuring different materials with known sound velocities.
5.3 Data Storage and Management
The WT130A can store up to 1500 data records.

Image 5.2: The device screen showing the data storage interface, indicating its capacity for 1500 records.
Access the "Memory" option from the main menu (Image 5.1) to view, save, or delete stored data.
5.4 Setting Measurement Limits
You can set upper and lower limits for your measurements. If a measurement falls outside these limits, the device will trigger an alarm.

Image 5.3: The display showing the interface for setting upper and lower measurement limits.
Navigate to the "Limit" menu (Image 5.1) to configure these settings.
6. Applications
The WT130A Ultrasonic Thickness Gauge is versatile and can be used for a wide range of applications:

Image 6.1: Visual examples of common materials suitable for thickness measurement with the WT130A, including metal pipes, plastic granules, ceramic art, and glass sheets.
- Metal Measurement: Ideal for pipes, plates, and structural components made of steel, aluminum, copper, etc.
- Plastic Measurement: Suitable for various plastic products and sheets.
- Ceramic Testing: Can measure the thickness of ceramic objects and tiles.
- Glass Inspection: Used for measuring glass panels and other glass products.
7. Maintenance and Care
- Cleaning: Wipe the device and probes with a soft, dry cloth after each use. Do not use abrasive cleaners or solvents.
- Storage: Store the device in its plastic box in a cool, dry place, away from direct sunlight and extreme temperatures. Remove batteries if storing for extended periods.
- Probe Care: Ensure probes are clean and free of coupling gel residue. Inspect probe cables for any damage before use.
- Battery Replacement: Replace batteries when the low battery indicator appears on the display to ensure accurate measurements.
8. Troubleshooting
| Problem | Possible Cause | Solution |
|---|---|---|
| Device does not power on. | Low or no battery power; incorrect battery insertion; power button not held long enough. | Check battery polarity and charge/replace batteries. Ensure power button is pressed and held. Connect to external power via USB. |
| Inaccurate readings or no reading. | Poor probe coupling; incorrect sound velocity setting; material not suitable for ultrasonic measurement; damaged probe/cable. | Apply sufficient coupling gel and ensure firm contact. Adjust sound velocity (VEL button) for the specific material. Ensure material conducts sound. Check probe and cables for damage. |
| Display is dim or flickering. | Low battery. | Replace or recharge batteries. |
| "Mala opción de compra" (Bad purchase option) / Cables not detected. | Faulty probe cables or connection issues. | Ensure probe cables are securely connected to both the probe and the device. Inspect cables for visible damage. If issues persist, contact customer support. |
9. Technical Specifications
| Parameter | Value |
|---|---|
| Item Type | Thickness Gauge |
| Material | ABS |
| Measuring Range | 1.00-300.00 mm |
| Data Storage | 1500 records |
| Operating Frequency | 5 MHz/2.5 MHz |
| Measurement Error | ± (0.5% H + 0.05) Mm |
| Minimum Pipe Size | Φ20x3mm (steel) |
| Sound Speed Adjustment Range | 1000 - 9999 m/S |
| Working Temperature Range | 0 ~ 40 ℃ |
| Battery | 3 x 1.2V AAA batteries (not included) |
| Product Dimensions | 0.39 x 0.39 x 0.39 inches |
| Product Weight | 1.71 Pounds |
| Manufacturer | Walfront |
| Country of Origin | China |
Probe Application:
- 5Md10: 1.0-300.0 mm
- 5Md6: 1.0-100.0 mm
- 25 M: 1.2-300.0 mm
- High temperature: 1.2-300.0 mm
10. Warranty and Support
For warranty information and technical support, please refer to the documentation provided with your purchase or contact Walfront customer service directly. Keep your purchase receipt for warranty claims.
Additional protection plans may be available for purchase:
- 3-Year Protection Plan
- 4-Year Protection Plan
- Complete Protect (monthly plan)
For further assistance, visit the Walfront Store on Amazon.
