Introduction
This manual provides comprehensive instructions for the installation, operation, and maintenance of your Stiflix Double Din CarPlay Multimedia System. Please read this manual thoroughly before installation and use to ensure proper functionality and to maximize your experience with the device. This multimedia system is designed to enhance your in-car entertainment and connectivity, featuring Apple CarPlay, Android Auto, Bluetooth, and a rearview camera input.
What's in the Box
- Double Din CarPlay Audio Receiver
- Backup Camera & 5m Camera Cable
- IR Wireless Remote
- Steering Wheel Control Remote
- Harness Wires
- Frame Mounting Bracket
Specifications
| Feature | Detail |
|---|---|
| Model Number | 70BT |
| Display Size | 7 Inch Capacitive Touchscreen |
| Resolution | 1024*600 |
| Operating Voltage | DC 12V |
| Max Power Output | 200W |
| Bluetooth Version | 5.3 |
| Dimensions (L x W x H) | 7 x 2.36 x 4 inches |
| Weight | 2.68 pounds |
Setup and Installation
Professional installation is recommended for this multimedia system. Ensure the vehicle's battery is disconnected before beginning any wiring or installation procedures. Refer to your vehicle's specific wiring diagram for accurate connections.
General Installation
The unit is designed to fit a universal double din dash opening (7″ x 4″). Verify your dashboard opening size before installation. Secure the unit using the provided mounting brackets.

Figure 1: Standard Double Din Size and Wiring Diagram. This image illustrates the dimensions of the head unit and a comprehensive wiring schematic for connecting the stereo to your vehicle's electrical system, including power, speakers, and auxiliary inputs/outputs.
Wiring Connections
Connect the harness wires according to the wiring diagram provided in Figure 1. Key connections include:
- Power (Yellow): Constant 12V (B+).
- Accessory (Red): Switched 12V (ACC).
- Ground (Black): Vehicle chassis ground.
- Speaker Wires: Connect to corresponding vehicle speaker wires (Front Left, Front Right, Rear Left, Rear Right). Ensure correct polarity.
- Reverse Gear Signal (Brown): Connect to the vehicle's reverse light signal wire for automatic rearview camera activation.
- Steering Wheel Control (Key1/Key2): Connect to vehicle's steering wheel control wires if applicable.
- Antenna (Blue): Connect to the vehicle's radio antenna.
Backup Camera Installation
The included backup camera provides a 170° wide viewing angle. Install the camera at the rear of your vehicle, typically near the license plate. Connect the camera's video output to the "R-CAM" input on the head unit and its power wire to the vehicle's reverse light power (12V) so it activates when the vehicle is in reverse.

Figure 2: Easy to Install HD Reverse Camera. This diagram illustrates the process of installing the backup camera, including routing the cable and connecting it to the head unit and the vehicle's reverse light circuit.
Operating Instructions
CarPlay and Android Auto
Connect your iPhone or Android smartphone via USB to enable Apple CarPlay or Android Auto. This allows you to access navigation, music, calls, and messages directly from the stereo's touchscreen. Use voice commands (Siri or Google Assistant) for hands-free operation.

Figure 3: Apple CarPlay and Android Auto Interface. This image displays the user interface for both Apple CarPlay and Android Auto, highlighting the integration of smartphone features like navigation, music, and voice commands.
Bluetooth Hands-free and Audio Streaming
Pair your mobile device with the stereo via Bluetooth 5.3 for hands-free calling and wireless audio streaming. Navigate to the Bluetooth menu on the stereo, enable Bluetooth on your phone, and select "Stiflix 70BT" to pair. The built-in microphone and external mic jack ensure clear call quality.
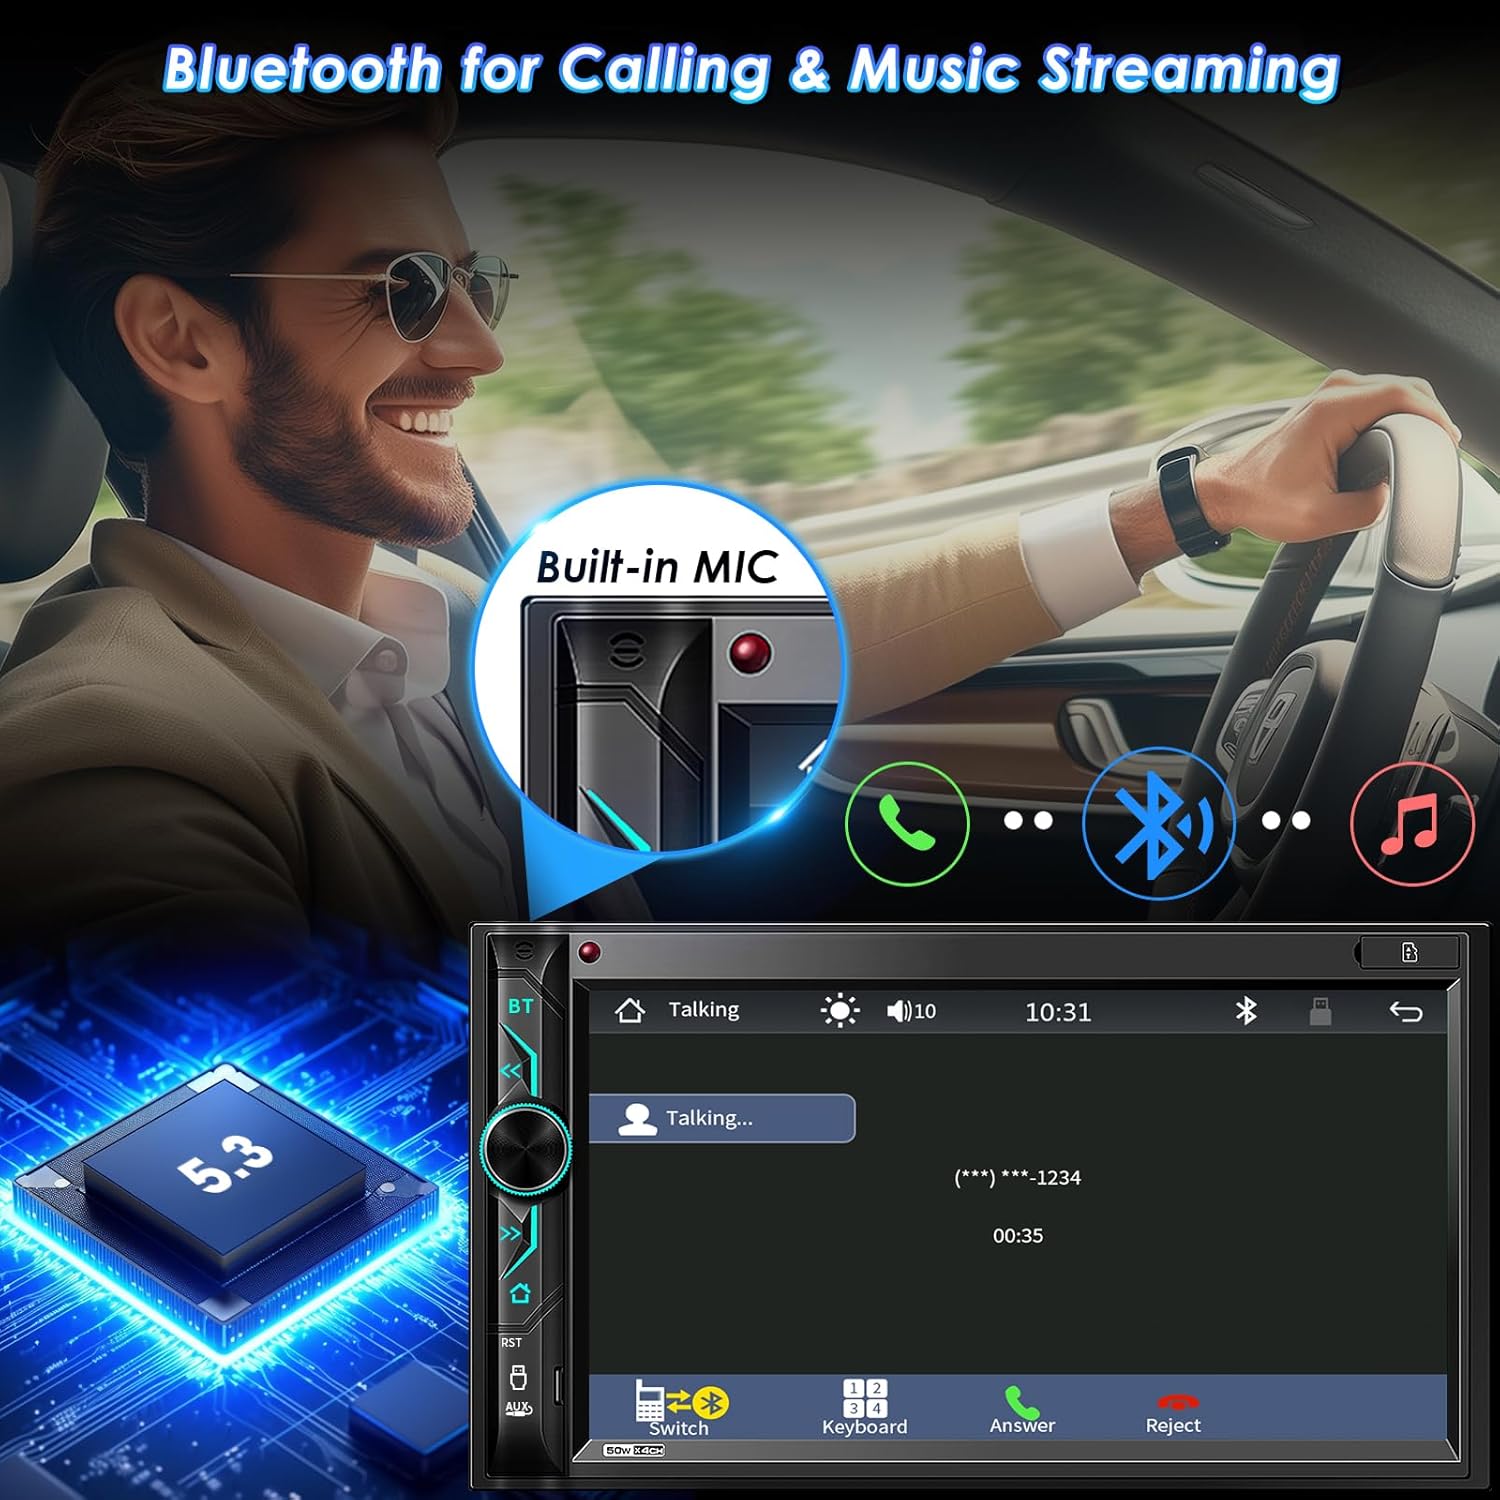
Figure 4: Bluetooth Connectivity. This image demonstrates the Bluetooth functionality for hands-free calls and streaming music, showing the integrated microphone and the Bluetooth 5.3 chip.
Phone Mirror Link
The stereo supports Mirror Link for both iOS (Note: Not compatible with iOS 18.0 or above) and Android phones. Connect your phone via USB to mirror its screen onto the stereo display. This allows you to view and control your smartphone's content, such as videos and apps, on the larger screen. The unit also provides 1.5A charging during Mirror Link operation.

Figure 5: Phone Mirror Link and HD Touchscreen. This image highlights the mirror link feature, allowing smartphone content to be displayed on the 7-inch HD touchscreen, along with details about the screen's resolution and wide viewing angle.
AM/FM Radio
Access the built-in AM/FM radio tuner. Use the touchscreen to scan for stations, save presets, and switch between AM and FM bands. The unit supports RDS (Radio Data System) where available.
Multimedia Playback (USB/SD/AUX)
Play audio and video files from various sources. Insert a USB drive into the USB port or an SD card into the SD slot. Connect external audio devices via the AUX-in port. The system supports 1080P video playback.

Figure 6: Car Multimedia Player. This image illustrates the various media input options available on the stereo, including SD card, USB drive, and auxiliary input for playing audio and video content.
Audio Customization
Utilize the 10-band EQ preset to customize sound settings according to your preference. The unit also features pre-amp and subwoofer audio outputs for connecting external amplifiers and subwoofers.

Figure 7: RCA Audio Output and EQ Settings. This image displays the various RCA output ports for connecting external audio components like amplifiers and subwoofers, as well as the graphical equalizer interface for fine-tuning audio output.
Controls
The system can be controlled via the 7-inch capacitive touchscreen, physical buttons and rotary knob on the unit, the included IR wireless remote, or the steering wheel control remote (requires proper wiring and configuration).

Figure 8: Wireless Remote Controller. This image shows the included wireless remote, which provides convenient control over the stereo's functions from a distance.
Maintenance
To ensure the longevity and optimal performance of your Stiflix multimedia system, follow these maintenance guidelines:
- Cleaning the Screen: Use a soft, lint-free cloth to gently wipe the touchscreen. For stubborn smudges, slightly dampen the cloth with water or a screen-safe cleaner. Avoid abrasive materials or harsh chemicals.
- General Cleaning: Keep the unit free from dust and debris. Use a soft brush or compressed air to clean around buttons and ports.
- Temperature: Avoid exposing the unit to extreme temperatures, both hot and cold, for extended periods.
- Connections: Periodically check all wiring connections to ensure they are secure and free from corrosion.
Troubleshooting
If you encounter issues with your multimedia system, refer to the following common problems and solutions:
| Problem | Possible Cause | Solution |
|---|---|---|
| No Power | Incorrect wiring; Blown fuse; Vehicle battery issue. | Check power and ground connections. Verify vehicle fuses and the unit's fuse. Ensure battery is charged. |
| No Sound | Speaker wires disconnected; Volume too low; Mute function active; Incorrect audio source. | Check speaker wiring. Increase volume. Disable mute. Select correct audio source. |
| Bluetooth Not Connecting | Bluetooth not enabled on phone/stereo; Incorrect pairing process; Interference. | Ensure Bluetooth is on for both devices. Delete previous pairings and re-pair. Move closer to the unit. |
| Mirror Link Not Working | Incorrect USB cable; Phone not compatible (e.g., iOS 18.0+); App not installed/updated. | Use a high-quality USB cable. Check phone OS version. Ensure necessary apps are installed and updated. |
| Backup Camera Not Displaying | Camera power/video cable disconnected; Reverse trigger wire not connected. | Verify camera power and video connections. Ensure the reverse trigger wire is correctly connected to the vehicle's reverse light. |
If the problem persists after attempting these solutions, please contact customer support.
Warranty and Support
Stiflix products are manufactured with high-quality standards. For information regarding warranty coverage and terms, please refer to the warranty card included with your product or visit the official Stiflix website. For technical assistance or customer support, please use the contact information provided with your purchase or on the brand's official channels.
Note: Specific warranty details and contact information may vary. Always refer to the most current information provided by the manufacturer.
