1. Safety Information
Always prioritize safety when using woodworking tools. Failure to follow these guidelines may result in injury or damage to the tool or workpiece.
- Wear Eye Protection: Always wear safety glasses or goggles to protect your eyes from flying debris.
- Secure Workpiece: Ensure the workpiece is firmly clamped before drilling to prevent movement and ensure accurate results.
- Read Instructions: Familiarize yourself with all instructions and warnings before operating the tool.
- Maintain Work Area: Keep your work area clean, well-lit, and free from clutter to avoid accidents.
- Inspect Tool: Before each use, inspect the jig, drill bit, and other components for any damage or wear. Do not use damaged tools.
2. Product Components
The Romacci All-in-One Pocket Hole Jig Kit includes the following items:
- 1 x Pocket Hole Jig with Built-in Clamp
- 1 x 9mm HSS Step Drill Bit (17.5 cm length)
- 1 x Steel Stop Collar
- 1 x 15 cm S2 PH1 Screwdriver Bit
- 1 x Hex Wrench
- 10 x Pocket Plugs
- 10 x Screws
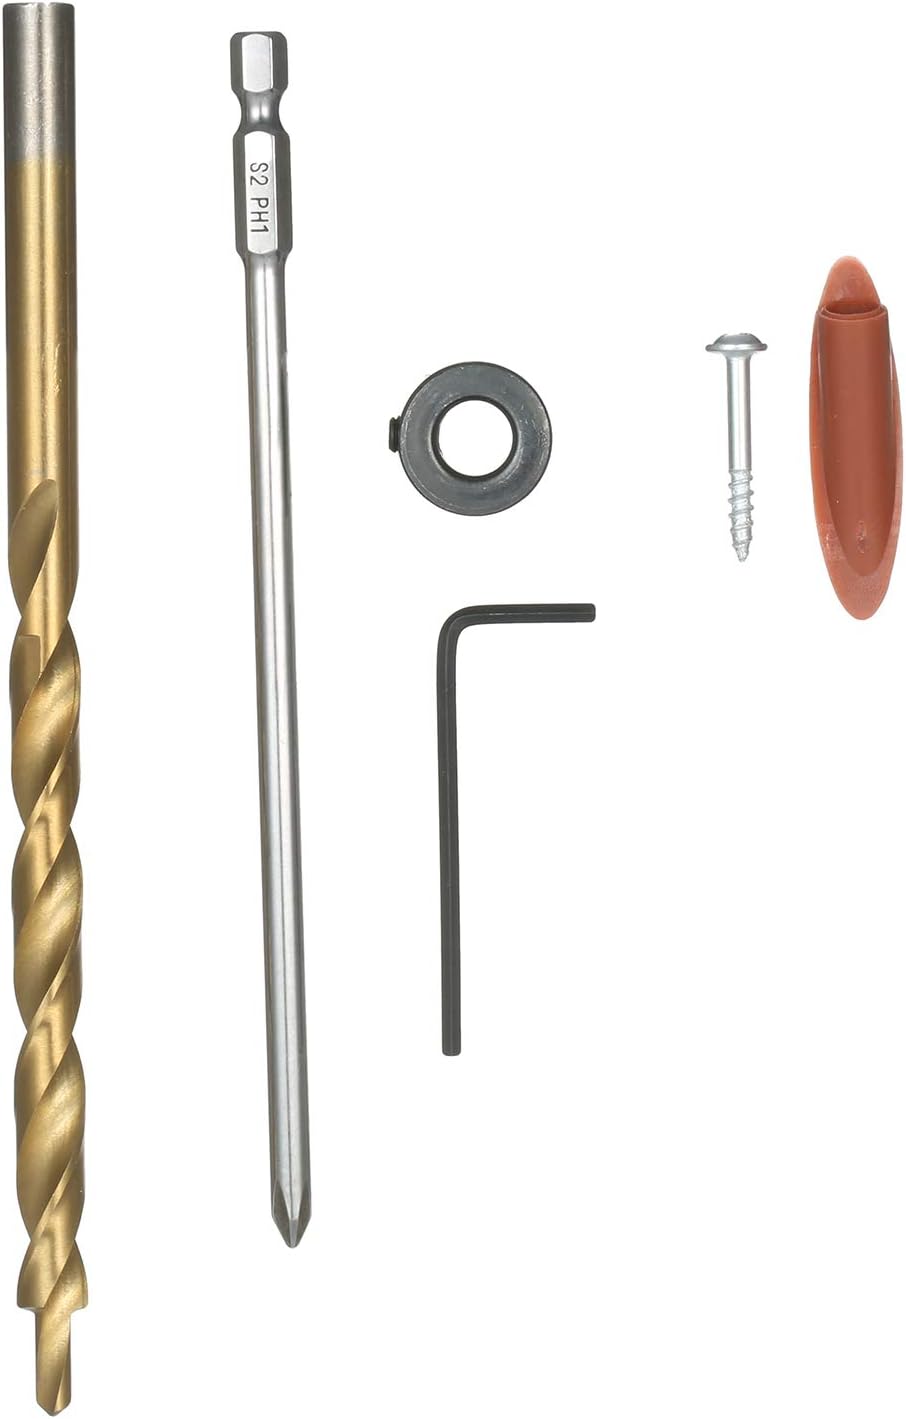
Figure 2.1: All components included in the kit, featuring the jig, drill bit, stop collar, screwdriver bit, hex wrench, pocket plugs, and screws.
3. Setup
Follow these steps to prepare your Romacci Pocket Hole Jig for use:
- Adjust the Clamp: The jig features a built-in clamp designed for materials with a thickness of 0-45 mm. Rotate the black star-shaped knob to adjust the clamping pressure and opening to securely hold your workpiece. Ensure the clamp is tight enough to prevent movement during drilling but not so tight as to damage the wood.
- Install the Step Drill Bit: Insert the 9mm HSS step drill bit into your drill chuck.
- Set the Stop Collar: Slide the steel stop collar onto the step drill bit. The stop collar controls the drilling depth. Adjust its position based on the thickness of your material to ensure the screw exits at the correct depth for a strong joint. Use the hex wrench to tighten the stop collar securely.
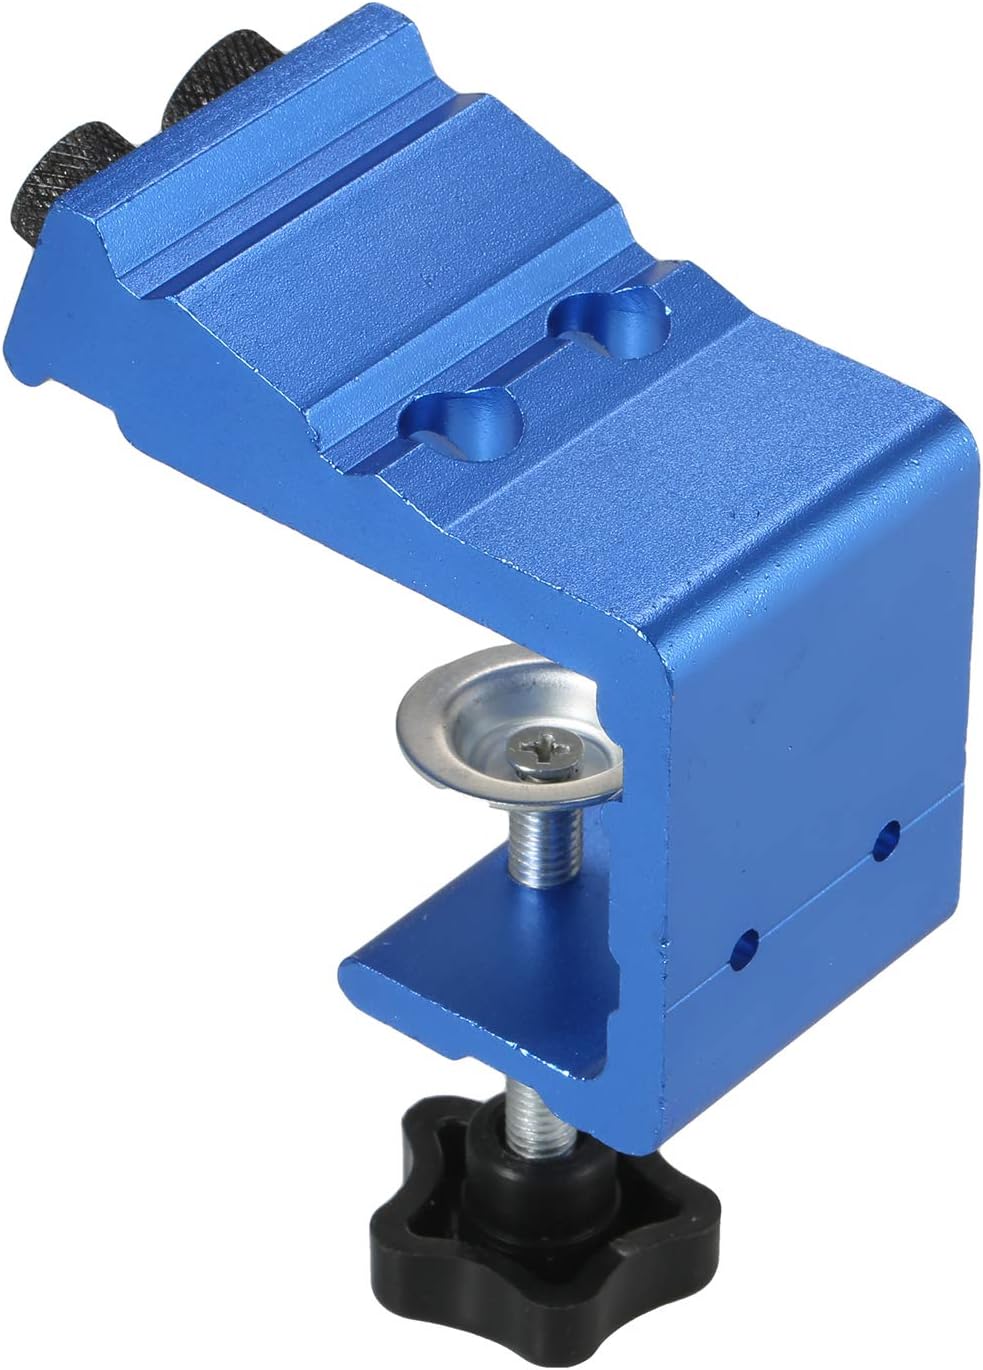
Figure 3.1: The pocket hole jig with its integrated clamp extended, ready to secure a workpiece.

Figure 3.2: A detailed view of the 9mm HSS step drill bit, designed for creating pocket holes.
4. Operating Instructions
The Romacci Pocket Hole Jig is designed for creating 15-degree oblique holes for strong, concealed wood joints. Follow these steps for effective operation:

Figure 4.1: The pocket hole jig illustrating the precise 15-degree drilling angle for strong joints.
- Position the Jig: Place the pocket hole jig on the edge of the workpiece where you intend to create the pocket hole. Ensure the jig is flush with the surface and aligned correctly.
- Clamp the Workpiece: Use the built-in clamp to firmly secure the jig and workpiece together. The clamp should hold the material without allowing any movement during drilling.
- Drill the Pocket Hole: Insert the step drill bit into one of the guide holes on the jig. Start your drill and slowly push the bit through the guide, allowing it to cut into the wood until the stop collar makes contact with the jig. This ensures the correct depth.
- Remove Jig and Join: Once the hole is drilled, remove the drill and unclamp the jig. Position the drilled workpiece against the mating piece.
- Insert Screws: Use the provided screws and the 15 cm S2 PH1 screwdriver bit to drive the screws into the pocket holes, joining the two pieces of wood. The 15-degree angle allows for strong, hidden joints.
- Conceal Holes (Optional): For a cleaner finish, insert the provided pocket plugs into the drilled holes to conceal the screw heads.
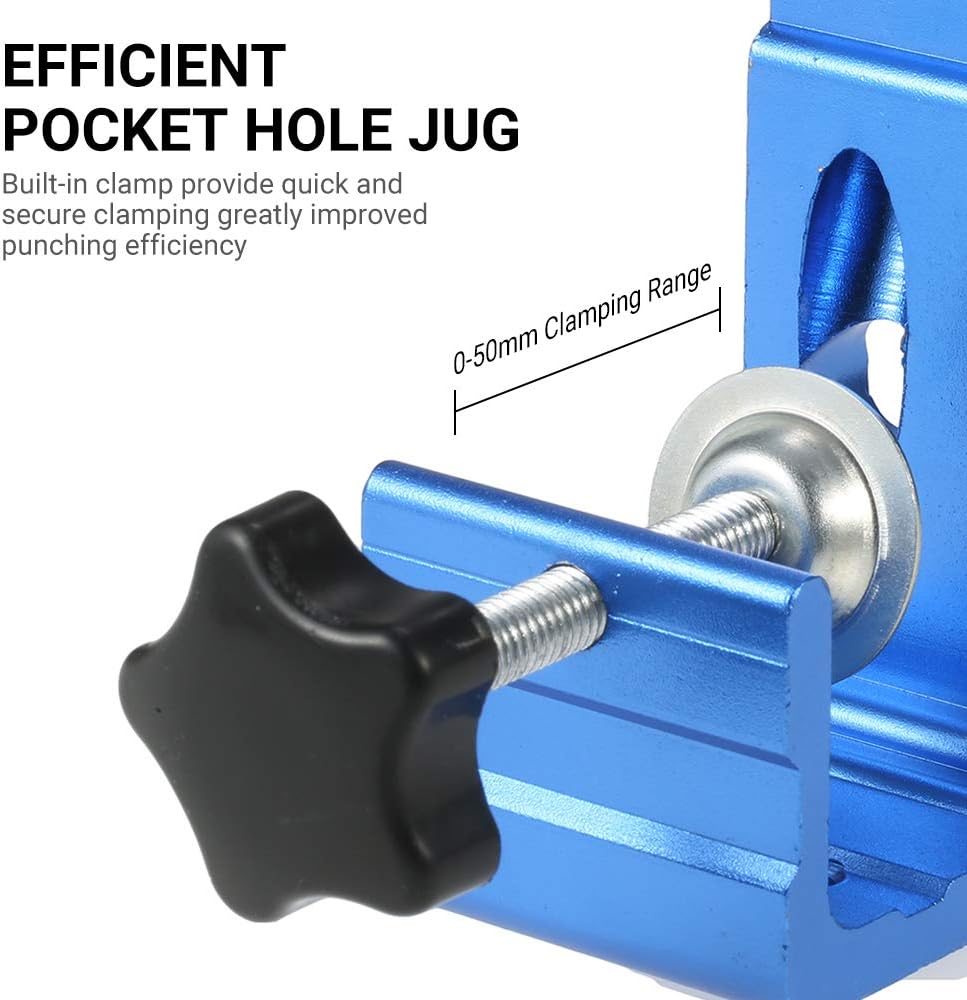
Figure 4.2: A close-up view of the jig's clamping mechanism, demonstrating its efficiency in securing the workpiece.

Figure 4.3: Visual guide demonstrating the simple four-step process: 1. Clamp the jig, 2. Drill the hole, 3. Insert the screw, 4. Achieve a finished joint.
5. Maintenance
Proper maintenance will extend the life and performance of your Romacci Pocket Hole Jig Kit:
- Cleaning: After each use, clean the jig and drill bit to remove sawdust and debris. A brush or compressed air can be used.
- Lubrication: Periodically apply a light coat of machine oil to the clamp screw mechanism to ensure smooth operation.
- Drill Bit Sharpening/Replacement: The HSS step drill bit will eventually dull with use. Sharpen it as needed or replace it to maintain optimal drilling performance.
- Storage: Store all components of the kit in a dry, clean place to prevent rust and damage.
6. Troubleshooting
If you encounter issues while using your pocket hole jig, refer to the following common problems and solutions:
- Inaccurate Holes:
- Ensure the workpiece is securely clamped and does not move during drilling.
- Verify the stop collar is correctly set for the material thickness.
- Check if the drill bit is sharp and free of debris.
- Difficulty Drilling:
- The drill bit may be dull; sharpen or replace it.
- Ensure your drill is operating at an appropriate speed for the material.
- Apply steady, even pressure, but do not force the drill.
- Clamp Not Holding:
- Adjust the clamp knob to increase pressure.
- Clean any sawdust or debris from the clamping surfaces.
- Ensure the material thickness is within the 0-45 mm clamping range.
7. Specifications
| Feature | Specification |
|---|---|
| Model | LQROMACCIE14923BLTS |
| Color | Blue |
| Jig Material | Aluminum Alloy |
| Drill Bit Material | HSS (High-Speed Steel) |
| Screwdriver Bit Material | S2 Steel |
| Drilling Angle | 15 Degrees |
| Drill Bit Size | 9 mm diameter, 17.5 cm length |
| Screwdriver Bit Size | PH1, 15 cm length |
| Sleeve Size | 9 mm |
| Jig Dimensions (L x W x H) | 90 x 90 x 50 mm (3.5 x 3.5 x 2.0 in) |
| Max Clamp Width | 45 mm (1.8 in) |
| Jig Weight | 247 g (8.7 oz) |
| Package Dimensions | 18.5 x 11 x 5.5 cm |
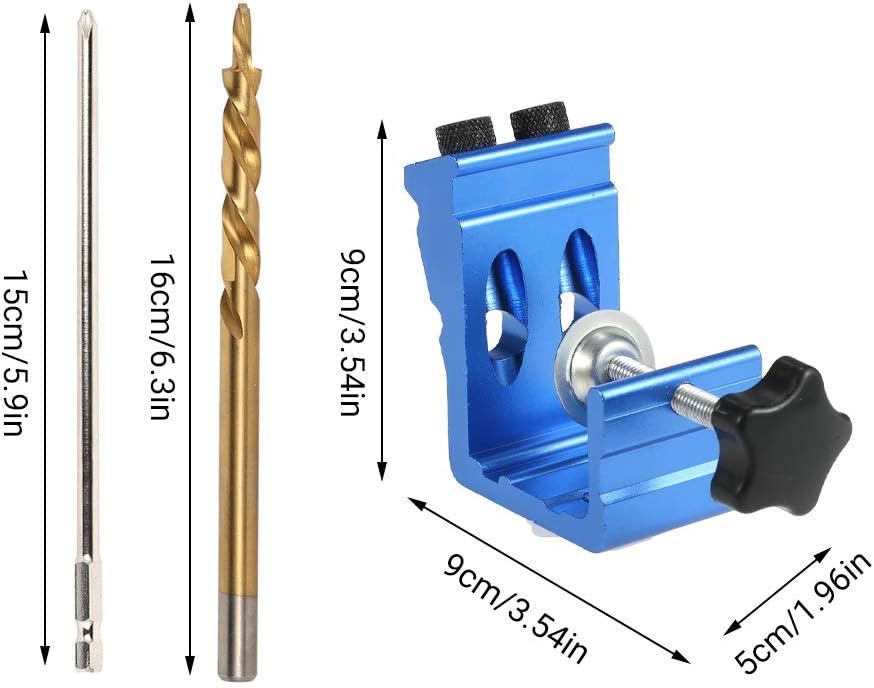
Figure 7.1: Dimensional overview of the pocket hole jig and its accompanying tools.
8. Warranty and Support
Information regarding product warranty and customer support is not available in the provided product data. Please refer to the product packaging or contact the retailer for details on warranty coverage and support options.