1. Introduction
Thank you for choosing the Davitu NEO COOLCAM Smart WiFi Light Touch Switch. This device is designed to provide convenient control over your lighting through touch, a mobile application, or voice commands via smart assistants like Amazon Alexa and Google Home. This manual provides essential information for the safe installation, operation, and maintenance of your smart switch.
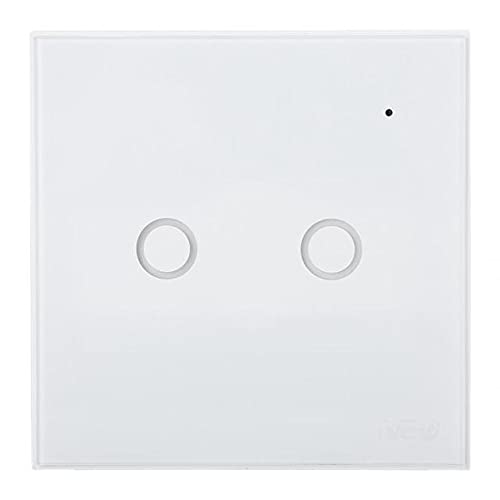
Figure 1.1: Front view of the Davitu NEO COOLCAM Smart WiFi Light Touch Switch (2-gang version).
2. Safety Information
Please read all safety warnings and instructions carefully before installation and operation. Failure to follow these instructions may result in electric shock, fire, or serious injury.
- Electrical Installation: Installation should only be performed by a qualified electrician or a person with thorough knowledge of electrical systems.
- Power Disconnection: Always disconnect power at the circuit breaker before installing, removing, or servicing the switch.
- Voltage Compatibility: Ensure the operating voltage of your electrical system matches the specifications of the switch (AC 85-250V).
- Indoor Use Only: This device is intended for indoor use in dry locations. Do not expose to water or excessive humidity.
- Overload Protection: Do not exceed the maximum current rating of 5 Amps per gang or 15 Amps total for multi-gang switches.
- Children Safety: Keep out of reach of children.
3. Package Contents
Verify that all items are present in your package:
- Davitu NEO COOLCAM Smart WiFi Light Touch Switch (1, 2, or 3 gang, depending on purchase)
- User Manual (This document)
- Mounting Screws
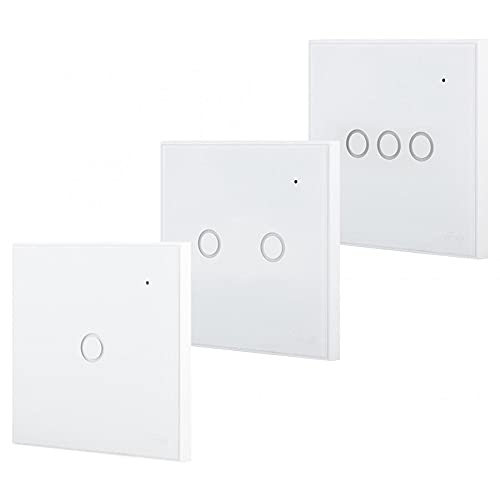
Figure 3.1: Different gang options for the Davitu NEO COOLCAM Smart WiFi Light Touch Switch.
4. Specifications
| Feature | Specification |
|---|---|
| Brand | DAVITU |
| Operating Voltage | AC 85-250 Volts |
| Current Rating | 5 Amps (per gang), Max 15 Amps total |
| Connectivity Protocol | Wi-Fi (2.4GHz only) |
| Controller Type | Amazon Alexa, Android, iOS (Google Home compatible) |
| Control Method | App, Remote (via app/voice), Touch |
| Mounting Type | Wall Mount |
| Actuator Type | Touch |
| International Protection Rating | IP85 |
| Operation Mode | Off (Default state after power loss) |
5. Setup and Installation
5.1 Wiring Diagram
Before starting, ensure the power is OFF at the circuit breaker. Incorrect wiring can damage the switch or cause electric shock.
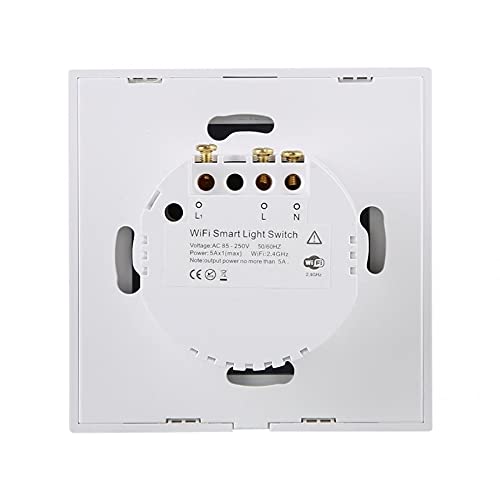
Figure 5.1: Wiring terminals on the back of the smart switch.
- Disconnect Power: Turn off the power to the light switch at the circuit breaker.
- Remove Old Switch: Carefully remove your existing light switch from the wall box.
- Identify Wires: Identify the Live (L), Neutral (N), and Load (L1, L2, L3) wires. A Neutral wire is required for this smart switch.
- Connect Wires: Connect the wires to the corresponding terminals on the Davitu Smart Switch:
- Connect the Live wire to the 'L' terminal.
- Connect the Neutral wire to the 'N' terminal.
- Connect the Load wire(s) for your light(s) to the 'L1', 'L2', or 'L3' terminals as appropriate for your switch gang configuration.
- Mount Switch: Gently push the switch into the wall box and secure it with the provided mounting screws. Attach the glass panel.
- Restore Power: Turn the power back on at the circuit breaker. The indicator light on the switch should illuminate.
5.2 App Pairing
To control your smart switch via your smartphone, you need to download and pair it with a compatible app (e.g., Smart Life or Tuya Smart app).
- Download App: Search for 'Smart Life' or 'Tuya Smart' in your mobile app store (App Store for iOS, Google Play for Android) and install it.
- Register/Login: Open the app and register a new account or log in if you already have one.
- Add Device: Tap the '+' icon in the top right corner of the app to add a device. Select 'Electrical Switch' or 'Light Switch' from the device list.
- Enter Pairing Mode: On the smart switch, press and hold any touch button for approximately 5-10 seconds until the Wi-Fi indicator light starts blinking rapidly. This indicates it's in pairing mode.
- Connect to Wi-Fi: In the app, confirm the indicator is blinking rapidly. Enter your 2.4GHz Wi-Fi network password (5GHz networks are not supported).
- Pairing: The app will begin searching for and connecting to the switch. Once connected, you can rename the switch and assign it to a room.
5.3 Voice Assistant Integration (Alexa/Google Home)
To enable voice control, link your Smart Life/Tuya Smart account with your preferred voice assistant.
- Open Voice Assistant App: Open the Amazon Alexa app or Google Home app.
- Enable Skill/Action:
- For Alexa: Go to 'Skills & Games', search for 'Smart Life' or 'Tuya Smart', and enable the skill.
- For Google Home: Go to 'Set up device' > 'Works with Google', search for 'Smart Life' or 'Tuya Smart'.
- Link Account: You will be prompted to link your Smart Life/Tuya Smart account. Enter your credentials.
- Discover Devices: Once linked, ask your voice assistant to
Related Documents - NEO COOLCAM Smart WiFi Light Touch Switch

Motive NEO-WiFi: Hướng dẫn Kỹ thuật và Lắp đặt Biến tần Động cơ
Hướng dẫn kỹ thuật chi tiết cho dòng biến tần động cơ Motive NEO-WiFi, bao gồm thông số kỹ thuật, hướng dẫn lắp đặt, lập trình và vận hành cho các mẫu NEO-WiFi-3, -4, -5.5, -11, và -22.
Smart M-Air Kullanım Kılavuzu: Mobil Uygulama ile Klima Kontrolü
Mitsubishi Heavy Industries Smart M-Air klima sisteminiz için kapsamlı kullanım kılavuzu. Mobil uygulama kurulumu, uzaktan kontrol, işletim modları ve sorun giderme hakkında detaylı bilgi edinin.
Motive NEO-WIFI Teknik Klavuz: Motor Kontrolü ve Enerji Tasarrufu
Motive NEO-WIFI teknik kılavuzu, endüstriyel motorlar için entegre motor-inverter çözümlerini, kablosuz kontrolü, IP65 korumasını ve enerji tasarrufu özelliklerini detaylandırır. Kurulum, programlama ve kullanım bilgileri içerir.
Manual Teknis Inverter Motor Motive NEO-WiFi
Panduan lengkap untuk inverter motor Motive NEO-WiFi, mencakup instalasi, pemrograman, pengoperasian, dan spesifikasi teknis. Tingkatkan efisiensi dan kontrol motor industri Anda.
Grenton 2 User Manual: Smart Building System Configuration Guide
Comprehensive user manual for the Grenton 2.0 Smart Building System, detailing system architecture, logical interface, project preparation, configuration procedures using Object Manager software, mobile applications, and various smart home modules.
NEO Coolcam Z-Wave Light Switch User Manual
User manual for the NEO Coolcam Z-Wave Light Switch, detailing its features, technical specifications, and installation for smart home automation using Z-Wave technology.