
Introduction
Thank you for choosing the PowerA Enhanced Wired Controller for Xbox. This manual provides essential information for setting up, operating, and maintaining your controller. This controller is designed for use with Xbox Series X|S, Xbox One, and Windows PCs.
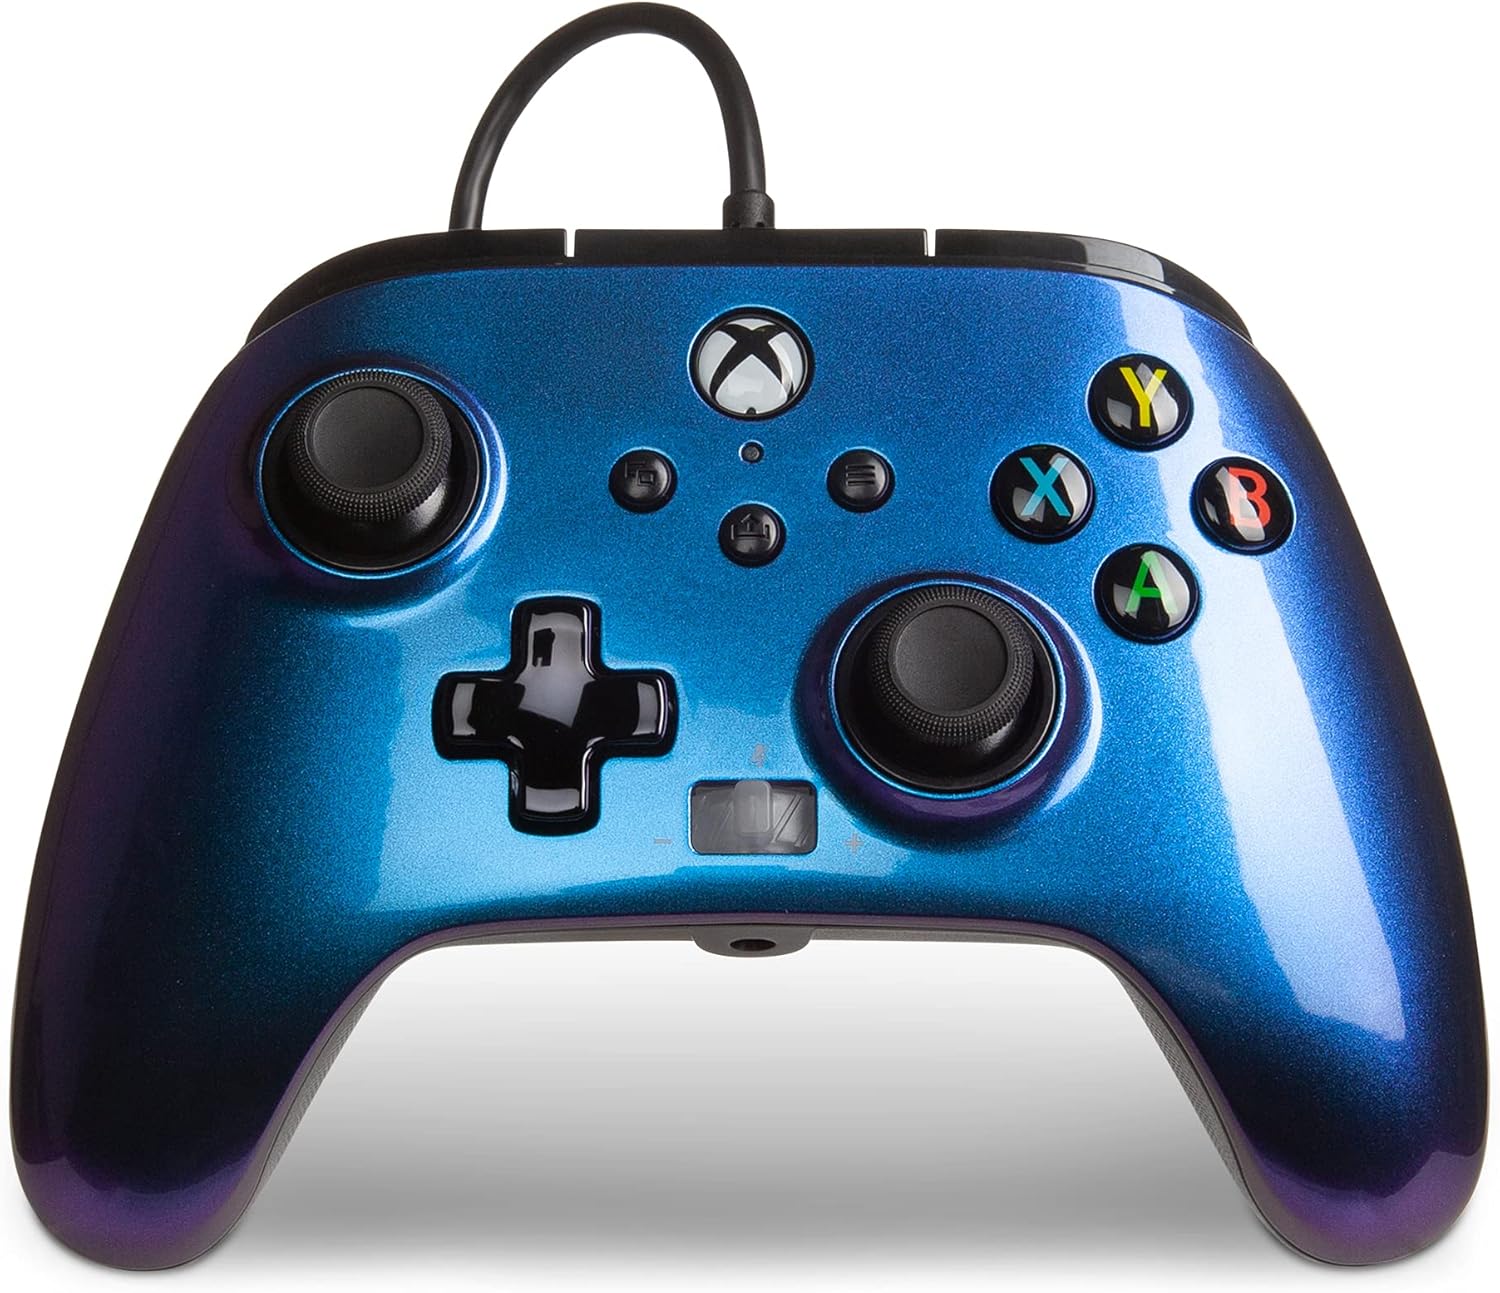
Image: Front view of the PowerA Enhanced Wired Controller in Nebula finish. This image displays the overall design, including the joysticks, D-pad, A/B/X/Y buttons, menu buttons, and the Xbox button.
Setup
Follow these steps to connect your PowerA Enhanced Wired Controller:
- Unpack the Controller: Carefully remove the controller and its detachable USB cable from the packaging.
- Connect the USB Cable: Insert the micro-USB end of the cable into the port on the top of the controller. Ensure it is securely seated.
- Connect to Console/PC: Plug the standard USB end of the cable into an available USB port on your Xbox console or Windows PC.
- Power On: The controller will automatically power on and connect once plugged in. The Xbox button on the controller will illuminate to indicate a successful connection.

Image: Rear view of the PowerA Enhanced Wired Controller showing the detachable USB cable connected to the micro-USB port. This illustrates the correct way to attach the cable to the controller.
Operating Instructions
Controller Layout
The PowerA Enhanced Wired Controller features a standard Xbox layout with additional programmable buttons and a headset dial.
- Left/Right Analog Sticks: For movement and camera control.
- D-Pad: For directional input.
- A/B/X/Y Buttons: Standard action buttons.
- Menu Button: Access in-game menus or system settings.
- View Button: Access in-game maps, scoreboards, or other context-sensitive features.
- Xbox Button: Power on/off console, access Xbox Guide.
- Shoulder Buttons (LB/RB) & Triggers (LT/RT): For various in-game actions.
Advanced Gaming Buttons (AGB)
The controller includes two programmable Advanced Gaming Buttons on the back for custom control mapping.

Image: Back view of the PowerA Enhanced Wired Controller, highlighting the two Advanced Gaming Buttons (AGB) located on the grips. This image demonstrates their placement for easy access during gameplay.
To Program Advanced Gaming Buttons:
- Press the Program Button on the back of the controller. The Program LED will flash.
- Press the button you wish to map (A/B/X/Y, LB/RB, LT/RT, D-pad, Left/Right Stick Click).
- Press the Advanced Gaming Button (left or right) you wish to assign. The Program LED will stop flashing, indicating the button has been programmed.
To Reset Advanced Gaming Buttons: Hold the Program Button for 5 seconds. The Program LED will flash rapidly, then turn off, indicating all AGBs have been reset to default.
Headset Dial
The Headset Dial located on the bottom of the controller allows for quick audio adjustments.
- Volume Control: Rotate the dial to increase or decrease headset volume.
- Mute Microphone: Press the dial inward to mute or unmute your microphone. The LED indicator next to the dial will show the microphone status.
Share Button
The dedicated Share Button allows you to capture screenshots and record game clips instantly. Press the button once for a screenshot, or hold it down to record a game clip (functionality may vary by platform and game).
Care and Maintenance
- Cleaning: Use a soft, dry cloth to clean the controller. Do not use harsh chemicals or abrasive materials.
- Storage: Store the controller in a cool, dry place away from direct sunlight and extreme temperatures.
- Cable Care: Avoid sharply bending or twisting the USB cable. Always grasp the plug, not the cable, when disconnecting.
- Avoid Drops: Protect the controller from drops and impacts, which can damage internal components.
Troubleshooting
- Controller Not Responding:
- Ensure the USB cable is securely connected to both the controller and the console/PC.
- Try plugging the controller into a different USB port.
- Restart your console or PC.
- Buttons Not Working Correctly:
- Check for any physical obstructions or debris around the buttons.
- Test the controller on another game or system to determine if the issue is specific to a game or the controller itself.
- Reset the Advanced Gaming Buttons if you suspect a mapping issue.
- Headset Audio Issues:
- Ensure your headset is fully plugged into the 3.5mm jack on the controller.
- Adjust the Headset Dial for volume.
- Check your console/PC audio settings to ensure the controller is selected as the audio output device.
If you continue to experience issues, please visit the PowerA support website for further assistance.
Product Specifications
| Model Number | 1521746-01 |
| Connectivity | Wired (USB) |
| Compatibility | Xbox Series X|S, Xbox One, Windows |
| Cable Length | 10 ft (3 meters) - (Inferred from product image) |
| Dimensions | 5.43 x 4.6 x 2.6 inches |
| Weight | 8 ounces |
| Color | Nebula (Blue/Purple Gradient) |
| Material | Plastic |
| Number of Buttons | 15 |
Warranty and Support
This PowerA Enhanced Wired Controller comes with a 2-Year Limited Warranty. Please retain your proof of purchase for warranty claims.

Image: Packaging of the PowerA Enhanced Wired Controller, clearly indicating a "2-Year Limited Warranty" and other key features. This confirms the warranty period for the product.
For detailed warranty information, product registration, or technical support, please visit the official PowerA support website:
Please have your model number (1521746-01) and purchase date available when contacting support.


