
1. Introduction
Thank you for choosing the LAUNCH CRP123X 3.0 OBD2 Diagnostic Tool. This device is designed to assist automotive technicians and DIY enthusiasts in diagnosing vehicle issues efficiently. It offers comprehensive diagnostics for Engine, Transmission, ABS, and SRS systems, along with 7 essential reset functions. This manual will guide you through the proper setup, operation, and maintenance of your diagnostic tool.
2. Product Overview
2.1 Key Features
- 4-System Diagnostics: Engine, Transmission, Anti-lock Braking System (ABS), and Supplemental Restraint System (SRS).
- 7 Reset Functions: Oil Reset, Steering Angle Sensor (SAS) Reset, Throttle Adaptation, ABS Bleeding, Battery Management System (BMS) Reset, Brake Reset, and Diesel Particulate Filter (DPF) Regeneration.
- Full OBD2 Functions: Read/Clear DTCs, Live Data Stream, I/M Readiness, O2 Sensor Test, EVAP System Test, On-Board Monitor Test, Freeze Frame, and Vehicle Information.
- Enhanced Hardware: Upgraded from Android 7.0 to Android 8.1, increased memory from 16GB to 32GB, and a 6100mAh battery for extended use.
- 5-inch Touch Screen: High-resolution display for clear readability and intuitive operation.
- Wide Vehicle Compatibility: Supports over 10,000 vehicle models, including European, Asian, and American cars, up to the latest 2026 models.
- Lifetime Free Updates: One-click Wi-Fi updates for software and vehicle data.
- Multi-language Support: Includes Japanese and 9 other languages.
2.2 Package Contents
The LAUNCH CRP123X 3.0 package includes the following items:
- LAUNCH CRP123X 3.0 Diagnostic Tool
- OBD2 Diagnostic Cable
- USB Charging Cable
- User Manual
- Carrying Bag

Image: LAUNCH CRP123X 3.0 package contents, showing the diagnostic tool, cables, manual, and carrying bag.
3. Setup
3.1 Initial Power On and Language Setting
- Press and hold the power button to turn on the device.
- Upon first use, you may be prompted to select your preferred language. Navigate to Settings and select Language to change to Japanese or any other supported language.
3.2 Wi-Fi Connection
Connecting to Wi-Fi is essential for software updates and accessing online features.
- From the main menu, tap on Settings.
- Select Wi-Fi and turn it on.
- Choose your desired Wi-Fi network and enter the password if required.
- Once connected, the Wi-Fi icon will appear in the status bar.
3.3 Connecting to Vehicle
The CRP123X 3.0 connects to your vehicle via the OBD2 port.
- Locate the 16-pin OBD2 diagnostic port in your vehicle. This is usually found under the dashboard on the driver's side.
- Ensure the vehicle's ignition is turned to the ON position (engine off).
- Connect the OBD2 diagnostic cable to the vehicle's OBD2 port.
- Connect the other end of the cable to the CRP123X 3.0 device. The device will automatically power on or prompt you to do so.
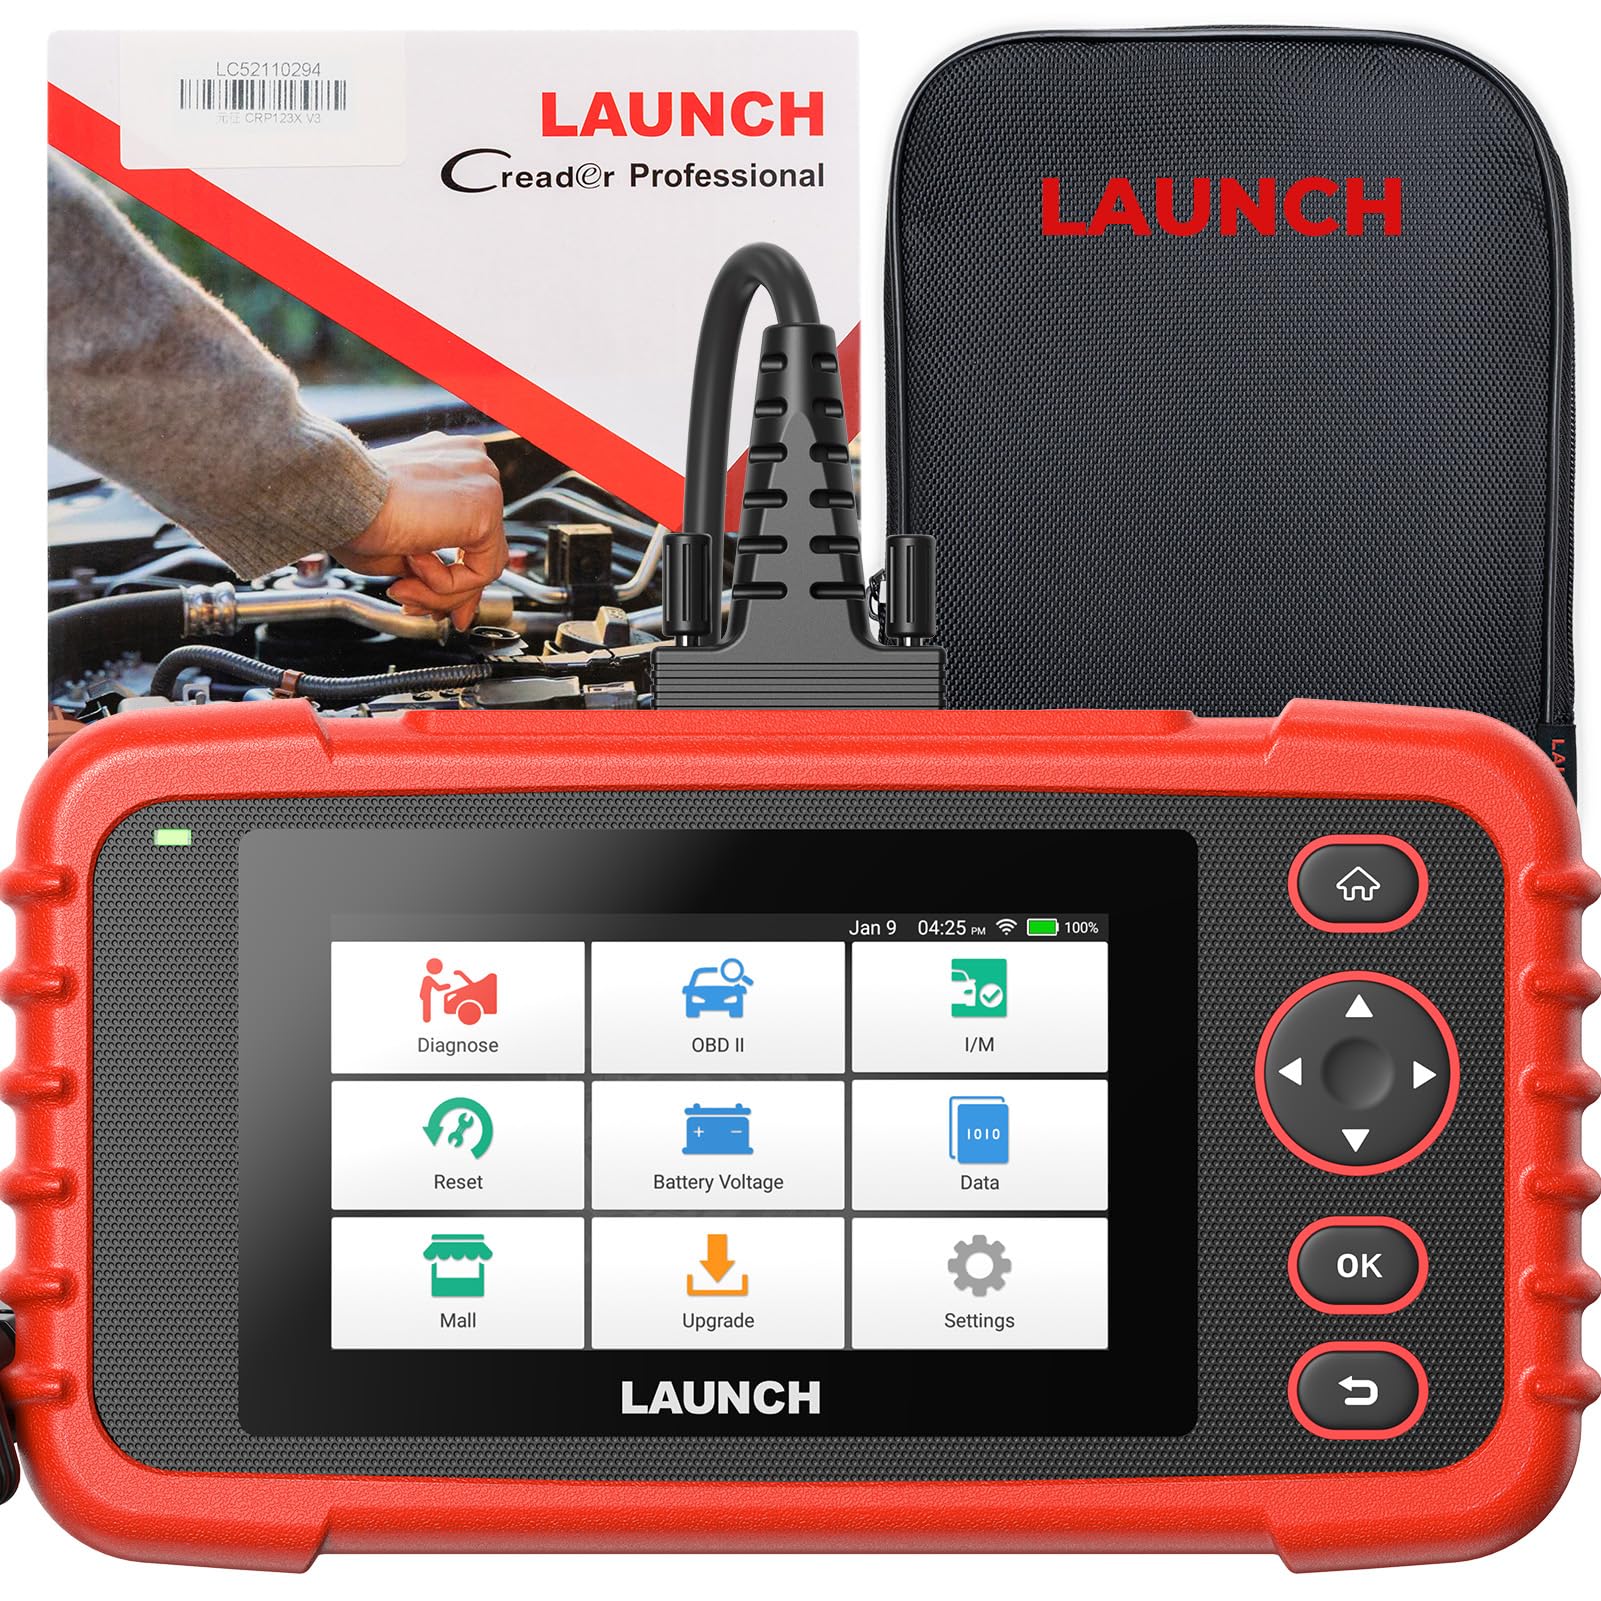
Image: The LAUNCH CRP123X 3.0 diagnostic tool, ready for connection to a vehicle.
4. Operating Instructions
4.1 Basic Navigation
The device features a 5-inch touch screen and physical buttons for navigation.
- Use the touch screen to select options and input data.
- The directional buttons (up, down, left, right) can be used to navigate menus.
- The OK button confirms selections.
- The Back button returns to the previous screen.
4.2 4-System Diagnostics
This tool can diagnose issues within the Engine, Transmission, ABS, and SRS systems.
- From the main menu, select Diagnose.
- Choose the vehicle make and model. The device supports automatic VIN detection for compatible vehicles, or you can manually select.
- Select the system you wish to diagnose (Engine, Transmission, ABS, or SRS).
- The tool will scan for Diagnostic Trouble Codes (DTCs).
- You can then view Read Codes to see detected faults or Clear Codes to erase them after repairs.

Image: Diagram illustrating the 4-system diagnostic capabilities for Engine, SRS, ABS, and Transmission systems.
4.3 Full OBD2 Functions
Access standard OBD2 diagnostic modes for emission-related issues.
- From the main menu, select OBDII.
- Choose from options like Read Codes, Erase Codes, Live Data, I/M Readiness, O2 Sensor Test, EVAP System Test, On-Board Monitor Test, Freeze Frame, and Vehicle Information.
- Follow on-screen prompts to perform each test.

Image: A visual representation of the full OBD2 functions available on the device, including reading/clearing trouble codes, live data, and various system tests.
4.4 Reset Functions
The CRP123X 3.0 offers 7 special reset functions for common maintenance tasks.
- From the main menu, select Reset.
- Choose the desired reset function:
- Oil Reset: Resets the oil life system after an oil change.
- SAS Reset: Calibrates the Steering Angle Sensor.
- Throttle Adaptation: Relearns the throttle body position.
- ABS Bleeding: Performs ABS brake bleeding procedures.
- Battery Reset: Registers a new battery to the vehicle's ECU.
- Brake Reset: Resets the electronic parking brake after brake pad replacement.
- DPF Regeneration: Initiates the Diesel Particulate Filter regeneration process.
- Follow the on-screen instructions carefully for each specific reset procedure.

Image: Overview of the 7 reset functions, including Oil Reset, SAS Reset, Throttle Reset, ABS Bleeding, Battery Reset, Brake Reset, and DPF Regeneration.
5. Maintenance
5.1 Software Updates
The CRP123X 3.0 offers lifetime free software updates to ensure compatibility with new vehicle models and improved functionality.
- Ensure the device is connected to a stable Wi-Fi network.
- From the main menu, tap on Upgrade.
- The device will check for available updates. Select the updates you wish to install and follow the on-screen instructions.
- Do not power off the device during the update process.

Image: Icon representing the one-click update feature for software and vehicle data.
5.2 Cleaning and Storage
- Clean the device with a soft, damp cloth. Do not use abrasive cleaners or solvents.
- Store the device in its carrying bag in a dry, cool place away from direct sunlight and extreme temperatures.
- Avoid dropping the device or exposing it to excessive moisture.
5.3 Battery Care
- Charge the device regularly, especially if it will not be used for an extended period.
- Use only the provided USB charging cable.
- Avoid fully discharging the battery frequently to prolong its lifespan.

Image: Icon indicating real-time battery voltage monitoring, a feature for checking vehicle battery health.
6. Troubleshooting
If you encounter issues with your CRP123X 3.0, refer to the following common problems and solutions:
| Problem | Possible Cause | Solution |
|---|---|---|
| Device does not power on. | Low battery; faulty connection to vehicle. | Charge the device. Ensure the OBD2 cable is securely connected to both the vehicle and the tool. |
| Communication error with vehicle. | Loose connection; incorrect vehicle protocol; vehicle ignition not ON. | Check cable connections. Ensure ignition is ON. Verify vehicle compatibility. Try manual VIN entry if auto-detect fails. |
| VIN not detected automatically. | Older vehicle model; specific vehicle manufacturer. | Manually select the vehicle make, model, and year from the menu. |
| Software update fails. | Unstable Wi-Fi connection; insufficient storage. | Ensure a strong Wi-Fi signal. Check available storage on the device. Restart the update process. |
If the problem persists, please contact LAUNCH customer support for assistance.
7. Specifications
| Feature | Specification |
|---|---|
| Brand | LAUNCH |
| Model | CRP123X 3.0 |
| Operating System | Android 8.1 |
| Screen Size | 5 inches |
| Memory | 32GB |
| Battery Capacity | 6100mAh |
| Power Source | Battery Powered |
| Vehicle Service Type | Universal Fit |
| Supported Languages | 10 languages (including Japanese) |
| Update Method | Wi-Fi (Lifetime Free) |
8. Warranty and Support
8.1 Warranty Information
The LAUNCH CRP123X 3.0 comes with a 5-year quality guarantee. Please retain your proof of purchase for warranty claims. The warranty covers manufacturing defects and malfunctions under normal use. It does not cover damage caused by misuse, accidents, unauthorized modifications, or improper maintenance.
8.2 Technical Support
For technical assistance, troubleshooting beyond this manual, or warranty inquiries, please contact LAUNCH customer support. You can typically find contact information on the official LAUNCH website or through your product retailer. Ensure you have your product model and serial number ready when contacting support.
Remember to regularly update your device via Wi-Fi to ensure optimal performance and access to the latest vehicle data and functions.


