1. Introduction
Thank you for choosing the Avatar Controls Smart Wi-Fi Dimmer Switch. This device allows you to control your lighting with precision, offering dimming capabilities from 1% to 100%. It integrates seamlessly with your smart home ecosystem through Wi-Fi connectivity and is compatible with voice assistants like Amazon Alexa and Google Home. This manual provides detailed instructions to ensure a safe and efficient installation and operation of your new smart dimmer switch.

Image 1.1: The Avatar Controls Smart Wi-Fi Dimmer Switch, its remote control, and a smartphone displaying the control app.
2. Important Safety Information
Please read all safety instructions before installing or operating this device. Failure to follow these instructions may result in electric shock, fire, or other hazards.
- Professional Installation Recommended: If you are unfamiliar with electrical wiring, consult a qualified electrician.
- Power Off Before Installation: Always disconnect power at the circuit breaker before installing or servicing the switch.
- Neutral Wire Required: This smart dimmer switch requires a neutral wire for operation. If your electrical box does not have a neutral wire, this product is not compatible.
- Single-Pole Only: This switch is designed for single-pole applications only (controlling lights from one location). It is not compatible with 3-way or multi-way switch configurations.
- 2.4GHz Wi-Fi Only: The switch connects to 2.4GHz Wi-Fi networks only. It is not compatible with 5GHz Wi-Fi.
- Compatible Bulb Types: Ensure your light bulbs are dimmable. Incompatible bulbs may flicker or be damaged.

Image 2.1: Illustration of compatible bulb types (CFL 150W, LED Dimmable 150W, INC 400W) and essential wiring requirements (Neutral wire, Single-pole, 2.4GHz Wi-Fi).
3. Package Contents
Verify that all components are present before beginning installation:
- Smart Dimmer Switch (x1 or x2, depending on pack)
- Remote Control (x1 or x2, depending on pack)
- Wall Plate (x1 or x2, depending on pack)
- Wire Nuts
- Screws
- User Manual
4. Product Features
The Avatar Controls Smart Wi-Fi Dimmer Switch offers multiple control options and smart functionalities:
- Multiple Control Methods: Control your lights via the mobile app, voice commands (Alexa, Google Home), the included remote control, or directly on the switch.
- 1%-100% Dimming: Adjust light brightness to your preference for any ambiance.
- Voice Control: Seamless integration with Amazon Alexa and Google Home Assistant for hands-free operation.
- Scheduling & Timers: Set custom schedules and countdown timers for automated lighting control.
- Remote Control: The included Bluetooth 5.0 remote offers convenient control up to 33 feet.

Image 4.1: Overview of control methods including voice control with Alexa, RF433 remote control, app control, and manual control on the switch.

Image 4.2: Visual representation of adjustable dimming from 100% to 1% brightness in a living room setting.

Image 4.3: Example of setting up schedules for lights to turn on/off and adjust brightness for daily routines.
5. Installation Guide
5.1 Pre-Installation Checklist
- Confirm your electrical box has a neutral wire.
- Ensure your existing switch is a single-pole switch (controls lights from one location).
- Verify your Wi-Fi network is 2.4GHz.
- Gather necessary tools: screwdriver, wire strippers, voltage tester.
5.2 Wiring Instructions
- Turn Off Power: Locate your circuit breaker and turn off the power to the switch you are replacing. Use a voltage tester to confirm the power is off.
- Remove Old Switch: Carefully remove the existing wall plate and unscrew the old switch from the wall box. Disconnect the wires.
- Identify Wires: Identify the Live/Line, Load, Neutral, and Ground wires from your wall box. The neutral wire is typically white, ground is green or bare copper.
- Connect New Switch:
- Connect the Live/Line wire from the wall box to the switch's Live terminal (usually black).
- Connect the Load wire from the wall box to the switch's Load terminal (usually red).
- Connect the Neutral wire from the wall box to the switch's Neutral terminal (usually white).
- Connect the Ground wire from the wall box to the switch's Ground terminal (usually green).
Use wire nuts to secure all connections. Ensure no bare wires are exposed.
- Mount Switch: Carefully push the wired switch into the wall box. Secure it with screws. Attach the new wall plate.
- Restore Power: Turn the power back on at the circuit breaker.

Image 5.1: Detailed wiring diagram showing connections for Ground, Neutral, Live/Line, and Load wires. Emphasizes that neutral wire is required and live/load wires are not interchangeable.

Image 5.2: Diagram illustrating a correct single-pole wiring setup (one switch controlling one light) versus an incorrect 3-way setup.
5.3 Physical Dimensions
Ensure the switch fits within your existing wall box. Refer to the dimensions below:

Image 5.3: Technical drawing displaying the dimensions of the smart dimmer switch in millimeters and inches.
6. Setup and Pairing
6.1 App Download and Registration
- Download the "Avatar Controls" app (or "Smart Life" / "Tuya Smart" app) from the App Store (iOS) or Google Play Store (Android). You can also scan the QR code on the switch or in the manual.
- Register a new account or log in with an existing one.

Image 6.1: A smartphone displaying the "Smart Life Smart Living" app interface with a QR code for easy download. Link: https://smartapp.tuya.com/avatarsmarthome
6.2 Connecting to Wi-Fi
- Ensure your phone is connected to a 2.4GHz Wi-Fi network.
- Open the app and tap "Add Device" or the "+" icon.
- Select "Lighting" > "Dimmer Switch (Wi-Fi)".
- Enter Pairing Mode: Press and hold the power button on the smart dimmer switch for approximately 5-7 seconds until the Wi-Fi indicator light on the switch blinks rapidly. This indicates EZ Mode.
- In the app, confirm the indicator is blinking rapidly and proceed. Enter your 2.4GHz Wi-Fi network password.
- The switch will connect to your Wi-Fi network. Once connected, the indicator light will stop blinking and remain solid.
- You can now rename the device in the app.
6.3 Pairing the Remote Control
- Ensure the smart dimmer switch is powered on.
- Press and hold the power button on the smart dimmer switch for approximately 3 seconds until the Wi-Fi indicator light blinks slowly. This indicates remote pairing mode.
- While the switch indicator is blinking slowly, press any button on the remote control.
- The switch indicator light will turn off, confirming successful pairing.
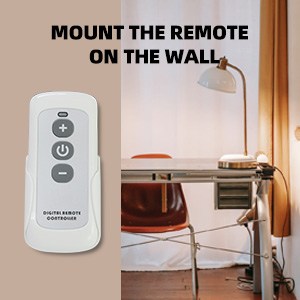
Image 6.2: The physical remote control with power, plus, and minus buttons for light adjustment.
7. Operating Instructions
7.1 Manual Control (On-Switch)
- Press the Power Button (circle icon) to turn lights On or Off.
- Press the Plus Button (+ icon) to increase brightness.
- Press the Minus Button (- icon) to decrease brightness.
7.2 Remote Control
- Press the Power Button on the remote to turn lights On or Off.
- Press the Plus Button on the remote to increase brightness.
- Press the Minus Button on the remote to decrease brightness.
7.3 App Control
Open the Avatar Controls (or Smart Life/Tuya Smart) app and select your dimmer switch. From the app interface, you can:
- Turn lights On/Off.
- Adjust brightness from 1% to 100% using a slider.
- Set schedules and timers for automated operation.
- Create scenes for specific lighting moods.
- Share control with family members.
7.4 Voice Control (Alexa / Google Home)
After linking your Avatar Controls account to Amazon Alexa or Google Home Assistant (instructions typically found within the Alexa/Google Home app), you can use voice commands:
- "Alexa, turn on [Device Name]."
- "Hey Google, turn off [Device Name]."
- "Alexa, dim [Device Name] to 50%."
- "Hey Google, brighten [Device Name]."
- "Alexa, set [Device Name] to 20%."

Image 7.1: A user interacting with an Amazon Echo device and a Google Home Mini for voice control of smart lighting.
8. Maintenance
- Cleaning: Wipe the switch and wall plate with a soft, dry cloth. Do not use abrasive cleaners or solvents.
- Firmware Updates: Periodically check the Avatar Controls app for firmware updates to ensure optimal performance and security.
- Remote Battery: The remote control uses a standard coin cell battery (e.g., CR2032). Replace the battery when the remote's range or responsiveness decreases.
9. Troubleshooting
| Problem | Possible Cause | Solution |
|---|---|---|
| Switch does not turn on/off. | No power, incorrect wiring, bulb issue. | Check circuit breaker. Verify wiring connections (Live, Load, Neutral, Ground). Test bulb with a standard switch. |
| Lights flicker or do not dim properly. | Non-dimmable bulbs, incompatible load, faulty wiring. | Ensure all bulbs are dimmable. Check total wattage does not exceed switch capacity (400W Incandescent, 150W LED/CFL). Re-check wiring. |
| Cannot connect to Wi-Fi. | Incorrect Wi-Fi band, wrong password, weak signal. | Ensure your router is broadcasting a 2.4GHz network. Confirm Wi-Fi password. Move router closer or use a Wi-Fi extender. Ensure switch is in rapid blinking (EZ) pairing mode. |
| Remote control not working. | Remote not paired, dead battery, out of range. | Re-pair the remote control (see Section 6.3). Replace the remote battery. Ensure remote is within 33ft of the switch. |
| Voice control not responding. | App not linked, incorrect device name, internet issue. | Verify Avatar Controls account is linked in Alexa/Google Home app. Use the exact device name. Check internet connection. |
10. Specifications
| Feature | Detail |
|---|---|
| Model Number | AWDS01RF |
| Operation Mode | ON-OFF |
| Current Rating | 10 Amps |
| Operating Voltage | AC 100V~240V |
| Maximum Wattage | 400W (Incandescent), 150W (LED/CFL) |
| Connectivity Protocol | Wi-Fi (2.4GHz only) |
| Control Method | App, Remote, Touch, Voice |
| Controller Type | Amazon Alexa, Google Assistant |
| Circuit Type | Single-pole (1-way) |
| Neutral Wire | Required |
| Remote Range | Up to 33 feet (Bluetooth 5.0) |
| Color | White |
| Item Weight | 14.4 ounces |
11. Warranty and Support
This Avatar Controls Smart Wi-Fi Dimmer Switch comes with a 12-month warranty from the date of purchase. This warranty covers manufacturing defects and malfunctions under normal use.
For technical support, warranty claims, or any questions regarding your product, please contact Avatar Controls customer service. Contact details can typically be found on the product packaging or the official Avatar Controls website.
Please have your model number (AWDS01RF) and proof of purchase ready when contacting support.


