
POCHFAN 44-inch Dimmable LED 3-Speed Reversible Ceiling Fan
POCHFAN 44-inch Dimmable LED 3-Speed Reversible Ceiling Fan User Manual
Model: 44-inch Dimmable LED 3-Speed Reversible Ceiling Fan
1. Important Safety Instructions
Read all instructions carefully before installation and use. Failure to follow these instructions could result in electric shock, fire, or personal injury.
- Always disconnect power at the main circuit breaker before installation or servicing.
- Ensure all electrical connections comply with local codes and ordinances, as well as the National Electrical Code (NEC).
- Consult a qualified electrician if you are unfamiliar with electrical wiring.
- Mount the fan directly to a structural ceiling joist or an outlet box marked "Acceptable for Fan Support of 35 lbs (15.9 kg) or less."
- Do not bend blade holders during installation, balancing, or cleaning.
- Keep hands clear of rotating fan blades.
- This fan is designed for indoor use only.
2. Package Contents
Verify that all components are present before beginning installation:
- Motor Housing Assembly
- Fan Blades (4)
- Light Kit with Dimmable LED
- Remote Control with Wall Mount
- Downrod
- Mounting Bracket
- Hardware Pack (screws, washers, wire nuts)
- Instruction Manual
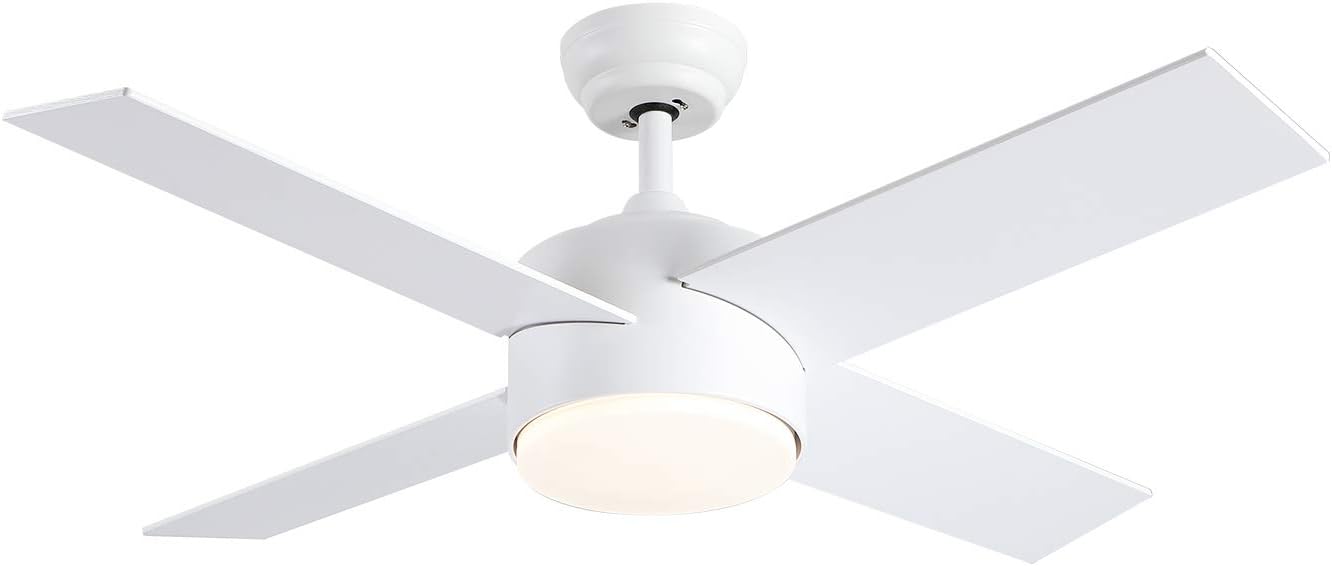
Figure 2.1: Overview of the POCHFAN 44-inch Dimmable LED 3-Speed Reversible Ceiling Fan.
3. Setup and Installation
Professional installation is recommended for safety and optimal performance. Ensure power is OFF at the circuit breaker before proceeding.
- Mounting Bracket Installation: Secure the mounting bracket to the ceiling outlet box (ensure it is fan-rated) or directly to a structural ceiling joist using appropriate hardware.
- Downrod Assembly: Insert the downrod through the canopy and connect it to the motor housing. Secure with the provided pin and screw.
- Wiring: Carefully connect the fan's electrical wires to the household wiring according to the wiring diagram in the full manual. Use the provided wire nuts. Ensure proper grounding.
- Hang Fan Assembly: Lift the fan assembly and hang it on the mounting bracket.
- Blade Attachment: Attach the fan blades to the motor housing using the provided screws. Ensure all blades are securely fastened.
- Light Kit Installation: Connect the light kit wires to the fan motor wires. Secure the light kit to the bottom of the fan motor housing.
- Power Restoration: Once all connections are secure and the fan is fully assembled, restore power at the circuit breaker.

Figure 3.1: The POCHFAN Ceiling Fan installed in a room, demonstrating its modern aesthetic.
4. Operating Instructions
The POCHFAN Ceiling Fan is operated using the included remote control.
4.1 Fan Speed Control
Use the remote control buttons to adjust the fan speed:
- LOW: Activates low fan speed.
- MED: Activates medium fan speed.
- HI: Activates high fan speed.
4.2 Light Control and Color Temperature Adjustment
The integrated LED light offers dimmable functionality and adjustable color temperature:
- LIGHT ON/OFF: Press to turn the light on or off.
- Color Temperature: Repeatedly press the LIGHT ON/OFF button to cycle through color temperatures: 3000K (warm yellow light), 4000K (natural light), and 6500K (cool white light).

Figure 4.1: Illustration of the three adjustable light color temperatures: 3000K (Warm Yellow), 4000K (Daylight), and 6000K (Cool Light).
4.3 Reversible Function (Summer/Winter Mode)
The fan features a reversible motor for year-round comfort. Locate the forward/reverse switch on the motor housing (typically above the light kit).
- Summer Mode (Downdraft): Set the switch to the position that causes the blades to rotate counter-clockwise, pushing air downwards to create a cooling breeze.
- Winter Mode (Updraft): Set the switch to the position that causes the blades to rotate clockwise, drawing air upwards to circulate warm air trapped near the ceiling.

Figure 4.2: Location of the manual forward/reverse switch for seasonal operation.
4.4 Timer Setting
The remote control allows you to set a timer for the fan to automatically turn off:
- Press the 1H button for 1 hour.
- Press the 2H button for 2 hours.
- Press the 4H button for 4 hours.
- Press the 8H button for 8 hours.
4.5 Product Features Overview Video
Video 4.1: A demonstration of the POCHFAN Ceiling Fan's features, including double-sided blades, adjustable light temperatures, 3-speed settings, reversible mode, and timer function.
5. Maintenance
Regular maintenance ensures the longevity and optimal performance of your ceiling fan.
- Cleaning: To avoid scratching the finish, clean the fan with a soft, damp cloth. Do not use abrasive cleaners or solvents.
- Blade Cleaning: Wipe the blades with a soft cloth to remove dust. Ensure blades are clean and free of debris to maintain balance.
- Tighten Fasteners: Periodically check all screws and fasteners for tightness. Vibration from normal fan operation can cause them to loosen over time.
- LED Light: The integrated LED light source is designed for long life and is generally not user-replaceable. If the light fails, contact customer support.
6. Troubleshooting
Refer to this section for common issues and their solutions.
| Problem | Possible Cause | Solution |
|---|---|---|
| Fan does not start. | No power to the fan; loose wire connections; remote control battery low. | Check circuit breaker; ensure all wire connections are secure; replace remote control batteries. |
| Light does not work. | Loose wire connection to light kit; LED failure. | Check light kit wiring; contact customer support if LED is faulty. |
| Fan wobbles. | Loose blades or blade holders; unbalanced blades; loose mounting bracket. | Ensure all blade screws are tight; use a balancing kit (not included) if necessary; tighten mounting bracket screws. |
| Noisy operation. | Loose screws; motor not properly seated; blades hitting an obstruction. | Check all screws for tightness; ensure motor housing is secure; verify no obstructions are in the fan's path. |
| Remote control not responding. | Low or dead batteries; remote not paired with fan. | Replace batteries; refer to the full manual for remote pairing instructions. |
7. Specifications
| Feature | Detail |
|---|---|
| Brand | POCHFAN |
| Model | 44-inch Dimmable LED 3-Speed Reversible Ceiling Fan |
| Dimensions | 44"D x 44"W x 174"H (Note: 174"H is an unusually high dimension, please refer to product packaging for exact height with downrod.) |
| Power Source | AC |
| Voltage | 120 Volts (AC) |
| Control Method | Remote Control |
| Fan Speeds | 3 (Low, Medium, High) |
| Light Type | Dimmable LED |
| Color Temperatures | 3000K (Warm Yellow), 4000K (Natural), 6500K (Cool White) |
| Reversible Function | Yes (Summer/Winter Mode) |
| Timer Options | 1H, 2H, 4H, 8H |
| Item Weight | 18 Pounds |
| Indoor/Outdoor Usage | Indoor |
| UPC | 754422330657 |
| ASIN | B09442LWRF |
8. Warranty and Support
Warranty: This POCHFAN Ceiling Fan comes with a 2-year warranty for the entire unit. This warranty covers non-working, missing, or damaged parts. Free replacement service will be provided for covered issues.
Customer Support: For any inquiries, assistance, or warranty claims, please contact POCHFAN customer service. Support is available 24 hours, 7 days a week via Amazon's messaging system or through the contact information provided in your product packaging.
For further assistance, please visit the POCHFAN Store on Amazon.
Related documents44-inch Dimmable LED 3-Speed Reversible Ceiling Fan


Ask a question about this manual
Ask about setup, troubleshooting, compatibility, parts, safety, or missing instructions. Manuals+ will review the question and use this page’s manual context to help answer it.