Introduction
This manual provides comprehensive instructions for the installation, operation, and maintenance of your Apevia Premier 850W Semi-Modular Gaming Power Supply. Designed for high performance and reliability, this 80+ Gold certified power supply features active PFC, a semi-modular cable design, and customizable RGB lighting modes. Please read this manual thoroughly before installation to ensure proper setup and safe operation.
Safety Information
Always observe the following safety precautions to prevent injury or damage to your equipment:
- Ensure the power supply is disconnected from the main power outlet before installation or maintenance.
- Do not open the power supply casing. High voltages are present inside, even when disconnected.
- Install the power supply in a well-ventilated area to prevent overheating.
- Use only the cables provided with the power supply.
- Avoid exposing the power supply to moisture or extreme temperatures.
- This power supply automatically switches between 110V and 230V; no manual toggle switch is required.
Package Contents
Verify that all items are present in the package:
- Apevia Premier 850W Semi-Modular Power Supply (ATX-PM850W)
- AC Power Cord
- Modular Cables (PCI-E, SATA, Peripheral, Floppy)
- Mounting Screws
- User Manual (this document)

Image: Apevia Premier 850W Power Supply, packaging, and included modular cables and power cord.
Features
- 850W Continuous Power: Provides stable and reliable power output for high-performance gaming systems.
- 80 PLUS Gold Certified: Achieves 90%+ efficiency at 20%, 50%, and 100% load levels, reducing heat generation and electricity consumption.
- Semi-Modular Design: Allows for improved cable management by connecting only the necessary cables, reducing clutter and improving airflow within the PC case.
- Active PFC (Power Factor Correction): Boasts a 99% factor correction, enhancing performance and energy efficiency.
- 135mm RGB Fan: Features an auto-thermally controlled fan with 366 selectable RGB lighting modes, adding aesthetic appeal and efficient cooling. The fan speed adjusts based on the power supply's temperature.
- Heavy Duty Protections: Includes Short-Circuit Protection (SCP), Over-Voltage Protection (OVP), Over-Power Protection (OPP), and Under-Voltage Protection (UVP) to safeguard your components.
- Double Forward Converter Design: Enhances stability and efficiency.
- Wide Compatibility: Supports ATX 12V 2.3 Version, Dual/Quad Core CPUs, SLI/Crossfire configurations, and Haswell processors.
- Japanese Capacitor: Utilizes a large Japanese capacitor for enhanced reliability and lifespan.

Image: Visual representation of the power supply's 80+ Gold efficiency and semi-modular cable benefits.
Setup and Installation
Follow these steps to properly install your Apevia Premier Power Supply:
- Prepare Your System: Ensure your computer is completely powered off and unplugged from the wall outlet. Open your PC case.
- Remove Old PSU (if applicable): Disconnect all cables from your old power supply and remove it from the case.
- Mount the New PSU: Carefully place the Apevia Premier 850W PSU into the power supply bay of your PC case. Secure it with the provided mounting screws.
- Connect Essential Cables:
- 20/24-pin Main Power Connector: Connect the main power cable to your motherboard. This connector can be split into 20+4 pins for motherboards requiring a 20-pin connector.
- P8 (4+4P) ESP 12V CPU Connector: Connect this to your motherboard's CPU power input. This 8-pin connector can be split into two 4-pin connectors for motherboards requiring a 4-pin power connector.
- Connect Modular Cables: Identify the necessary cables for your components (graphics card, SSDs/HDDs, optical drives) and plug them into the corresponding modular ports on the power supply.
- PCI-E (6+2 pin) Connectors: Use these for your graphics card(s). The 8-pin PCI-E GPU connector can be split into a 6+2 pin configuration for graphics cards requiring a 6-pin power connector.
- SATA Connectors: For SATA hard drives, SSDs, and optical drives.
- Peripheral (Molex) Connectors: For older components or case fans.
- Floppy Connector: For legacy floppy drives or certain fan controllers.
- Cable Management: Route cables neatly to improve airflow and aesthetics. Utilize the semi-modular design to only use cables you need.
- Close Case and Power On: Once all connections are secure, close your PC case. Connect the AC power cord to the power supply and then to a wall outlet. Flip the power switch on the PSU to the 'ON' position.
Important Note:
The power supply will not power on simply by connecting the power cord to both the power supply and wall outlet. Ensure that all the power supply cables are properly connected to the PC components for it to power on.

Image: Detailed diagram illustrating the types and lengths of connectors included with the power supply, such as ATX Main, EPS 12V, PCI Express, SATA, Peripheral, and Floppy connectors.

Image: Side view of the power supply unit, highlighting the modular ports for PCI-E and SATA/Peripheral cables, allowing for flexible cable management.
Operating Instructions
Once installed and connected, the power supply operates automatically. The 135mm fan will adjust its speed based on the internal temperature to maintain optimal cooling.
RGB Lighting Control
The Apevia Premier Power Supply features 366 selectable RGB lighting modes for its fan. To change the lighting mode, locate the dedicated button on the back of the PSU (near the power switch). Press this button to cycle through various modes, including:
- RGB Cycle
- Breathe Cycle
- Breathe Mode
- RGB Mode
- Solid Colors (Red, Blue, Green, Pink, Orange, White)
- Off Mode
- And many more.
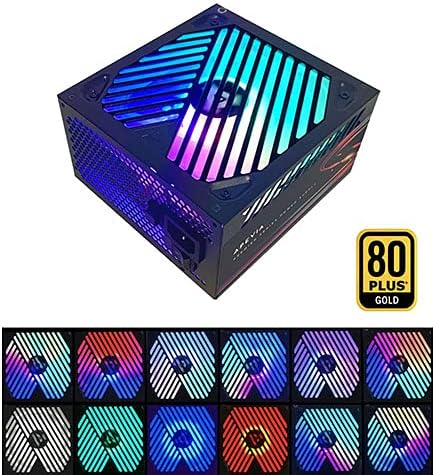
Image: The power supply unit showcasing its RGB fan with multiple color options, demonstrating the customizable lighting effects.
Maintenance
To ensure the longevity and optimal performance of your power supply, consider the following maintenance tips:
- Keep Vents Clear: Periodically check that the power supply's intake and exhaust vents are free from dust and obstructions.
- Dust Removal: Use compressed air to gently clean dust from the fan and internal components of the power supply (only when the unit is unplugged and outside the PC case, if possible).
- Cable Integrity: Ensure all connected cables are securely seated and not pinched or damaged.
Troubleshooting
If you encounter issues with your Apevia Premier Power Supply, refer to the following common problems and solutions:
| Problem | Possible Cause | Solution |
|---|---|---|
| Power Supply does not turn on. | Not all cables are properly connected to PC components. | Ensure the 20/24-pin main power, 4+4-pin CPU, and any necessary PCI-E cables are fully seated in their respective ports on the motherboard and graphics card. The PSU requires a load to power on. |
| System powers on but immediately shuts down. | Overload, short circuit, or component malfunction. | Check for any loose connections or short circuits. Ensure your system's power requirements do not exceed the PSU's capacity. Test components individually if possible. |
| RGB fan not lighting up or cycling modes. | RGB control button not pressed or internal issue. | Press the RGB control button on the back of the PSU to cycle through modes. If still unresponsive, ensure the PSU is receiving power. |
| Unusual noise from the PSU fan. | Dust accumulation or fan bearing issue. | Clean the fan and vents. If the noise persists and is excessive, contact customer support. |
Specifications
| Feature | Detail |
|---|---|
| Model Number | ATX-PM850W |
| Wattage | 850 Watts |
| Efficiency Certification | 80 PLUS Gold |
| Form Factor | ATX |
| Power Supply Design | Semi-Modular |
| Cooling Method | Air (135mm RGB Fan) |
| Product Dimensions (L x W x H) | 6.2 x 5.9 x 3.4 inches |
| Item Weight | 4.31 pounds |
| Input Voltage | Auto-switching (110V/230V) |
| Output (Max) | +3.3V@20A, +5V@20A, +12V@83.3A, -12V@0.3A, +5Vsb@3A |
| Protections | SCP, OVP, OPP, UVP |
Warranty and Support
For warranty information or technical support, please refer to the official Apevia website or contact their customer service directly. Keep your purchase receipt as proof of purchase for warranty claims.
You can visit the Apevia Store on Amazon for more product information and support resources.


