
1. Introduction
This manual provides essential instructions for the safe assembly, use, maintenance, and conversion of your NAMESAKE Noelle 4-in-1 Convertible Metal Crib. Please read all instructions carefully before assembly and keep this manual for future reference. This crib is designed to grow with your child, converting from a crib to a toddler bed, daybed, and full-size bed (conversion kits sold separately).

Image 1.1: The NAMESAKE Noelle 4-in-1 Convertible Metal Crib in Vintage Iron, shown in its crib configuration with a mattress.
2. Safety Information
WARNING: Failure to follow these warnings and the assembly instructions could result in serious injury or death.
- Read all instructions before assembling the crib. Keep instructions for future use.
- Do not use this crib if you cannot exactly follow the accompanying instructions.
- The crib is Greenguard Gold Certified, ensuring it has been tested for over 10,000 chemical emissions and VOCs for cleaner indoor air.
- Strangulation Hazard: Strings and cords can cause strangulation. Do not place items with a string around a child's neck, such as hood strings or pacifier cords. Do not suspend strings over a crib or attach strings to toys.
- Suffocation Hazard: Infants can suffocate on soft bedding. Never add a pillow, comforter, or extra padding.
- To prevent falls, when the child is able to pull himself or herself to a standing position, set the mattress to the lowest position.
- Check this product for damaged hardware, loose joints, missing parts, or sharp edges before assembly and periodically thereafter. Do not use the crib if any parts are missing or broken.
- Never use plastic shipping bags or other plastic film as mattress covers because they can cause suffocation.
- The mattress used with this crib must be at least 27.25 inches (69 cm) by 51.625 inches (131 cm) with a thickness not exceeding 6 inches (15 cm).
3. Parts List
Before beginning assembly, ensure all parts are present. If any parts are missing or damaged, do not proceed with assembly. Contact customer support for replacement parts.
- Headboard (1)
- Footboard (1)
- Side Rails (2)
- Mattress Support (1)
- Hardware Pack (bolts, washers, barrel nuts, Allen wrench)
Note: Toddler bed conversion kit (#M21499) and full-size bed conversion kit (#M21589) are sold separately and are required for converting the crib to a toddler bed or full-size bed, respectively.
4. Setup (Assembly Instructions)
Assembly requires two adults. Use the provided Allen wrench. Do not overtighten bolts.
- Unpack and Identify Parts: Carefully remove all components from the packaging. Lay them out on a soft, clean surface to prevent scratches. Verify all parts listed in Section 3 are present.
- Attach Side Rails to Headboard: Align the holes on the side rails with the pre-drilled holes on the headboard. Insert bolts with washers through the side rails into the headboard, securing them with barrel nuts. Hand-tighten initially.
- Attach Footboard: Repeat the process from step 2 to attach the footboard to the other ends of the side rails. Ensure all connections are secure but do not fully tighten yet.
- Install Mattress Support: Position the mattress support within the crib frame. The mattress support has multiple height settings. Choose the desired height (highest for infants, lowest for toddlers who can stand). Secure the mattress support to the side rails using the designated hardware.
- Final Tightening: Once all components are assembled, go back and fully tighten all bolts using the Allen wrench. Do not overtighten.
- Safety Check: Ensure all hardware is tight and secure. There should be no exposed sharp edges or loose parts.
5. Operating (Usage and Conversion)
5.1 Mattress Height Adjustment
The NAMESAKE Noelle crib features four adjustable mattress positions. As your child grows and becomes more mobile, the mattress support should be lowered to prevent falls.
- Highest Position: For newborns and infants who cannot push up on their hands and knees.
- Mid-High Position: For infants who can push up on their hands and knees.
- Mid-Low Position: For infants who can sit up unassisted.
- Lowest Position: For toddlers who can pull themselves to a standing position.
To adjust the mattress height, remove the mattress, unfasten the mattress support from the side rails, reposition it to the desired height, and re-secure it with the hardware.
5.2 Crib to Toddler Bed Conversion
To convert your crib into a toddler bed, you will need the Toddler Bed Conversion Kit (#M21499), sold separately.
- Remove the mattress from the crib.
- Carefully detach one of the side rails from the headboard and footboard.
- Attach the toddler safety rail (from kit #M21499) to the headboard and footboard in place of the removed side rail, following the instructions provided with the conversion kit.
- Re-install the mattress.

Image 5.1: The NAMESAKE Noelle Crib configured as a toddler bed, with one side rail replaced by a shorter safety rail.
5.3 Toddler Bed to Daybed Conversion
To convert the toddler bed into a daybed, no additional kit is typically required if you have already converted to a toddler bed.
- Remove the mattress from the toddler bed.
- Carefully detach the toddler safety rail from the headboard and footboard.
- Re-install the mattress. The daybed configuration retains the headboard, footboard, and one side rail, leaving one side open.

Image 5.2: The NAMESAKE Noelle Crib configured as a daybed, with one side completely open.
5.4 Daybed to Full-Size Bed Conversion
To convert the daybed into a full-size bed, you will need the Full-Size Bed Conversion Kit (#M21589), sold separately.
- Remove the mattress and mattress support from the daybed.
- Detach the remaining side rail from the headboard and footboard.
- Attach the full-size bed rails (from kit #M21589) to the headboard and footboard, following the instructions provided with the conversion kit.
- Place a full-size mattress and box spring (not included) onto the new bed frame.
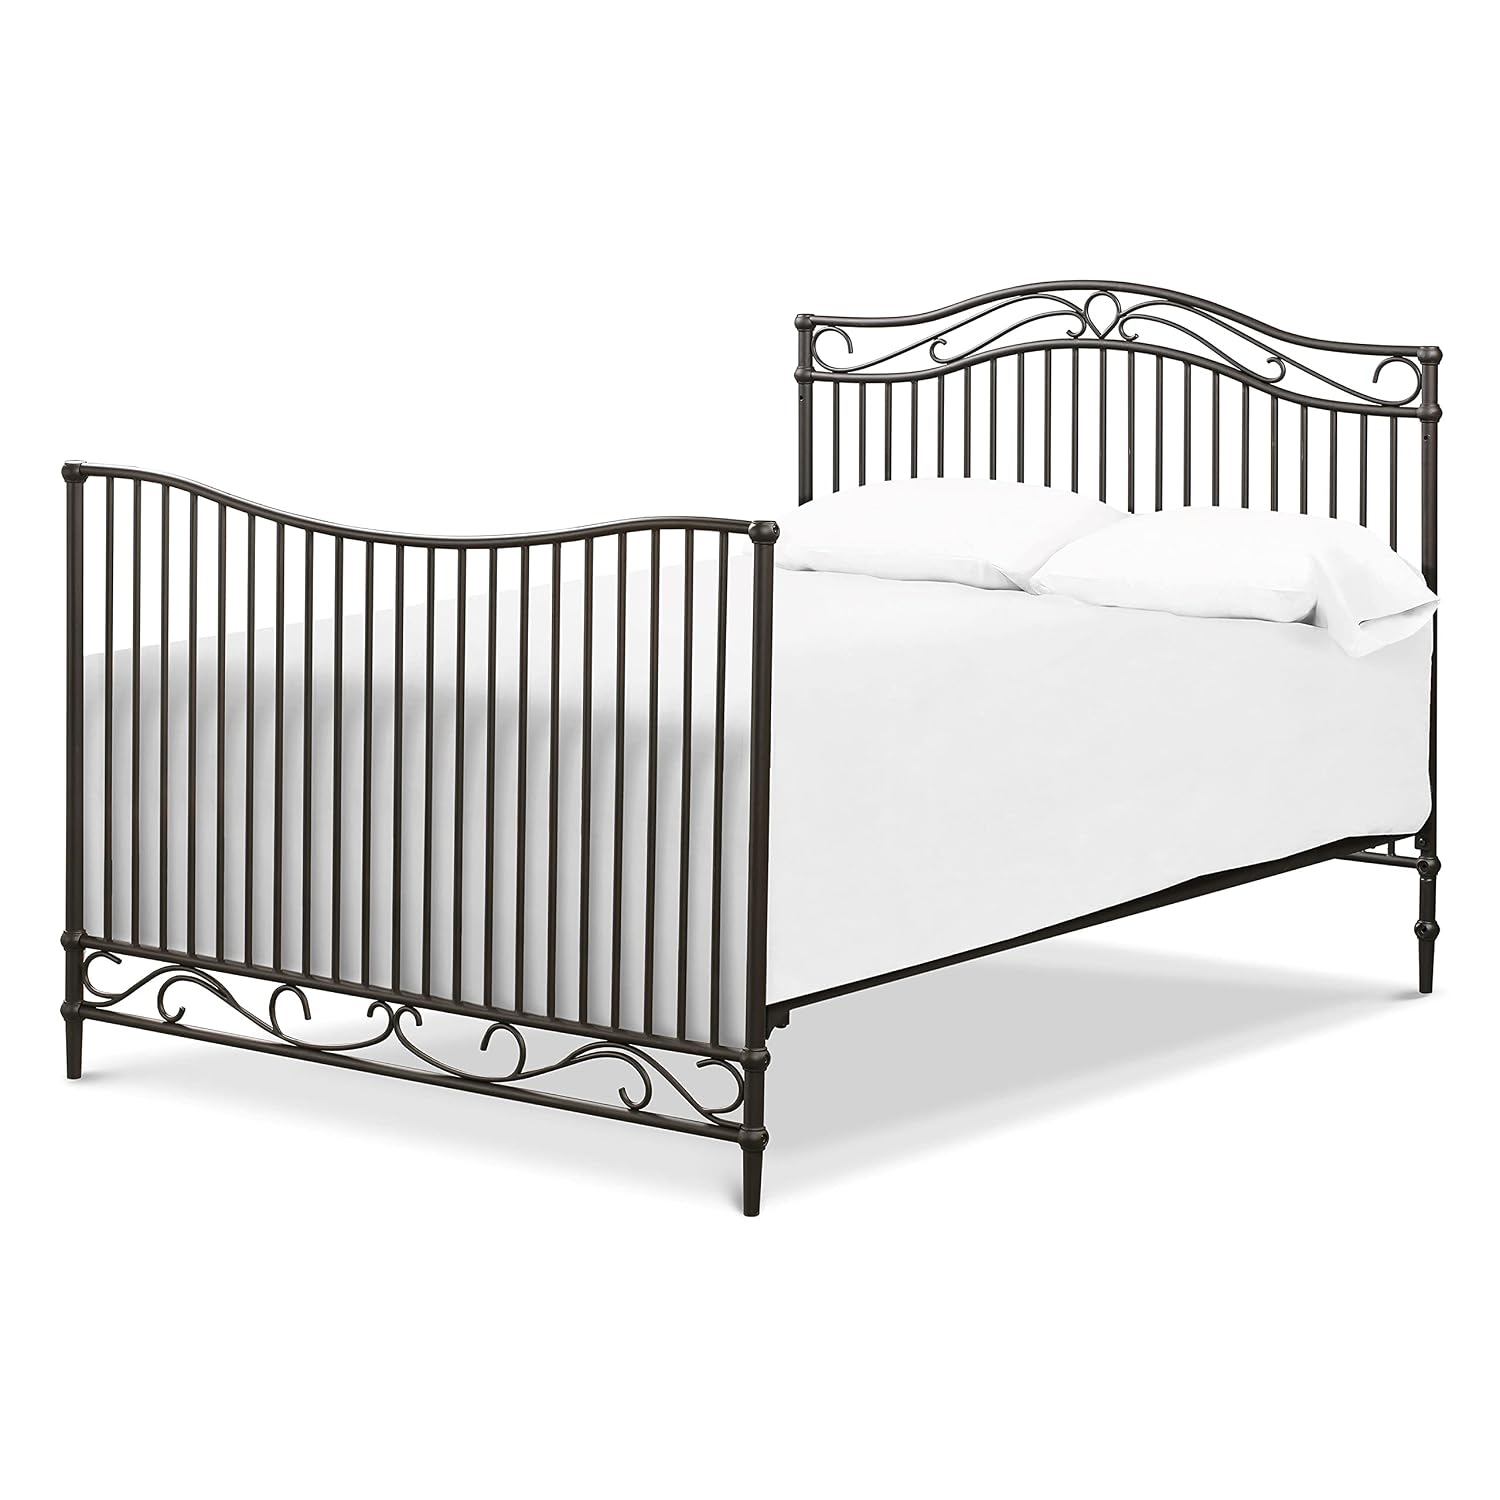
Image 5.3: The NAMESAKE Noelle Crib headboard and footboard used with a full-size bed conversion kit to form a full-size bed.
6. Maintenance
Proper maintenance ensures the longevity and safety of your crib.
- Cleaning: Clean the crib with a soft, damp cloth and mild soap. Avoid abrasive cleaners, harsh chemicals, or strong detergents, as these can damage the finish.
- Inspection: Periodically check all bolts, screws, and other hardware to ensure they are tight and secure. Do not overtighten.
- Storage: If storing the crib, disassemble it carefully and store all parts and hardware in a dry, safe place.
- Finish Care: The crib features a durable powder-coated finish. Avoid scratching or chipping the finish.
7. Troubleshooting
- Loose Parts/Wobbling: If the crib feels unstable or parts are loose, re-check all hardware connections. Tighten any loose bolts or screws. Ensure all components are correctly aligned.
- Difficulty Adjusting Mattress Height: Ensure the mattress support is properly aligned with the designated holes on the side rails. Check for any obstructions or misaligned hardware.
- Squeaking: Squeaking can sometimes occur from metal-on-metal contact. Ensure all bolts are tightened appropriately. If squeaking persists, a small amount of lubricant (e.g., silicone spray) can be applied to contact points, ensuring it is safe for children's products and wiped clean afterward.
- Missing Hardware: If you discover missing hardware during assembly, do not proceed. Contact NAMESAKE customer support for replacement parts.
8. Specifications
| Feature | Detail |
|---|---|
| Brand | NAMESAKE |
| Model | Noelle 4-in-1 Convertible Metal Crib |
| Color | Vintage Iron |
| Product Dimensions (Crib) | 55"L x 30"W x 47"H |
| Special Feature | Adjustable, Convertible |
| Certifications | GREENGUARD Gold Certified |
| Material | Premium steel with durable powder-coated finish |

Image 8.1: Detailed dimensions of the NAMESAKE Noelle 4-in-1 Convertible Metal Crib.
9. Warranty and Support
For warranty information, replacement parts, or any other customer support inquiries, please refer to the warranty card included with your product or visit the official NAMESAKE website. You may also contact customer support through the retailer where the product was purchased.
For direct customer support, please visit the NAMESAKE Store on Amazon.