Introduction
This manual provides detailed instructions for the installation, operation, and maintenance of your new JTWEB Black Extendable Kitchen Faucet. Please read this manual thoroughly before installation and use to ensure proper function and longevity of the product.
Product Overview and Features
The JTWEB Extendable Kitchen Faucet is designed to enhance your kitchen experience with its versatile features and modern aesthetic.
- Extendable Spout: Offers extended reach for filling pots, cleaning the sink, and other tasks.
- 360° Swivel: Provides full rotation for maximum flexibility and convenience.
- Single Lever Control: Allows for easy adjustment of water temperature and flow.
- Dual Spray Modes: Features both aerated stream and powerful spray options for various cleaning needs.
- Durable Construction: Made from stainless steel with a black finish for lasting performance and style.
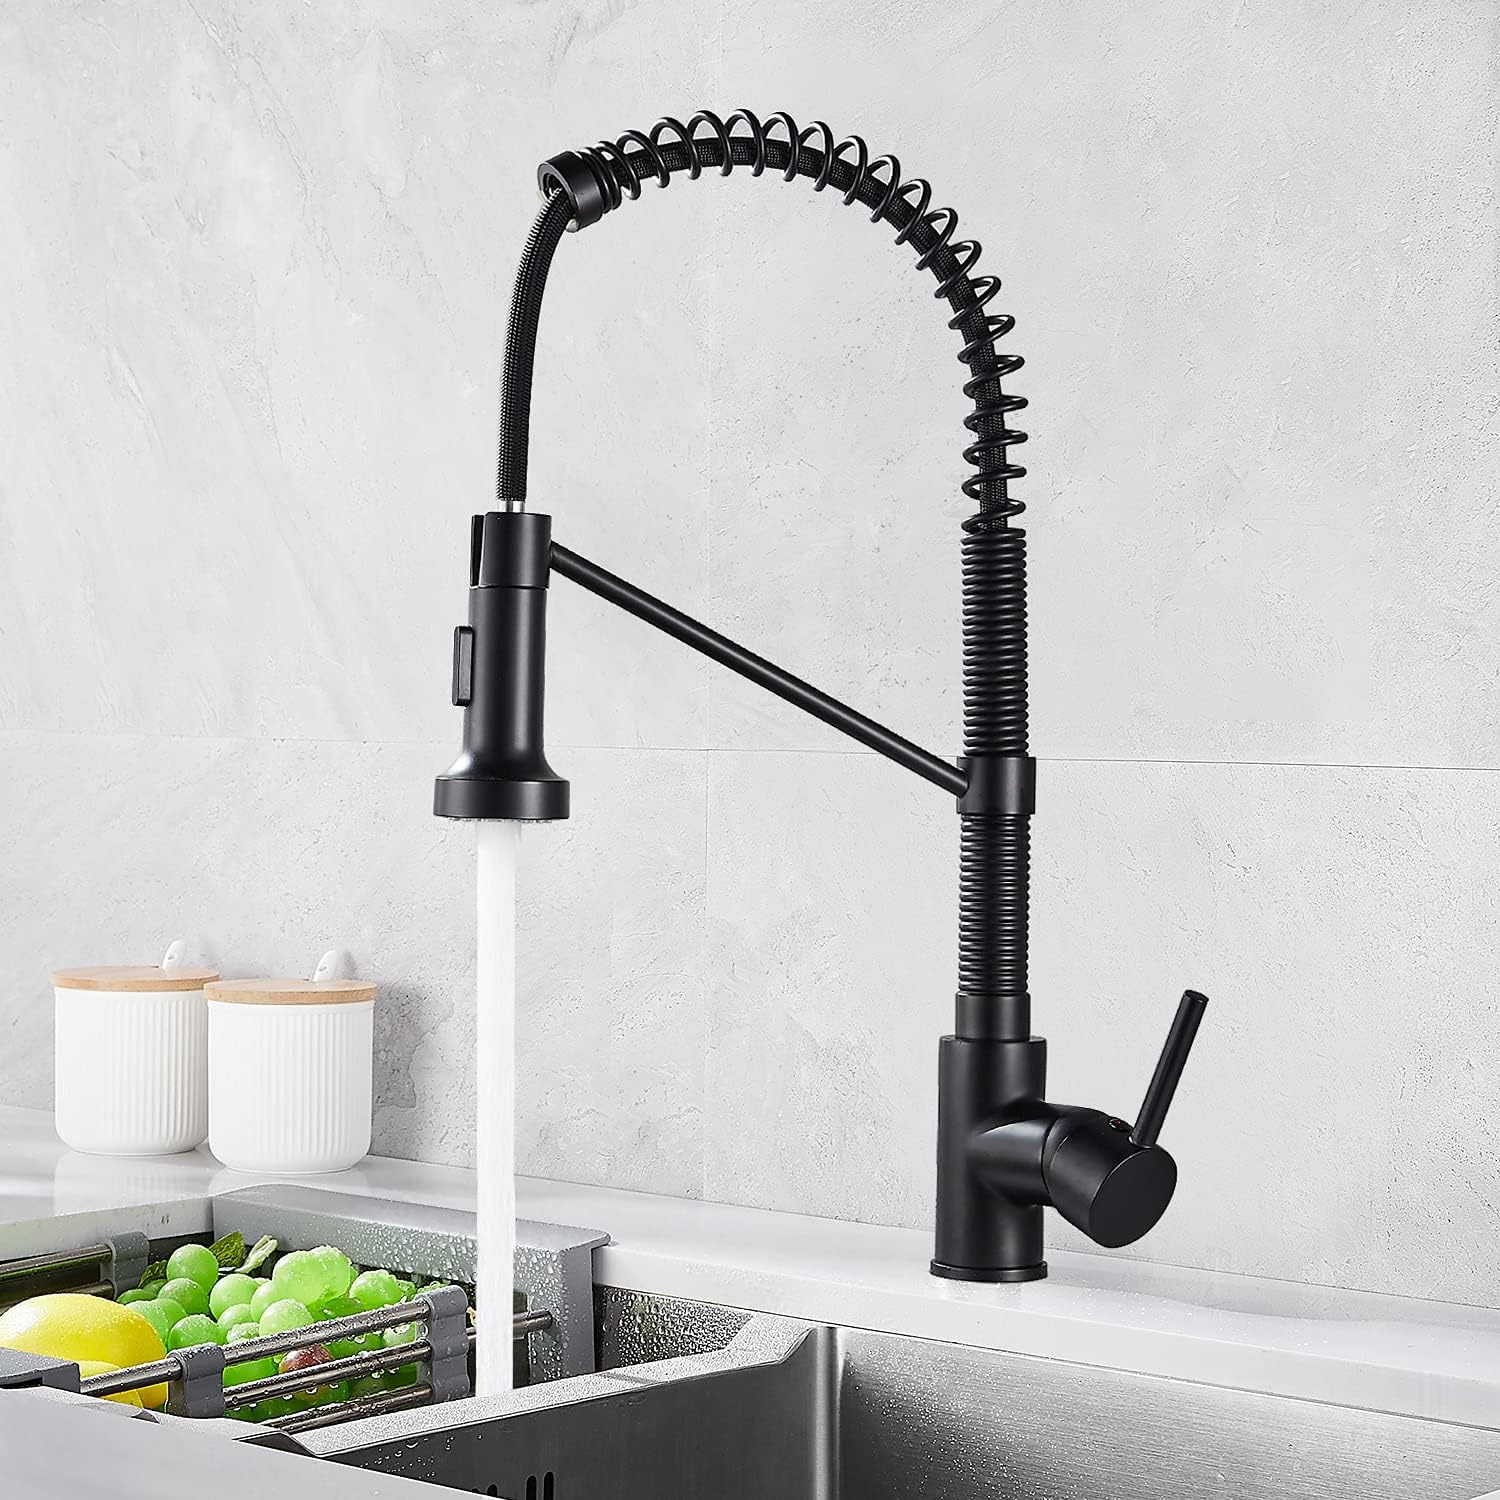
Image: The JTWEB Black Extendable Kitchen Faucet in operation, showcasing its sleek design and functional pull-down spray head.
Package Contents
Please verify that all components are present before beginning installation.
- Kitchen Faucet Assembly (Main body with spring spout and pull-down spray)
- Hot and Cold Water Supply Hoses (450mm length, 3/8" nut)
- Mounting Hardware (Gasket, nut, washer)
- Counterweight
- User Manual (This document)
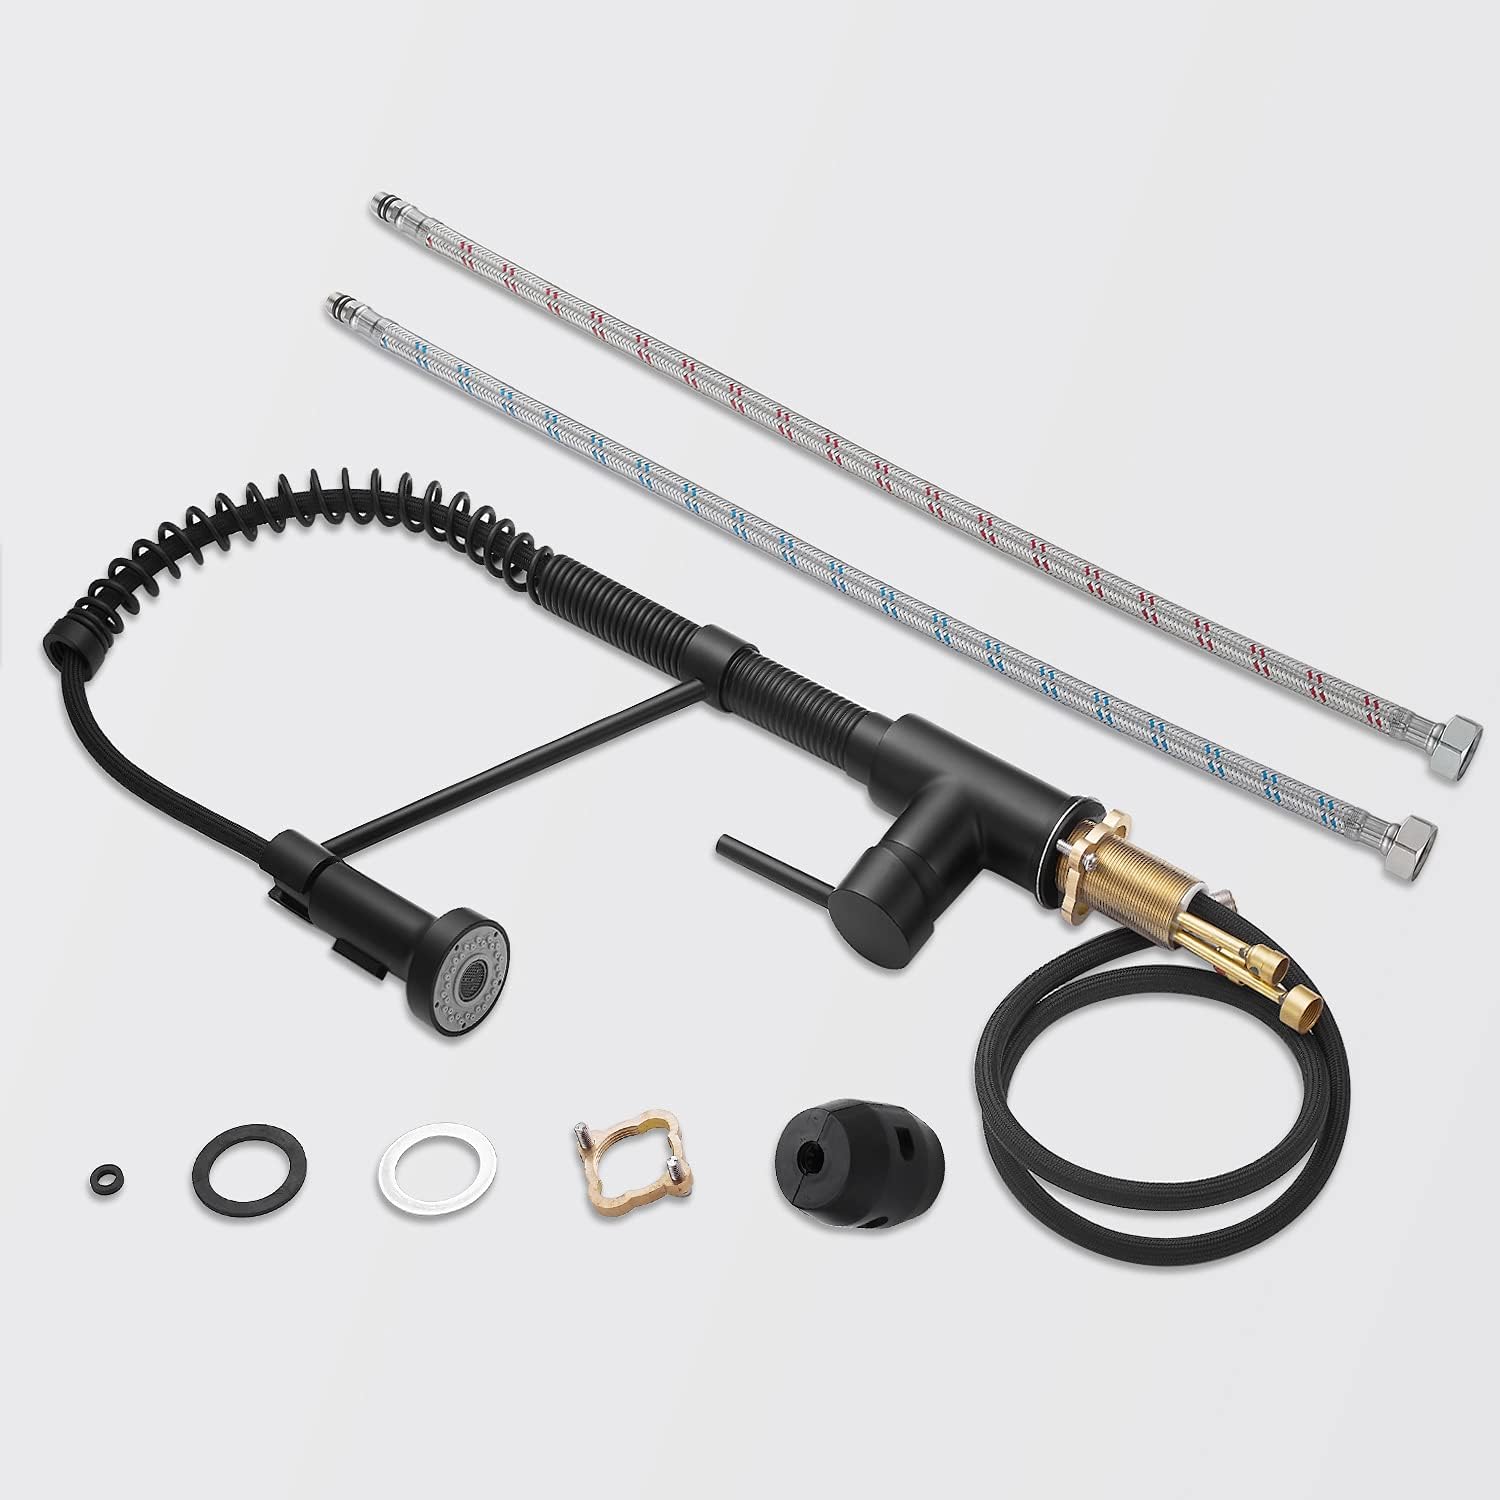
Image: A complete view of all parts included in the JTWEB faucet package, ready for assembly.
Specifications
| Feature | Specification |
|---|---|
| Brand | JTWEB |
| Model | Extendable Spring Spout Kitchen Faucet |
| Color | Black |
| Material | Stainless Steel |
| Installation Method | Single Hole, Surface Mount |
| Number of Handles | 1 (Single Lever) |
| Special Features | 360° Swivel, Extendable Spout, Dual Spray Modes |
| Product Dimensions | 59 x 27.5 x 7 cm (approximate, refer to diagram for detailed measurements) |
| Product Weight | 2.2 kg |

Image: Detailed dimensions of the faucet, illustrating its size and reach.
Safety Information
- Always turn off the main water supply before attempting any installation or maintenance.
- Wear appropriate safety gear, such as gloves and eye protection, during installation.
- Ensure all connections are tight to prevent leaks. Do not overtighten.
- If you are unsure about any step, consult a qualified plumber.
Installation Guide
The installation process is designed to be straightforward. No specialized plumbing skills are required, and installation can typically be completed within 20 minutes.
Tools Required
- Adjustable Wrench
- Screwdriver (Phillips or Flathead, depending on mounting hardware)
- Plumber's Putty or Silicone Sealant (Optional, for base sealing)
- Flashlight (for under-sink visibility)
- Bucket and Towel (for catching drips)
Step-by-Step Installation
- Prepare the Sink: Turn off the main water supply. Clear the area under the sink. If replacing an old faucet, remove it. Clean the mounting surface.
- Install the Faucet: Insert the faucet body into the single hole on your sink or countertop. Ensure the base gasket is properly seated.
- Secure the Faucet: From underneath the sink, slide the rubber washer, metal washer, and mounting nut onto the threaded shank. Tighten the mounting nut securely with an adjustable wrench.
- Connect Water Supply Lines: Attach the hot and cold water supply hoses (provided) to the corresponding inlets on the faucet body. Connect the other ends of the hoses to your hot and cold water supply valves. Ensure connections are hand-tight, then use a wrench for a final quarter-turn.
- Install Counterweight: Attach the counterweight to the pull-down hose, typically 6-8 inches below the sink deck, to ensure the spray head retracts smoothly.
- Test for Leaks: Turn on the main water supply slowly. Check all connections for leaks. Run the faucet for a few minutes to flush out any debris and check for proper hot/cold water flow.

Image: Illustration of hot and cold water connections, indicating proper hose attachment.
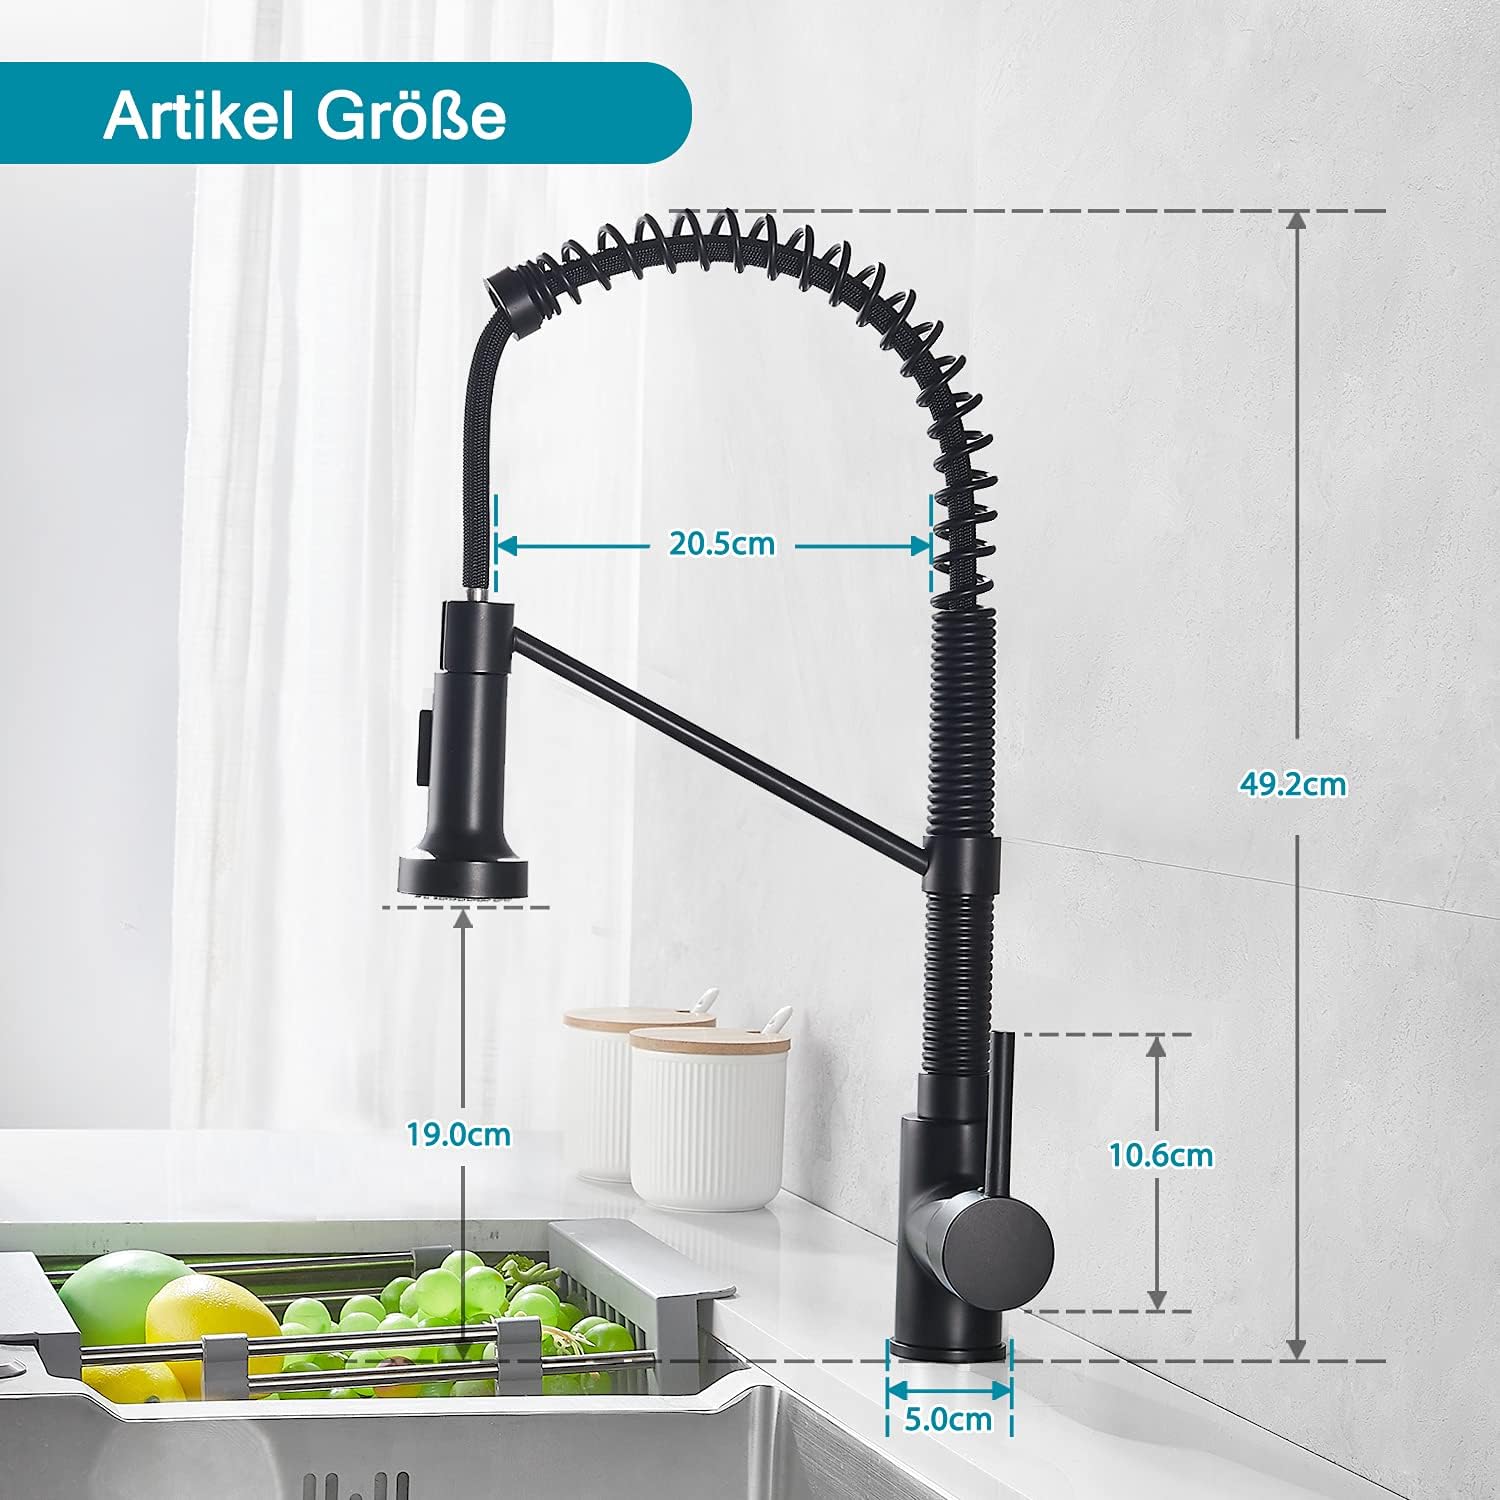
Image: The extendable spray head in use, highlighting its flexibility and reach.
Operating Instructions
Water Flow and Temperature Control
The single lever handle controls both water flow and temperature.
- To Turn On/Off: Lift the handle upwards to turn on the water. Push it downwards to turn off.
- To Adjust Temperature: Move the handle to the left for hot water and to the right for cold water.
- To Adjust Flow: The further you lift the handle, the greater the water flow.

Image: Visual guide for operating the single lever handle to control water temperature and flow.
Spray Head Functionality
The pull-down spray head offers two distinct spray patterns.
- Aerated Stream: Ideal for filling pots and general washing.
- Powerful Spray: Suitable for rinsing dishes and heavy-duty cleaning.
Press the button on the spray head to switch between the two modes. The spray head can be pulled out for extended reach and will retract automatically when released, thanks to the counterweight.
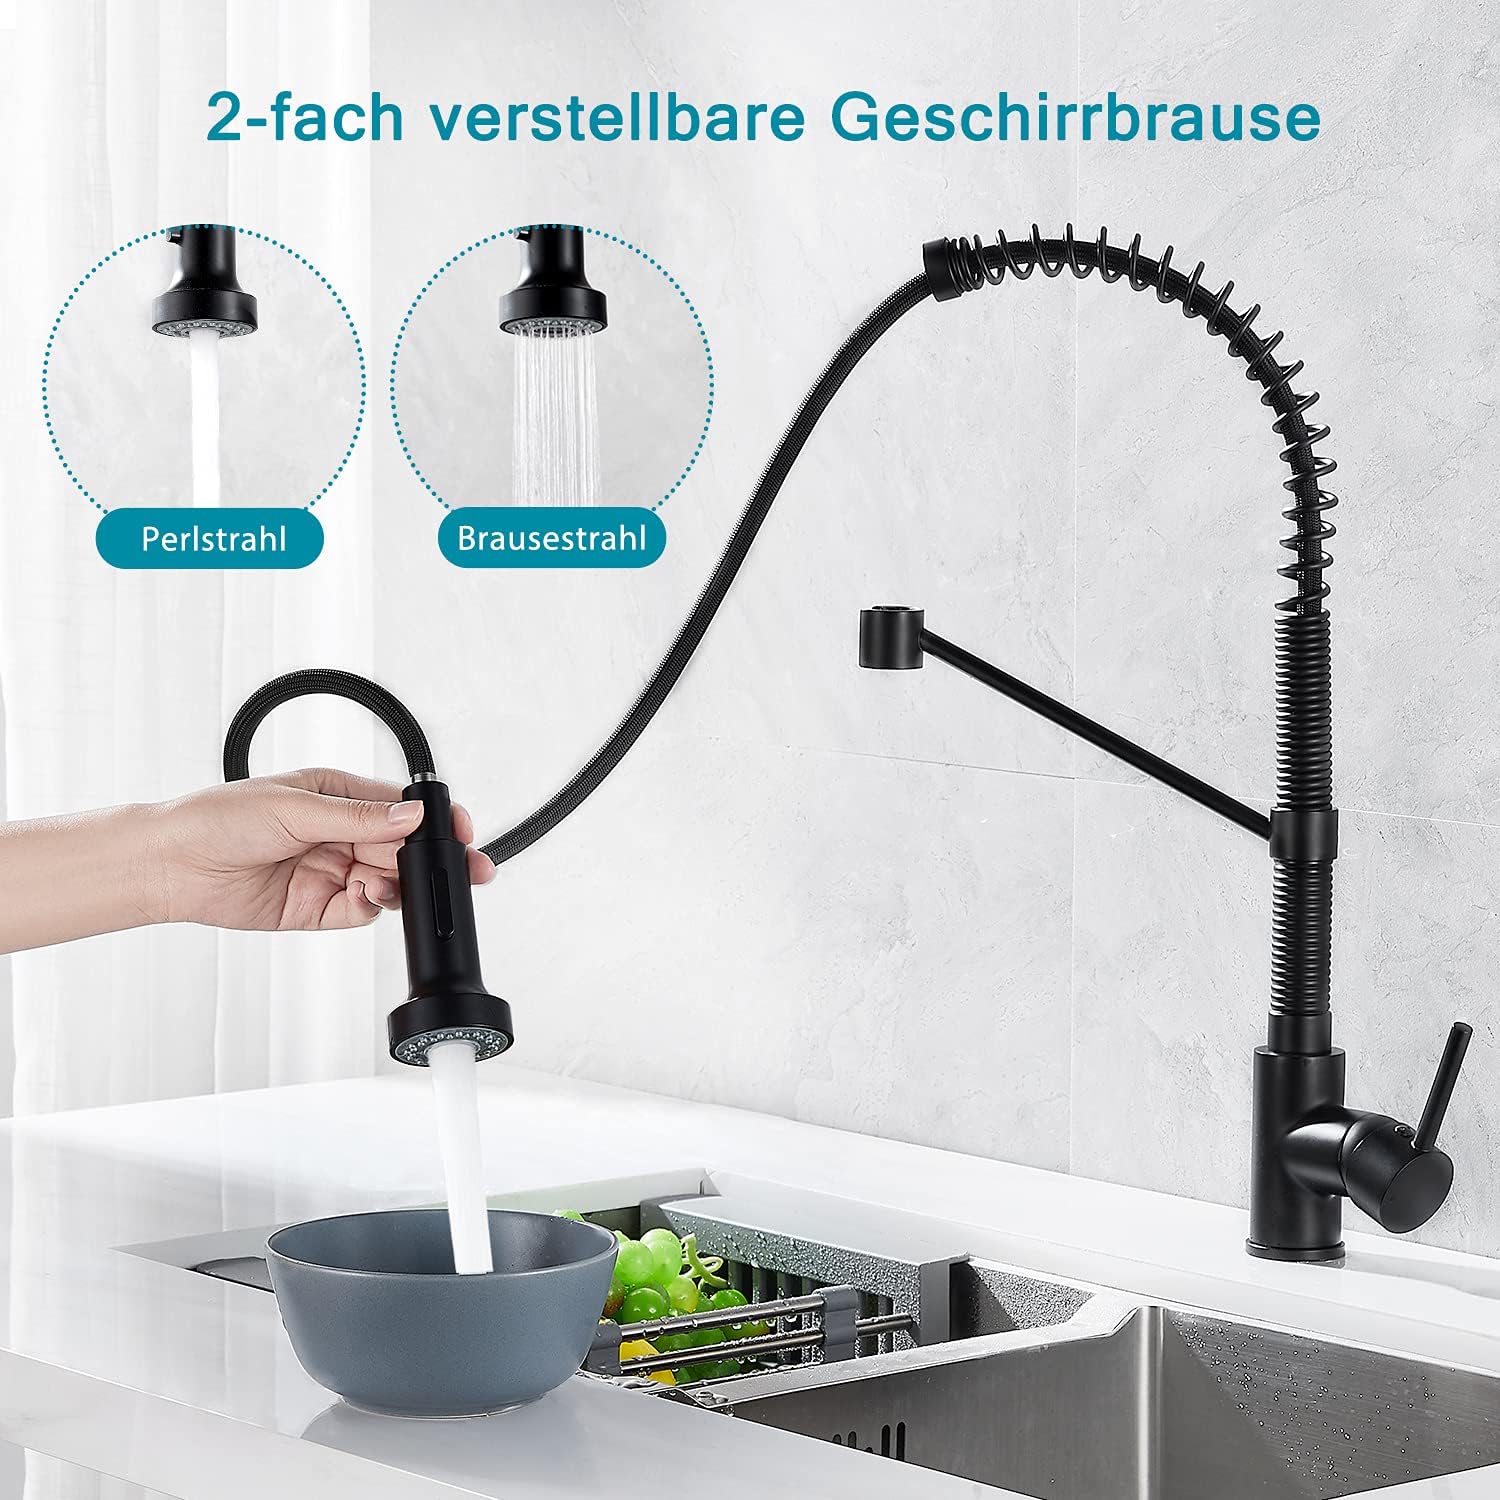
Image: The two spray modes available on the pull-down spray head.
360° Swivel Feature
The faucet body can rotate 360 degrees, providing complete access to all areas of your sink.
Image: The 360-degree rotation feature of the faucet, enhancing usability.
Maintenance and Care
- Regular Cleaning: Clean the faucet regularly with a soft cloth and mild soap. Avoid abrasive cleaners, harsh chemicals, or scouring pads, as these can damage the finish.
- Aerator Cleaning: Periodically unscrew the aerator from the spray head and clean any mineral deposits or debris. This helps maintain optimal water flow.
- Check for Leaks: Regularly inspect connections under the sink for any signs of leaks. Tighten connections if necessary.
- Avoid Hard Water Buildup: In areas with hard water, wipe the faucet dry after each use to prevent mineral spots.
Troubleshooting
| Problem | Possible Cause | Solution |
|---|---|---|
| Low Water Flow | Clogged aerator; partially closed shut-off valve; kinked supply line. | Clean aerator; ensure shut-off valves are fully open; straighten supply lines. |
| Leaks at Connections | Loose connections; damaged O-rings or washers. | Tighten connections (do not overtighten); replace O-rings or washers if damaged. |
| Spray Head Does Not Retract | Counterweight improperly positioned or missing; hose obstructed. | Adjust counterweight position; ensure hose moves freely under the sink. |
| Water Temperature Issues | Incorrect handle position; issues with water heater or supply. | Adjust handle; check water heater settings and supply lines. |
Warranty and Support
JTWEB offers a 3-year warranty on this product, covering manufacturing defects and material flaws under normal use.
For warranty claims, technical assistance, or any questions regarding your JTWEB kitchen faucet, please contact our customer support team.
Contact Information: Please refer to the product packaging or the official JTWEB website for the most current customer support contact details.


