1. Introduction
This manual provides detailed instructions for the installation, operation, and maintenance of your SMARTSTANDARD 5FT Heavy Duty Double Door Sliding Barn Door Hardware Kit. This kit is designed to provide a smooth and quiet sliding mechanism for two barn door panels, enhancing the functionality and aesthetic of your space. Please read all instructions carefully before beginning installation.

Image 1.1: Overview of the SMARTSTANDARD 5FT Heavy Duty Double Door Sliding Barn Door Hardware Kit components, including the rail, rollers, and other hardware. (Doors not included)
2. Product Specifications
| Feature | Detail |
|---|---|
| Model Number | SDH-0050-ISHAPE02-BK |
| Rail Length | 5 Feet (2x 2.5ft sections) |
| Material | High-quality Carbon Steel (track), Nylon (rollers) |
| Color | Black |
| Maximum Door Weight Capacity | 150lb - 220lb (per door panel) |
| Fit Door Panel Width | Up to 15 inches (per door panel) |
| Fit Door Panel Thickness | 1 3/8 inches to 1 3/4 inches |
| Roller Test | Tested beyond 100,000 rolls |
| Assembly Required | Yes |
| Product Dimensions | 1.63 x 15 x 1.75 inches (packaging/component dimensions) |
| Item Weight | 18.36 pounds |

Image 2.1: Close-up view highlighting the heavy-duty raw steel rail (1/4" thick carbon steel) and upgraded sturdy nylon pulleys with lubricated bearings, designed for smooth and quiet operation.
3. Package Contents
Before beginning installation, please verify that all components listed below are present and undamaged. If any parts are missing or damaged, contact customer service.
- 2x 2.5ft Rail Sections (Total 5ft)
- 4x Rail Spacers
- 4x Rollers (Hangers)
- 4x Door Stops
- 4x End Caps
- 2x Floor Guides
- 1x Hex Key
- All necessary mounting hardware (bolts, washers, screws, anchors for 16-inch stud installation)
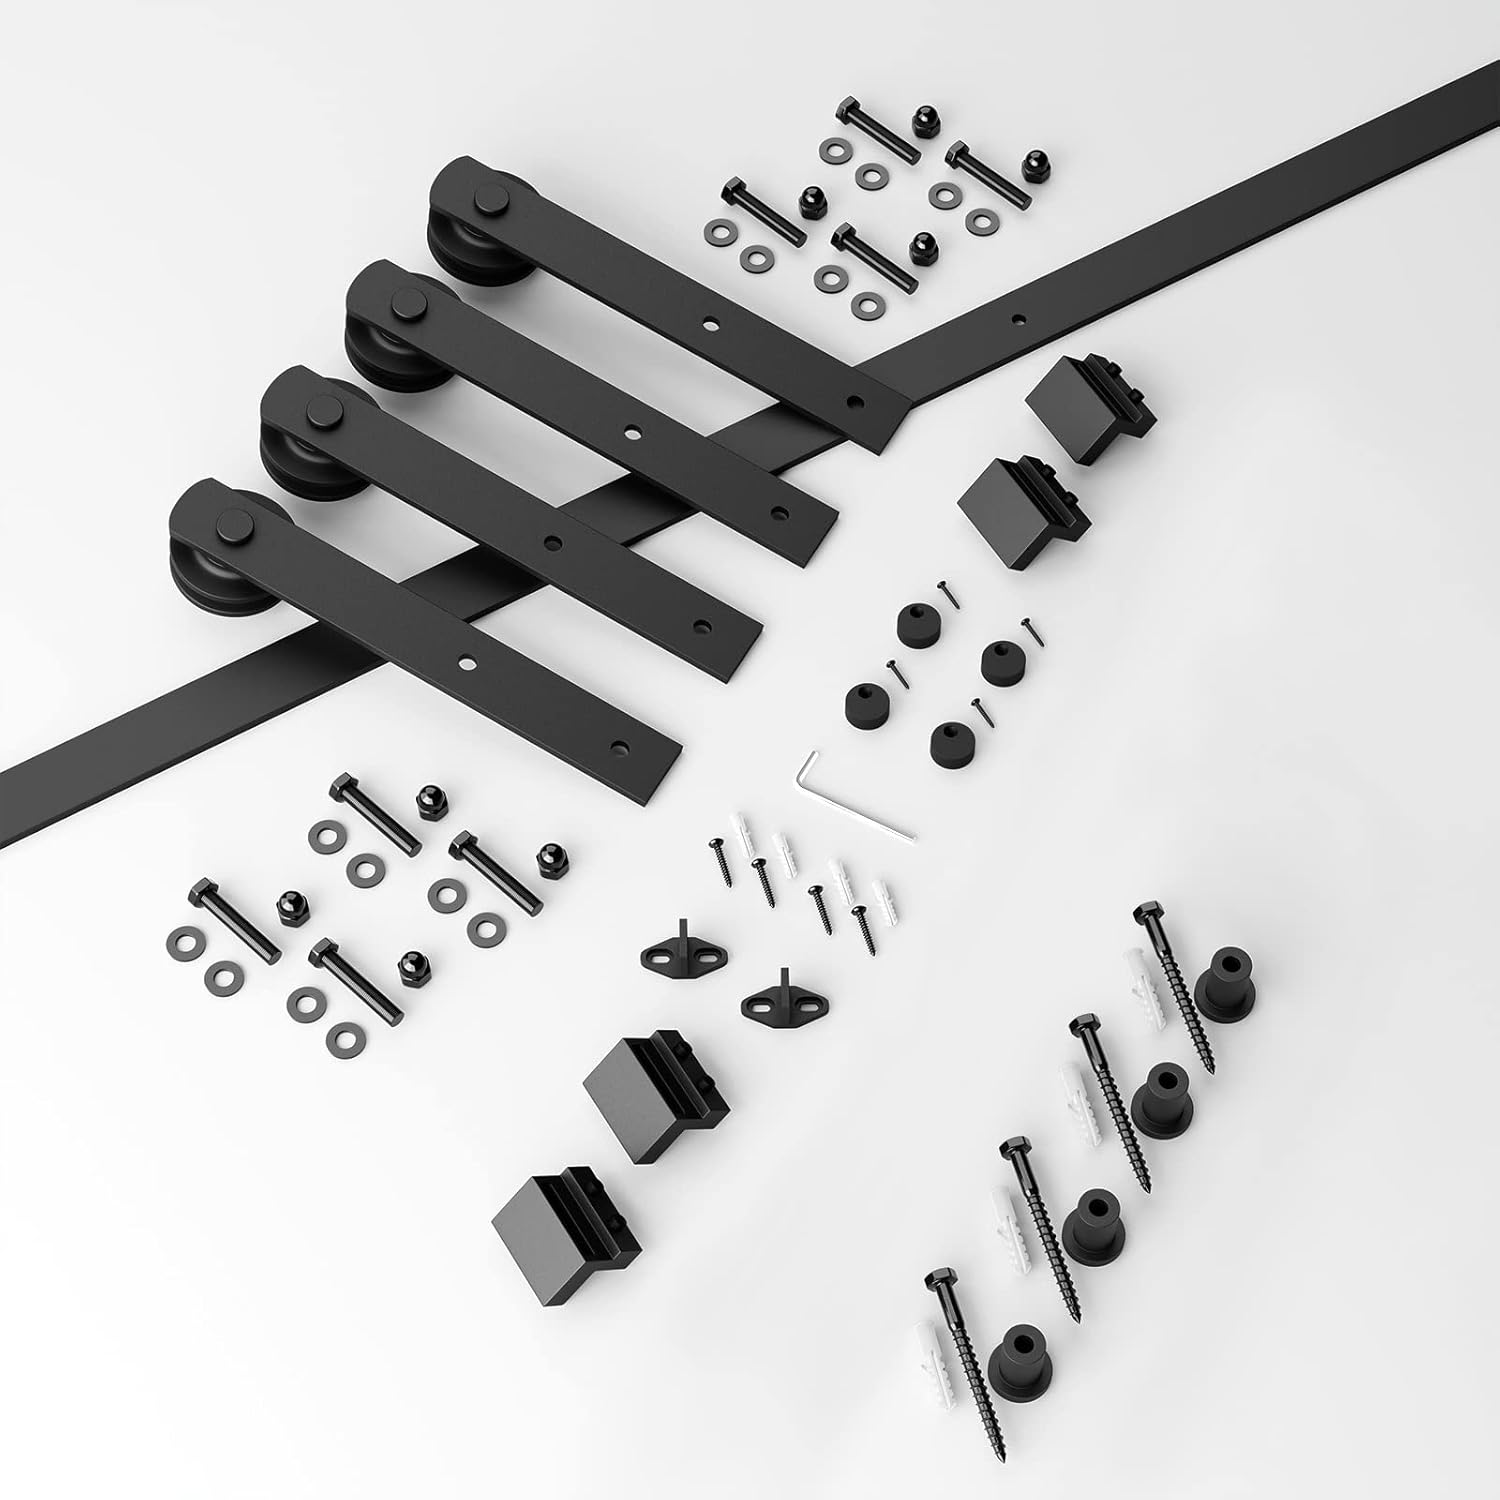
Image 3.1: An aerial view of all hardware components included in the kit, neatly arranged on a white surface, confirming the completeness of the package.
4. Setup and Installation
This section outlines the steps required to install your sliding barn door hardware kit. Ensure you have the necessary tools and follow all safety precautions. Professional assistance is recommended if you are unsure about any step.
4.1 Tools Required (Not Included)
- Measuring Tape
- Pencil
- Level
- Drill
- Drill Bits (appropriate for wall material and lag bolts)
- Wrench or Socket Set
- Stud Finder
- Safety Glasses
4.2 Pre-Installation Checks
- Wall Type: Ensure your wall can support the weight of the doors and hardware. For drywall, locate studs (16-inch spacing is assumed by the kit). If studs are not aligned, a header board (not included) must be installed.
- Door Dimensions: Confirm your door panels meet the specifications: width up to 15 inches each, thickness between 1 3/8 inches and 1 3/4 inches.
- Clearance: Verify sufficient clearance above the door opening for the track and rollers.
4.3 Installation Steps
- Assemble the Rail: Connect the two 2.5ft rail sections using the provided connector and screws. Ensure they are perfectly aligned and secure.
- Mark Mounting Holes:
- Measure the height from the floor to the top of your door panel. Add 1 13/16 inches to this measurement. This is the height for the bottom of the rail.
- Using a level, mark this height on the wall.
- Hold the assembled rail against the wall at the marked height and use a pencil to mark the positions for the rail spacers/mounting holes. Ensure these marks align with wall studs for secure installation.
- Drill Pilot Holes: Drill pilot holes at the marked locations. The size of the drill bit will depend on your wall material and the lag bolts provided.
- Install Rail Spacers: Attach the rail spacers to the wall using the lag bolts. Do not overtighten initially.
- Mount the Rail: Place the rail onto the installed spacers and secure it with the remaining bolts. Ensure the rail is level before fully tightening all bolts.
- Attach Rollers to Doors:
- Measure and mark the positions for the rollers on the top edge of each door panel. Typically, rollers are placed a few inches from the door's edge.
- Drill pilot holes and attach the rollers to the top of each door panel using the provided bolts. Ensure they are securely fastened.
- Hang the Doors: Carefully lift each door panel and hook the rollers onto the rail.
- Install Door Stops: Slide the door stops onto the rail at the desired positions to prevent the doors from sliding too far. Use the hex key to tighten them.
- Install Floor Guides:
- With the doors hanging, position the floor guides on the floor directly beneath the doors.
- Mark the screw holes, then drill pilot holes and secure the floor guides to the floor. These prevent the bottom of the doors from swinging out.
- Install Anti-Jump Disks: Attach the anti-jump disks to the top edge of the doors, ensuring they are positioned to prevent the door from lifting off the track.
- Install End Caps: Place the end caps on both ends of the rail for a finished look.

Image 4.1: An example of the SMARTSTANDARD double barn door hardware kit installed, showcasing two wooden doors sliding smoothly to reveal an interior space.

Image 4.2: A diagram detailing critical measurements for installation, including door panel thickness compatibility (1 3/8" - 1 3/4"), maximum door panel width (15"), and the overall weight limit (220 lbs).
5. Operation
Once installed, your SMARTSTANDARD barn door hardware allows for smooth and quiet operation of your sliding doors.
- To open or close the doors, gently push or pull the door panel along the track.
- The door stops can be adjusted to control the extent of the door's travel.
- The floor guides ensure the door remains stable and aligned during movement.

Image 5.1: A detailed view of the roller mechanism on the track, illustrating the smooth and quiet operation of the barn door system.
6. Maintenance
Regular maintenance will ensure the longevity and optimal performance of your barn door hardware.
- Cleaning: Wipe down the track and rollers periodically with a soft, damp cloth to remove dust and debris. Avoid abrasive cleaners.
- Lubrication: The nylon rollers are designed with lubricated bearings. Additional lubrication is generally not required, but if any squeaking occurs, a small amount of silicone-based lubricant can be applied to the roller bearings.
- Tightness Check: Periodically check all bolts and screws (especially those mounting the track to the wall and the rollers to the door) to ensure they remain tight. Retighten if necessary.
- Floor Guides: Ensure floor guides are free of obstructions and securely fastened.
7. Troubleshooting
| Problem | Possible Cause | Solution |
|---|---|---|
| Door does not slide smoothly. | Debris on track, loose rollers, misaligned track. | Clean track, tighten roller bolts, check track level and alignment. |
| Squeaking noise during operation. | Lack of lubrication in roller bearings. | Apply a small amount of silicone-based lubricant to roller bearings. |
| Door swings out at the bottom. | Floor guide not installed or improperly positioned. | Install or adjust the floor guide to properly engage the door. |
| Door comes off the track. | Anti-jump disks not installed or improperly positioned. | Install or adjust anti-jump disks to prevent the door from lifting off the track. |
8. Warranty and Customer Support
SMARTSTANDARD is committed to providing high-quality products. For any questions, missing parts, or assistance with installation, please contact SMARTSTANDARD customer service. Refer to your purchase documentation for specific warranty details.
You can find more information and support on the official SMARTSTANDARD store page: SMARTSTANDARD Store
9. Product Videos
The following videos provide additional visual guidance and demonstrations of the product.
No official product videos from the seller are available for this manual.


