
1. Introduction
The AnyTone AT-779UV is a compact and versatile dual-band mobile transceiver designed for reliable two-way radio communication. Featuring a clear 1.44-inch TFT display and 500 programmable memory channels, this radio offers professional-grade functionality in a mini-sized form factor. It supports various signaling methods including CTCSS, DCS, DTMF, 2Tone, and 5Tone, and includes advanced features like compander function and LCD brightness control. Its robust design and comprehensive features make it suitable for a wide range of mobile communication needs.
2. Safety Information
Please read and understand all safety precautions before operating the AT-779UV transceiver. Failure to follow these instructions could result in injury, damage to the radio, or voiding your warranty.
- Power Supply: Use only a stable 13.8V DC power source with sufficient current capacity. Incorrect voltage can damage the unit.
- Antenna: Always connect a suitable antenna before transmitting. Transmitting without an antenna can cause damage to the radio's final amplifier.
- Heat: The radio's heatsink can become hot during prolonged transmission. Ensure adequate ventilation around the unit.
- Electromagnetic Interference: This device generates RF energy. Ensure it is used in a manner that does not cause harmful interference to other electronic devices.
- Water and Moisture: While the product description mentions "Waterproof" in specifications, it's generally best practice to protect electronic devices from direct exposure to water and excessive moisture to prevent damage.
- Servicing: Do not attempt to open or service the radio yourself. Refer all servicing to qualified technicians.
3. Package Contents
Verify that all items listed below are included in your package. If any items are missing or damaged, please contact your dealer immediately.
- AnyTone AT-779UV Mobile Transceiver Unit
- Hand Microphone with DTMF Keypad
- DC Power Cable with Fuse Holder
- Mounting Bracket and Hardware
- USB Programming Cable
- User Manual (this document)
4. Product Overview
Familiarize yourself with the components and controls of your AT-779UV transceiver.
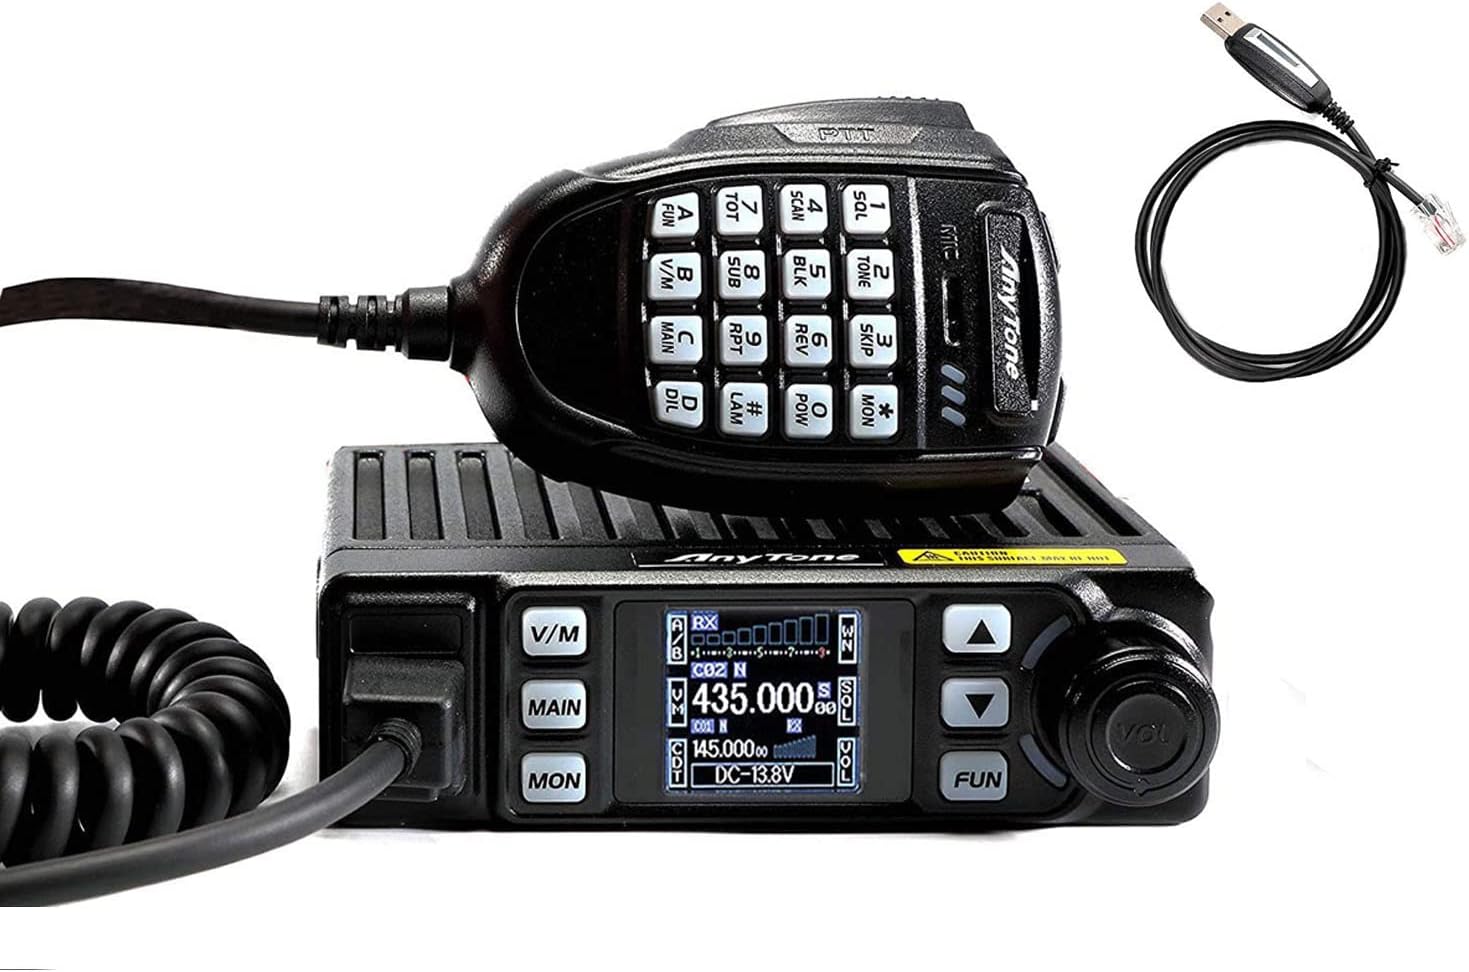
Figure 4.1: The AnyTone AT-779UV mobile transceiver unit shown with its connected hand microphone and a USB programming cable. This image provides a comprehensive view of the main components included.
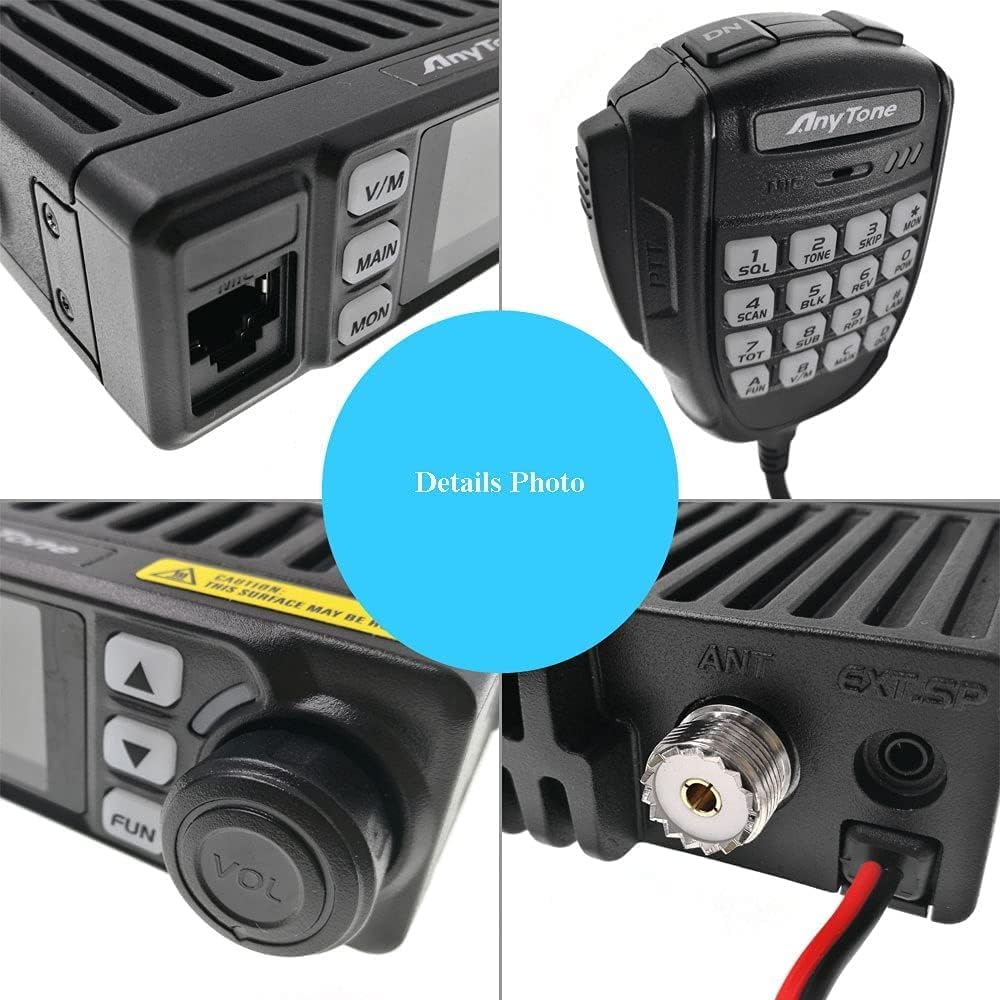
Figure 4.2: Close-up views highlighting various parts of the AT-779UV. This includes the microphone port, the main display, the volume control knob, and the antenna connector (SO-239 type) along with the power input.

Figure 4.3: The adjustable smart mount bracket, designed to allow users to set the radio's angle for optimal viewing and operation, whether mounted from above or below.

Figure 4.4: A view of the bottom side of the AT-779UV, clearly showing the integrated speaker grille. This speaker is designed to provide clear and powerful audio output.

Figure 4.5: The AT-779UV radio held in an average-sized hand, illustrating its compact and mini dimensions, making it suitable for installations with limited space.

Figure 4.6: The AT-779UV main unit positioned next to its hand microphone, providing a clear view of both primary components.
4.1 Main Unit Controls and Connectors
- Front Panel:
- 1.44 Inch TFT Display: Shows frequency, channel number, mode, and other operational information.
- V/M Button: Toggles between VFO (Frequency) mode and Memory (Channel) mode.
- MAIN Button: Switches between main and sub-bands (if applicable).
- MON Button: Momentarily opens the squelch to listen for weak signals.
- Up/Down Arrows: Used for frequency tuning, channel selection, and menu navigation.
- FUN Button: Activates function menus or secondary key functions.
- VOL Knob: Adjusts the audio output volume.
- Microphone Jack: Connects the supplied hand microphone.
- Rear Panel:
- Antenna Connector (SO-239): Connects to your external VHF/UHF antenna.
- DC Power Input: Connects the supplied DC power cable.
- External Speaker Jack (EXT.SP): For connecting an optional external speaker.
4.2 Hand Microphone
- PTT (Push-To-Talk) Button: Press to transmit, release to receive.
- DTMF Keypad: For direct frequency entry, DTMF signaling, and accessing various functions.
- Function Keys: Dedicated buttons for common operations like SQL (Squelch), SCAN, TONE, BLK (Backlight), SKIP, RPT (Repeater), etc.
5. Setup and Installation
Follow these steps to properly set up your AT-779UV mobile transceiver.
- Mounting the Transceiver:
- Choose a secure and well-ventilated location in your vehicle or operating position.
- Use the supplied mounting bracket and hardware to securely fasten the radio. Ensure the bracket allows for proper airflow around the heatsink.
- Power Connection:
- Connect the supplied DC power cable to the radio's power input jack on the rear panel.
- Connect the red wire to the positive (+) terminal of your 13.8V DC power source and the black wire to the negative (-) terminal. Ensure the power source can supply sufficient current (e.g., 5-10 Amps).
- The power cable includes an inline fuse for protection. Ensure it is properly installed.
- Antenna Connection:
- Connect your VHF/UHF antenna cable to the SO-239 antenna connector on the rear panel of the radio.
- Ensure the antenna is properly tuned for the operating frequencies to prevent damage to the radio.
- Microphone Connection:
- Plug the hand microphone connector into the microphone jack on the front panel of the radio.
- Initial Power On:
- Once all connections are secure, turn on your 13.8V DC power supply.
- Press the power button (usually integrated with the VOL knob) on the radio to turn it on. The TFT display should illuminate.
- Software Programming (Optional):
- For advanced channel programming and customization, connect the radio to a computer using the supplied USB programming cable.
- Dedicated programming software is required. Please contact AnyTone support or your dealer for the software download link and instructions.
6. Operating Instructions
This section covers the basic operation of your AT-779UV transceiver.
6.1 Basic Operation
- Power On/Off: Rotate the VOL knob clockwise until it clicks to turn the radio on. Rotate counter-clockwise until it clicks to turn off.
- Volume Adjustment: Rotate the VOL knob to adjust the audio output level.
- Frequency/Channel Selection: Use the Up/Down arrow buttons on the front panel or microphone to change frequency in VFO mode or select channels in Memory mode.
- VFO/Memory Mode Switch: Press the V/M button to toggle between VFO (Frequency) mode for direct frequency input and Memory mode for recalling programmed channels.
- Squelch Adjustment: Press the SQL button on the microphone or use the menu to adjust the squelch level, which mutes background noise when no signal is present.
- LCD Brightness Control: Access the menu or use a dedicated function key (e.g., BLK on microphone) to adjust the brightness of the 1.44-inch TFT display.
6.2 Advanced Features
- Channel Programming: The radio supports 500 programmable memory channels. Each channel can be identified by an editable name. Programming can be done manually via the keypad or more efficiently using the PC programming software.
- CTCSS/DCS/DTMF/2Tone/5Tone: These signaling methods can be set for each individual channel to enable selective calling and access repeaters. Refer to the detailed programming guide for specific settings.
- Scrambler Function: The radio includes 11 groups of fixed scrambler codes and allows for self-defined scrambler codes for enhanced communication privacy.
- Key Lock Function: The main unit and microphone feature a key lock function to prevent accidental changes to settings.
- Compander Function: This feature helps to improve audio clarity by compressing the dynamic range of the transmitted signal and expanding it upon reception, reducing noise.
- Power Output Selection: The AT-779UV offers multiple power output levels (25W / 10W / 5W) for both VHF and UHF bands. This can be adjusted via the menu to conserve power or extend range.
7. Maintenance and Care
Proper maintenance ensures the longevity and optimal performance of your AT-779UV transceiver.
- Cleaning: Use a soft, dry cloth to clean the radio's exterior. For stubborn dirt, a slightly damp cloth with mild detergent can be used, but ensure no liquid enters the unit. Do not use abrasive cleaners or solvents.
- Environmental Conditions: Operate and store the radio within the specified temperature range of -20°C to +60°C. Avoid extreme temperatures, direct sunlight, and high humidity.
- Connections: Periodically check all cable connections (power, antenna, microphone) to ensure they are secure and free from corrosion.
- Antenna: Ensure your antenna is in good condition and properly tuned. A damaged or poorly tuned antenna can reduce performance and potentially damage the radio.
8. Troubleshooting
If you encounter issues with your AT-779UV, refer to the following common problems and solutions before seeking professional service.
| Problem | Possible Cause | Solution |
|---|---|---|
| Radio does not power on. | No power from source; loose power cable; blown fuse. | Check power supply, ensure connections are secure. Inspect and replace fuse if necessary. |
| No audio from speaker. | Volume too low; squelch set too high; external speaker connected. | Increase volume. Adjust squelch level. Disconnect external speaker if not in use. |
| Cannot transmit or receive. | Antenna not connected; incorrect frequency/channel; CTCSS/DCS mismatch; power output too low. | Ensure antenna is connected. Verify frequency and channel settings. Check CTCSS/DCS tones. Increase power output. |
| Display is dim or unreadable. | LCD brightness setting is low. | Adjust the LCD brightness control via the menu. |
| Microphone buttons unresponsive. | Microphone key lock engaged; loose microphone connection. | Disable microphone key lock. Re-seat the microphone connector. |
9. Specifications
Detailed technical specifications for the AnyTone AT-779UV mobile transceiver.
| General | |
|---|---|
| Number of Channels | 500 Channels |
| Operating Voltage | 13.8V DC ±15% |
| Squelch Type | Carrier/CTCSS/DCS |
| Frequency Stability | ±2.5ppm |
| Operating Temperature | -20°C ~ +60°C |
| Dimensions (WxDxH) | 124 (W) x 101(D) x 36 (H)mm (4.88 x 3.98 x 1.42 inches) |
| Weight | Approx. 0.5Kg (1.1 pounds) |
| Frequency Range | 136 - 174 MHz (VHF), 400 - 480 MHz (UHF) |
| FCC ID | T4K-779UV |
| Transmitting Part | |
| Power Output | 25W / 10W / 5W (VHF/UHF) |
| Modulation | 16KΦF3E / 11KΦF3E |
| Adjacent Channel Power | ≥70dB / ≥60dB |
| Hum & Noise | ≥40dB / ≥36dB |
| Spurious Emission | ≥60dB / ≥60dB |
| Audio Response | +1~-3dB (0.3~3KHz) |
| Audio Distortion | ≤5% |
| Receiving Part | |
| Sensitivity (12dB SINAD) | ≤0.25μV / ≤0.35μV |
| Adjacent Channel Selectivity | ≥60dB / ≥60dB |
| Intermodulation | ≥60dB / ≥60dB |
| Spurious Response | ≥60dB / ≥60dB |
| Audio Response | +1~-3dB (0.3~3KHz) |
| Audio Distortion | ≤5% |
| Audio Power Output | >2W@16Ω |
10. Warranty and Support
Your AnyTone AT-779UV transceiver comes with a manufacturer's warranty.
10.1 Warranty Information
This product is covered by a 1-year warranty from the date of purchase. This warranty covers defects in materials and workmanship under normal use. It does not cover damage caused by misuse, accident, unauthorized modification, or improper installation. Please retain your proof of purchase for warranty claims.
10.2 Customer Support
For technical assistance, troubleshooting, or inquiries regarding programming software, please contact AnyTone customer support.
- Software Download: If you require the programming software for your AT-779UV, please reach out to AnyTone directly or your authorized dealer for the official download link and instructions.
- Online Resources: Visit the official AnyTone website for FAQs, updated manuals, and additional support resources.