
1. Introduction
Thank you for choosing the MEBUS Model 11908 Weather Station. This device provides accurate indoor and outdoor temperature and humidity readings, a weather forecast, moon phase display, and an alarm clock function. Please read this manual carefully to ensure proper setup and operation.
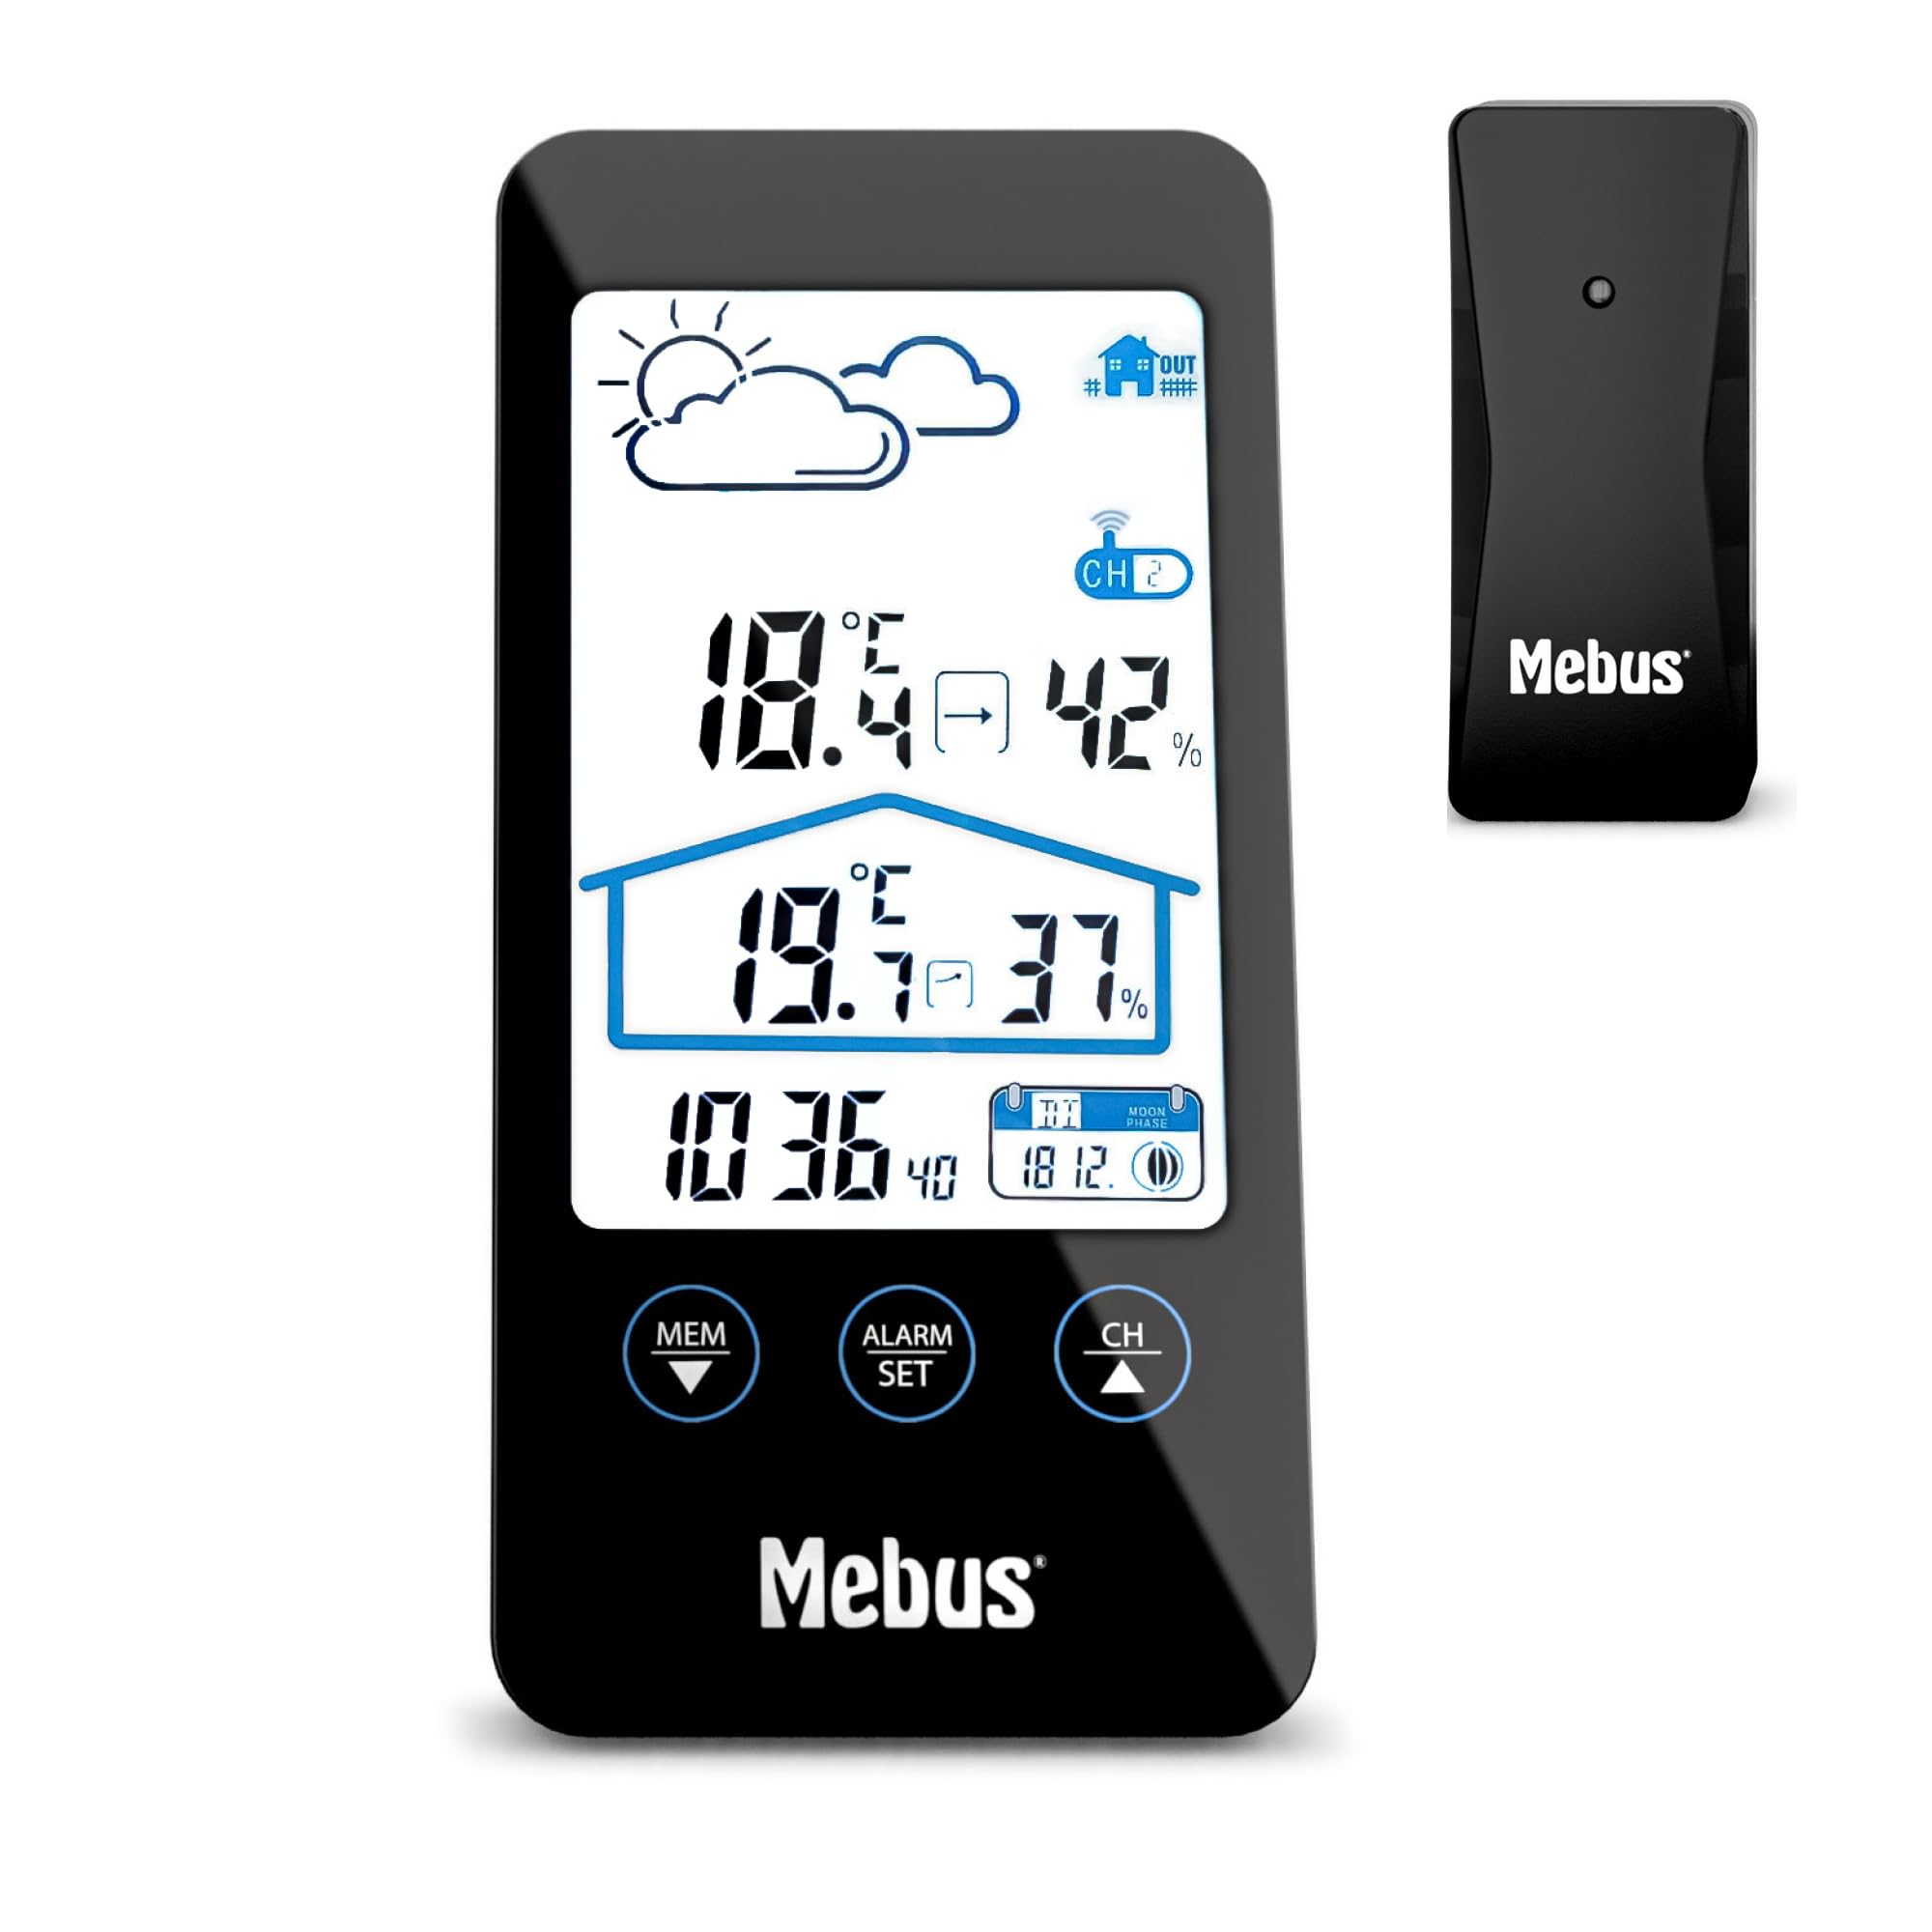
Image 1.1: The MEBUS Model 11908 Weather Station main unit and its wireless outdoor sensor.
2. Package Contents
- MEBUS Model 11908 Weather Station (Main Unit)
- Wireless Outdoor Sensor
- 4 x AAA Batteries (for both units)
- User Manual (this document)
3. Setup
3.1 Battery Installation
Both the main unit and the outdoor sensor require batteries for operation. Use the provided 4x AAA batteries.
- Open the battery compartment cover on the back of the main unit.
- Insert 2 AAA batteries, observing the correct polarity (+/-).
- Close the battery compartment cover.
- Open the battery compartment cover on the back of the outdoor sensor.
- Insert 2 AAA batteries, observing the correct polarity (+/-).
- Close the battery compartment cover.

Image 3.1: Rear view of the main unit and outdoor sensor, indicating battery compartment locations.
3.2 Sensor Placement
For accurate outdoor readings, place the wireless sensor in a sheltered location away from direct sunlight and rain. Ensure it is within the effective transmission range of the main unit (typically up to 30 meters in open air).
3.3 Initial Synchronization
After inserting batteries, the main unit will automatically search for the outdoor sensor and the DCF77 radio signal for time synchronization. This process may take a few minutes. Ensure both units are close to each other during initial setup.
- If the outdoor temperature/humidity does not appear, press the "CH" button on the main unit to cycle through channels or initiate a new search.
- The radio-controlled time signal (DCF77) will automatically set the time. If reception is poor, manual time setting is possible (see Section 4.2).
4. Operating Instructions
4.1 Display Overview
The LCD display shows various information:
- Top Left: Weather forecast icons (sunny, cloudy, rainy).
- Top Right: Outdoor temperature and humidity.
- Middle: Indoor temperature and humidity.
- Bottom Left: Current time.
- Bottom Right: Date and Moon phase.

Image 4.1: Detailed view of the weather station's LCD display.
4.2 Setting Time and Date
The time is automatically set via the DCF77 radio signal. If manual adjustment is needed:
- Press and hold the "ALARM SET" button (or similar, referring to the image of buttons) for a few seconds to enter time setting mode.
- Use the "MEM ▼" and "CH ▲" buttons to adjust values.
- Press "ALARM SET" again to confirm and move to the next setting (e.g., hour, minute, year, month, day).
- Press "ALARM SET" repeatedly to exit setting mode.
To switch between 12-hour and 24-hour format, press the "ALARM SET" button briefly in normal display mode.
4.3 Alarm Function
The weather station includes an alarm clock with a snooze function.
- Press the "ALARM SET" button once to display the alarm time.
- Press and hold "ALARM SET" to enter alarm setting mode.
- Use "MEM ▼" and "CH ▲" to set the desired alarm hour and minute.
- Press "ALARM SET" to confirm each setting.
- To activate/deactivate the alarm, press the "ALARM SET" button briefly when the alarm time is displayed. An alarm icon will appear/disappear.
- When the alarm sounds, press the top button (often labeled "SNOOZE" or similar, or the main unit's top surface) to activate the snooze function. The alarm will sound again after approximately 5 minutes.
- To stop the alarm completely, press any other button.

Image 4.2: Control buttons on the MEBUS weather station for settings and alarm.
4.4 Temperature Unit Selection (°C/°F)
To switch between Celsius (°C) and Fahrenheit (°F), press the "MEM ▼" button briefly in normal display mode.
4.5 Display Backlight
The display features a backlight for improved readability in low light conditions. Press the top button (often the snooze button) to activate the backlight temporarily.
4.6 Weather Forecast
The weather station provides a forecast based on atmospheric pressure changes. The icons (sunny, cloudy, rainy) indicate the predicted weather for the next 12-24 hours. This is an estimation and may not always be perfectly accurate.
4.7 Moon Phase Display
The bottom right of the display shows the current moon phase, which changes automatically with the date.
5. Maintenance
5.1 Battery Replacement
When the battery indicator appears on the display, replace the batteries in the respective unit (main unit or sensor). Always replace all batteries at the same time with new ones of the same type (AAA).
5.2 Cleaning
Clean the weather station and sensor with a soft, damp cloth. Do not use abrasive cleaners or solvents. Avoid getting moisture into the battery compartments or other openings.
5.3 Storage
If the device will not be used for an extended period, remove the batteries from both units to prevent leakage and damage.
6. Troubleshooting
| Problem | Possible Cause | Solution |
|---|---|---|
| No outdoor temperature/humidity reading. |
|
|
| Incorrect time displayed. |
|
|
| Display is dim or blank. |
|
|
7. Specifications
| Feature | Detail |
|---|---|
| Model Number | 11908 |
| Brand | Mebus |
| Dimensions (Main Unit) | Approx. 8 cm (Depth) x 2.5 cm (Width) x 16 cm (Height) |
| Weight | 290 grams |
| Power Source | 4 x AAA batteries (2 for main unit, 2 for sensor) |
| Display Type | LCD |
| Connectivity Technology | Radio Frequency (RF) |
| Special Features | Alarm, Thermometer, Radio Clock, Hygrometer, Moon Phase Calendar, Display Backlight |
| Temperature Range (Upper) | 40.3°C |
| Included Components | Weather station, outdoor sensor, batteries |
| Material | Plastic |
| Number of Channels | 3 (for outdoor sensors, though only one is included) |
8. Warranty and Support
8.1 Warranty Information
This MEBUS product comes with a 2-year warranty from the date of purchase. This warranty covers manufacturing defects and material faults. It does not cover damage caused by improper use, accidents, unauthorized repairs, or normal wear and tear.
8.2 Customer Support
For technical assistance, warranty claims, or further inquiries, please contact your retailer or the MEBUS customer service department. Refer to the packaging or the official MEBUS website for contact details.


