1. Introduction
The Rapoo MT550 is a versatile multi-device wireless mouse designed for enhanced productivity and comfort. This manual provides detailed instructions for setting up, operating, and maintaining your MT550 mouse, ensuring optimal performance across various devices.
Key features include:
- Multi-device connectivity (Bluetooth 3.0, Bluetooth 4.0, and 2.4G wireless)
- Adjustable DPI settings (600/1000/1300/1600)
- Ergonomic design for comfortable use
- Long battery life of up to 12 months
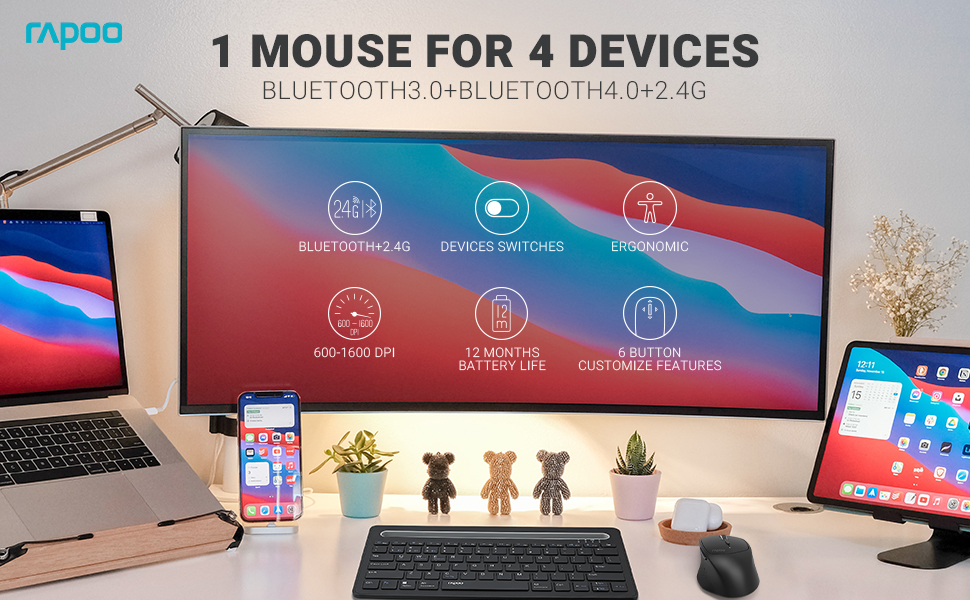
Image: The Rapoo MT550 mouse, highlighting its design for endurance, versatility, and comfort.
2. Setup
2.1. Battery Installation
The Rapoo MT550 mouse requires two AA batteries (included). To install:
- Locate the battery compartment cover on the underside of the mouse.
- Slide the cover open.
- Insert two AA batteries, ensuring correct polarity (+/-).
- Close the battery compartment cover.
2.2. Connecting via 2.4G Wireless (USB Receiver)
For a 2.4G wireless connection:
- Turn on the mouse using the ON/OFF switch on the underside.
- Locate the USB receiver stored in the battery compartment.
- Insert the USB receiver into an available USB port on your computer.
- The mouse should automatically connect. If not, press the device switch button until the indicator for channel 4 (usually indicated by a specific light pattern or number) is active.
2.3. Connecting via Bluetooth
The Rapoo MT550 supports up to three Bluetooth connections. To connect:
- Turn on the mouse using the ON/OFF switch.
- Short press the device switch button to select a Bluetooth channel (1, 2, or 3). The corresponding indicator light will illuminate.
- Press and hold the Bluetooth pairing button (often located near the device switch button) for approximately 3 seconds until the indicator light for the selected channel starts flashing rapidly. This indicates the mouse is in pairing mode.
- On your device (computer, laptop, tablet, phone), enable Bluetooth and search for new devices.
- Select "Rapoo MT550" from the list of available devices to complete the pairing process.
- Repeat these steps to pair with up to two additional Bluetooth devices on channels 2 and 3.

Image: Labeled diagram of the Rapoo MT550 mouse, indicating the location of the ON/OFF switch, Bluetooth button, device switch button, battery slot, USB receiver, DPI button, scroller, and other buttons.
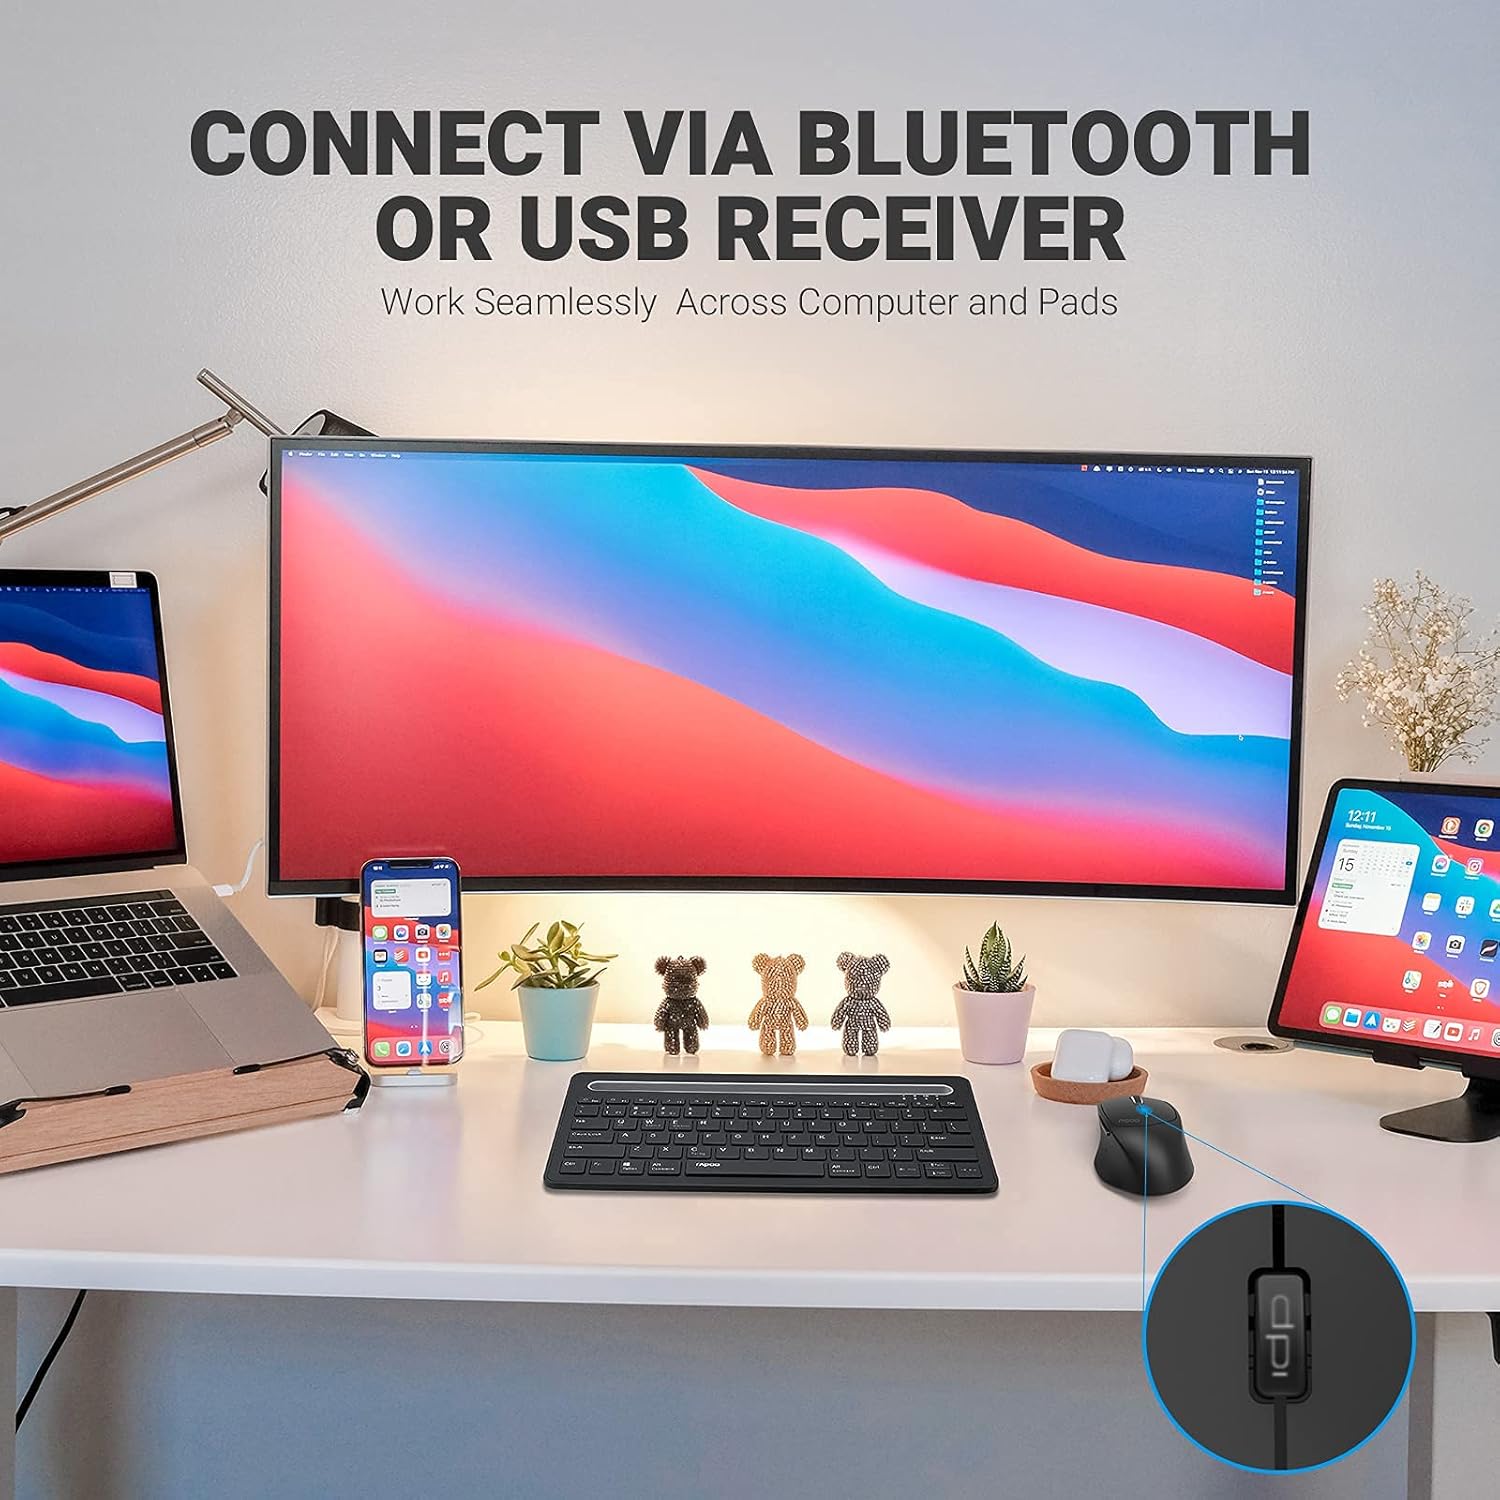
Image: A workstation demonstrating the Rapoo MT550 mouse connecting to multiple devices via Bluetooth or USB receiver.
3. Operating Instructions
3.1. Switching Between Devices
To switch between your connected devices:
- Short press the device switch button located on the underside of the mouse.
- Each press will cycle through the connected channels (1, 2, 3 for Bluetooth, 4 for 2.4G USB receiver). The corresponding indicator light will show the active channel.
3.2. Adjusting DPI (Sensitivity)
The MT550 mouse features four adjustable DPI settings for precise control:
- Press the DPI button, located behind the scroll wheel, to cycle through the available settings: 600, 1000, 1300, and 1600 DPI.
- The indicator light will briefly change to reflect the selected DPI level.

Image: Close-up view of the DPI button on the Rapoo MT550 mouse, with the indicator light showing the current DPI setting.
3.3. Using Forward/Back Buttons
The two thumb buttons on the side of the mouse provide quick navigation:
- The forward button advances to the next page or folder.
- The back button returns to the previous page or folder.
4. Maintenance
4.1. Cleaning
To maintain the appearance and functionality of your mouse:
- Use a soft, dry cloth to wipe the surface of the mouse.
- Avoid using harsh chemicals, abrasive cleaners, or solvents, as these can damage the finish.
4.2. Battery Replacement
When the low battery indicator appears or the mouse becomes unresponsive, it's time to replace the batteries:
- Follow the battery installation steps outlined in Section 2.1.
- Ensure you use two fresh AA batteries and insert them with the correct polarity.
4.3. Storage
When not in use for extended periods, store the mouse in a dry, cool environment away from direct sunlight and extreme temperatures.
5. Troubleshooting
If you encounter issues with your Rapoo MT550 mouse, refer to the following troubleshooting steps:
5.1. Mouse Not Responding
- Check Power: Ensure the mouse is turned on using the ON/OFF switch.
- Check Batteries: Verify that the batteries are correctly installed and have sufficient charge. Replace them if necessary.
- 2.4G Receiver: For 2.4G connection, ensure the USB receiver is securely plugged into a working USB port on your computer. Try a different USB port.
- Bluetooth Connection: For Bluetooth, ensure Bluetooth is enabled on your device and the mouse is paired to the correct channel. Try re-pairing the mouse if the connection is lost.
5.2. Intermittent Connection or Lag
- Proximity: Move the mouse closer to your computer or device to ensure a strong signal.
- Interference: Avoid using the mouse near other wireless devices (e.g., Wi-Fi routers, cordless phones) that might cause interference.
- Surface: Ensure you are using the mouse on a suitable surface. While the MT550 is designed for various surfaces, extreme textures or reflective surfaces can affect tracking.
5.3. DPI Not Changing
- Ensure you are pressing the dedicated DPI button, not another button.
- If the issue persists, try turning the mouse off and on again.
6. Specifications
| Product Dimensions | 3.93 x 2.55 x 1.57 inches |
| Item Weight | 5.3 ounces |
| Batteries | 2 AA batteries (included) |
| Connectivity Technology | Bluetooth (3.0/4.0) and 2.4G Wireless |
| Movement Detection Technology | Optical |
| Adjustable DPI | 600 / 1000 / 1300 / 1600 |
| Number of Buttons | 6 (Left, Right, Scroll, DPI, Forward, Back) |
| Battery Life | Up to 12 months (under normal conditions) |
7. Warranty and Support
Rapoo provides the following coverage for your MT550 Multi-Device Wireless Mouse:
- Warranty: 3-year worry-free warranty.
- Return Policy: 180-day money-back guarantee.
For further assistance, technical support, or warranty claims, please visit the official Rapoo website or contact their customer service department.


