
1. Introduction and Overview
The TENKER EMS TENS Unit Muscle Stimulator is a versatile electronic pulse massager designed for effective pain relief and muscle stimulation. This device offers 24 pre-programmed massage modes and 20 adjustable intensity levels, providing precise control for various therapeutic needs. It features a dual-channel design, allowing for simultaneous treatment of two different body areas or use by two individuals. The unit is rechargeable and built for convenience and portability.

Figure 1: TENKER EMS TENS Unit Muscle Stimulator and included accessories.
This manual provides detailed instructions for setting up, operating, and maintaining your TENKER TENS unit to ensure safe and effective use.
2. What's Included
Upon unboxing your TENKER TENS unit, please verify that all the following components are present:
- 1x TENKER TENS EMS Unit
- 6x 2" Square Electrode Pads
- 2x 2"x4" Large Electrode Pads
- 2x Lead Wires
- 1x USB Cable
- 1x Pouch
- Cable Ties
- 1x User Manual (this document)

Figure 2: Contents of the TENKER TENS Unit package.
3. Product Features
The TENKER TENS unit is equipped with several features designed for optimal pain management and muscle stimulation:
- 24 Pre-programmed Modes: Choose from a variety of massage modes, including Kneading, Acupuncture, Beat, Cupping, Scraping, and Taichi Massage, to target specific pain types and muscle groups. Sub-modes 1 and 2 provide a steady, continuous pulse, ideal for sensitive users.

Figure 3: Overview of the 24 available massage modes.
- Dual Independent Channels: The unit features two independent output channels (A and B), allowing you to apply different modes and intensity levels to separate body areas simultaneously, or for two people to use the device at once.

Figure 4: Dual independent channel application.
- 20 Adjustable Intensity Levels: Customize the stimulation intensity to your comfort and therapeutic needs.
- Memory Function: The device automatically remembers the last used massage mode and intensity settings, making it convenient for subsequent uses.

Figure 5: Memory and Lock functions.
- Lock Function: Prevent accidental changes to settings during use by activating the lock function.
- Built-in Timer: Set treatment durations from 10 to 60 minutes.
- Rechargeable Lithium Battery: Provides up to 24 hours of continuous use on a single charge.
- Premium Reusable Electrode Pads: The included electrode pads are designed for reliable adhesion and conductivity, ensuring effective signal delivery.
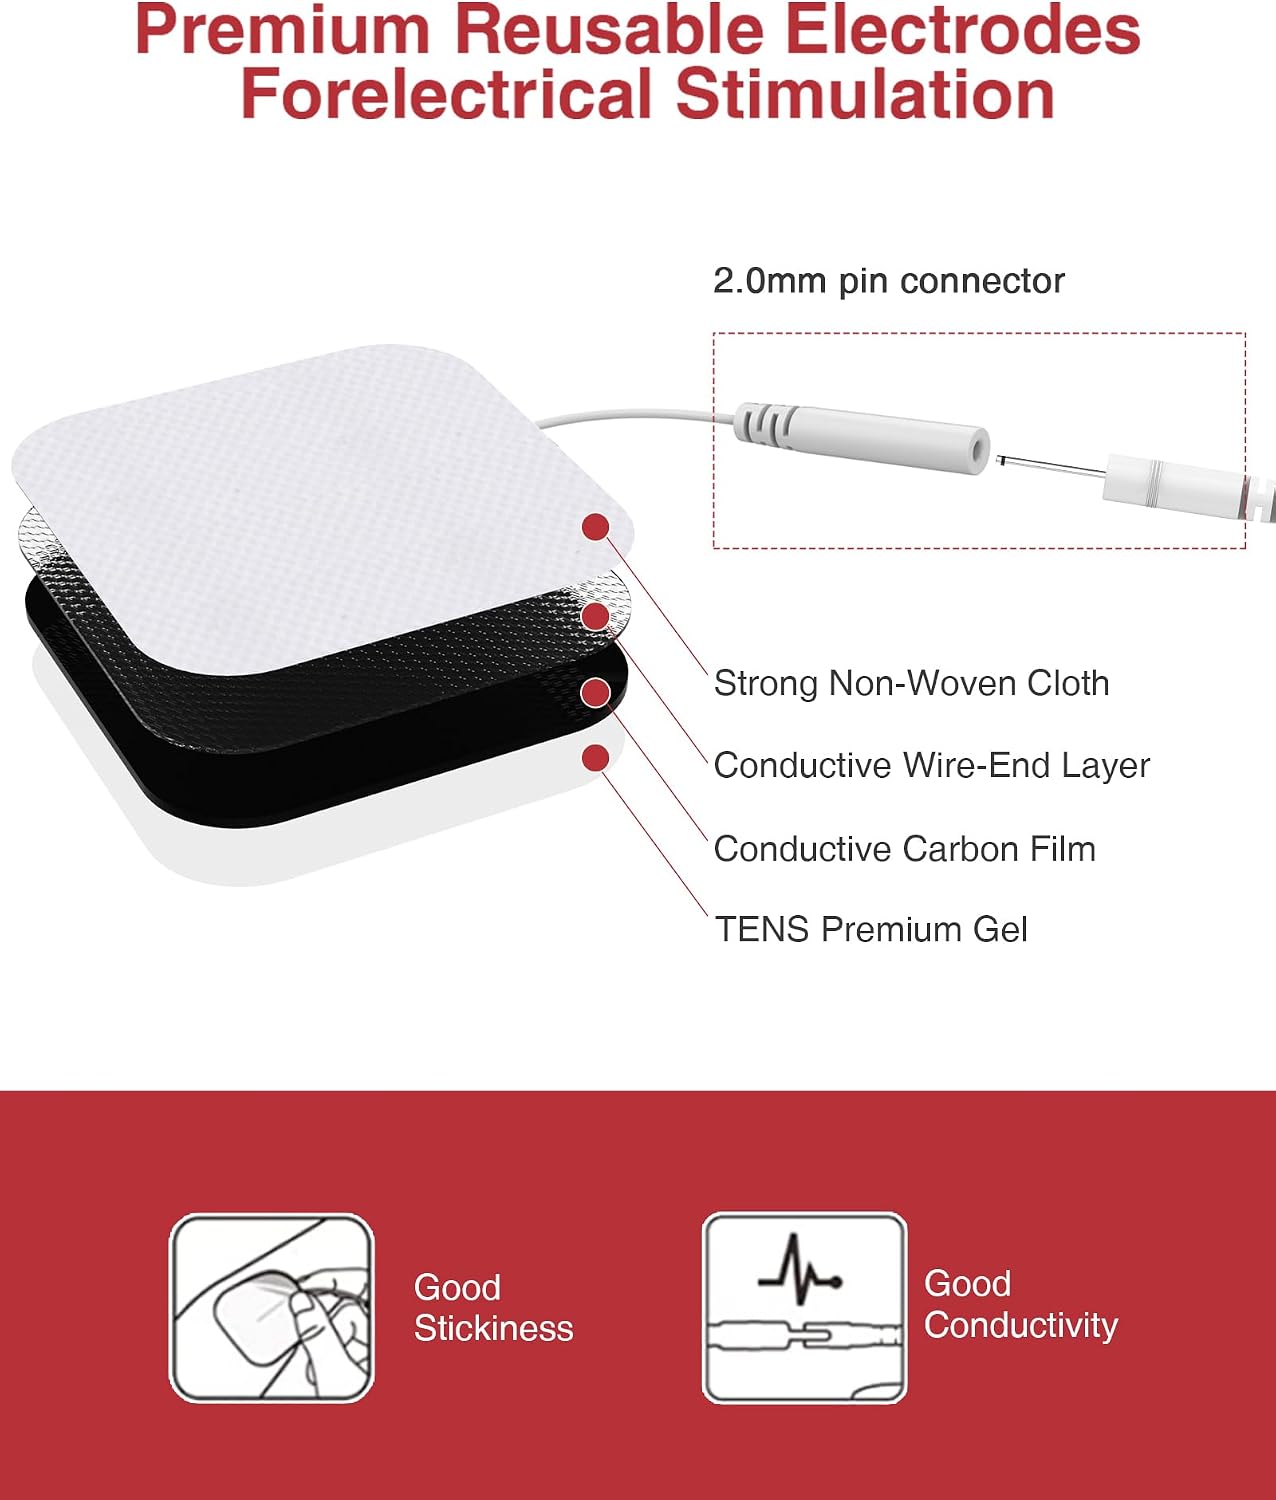
Figure 6: Electrode pad construction.
4. Setup
- Charge the Unit: Before first use, fully charge the TENKER TENS unit using the provided USB cable. Connect the USB cable to the unit and a compatible USB power source (e.g., computer USB port, wall adapter). The battery indicator on the screen will show charging status.
- Connect Lead Wires: Insert the pin connectors of the lead wires into the electrode pads. Ensure a secure connection.
- Connect Lead Wires to Unit: Plug the other end of the lead wires into the output ports (Channel A and/or Channel B) on the top of the TENKER TENS unit.
- Prepare Skin: Clean and dry the skin area where the electrode pads will be applied. Avoid applying pads over broken skin, open wounds, or areas with excessive hair.
- Apply Electrode Pads: Carefully remove the protective film from the adhesive side of the electrode pads. Apply the pads firmly to the desired treatment area on your skin. Ensure the pads are flat and making full contact.

Figure 7: Proper application of electrode pads.
5. Operating Instructions
- Power On: Press and hold the power button (usually the central round button) to turn on the unit. The screen will illuminate.
- Select Main Mode: Press the 'M' button to cycle through the 6 main massage modes.
- Select Sub-Mode: Once a main mode is selected, use the '<' or '>' buttons to choose from the 4 sub-modes available within that main mode.
- Adjust Intensity:
- For Channel A: Use the left '+' or '-' buttons to increase or decrease the intensity.
- For Channel B: Use the right '+' or '-' buttons to increase or decrease the intensity.
- Set Timer: Press the 'T' button to cycle through the available timer settings (10-60 minutes). The unit will automatically shut off once the timer expires.
- Pause/Lock Function:
- Pause: Short press the central round button to pause the stimulation. Short press again to resume.
- Lock: Long press the central round button for 3 seconds to lock the screen and prevent accidental button presses. Long press again for 3 seconds to unlock.
Figure 8: Control buttons and screen functions.
- Power Off: Press and hold the power button to turn off the unit. Always turn off the unit before removing electrode pads.
6. Maintenance
- Cleaning the Unit: Wipe the unit with a soft, dry cloth. Do not use abrasive cleaners or immerse the unit in water.
- Electrode Pad Care:
- After each use, place the electrode pads back on their protective film to preserve their adhesive quality.
- If the pads lose their stickiness, gently wipe the adhesive surface with a damp cloth (water only) and let them air dry. Do not use soap or alcohol.
- Replace pads when they no longer adhere well to the skin, typically after 20-50 uses depending on skin type and care.
Figure 9: Electrode pad structure and care.
- Storage: Store the unit and accessories in the provided pouch in a cool, dry place, away from direct sunlight and extreme temperatures.
7. Troubleshooting
If you experience issues with your TENKER TENS unit, consider the following common troubleshooting steps:
- No Sensation/Weak Sensation:
- Ensure the unit is powered on and the intensity level is increased sufficiently.
- Check that all lead wire connections to both the unit and the electrode pads are secure.
- Verify that the electrode pads are making full contact with your skin and are not dried out. Replace pads if necessary.
- Ensure the battery is charged.
- Unit Not Turning On:
- Confirm the battery is charged. Connect the unit to a power source and allow it to charge for at least 30 minutes before attempting to power on again.
- Ensure you are pressing and holding the power button for a few seconds.
- Pads Not Sticking:
- Clean and dry the skin area thoroughly before application.
- Gently wipe the adhesive side of the pads with a damp cloth (water only) and let them air dry.
- If pads are old or heavily used, they may need to be replaced.
If problems persist after attempting these steps, please refer to the Warranty and Support section for further assistance.
8. Specifications
| Attribute | Detail |
|---|---|
| Product Dimensions | 3.59 x 1.69 x 0.43 inches |
| Item Weight | 10.86 ounces |
| Number of Modes | 24 (EMS & TENS) |
| Intensity Levels | 20 |
| Channels | Dual Independent |
| Battery Life | Up to 24 hours continuous use |
| Manufacturer | TENKER |
| ASIN | B0936B4X1T |
9. Safety Information
Please read and understand all safety precautions before using the TENKER EMS TENS Unit. Improper use can lead to injury or adverse effects.
- Do not use this device if you have a pacemaker, implanted defibrillator, or other implanted metallic or electronic devices.
- Do not use if you are pregnant or suspect you might be pregnant.
- Do not use on areas of the body where you have skin lesions, open wounds, or rashes.
- Do not use near the heart, on the head, face, or over the carotid sinus nerves (front of the neck).
- Consult with a healthcare professional before use if you have any pre-existing medical conditions, including but not limited to epilepsy, heart disease, or recent surgery.
- Keep out of reach of children.
- Discontinue use immediately if you experience any discomfort, pain, or adverse reactions.
- Statements regarding dietary supplements have not been evaluated by the FDA and are not intended to diagnose, treat, cure, or prevent any disease or health condition.
10. Warranty and Support
The TENKER EMS TENS Unit Muscle Stimulator comes with a 12-month warranty from the date of purchase, covering manufacturing defects. Please retain your proof of purchase for warranty claims.
For technical support, troubleshooting assistance beyond what is provided in this manual, or warranty inquiries, please contact TENKER customer service. Refer to the contact information provided on the product packaging or the official TENKER website for the most up-to-date support channels.
Our customer-friendly service team is available 24/7 to assist you.

