
BRANTMAKER B092YNQVHV
Contents
BRANTMAKER Nail Dust Collector Instruction Manual
Model: B092YNQVHV
Brand: BRANTMAKER
1. Introduction
The BRANTMAKER 60W Nail Dust Collector is designed to provide a clean and comfortable working environment by effectively collecting nail dust generated during various nail art and crafting processes. Its powerful suction and reusable filter system ensure efficient dust removal.
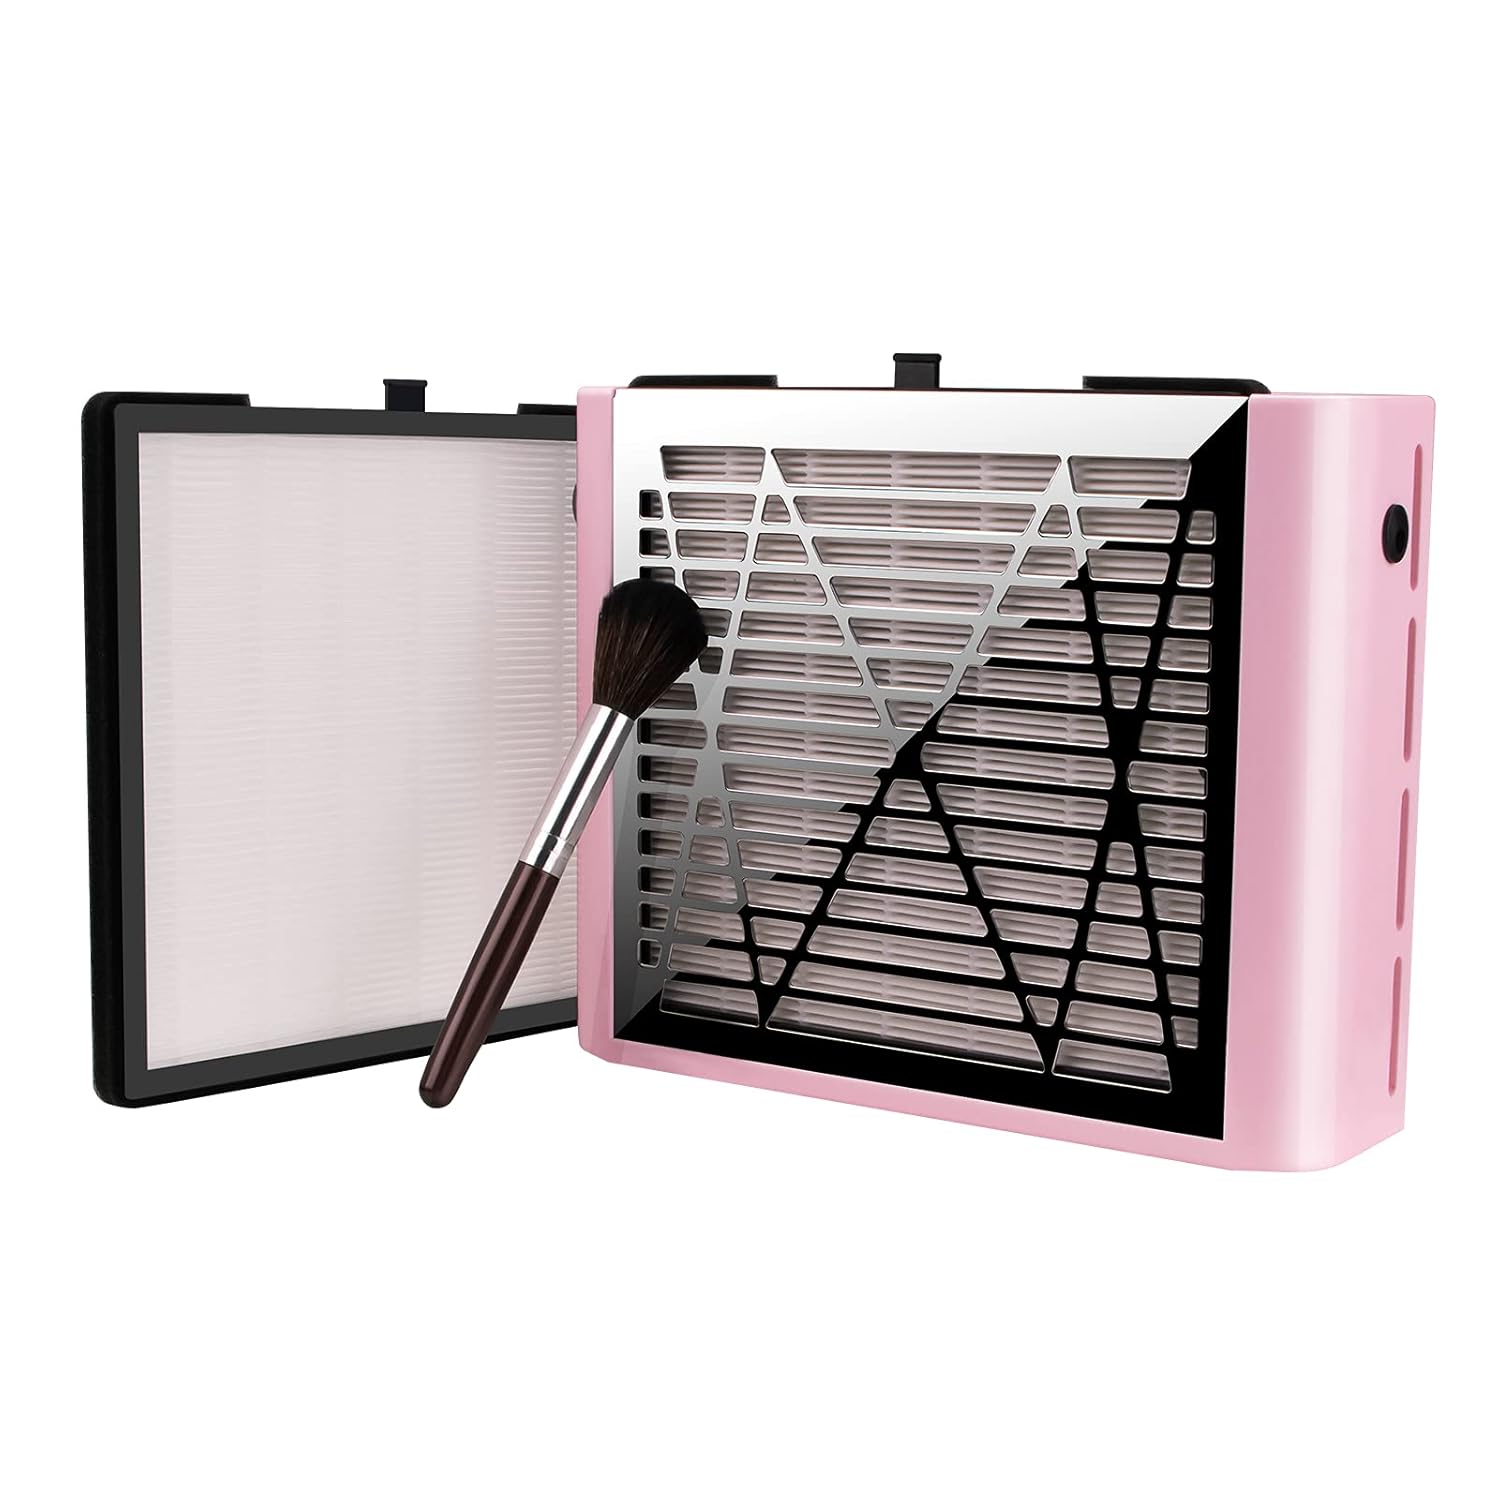
Image: The BRANTMAKER Nail Dust Collector, showcasing its compact design, alongside a cleaning brush and a reusable filter.
Key Features:
- 60W Super Suction: Equipped with a powerful fan for effective dust collection.
- Acceptable Sound Level: Designed to operate at a comfortable noise level for a pleasant working experience.
- Handy Accessories: Includes a delicate brush and two reusable filters for convenience.
- Efficient Heat Dissipation: Features a large air hole and non-slip mat for stable operation and heat management.
- Simple One-Button Switch: Easy to operate with a straightforward on/off switch.
2. Package Contents
Please verify that all items listed below are included in your package:
- Dust Collector Main Box (x1)
- AC Adapter (110V-240V) (x1)
- Reusable Filter (x2)
- Dust Brush (x1)
- Instruction Manual (x1)

Image: A visual representation of the package contents, including the dust collector, adapter, filters, brush, and manual.
3. Safety Information
- Caution: Do not insert your finger into the fan.
- Caution: Do not allow water to enter the machine.
- Caution: Keep away from children.
- Filter Cleaning: The filter board cannot be washed with water. Clean it using a hair dryer or dust brush only.
- Maintenance: It is forbidden for unprofessional personnel to disassemble the screws of the motor, rebuild, or decompose the machine, as this may cause malfunctions.
4. Setup
- Unpack: Carefully remove the Nail Dust Collector and all accessories from the packaging.
- Placement: Place the dust collector on a stable, flat surface where you intend to perform nail work. Ensure there is adequate ventilation around the unit.
- Filter Installation: Ensure the reusable filter is correctly inserted into the designated slot. The filter slides in from the side of the unit.
- Power Connection: Connect the AC adapter to the power input port on the dust collector. Plug the adapter into a suitable electrical outlet (110V-240V).

Image: Demonstrates the typical setup with hands positioned over the dust collector for nail work.
5. Operating Instructions
- Power On: Locate the one-button switch on the side of the unit. Press the switch to turn on the dust collector. The fan will begin to operate.
- Positioning: Place your hand or the area being worked on directly over the dust collection grate. The powerful suction will draw in nail dust and debris.
- During Use: Continue with your nail art, grinding, or drilling tasks. The dust collector will continuously capture airborne particles.
- Power Off: After completing your work, press the one-button switch again to turn off the dust collector.

Image: An illustration highlighting the powerful suction capability of the device, drawing dust downwards.
Official Product Video:
Video: An official product video demonstrating the BRANTMAKER Nail Dust Collector in use, showcasing its suction and ease of operation.
6. Maintenance
Regular cleaning of the filter is essential to maintain optimal performance of your dust collector.
- Filter Removal: Gently slide out the reusable filter from the side of the unit.
- Filter Cleaning: Use the provided dust brush or a hair dryer to clean the collected dust from the filter. Do not wash the filter with water.
- Re-installation: Once clean, slide the filter back into its slot until it is securely in place.
- Frequency: Clean the filter regularly, ideally after each significant use, to ensure consistent suction power. Replace the filter every 3-4 months for best results.

Image: A visual guide demonstrating the proper method for cleaning the reusable filter using a hair dryer, emphasizing not to use water.
7. Troubleshooting
| Problem | Possible Cause | Solution |
|---|---|---|
| Device does not turn on. | No power supply; loose connection. | Check if the AC adapter is securely plugged into both the device and the power outlet. Ensure the outlet is functional. |
| Weak suction. | Clogged filter; fan obstruction. | Clean the reusable filter as per maintenance instructions. Ensure nothing is blocking the fan or the intake grate. |
| Unusual noise during operation. | Foreign object in fan; unit not stable. | Turn off and unplug the device. Carefully check for any foreign objects near the fan. Ensure the unit is placed on a flat, stable surface. |
8. Specifications
- Product Dimensions: 11.02 x 7.08 x 3.14 inches
- Weight: 2.43 Pounds
- Power: 60W
- Input Voltage: 110V-240V
- Model Number: B092YNQVHV
- UPC: 752771741896
9. Applications
The BRANTMAKER Nail Dust Collector is suitable for various applications where dust collection is required:
- Nail Art (e.g., acrylic, gel, dip powder removal)
- Grinding
- Drilling
- Crafting
- Carving
- Model Making
Image: A collage illustrating the versatility of the dust collector across various hobbies and professional uses.
10. Warranty and Support
For warranty information or technical support, please refer to the contact details provided with your purchase or visit the official BRANTMAKER store on Amazon:
BRANTMAKER is committed to providing high-quality products and customer satisfaction. If you encounter any issues, please do not hesitate to reach out to their support team.
Ask a question about this manual
Ask about setup, troubleshooting, compatibility, parts, safety, or missing instructions. Manuals+ will review the question and use this page’s manual context to help answer it.