
1. Product Overview
This manual provides essential information for the installation, operation, and maintenance of your Nilight Headlight Assembly. This product is designed to replace factory quad-style halogen headlights on specific Dodge Ram models, offering improved visibility and durability.
Product Model: Headlight Assembly for Ram 1500 2500 3500 (Quad Models)
Specific Variant: Chrome Housing + Clear Reflector

Image: Nilight Headlight Assembly, Chrome Housing with Clear Reflector.
2. Compatibility
This headlight assembly is compatible with the following vehicles:
- 2009-2018 Dodge Ram 1500
- 2010-2018 Dodge Ram 2500
- 2010-2018 Dodge Ram 3500
Important: This product is only compatible with vehicles equipped with factory quad-style halogen headlights. It is not compatible with 2010-2018 Dodge Ram models that have factory projector LED-style headlights.

Image: Visual guide to verify factory headlight type, distinguishing between quad-style (two holes for high/low beam) and single-hole projector LED-style headlights.
3. Setup and Installation
The Nilight Headlight Assembly is designed for a quick and straightforward installation process. No modifications or drilling are required for a perfect fit.
Required Bulbs (Not Included):
- Low Beam: H11 Bulb
- High Beam: 9005 Bulb
- Turn Signal Light: 3157NA Bulb

Image: Diagram showing required bulb types: H11 for Low Beam, 9005 for High Beam, and 3157NA for Turn Signal Light.
Installation Steps:
- Preparation: Ensure your vehicle is turned off and the battery is disconnected for safety.
- Remove Old Assembly: Carefully unbolt and disconnect the wiring from your existing headlight assembly.
- Install Bulbs: Insert the correct H11, 9005, and 3157NA bulbs into the new Nilight assembly.
- Mount New Assembly: Position the new headlight assembly and secure it using the factory mounting points. Connect all wiring harnesses.
- Test Functionality: Reconnect the battery and test all light functions (low beam, high beam, turn signal).
- Adjust Beam: If necessary, adjust the beam angle using the integrated adjusters. Refer to your vehicle's service manual for specific aiming procedures.
It is recommended to have professional assistance during the installation process to ensure proper fitment and functionality.
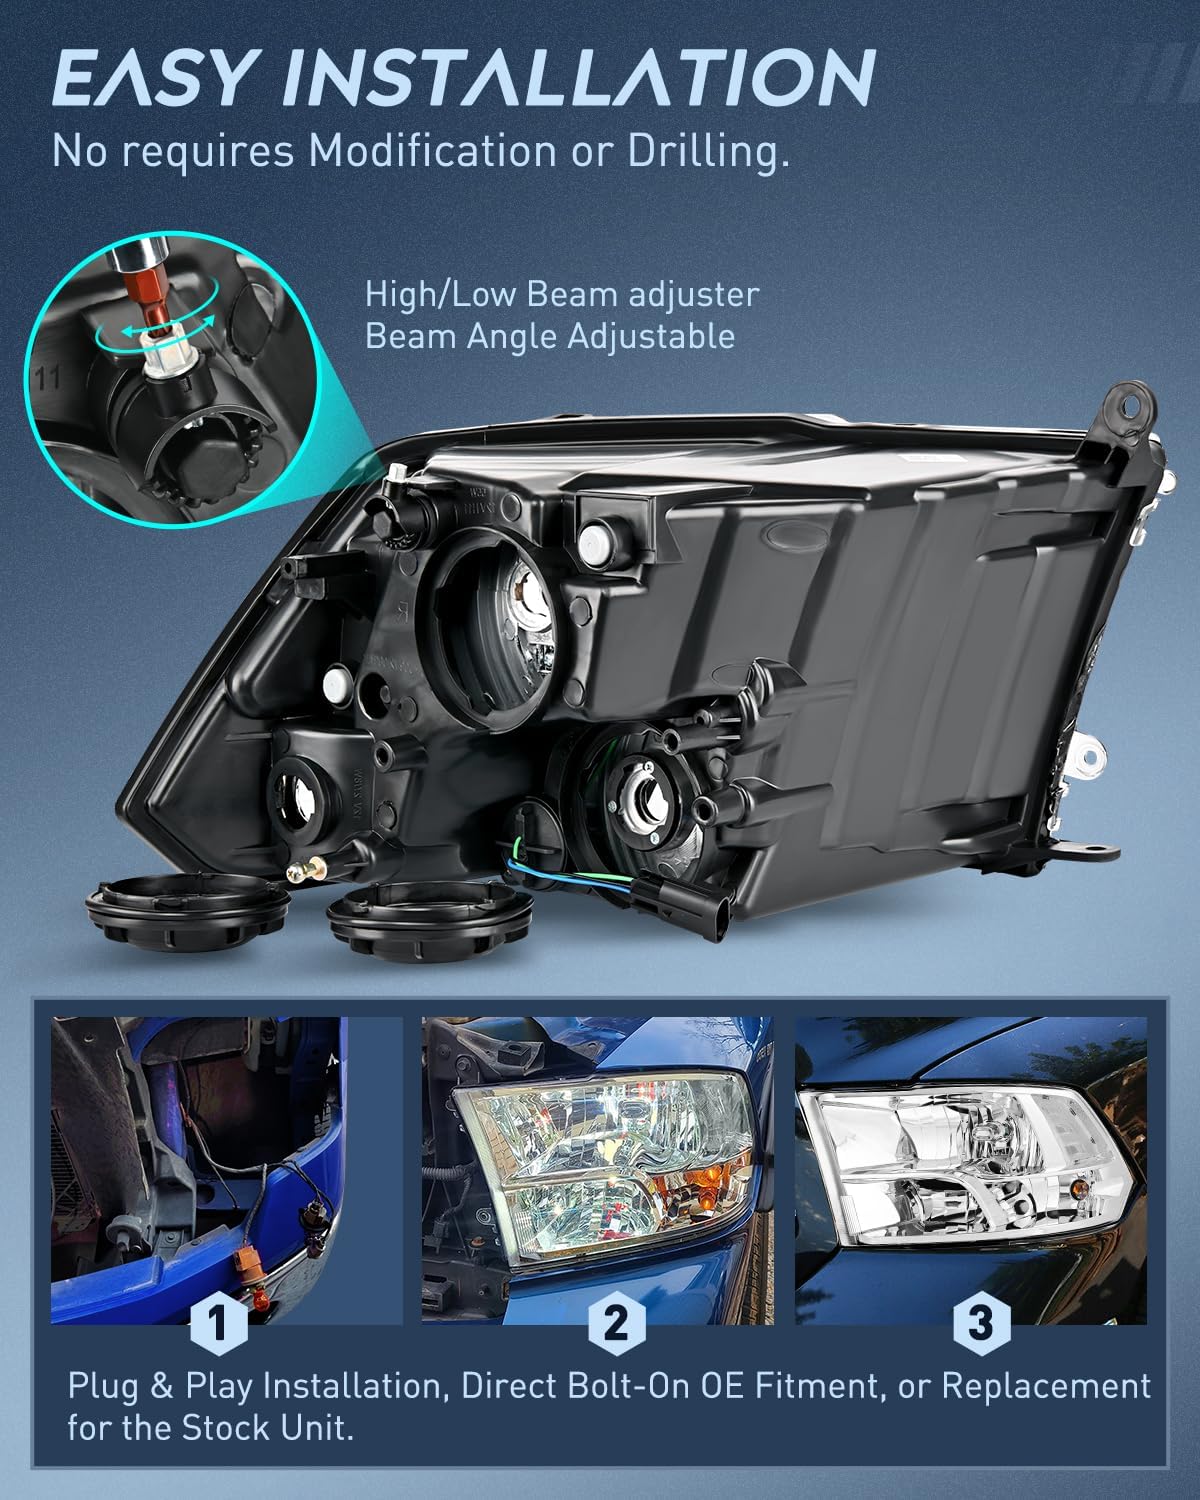
Image: Illustration of the headlight assembly's rear, showing the high/low beam adjuster and a three-step process for plug-and-play installation.
4. Operating Instructions
Once installed, your Nilight Headlight Assembly operates like your original factory headlights. Ensure all bulbs are correctly installed for optimal performance.
Clear Visibility:
The PC lens material provides higher light transmittance, resulting in a clearer and brighter lighting output. This enhances your ability to see obstacles and road conditions at night, contributing to safer driving.

Image: Side-by-side comparison of Nilight headlights providing clear, bright visibility versus ordinary headlights with poor light transmittance.
Micro-Prism Reflectors:
The integrated micro-prism reflectors are designed to optimize light distribution, making your vehicle more noticeable to other drivers and improving overall road safety, especially at night.

Image: Close-up view of the headlight lens and reflector, highlighting the high-grade material and micro-prism reflectors.
5. Maintenance
Proper maintenance ensures the longevity and performance of your headlight assembly.
Durable Construction:
The headlight assemblies are constructed from fully sealed ABS plastics, providing tensile and impact strength. The upgraded materials are UV and shock resistant, designed to prevent common issues like yellowing and cracking over time.
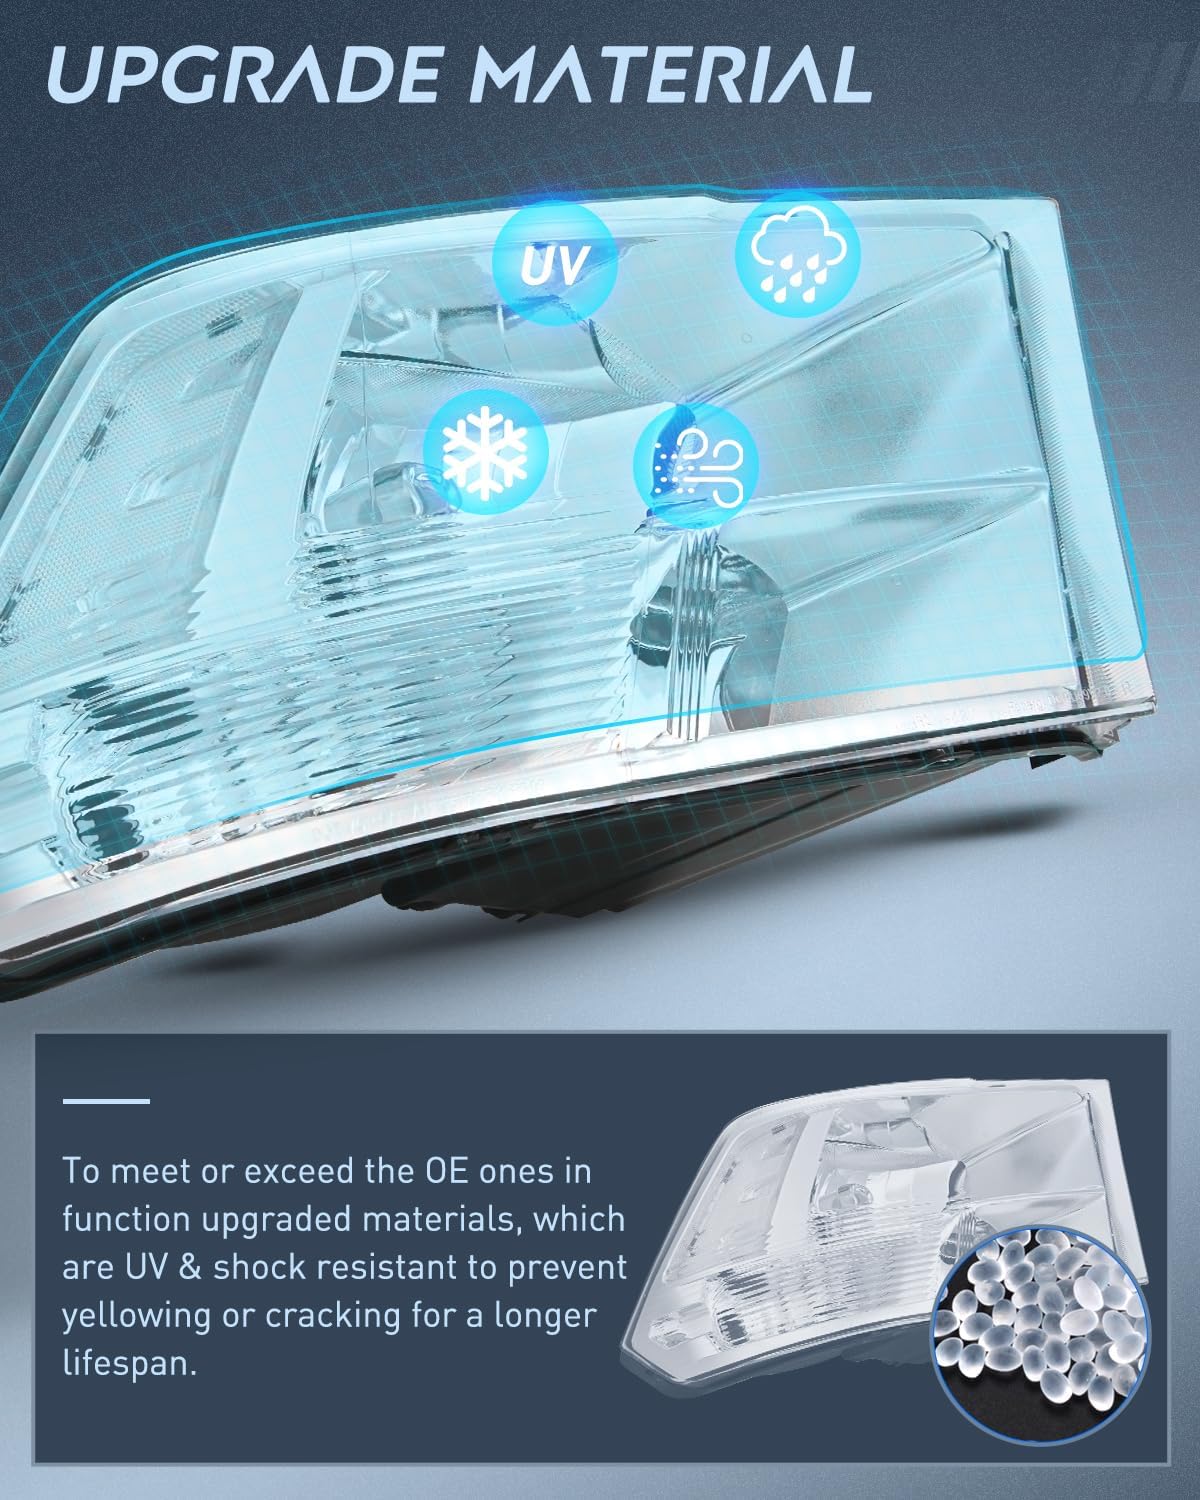
Image: Image illustrating the UV and shock-resistant properties of the upgraded material used in the headlight assembly, preventing yellowing and cracking.
IP65 Waterproof Rating:
The IP65 rating ensures the headlight assembly is waterproof and completely sealed. This design, featuring solid silicon sealing and one-way vents, prevents moisture from intruding into the housing, protecting against misty problems in various weather conditions such as heavy rains, snow, and dust storms.

Image: Demonstration of the IP65 waterproof rating, showing a headlight assembly under simulated rain, with details on solid silicon sealing and one-way vents.
Cleaning:
Clean the exterior of the headlight lenses regularly with a soft cloth and mild automotive cleaning solution to maintain clarity and light output. Avoid abrasive cleaners that can scratch the lens surface.
6. Troubleshooting
If you encounter issues with your headlight assembly, consider the following common problems and solutions:
Condensation Inside Housing:
While designed to be waterproof, minor condensation can sometimes occur due to temperature fluctuations. If persistent or excessive, check the seals and ensure the one-way vents are not obstructed. If the issue continues, contact customer support.

Image: Headlight with internal condensation, indicating a potential issue.
Yellowing or Cracking of Lens:
The product uses UV-resistant materials to minimize yellowing and cracking. If these issues appear prematurely, it may indicate exposure to harsh conditions or a manufacturing defect. Refer to the warranty section.

Image: Headlight lens with yellowing, a common sign of UV degradation.

Image: Cracked headlight lens, indicating physical damage.
Improper Beam Trajectory/Adjustment:
If the light beam appears misaligned or ineffective, ensure the headlight assembly is securely mounted. Use the integrated adjusters to fine-tune the beam. Consult a professional if you are unable to achieve proper alignment, as incorrect adjustment can affect visibility and safety.
7. Specifications
| Brand | Nilight |
| Color | Chrome Housing + Clear Reflector |
| Specific Uses For Product | Head Lights |
| Light Source Type | Halogen |
| Vehicle Service Type | Truck |
| Compatible Years | 2009-2018 |
| Special Feature | Waterproof |
| Voltage | 12 Volts |
| Wattage | 110 watts |
| Auto Part Position | Front |
| Lens Material | ABS |
| Lens Color | Clear |
| UPC | 812227033224 |
8. Warranty and Support
Warranty Information:
This Nilight Headlight Assembly comes with a 2-Year Warranty from the date of purchase. This warranty covers manufacturing defects and material flaws under normal use. It does not cover damage caused by improper installation, accidents, misuse, or unauthorized modifications.
Customer Support:
For any questions, technical assistance, or warranty claims, please contact Nilight customer support through their official website or the retailer where the product was purchased. Please have your purchase receipt and product model information ready when contacting support.