
1. Introduction
This manual provides essential information for the proper installation, operation, and maintenance of your SIGNALPLUS 915MHz LoRa Antenna. This antenna is designed for long-range LoRa applications, including Helium HNT mining, IoT, and M2M communication, operating within the 824-960MHz frequency range.
Please read this manual thoroughly before installation and retain it for future reference.
2. Safety Information
- Professional Installation Recommended: Antenna installation can be hazardous. It is recommended that installation be performed by qualified personnel.
- Lightning Protection: The antenna features DC Ground lightning protection. However, additional external lightning arrestors are recommended for comprehensive protection, especially in areas prone to lightning.
- Avoid Power Lines: Never install the antenna near overhead power lines or other electrical power circuits. Contact with power lines can be fatal.
- Secure Mounting: Ensure the antenna is securely mounted to withstand rated wind velocities. Loose antennas can cause damage or injury.
- Proper Grounding: Ensure all components are properly grounded according to local electrical codes.
3. Package Contents
Verify that all items listed below are included in your package:
- 1x SIGNALPLUS 915MHz LoRa Antenna (15dBi)
- 1x 32.8-foot (10-meter) RG58 Cable with SMA Connector
- 1x SMA Female to RP-SMA Male Adapter
- 1x Set of U-clip Mounting Hardware
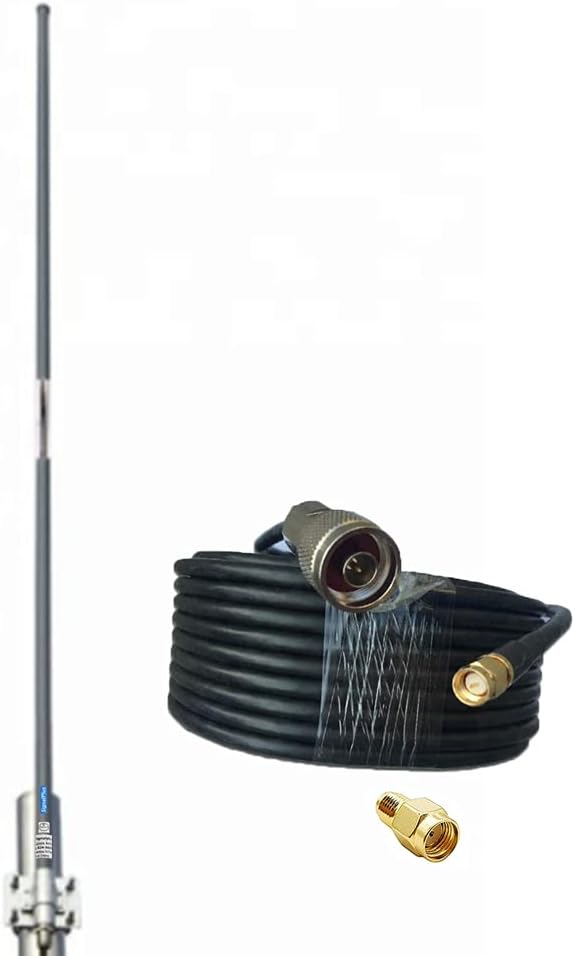
Image 3.1: Included components: 15dBi LoRa antenna, 32.8ft RG58 cable, and SMA to RP-SMA adapter.
4. Specifications
4.1 Electrical Data
| Parameter | Value |
|---|---|
| Frequency Range | 824MHz - 960MHz |
| Bandwidth | 136 MHz |
| Gain | 15 dBi |
| Half-power Beam Width (H/V) | H: 360°, V: 20° |
| VSWR | ≤1.5 |
| Input Impedance | 50 Ω |
| Polarization | Vertical |
| Maximum Input Power | 50 W |
| Lightning Protection | DC Ground |
| Input Connector Type | N Female |
4.2 General Specifications
| Parameter | Value |
|---|---|
| Antenna Dimensions (Diameter x Length) | Φ20mm x 2200mm (0.79 x 86.61 inches) |
| Antenna Weight | 0.9 kg (1.98 lbs) |
| Total Item Weight | 3.64 pounds |
| Cable Length | 32.8 feet (10 meters) |
| Cable Type | RG58 |
| Operating Temperature | -40°C to 60°C |
| Rated Wind Velocity | 60 m/s |
| Radome Color | Gray |
| Mounting Way | Pole-holding |
| Mounting Hardware (Pole Diameter) | φ40mm - φ60mm |
| Number of Channels | 1 |

Image 4.1: Antenna dimensions and compatibility overview.
5. Setup and Installation
5.1 Mounting the Antenna
- Choose a Location: Select an outdoor location that provides the highest possible elevation and a clear line of sight to maximize signal coverage. Avoid obstructions like buildings, trees, and metal structures.
- Secure the Pole: Ensure you have a sturdy mounting pole with a diameter between 40mm and 60mm. Securely fasten the pole to a stable surface.
- Attach Mounting Hardware: Use the provided U-clip mounting hardware to attach the antenna to the pole. Ensure all bolts are tightened firmly to prevent movement in high winds.
- Vertical Orientation: The antenna is designed for vertical polarization. Ensure it is mounted in a perfectly vertical position for optimal performance.

Image 5.1: Close-up of the antenna base and mounting bracket.

Image 5.2: Example of outdoor antenna installation for optimal signal.
5.2 Connecting the Cable
- Connect to Antenna: The antenna features an N Female connector. Connect the N Male end of your coaxial cable (or an appropriate adapter if your cable has a different connector) to the antenna. Ensure a tight, secure connection.
- Connect to Device: The provided 32.8-foot RG58 cable has an SMA connector. If your LoRa device (e.g., Helium miner) requires an RP-SMA connection, use the included SMA Female to RP-SMA Male adapter. Connect the cable to your device.
- Cable Management: Route the cable carefully, avoiding sharp bends or kinks that can damage the cable and degrade signal quality. Use cable ties to secure the cable along its path.

Image 5.3: Detail of the N Female connector on the antenna.

Image 5.4: Visual guide to SMA Male, N Male, and RP-SMA Male connector types.
6. Operating Instructions
Once the antenna is securely mounted and connected to your LoRa device, ensure your device is configured to operate on the 915MHz frequency band (or within the 824-960MHz range).
- The antenna is designed to enhance the signal transmission and reception capabilities of compatible LoRa devices.
- Ensure your device's software or firmware is up-to-date for optimal performance with external antennas.
- The 15dBi gain provides a focused, long-range signal pattern, ideal for elevated installations.
7. Maintenance
- Regular Inspection: Periodically inspect the antenna, mounting hardware, and cable for any signs of wear, corrosion, or damage.
- Cleanliness: Keep the antenna radome clean from dirt, dust, and debris. A soft cloth and mild detergent can be used if necessary. Avoid abrasive cleaners.
- Connection Check: Ensure all cable connections remain tight and free from moisture. Consider using weatherproof tape or sealant around outdoor connections for added protection.
- Cable Integrity: Check the coaxial cable for any cracks, fraying, or damage, especially after severe weather conditions. Replace damaged cables promptly to maintain performance.
8. Troubleshooting
- Poor Signal/Low Performance:
- Verify antenna is mounted vertically and at the highest possible point with clear line of sight.
- Check all cable connections for tightness and proper seating.
- Inspect the coaxial cable for damage. RG58 cable can have significant signal loss over long distances; consider upgrading to LMR400 or similar low-loss cable for optimal performance, especially for longer runs.
- Ensure your LoRa device is correctly configured for the 915MHz frequency band.
- No Connection:
- Confirm the correct adapter (SMA to RP-SMA) is used if required by your device.
- Test the cable and connectors for continuity if possible.
- Ensure the LoRa device itself is functioning correctly.
- Physical Damage:
- If the antenna or cable shows signs of physical damage, replace the affected components immediately.
9. Warranty and Support
SIGNALPLUS products are manufactured to high-quality standards. For specific warranty details, please refer to the warranty information provided at the time of purchase or contact your retailer. For technical support or inquiries, please reach out to the manufacturer or authorized distributor.