1. Product Overview
The BESTTEN USOT-D-3A-L is a heavy-duty digital programmable timer designed for outdoor use. It features a 7-day programming cycle, a built-in clock, and three grounded outlets, allowing for automated control of outdoor lighting, decorations, and appliances. Its weatherproof construction ensures reliable operation in various outdoor conditions.
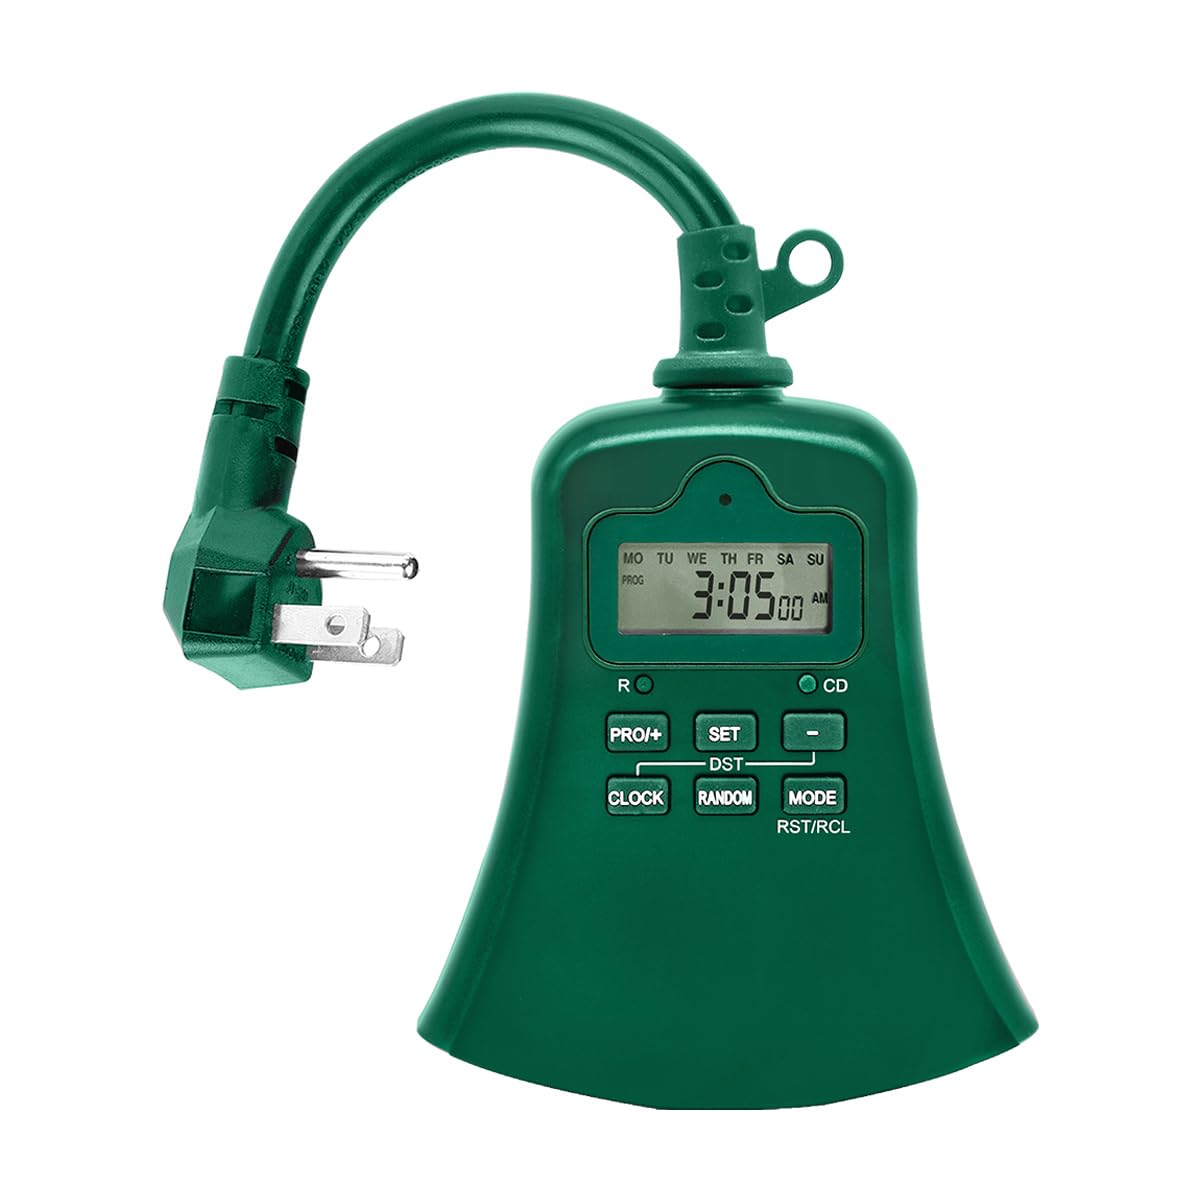
Image 1.1: Front view of the BESTTEN USOT-D-3A-L Outdoor Digital Programmable Timer, showing the display, control buttons, and three grounded outlets.
2. Important Safety Instructions
Please read and understand all safety instructions before using this product. Failure to follow these instructions may result in fire, electric shock, or injury.
- Outdoor Use Only: This timer is designed for outdoor use. Ensure it is installed in a location protected from direct water spray, though its weatherproof design offers protection against rain.
- Grounding: Always plug the timer into a grounded 3-prong outlet. Do not remove the grounding prong.
- Electrical Rating: Do not exceed the electrical ratings of the timer. Refer to the specifications section for details.
- Water Immersion: Do not immerse the timer in water.
- Children: Keep out of reach of children.
- Maintenance: Do not attempt to open or repair the timer. Refer all servicing to qualified personnel.
- Extension Cords: If using an extension cord, ensure it is rated for outdoor use and can handle the total amperage of the connected devices.
3. Product Features
- 7-Day Digital Programming: Set up to 20 ON/OFF programs per day for individual days or groups of days.
- 3 Grounded Outlets: Control multiple devices simultaneously.
- Weatherproof Design: Durable construction suitable for outdoor environments.
- Countdown Timer Function: Set a specific duration for devices to remain ON.
- Manual Override: Easily switch between ON, OFF, and AUTO modes.
- Built-in Battery Backup: Retains programming during power outages.
- ETL Listed: Certified for safety and quality standards.
4. Package Contents
Verify that all items are present upon opening the package:
- BESTTEN USOT-D-3A-L Outdoor Digital Programmable Timer
- Instruction Manual
5. Installation
- Choose a Location: Select a suitable outdoor location for the timer. Ensure it is near a grounded 3-prong electrical outlet and where the connected devices will reach. While weatherproof, avoid locations where it might be submerged or exposed to direct, high-pressure water spray.
- Mounting (Optional): The timer can be hung using the integrated keyhole slot on the back. Use a screw (not included) appropriate for your mounting surface.
- Plug In the Timer: Insert the timer's plug into a grounded 3-prong outdoor electrical outlet. The display should illuminate.
- Connect Devices: Plug your outdoor lights or appliances into the three grounded outlets on the bottom of the timer. Ensure the total load does not exceed the timer's maximum rating.
Image 5.1: Illustration of the timer plugged into an outdoor GFCI outlet, with three devices connected to its outlets.
6. Setup and Programming
Before programming, familiarize yourself with the control buttons:
- CLOCK: Used to set the current time and day.
- PROG: Used to enter and exit programming mode for ON/OFF times.
- ON/OFF/AUTO: Cycles through ON, OFF, and AUTO modes.
- DAY: Adjusts the day of the week during time setting or program setting.
- HOUR: Adjusts the hour during time setting or program setting.
- MIN: Adjusts the minute during time setting or program setting.
- RST/RCL: Resets the timer or recalls program settings.
6.1. Initial Reset
It is recommended to perform a full reset before first use or after a prolonged period of inactivity.
- Locate the small RST/RCL button.
- Using a pointed object (e.g., a pen tip), press the RST/RCL button. The display will clear, and the timer will reset to default settings.
6.2. Setting Current Time and Day
- Press and hold the CLOCK button. The display will show the current time.
- While holding CLOCK, press the DAY button repeatedly until the correct day of the week is displayed (MO, TU, WE, TH, FR, SA, SU).
- While holding CLOCK, press the HOUR button repeatedly to set the correct hour (12-hour format with AM/PM).
- While holding CLOCK, press the MIN button repeatedly to set the correct minute.
- Release the CLOCK button. The current time and day are now set.
6.3. Programming ON/OFF Times
The timer allows for up to 20 ON/OFF programs. Each program consists of an ON time and an OFF time.
- Press the PROG button once. The display will show "1 ON" and the time will flash. This is for the first ON program.
- Press DAY repeatedly to select the desired day(s) for this program. Options include: specific day (MO, TU, etc.), all weekdays (MO TU WE TH FR), all weekend days (SA SU), all 7 days (MO TU WE TH FR SA SU), or various combinations.
- Press HOUR to set the desired ON hour.
- Press MIN to set the desired ON minute.
- Press PROG again. The display will show "1 OFF" and the time will flash. This is for the first OFF program.
- Repeat steps 2-4 to set the desired OFF time for the first program. The day selection will automatically match the ON program.
- Press PROG again to move to the next program ("2 ON"). Repeat the process for up to 20 programs.
- To exit programming mode at any time, press the CLOCK button.
To clear a program: While viewing the specific ON or OFF program you wish to clear, press the RST/RCL button. The program will be replaced with "--:--".
6.4. Countdown Timer Function
The countdown function allows you to turn on or off a device for a specific duration.
- Ensure the timer is in AUTO mode.
- Press and hold the ON/OFF/AUTO button for approximately 3 seconds. The display will show "CD" (Countdown).
- Use the HOUR and MIN buttons to set the desired countdown duration.
- Press ON/OFF/AUTO again to start the countdown. The connected device will turn ON (if currently OFF) or OFF (if currently ON) for the set duration.
- To cancel the countdown, press ON/OFF/AUTO once more.
7. Operating Modes
Press the ON/OFF/AUTO button repeatedly to cycle through the operating modes:
- AUTO: The timer operates according to the programmed ON/OFF times. This is the standard operating mode for automated control.
- ON: The connected devices will remain continuously ON, overriding any programmed settings. The display will show "ON".
- OFF: The connected devices will remain continuously OFF, overriding any programmed settings. The display will show "OFF".
Always ensure the timer is in AUTO mode for programmed schedules to function.
8. Maintenance
- Cleaning: Disconnect the timer from the power outlet before cleaning. Wipe the exterior with a soft, damp cloth. Do not use harsh chemicals or abrasive cleaners.
- Storage: If storing the timer for an extended period, disconnect it from power and store it in a cool, dry place.
- Battery: The internal battery is designed to retain settings during power outages. If the display is consistently blank or settings are lost frequently, the internal battery may need servicing by a qualified technician.
9. Troubleshooting
| Problem | Possible Cause | Solution |
|---|---|---|
| Timer display is blank. | No power to the timer; internal battery depleted. | Ensure the timer is securely plugged into a live outlet. If the problem persists, the internal battery may need charging (leave plugged in for 24 hours) or replacement. |
| Devices are not turning ON/OFF at programmed times. | Timer is not in AUTO mode; incorrect program settings; devices not properly connected. | Press ON/OFF/AUTO until "AUTO" is displayed. Review your program settings (Section 6.3) for accuracy. Ensure devices are securely plugged into the timer. |
| Timer is ON/OFF continuously, ignoring programs. | Timer is in ON or OFF mode. | Press ON/OFF/AUTO until "AUTO" is displayed. |
| Difficulty programming. | Incorrect button sequence; unfamiliarity with controls. | Refer to Section 6.3 for detailed programming steps. Perform an initial reset (Section 6.1) and try again. |
10. Specifications
| Model Number | USOT-D-3A-L |
| Electrical Rating | 125V AC, 60Hz, 15A Resistive, 1875W |
| Number of Outlets | 3 Grounded Outlets |
| Programming Cycles | 7-Day, up to 20 ON/OFF programs |
| Material | Polycarbonate |
| Item Weight | 8.5 ounces (0.53 Pounds) |
| Certifications | ETL Listed |
11. Warranty and Customer Support
BESTTEN products are designed and manufactured to the highest quality standards. For warranty information, technical support, or customer service inquiries, please contact BESTTEN directly through their official website or the retailer where the product was purchased.
Please have your model number (USOT-D-3A-L) and purchase information ready when contacting support.


