1. Introduction and Overview
Thank you for choosing the Scheppach MS173-51E Thermal Lawn Mower. This manual provides essential information for the safe and efficient operation, maintenance, and troubleshooting of your new lawn mower. Please read this manual thoroughly before first use and keep it for future reference.
Key Features:
- Powerful 4-stroke gasoline engine with electric and cable start.
- Cutting width: 51 cm.
- Equipped with professional transmission for high torque, high power, and long service life.
- Integrated cleaning function with water connection.
- Robust 65 L collection bag.
- Central cutting height adjustment with 7 levels (25 - 75 mm).
- Foldable handle for easy, space-saving storage or transport.
- High torque for comfortable work even in tall grass.
- Easy mowing thanks to electric start and drive wheel.
- Battery and charger included.
2. Safety Instructions
Always observe the following safety precautions to prevent injury or damage to the machine.
- Read the entire manual before operating the lawn mower.
- Wear appropriate personal protective equipment (PPE), including eye protection, hearing protection, sturdy footwear, and long pants.
- Never operate the mower without the grass catcher or discharge guard in place.
- Keep children and bystanders away from the mowing area.
- Clear the area of objects such as rocks, sticks, wires, and toys before mowing.
- Do not operate the mower in wet grass or rain.
- Refuel in a well-ventilated area with the engine off and cool. Do not smoke while refueling.
- Exercise extreme caution when operating on slopes. Mow across the face of slopes, never up and down.
- Before cleaning, servicing, or unclogging the chute, turn off the engine and disconnect the spark plug wire.
- Inspect the mower regularly for loose fasteners, damaged parts, or excessive vibration.
3. Product Components
Familiarize yourself with the main parts of your Scheppach MS173-51E lawn mower.

Figure 3.1: Overall view of the Scheppach MS173-51E Thermal Lawn Mower, showing the main unit, grass collection bag, and included battery and charger.
- Engine (4-stroke gasoline)
- Handlebar with control levers
- Grass collection bag (65L)
- Cutting deck and blade
- Wheels (front and rear, self-propelled rear wheels)
- Cutting height adjustment lever
- Electric start button
- Pull start handle
- Side discharge chute (optional attachment)
- Mulching plug
- Water hose connection for cleaning
- Battery and charger
4. Setup and Assembly
Follow these steps to assemble and prepare your lawn mower for first use.
4.1 Handlebar Assembly
- Unfold the handlebar and secure it in place using the quick-release levers or bolts provided. Ensure all cables are not pinched.
- Attach the control levers to the handlebar if they are not pre-assembled.

Figure 4.1: The foldable handle allows for compact storage and easy transport.
4.2 Fuel and Oil Filling
- Engine Oil: Before starting, fill the engine with the recommended 4-stroke engine oil (refer to specifications for type and volume). Do not overfill.
- Fuel: Fill the fuel tank with unleaded gasoline. Use fresh fuel. Do not use E85 or other high-ethanol fuels.
- Ensure caps are securely tightened after filling.
4.3 Battery Installation and Charging
- Charge the included battery fully before first use. Connect the charger to a power outlet and the battery.
- Once charged, insert the battery into its designated compartment on the mower for electric starting.

Figure 4.2: Advantages of the hybrid start system, including automatic starter, no need for pull cord, lithium battery, and choice of manual or electric start.
5. Operating Instructions
This section details how to operate your lawn mower safely and effectively.
5.1 Starting the Engine
- Ensure the spark plug wire is connected.
- Electric Start: Press and hold the electric start button. The engine should start within a few seconds. Release the button once the engine runs.
- Pull Start: If the electric start is not used or the battery is low, pull the starter cord firmly and smoothly until the engine starts.
- Allow the engine to warm up for a minute before engaging the blade.
5.2 Adjusting Cutting Height
The Scheppach MS173-51E features a central cutting height adjustment with 7 levels, from 25 mm to 75 mm.
- Turn off the engine and wait for the blade to stop completely.
- Locate the central height adjustment lever on the side of the mower.
- Pull the lever outwards and move it to the desired height setting. Release the lever to lock it in place.

Figure 5.1: The central cutting height adjustment allows for quick and easy selection of 7 different cutting heights (25-75 mm).
5.3 Mowing Techniques
Your mower supports various mowing modes:
- Collection: Attach the 65L grass collection bag to collect clippings. Empty the bag when full to maintain optimal performance.
- Mulching: Insert the mulching plug into the discharge opening. This finely chops grass clippings and returns them to the lawn as natural fertilizer.
- Side Discharge: Attach the side discharge chute for areas where collection or mulching is not desired. The side ejector can be easily mounted and removed as needed.

Figure 5.2: Illustrations showing the different application modes: standard mowing, grass collection, and mulching.
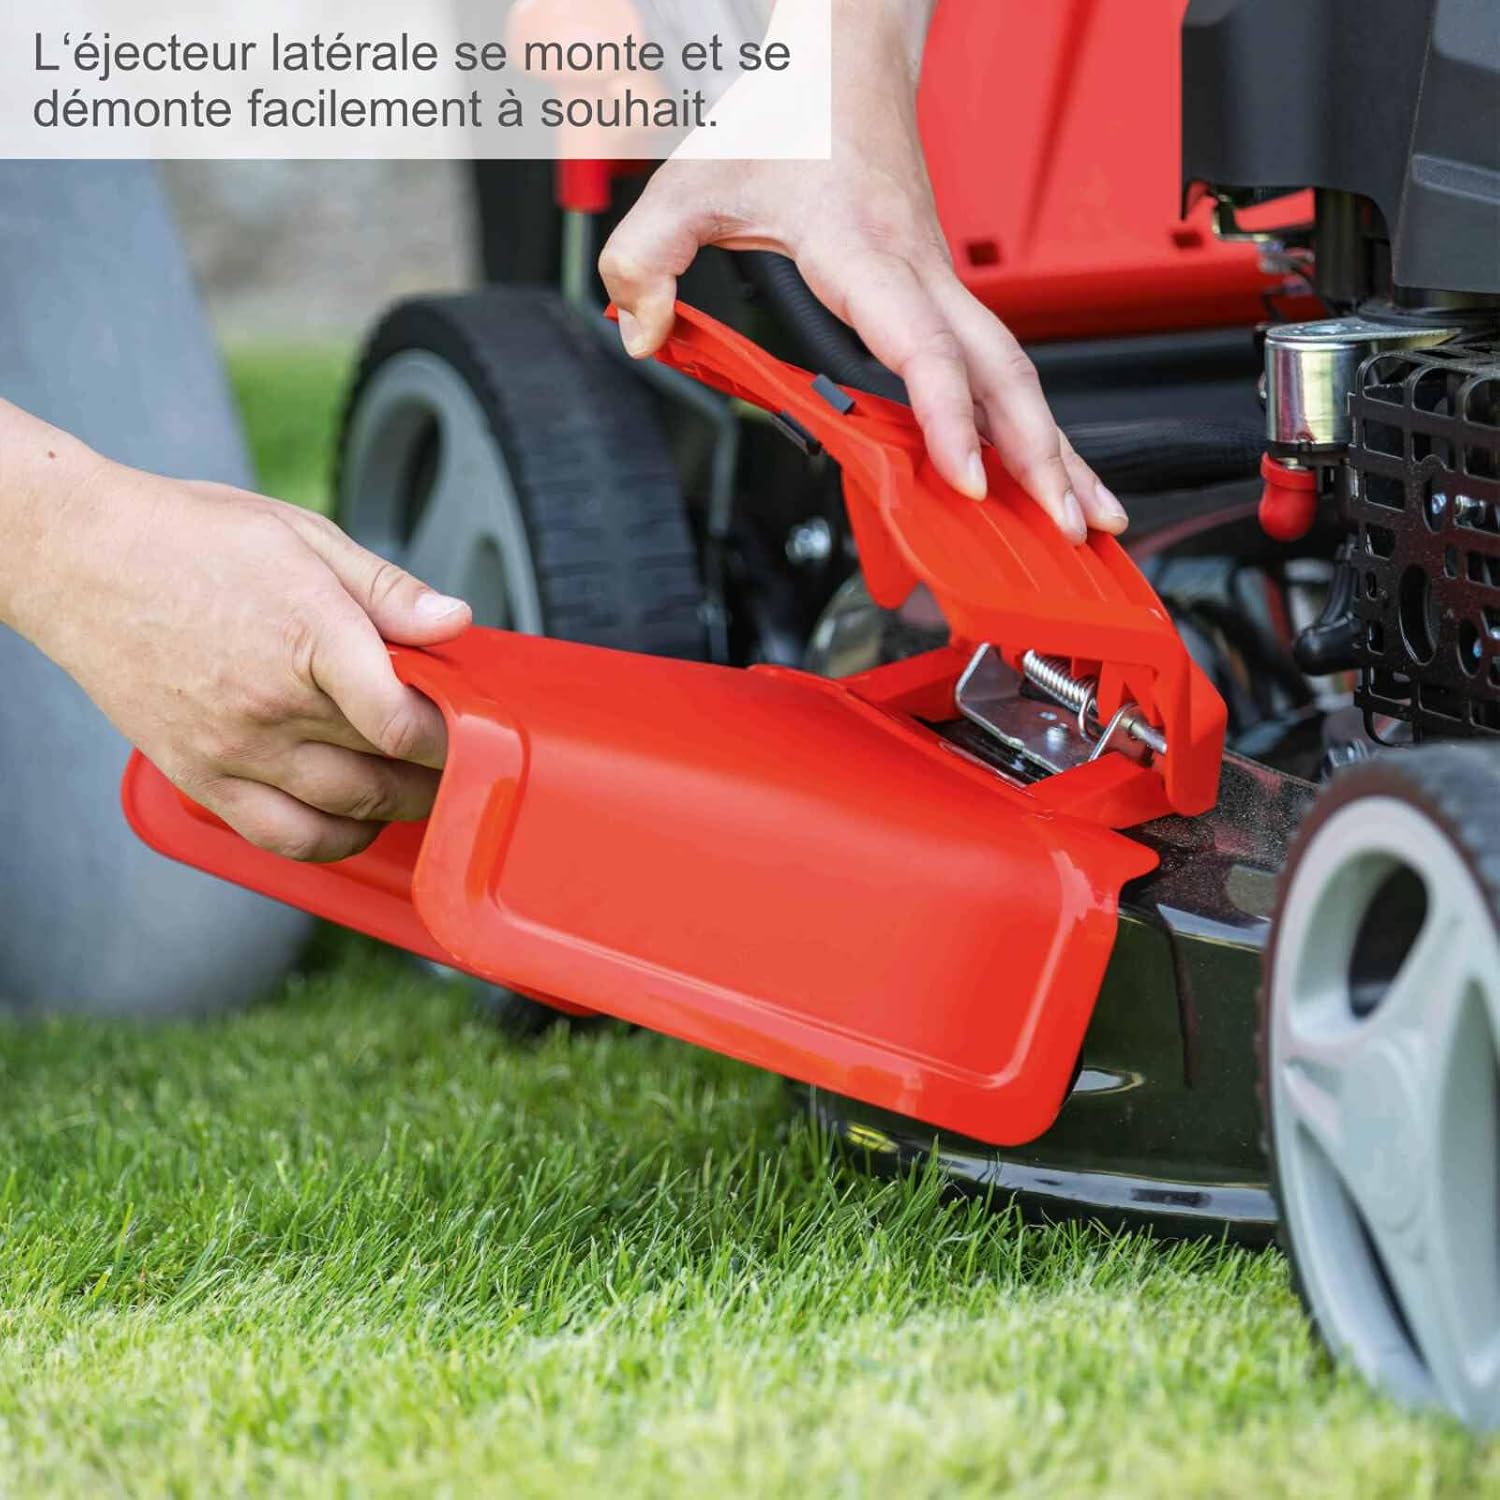
Figure 5.3: The side ejector can be easily installed and removed as desired for side discharge.
5.4 Self-Propelled Function
Engage the self-propelled lever on the handlebar to activate the drive to the rear wheels. This provides significant assistance when mowing on uneven terrain or slopes.

Figure 5.4: The self-propelled drive provides undeniable support when mowing on steep terrain.
5.5 Stopping the Engine
Release the engine brake lever (usually located on the handlebar) to stop the engine and blade rotation. Always wait for the blade to come to a complete stop before approaching the mower.
6. Maintenance
Regular maintenance ensures the longevity and optimal performance of your lawn mower.
6.1 Cleaning
- After each use, clean the underside of the cutting deck to prevent grass buildup.
- Utilize the integrated "Easy Clean" function by connecting a garden hose to the water connection point on the deck. Run the engine briefly to allow the rotating blade to clean the underside.
- Clean the exterior with a damp cloth. Do not use high-pressure washers directly on the engine or electrical components.

Figure 6.1: Easy Clean - Quick connection for washing the mower deck.
6.2 Blade Care
- Regularly inspect the blade for sharpness and damage. A dull blade can tear grass, leading to an unhealthy lawn.
- If the blade is dull or damaged, have it sharpened or replaced by a qualified service technician.
6.3 Engine Maintenance
- Oil Change: Change the engine oil after the first 5 hours of operation, then every 25 hours or annually, whichever comes first.
- Air Filter: Clean or replace the air filter regularly, especially in dusty conditions.
- Spark Plug: Inspect and clean the spark plug annually. Replace if worn or fouled.
6.4 Storage
- For long-term storage, drain the fuel tank or add a fuel stabilizer.
- Clean the mower thoroughly.
- Store in a dry, well-ventilated area, away from direct sunlight and extreme temperatures. The foldable handle allows for compact storage.
7. Troubleshooting
This section addresses common issues you might encounter with your lawn mower.
| Problem | Possible Cause | Solution |
|---|---|---|
| Engine does not start (Electric Start) | Low or uncharged battery; loose battery connection. | Charge the battery fully. Ensure battery is properly seated and connected. Try pull start. |
| Engine does not start (General) | No fuel; stale fuel; clogged fuel filter; fouled spark plug; engine brake not engaged. | Fill with fresh fuel. Clean/replace fuel filter. Clean/replace spark plug. Ensure engine brake lever is held down. |
| Engine starts then stops | Low oil level; clogged air filter; carburetor issues. | Check oil level and add if necessary. Clean/replace air filter. Consult a service technician for carburetor issues. |
| Uneven cut | Dull or bent blade; incorrect cutting height setting; uneven ground. | Sharpen or replace blade. Adjust cutting height evenly. Mow at a consistent pace. |
| Excessive vibration | Bent blade; loose blade bolt; debris on blade or deck. | Inspect blade for damage and balance. Tighten blade bolt. Clean deck and blade. If vibration persists, seek professional service. |
| Difficult hot start | Engine flooded; vapor lock; spark plug issues. | Wait a few minutes for engine to cool. Try starting without choke. Check spark plug. |
If you encounter problems not listed here or if the suggested solutions do not resolve the issue, please contact Scheppach customer support or a qualified service center.
8. Specifications
| Specification | Value |
|---|---|
| Model | MS173-51E |
| Product Dimensions (L x W x H) | 164 x 56 x 113 cm |
| Item Weight | 30.5 Kilograms |
| Material Type | Alloy Steel |
| Power Source | Gas Powered |
| Cutting Width | 51 Centimeters |
| Cutting Height Positions | 7 (25 - 75 mm) |
| Operation Mode | Automatic (Self-propelled) |
| Grass Bag Volume | 65 Liters |
| Color | Black/Red |
9. Warranty and Support
Scheppach products are manufactured with high-quality materials and undergo strict quality controls. For information regarding warranty coverage, terms, and conditions, please refer to the warranty card included with your product or visit the official Scheppach website.
For technical support, spare parts, or service inquiries, please contact your authorized Scheppach dealer or the Scheppach customer service department. Always provide your model number (MS173-51E) and serial number when contacting support.
You can find more information and contact details on the official Scheppach website: www.scheppach.com


