Introduction
This manual provides essential information for setting up, operating, and maintaining your GIGABYTE G32QC Advanced 32-inch Curved Gaming Monitor. This monitor features a 2560x1440 VA display with a 165Hz refresh rate and 1ms (MPRT) response time, offering a native 1500R curvature for an immersive experience. It supports AMD FreeSync Premium Pro, VESA Display HDR400, and covers 93% DCI-P3 color space. The monitor also includes GIGABYTE's tactical features and OSD Sidekick for easy adjustments, along with an ergonomic design for tilt and height adjustments, low blue light, and flicker-free technology.

Figure 1: GIGABYTE G32QC Advanced 32-inch Curved Gaming Monitor.
Setup
1. Unpacking and Package Contents
Carefully remove all components from the packaging. Ensure all items listed below are present:
- GIGABYTE G32QC Advanced Monitor
- Monitor Stand (Base and Neck)
- Power Adapter
- DisplayPort Cable
- HDMI Cable
- USB Type-B Cable (for USB 3.0 hub functionality)
- Quick Start Guide / User Manual (this document)

Figure 2: Monitor and packaging upon unboxing.
2. Stand Assembly
- Attach the stand neck to the monitor panel.
- Secure the stand base to the neck using the provided screws.
- Place the assembled monitor on a stable, flat surface.
The monitor stand allows for height and tilt adjustments. For VESA wall mounting, remove the stand and use a compatible VESA 100x100mm mount.

Figure 3: Adjustable stand and VESA 100x100mm mounting points.
3. Connecting to a Computer
Connect the monitor to your computer using one of the available video input ports:
- DisplayPort 1.2: For optimal performance, including 165Hz refresh rate and FreeSync Premium Pro.
- HDMI 2.0: Supports high refresh rates and resolutions.
Additionally, connect the USB Type-B cable from your computer to the monitor's USB upstream port to enable the monitor's USB 3.0 downstream ports.

Figure 4: Input/Output (I/O) Ports diagram.

Figure 5: Physical rear view of the monitor ports.
4. Power Connection
Connect the power adapter to the monitor's DC power input, then plug the power cord into an electrical outlet.
Operating Instructions
1. Power On/Off and OSD Navigation
The monitor typically uses a joystick control for power and On-Screen Display (OSD) navigation. Press the joystick to power on/off or to access the OSD menu. Use the joystick to navigate through menu options and adjust settings.
For advanced settings and easier control, install the GIGABYTE OSD Sidekick software on your computer. This utility allows you to adjust display options using your keyboard and mouse.

Figure 6: GIGABYTE OSD Sidekick software for monitor settings.
2. Key Features and Adjustments
- High Refresh Rate & Response Time: Experience smooth gameplay with 165Hz refresh rate and 1ms (MPRT) response time.
- AMD FreeSync Premium Pro: Ensures tear-free and stutter-free gaming by synchronizing the monitor's refresh rate with your GPU's frame rate.
- VESA Display HDR400 & 93% DCI-P3: Delivers vibrant colors and improved contrast for a more realistic visual experience.
- Black Equalizer: Enhances visibility in dark areas of the screen without overexposing bright areas, providing a tactical advantage in games.
- Low Blue Light & Flicker-Free: TÜV Rheinland certified technologies to reduce eye strain and fatigue during extended use.
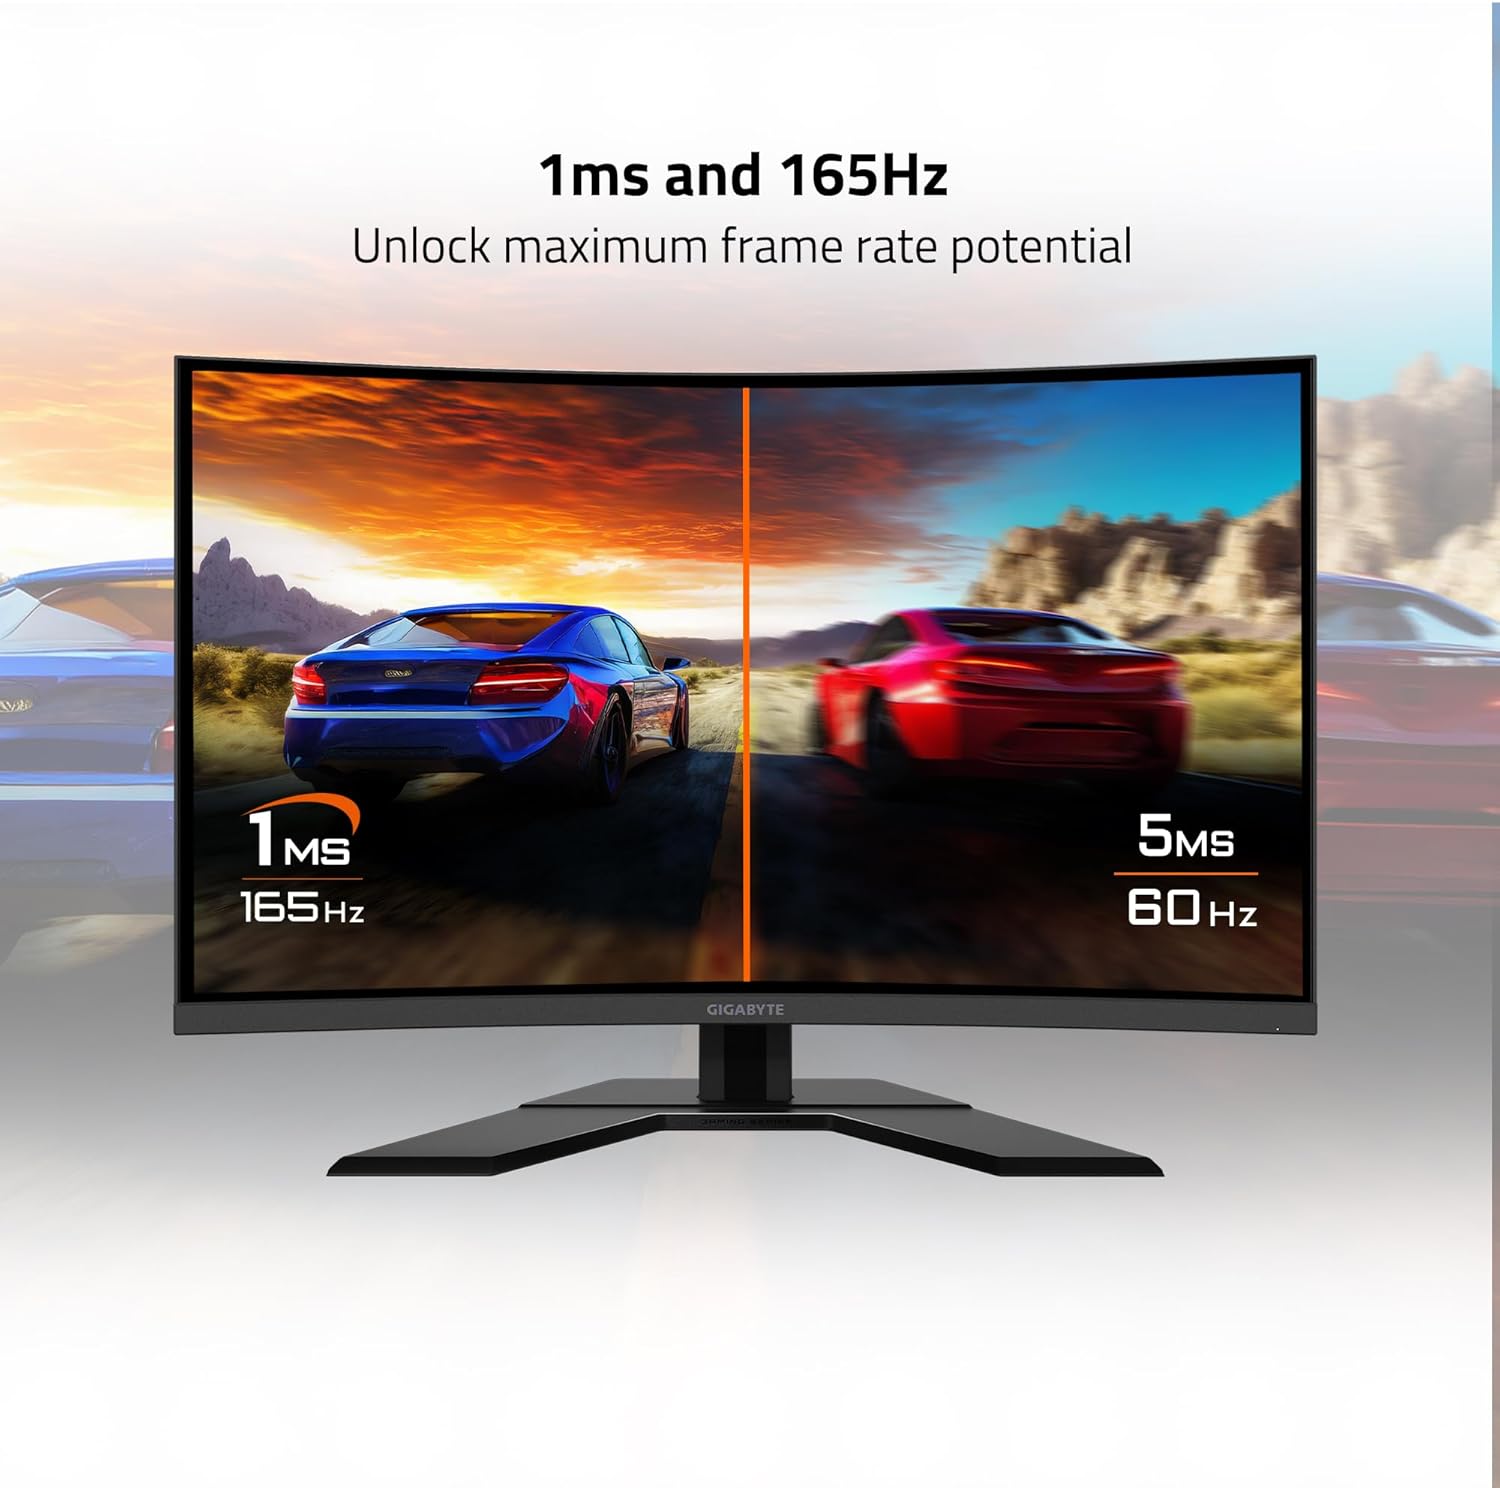
Figure 7: Visual representation of 1ms and 165Hz performance.

Figure 8: Monitor supports AMD FreeSync Premium Pro and HDR.

Figure 9: Black Equalizer feature demonstration.

Figure 10: TÜV Rheinland certified eye care features.
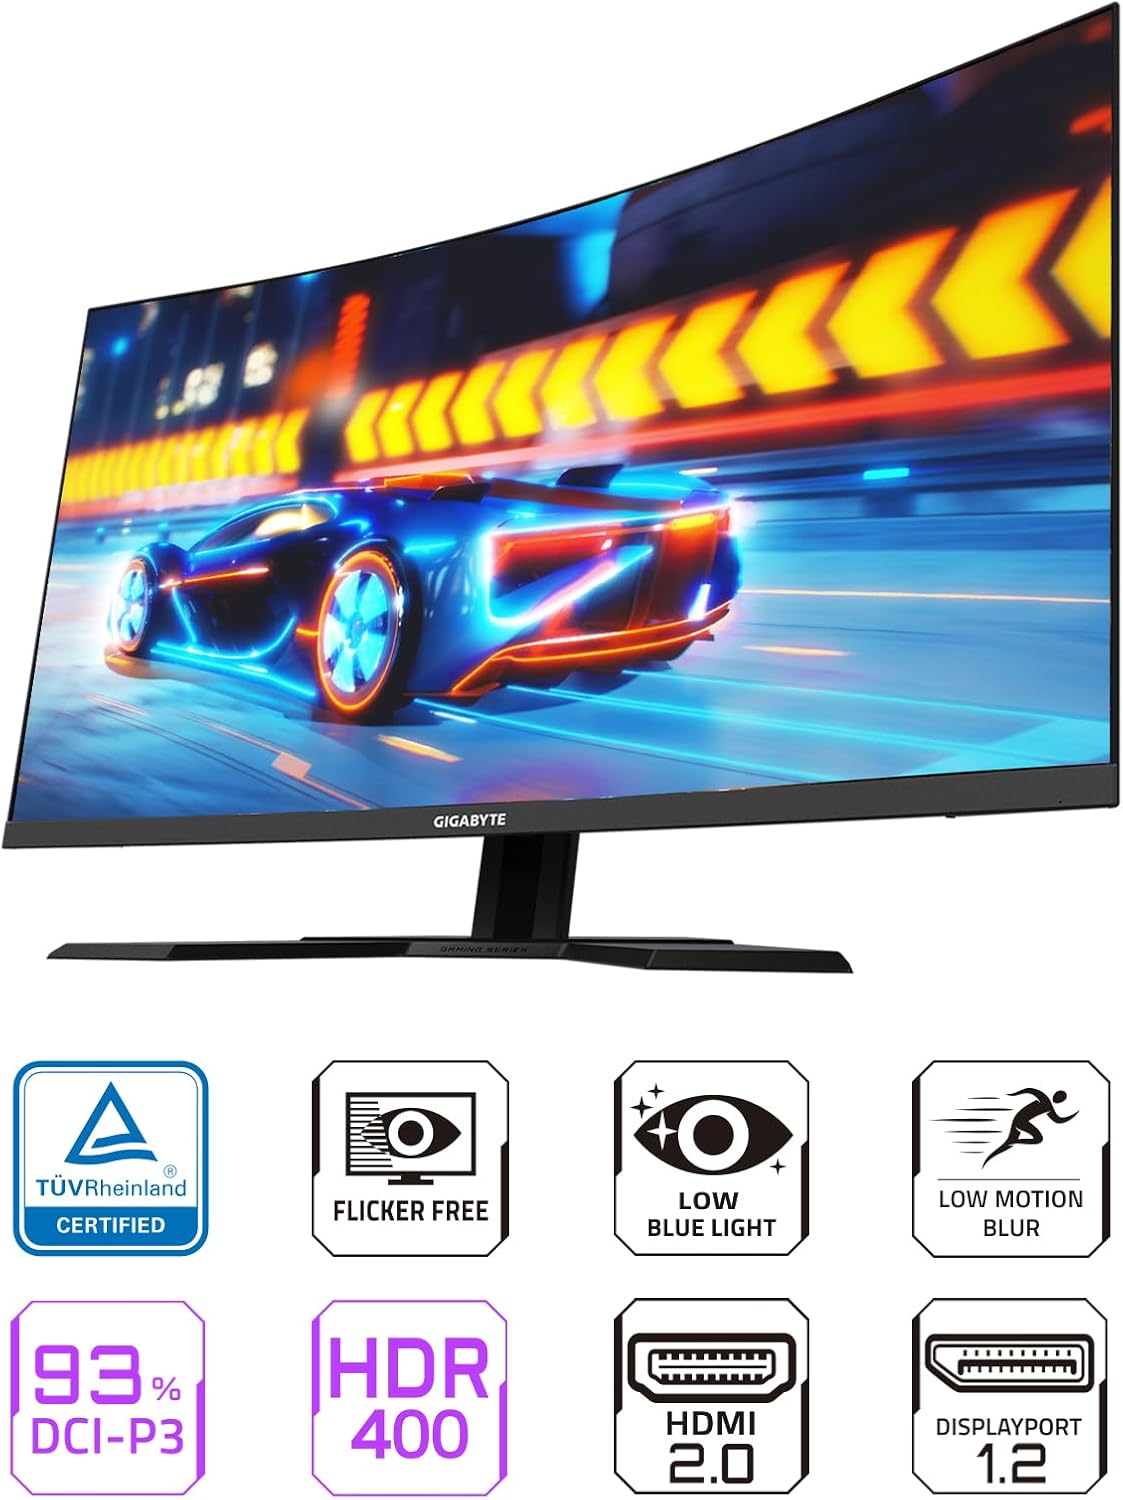
Figure 11: Overview of monitor features.
Maintenance
1. Cleaning the Monitor
- Always power off the monitor and unplug the power cord before cleaning.
- Use a soft, lint-free cloth lightly dampened with water or a mild, non-abrasive screen cleaner.
- Do not spray cleaner directly onto the screen.
- Avoid using benzene, thinner, ammonia-based cleaners, or abrasive materials, as these can damage the screen or casing.
2. General Care
- Avoid placing the monitor in direct sunlight or near heat sources.
- Ensure adequate ventilation around the monitor to prevent overheating.
- Do not place heavy objects on the monitor or its cables.
- If the monitor will not be used for an extended period, unplug it from the power outlet.
Troubleshooting
| Problem | Possible Cause | Solution |
|---|---|---|
| No power | Power cable not connected; Power outlet faulty; Monitor power button off. | Ensure power cable is securely connected to monitor and outlet. Test outlet with another device. Press monitor power button. |
| No image on screen | Video cable not connected; Incorrect input source selected; Computer in sleep mode. | Check video cable connections (DisplayPort/HDMI). Select correct input source via OSD. Wake up computer. |
| Image is blurry or distorted | Incorrect resolution; Graphics driver issues; Cable quality. | Set display resolution to 2560x1440. Update graphics drivers. Try a different video cable. |
| Flickering screen | Refresh rate mismatch; Faulty cable; Graphics card issue. | Ensure refresh rate is set to 165Hz in display settings. Replace video cable. Update graphics drivers. |
| USB ports not working | USB upstream cable not connected; Computer USB port issue. | Connect the USB Type-B upstream cable from the monitor to your computer. Try a different USB port on your computer. |
Specifications
| Feature | Detail |
|---|---|
| Model Number | G32QC A-SA |
| Screen Size | 32 Inches |
| Panel Type | VA (Vertical Alignment) |
| Curvature | 1500R |
| Resolution | 2560 x 1440 (QHD Wide 1440p) |
| Refresh Rate | 165Hz |
| Response Time | 1ms (MPRT) |
| Color Gamut | 93% DCI-P3 |
| HDR Support | VESA Display HDR400 |
| Adaptive Sync Technology | AMD FreeSync Premium Pro |
| Video Inputs | 1x DisplayPort 1.2, 2x HDMI 2.0 |
| USB Ports | 2x USB 3.0 (downstream), 1x USB Type-B (upstream) |
| Audio | Earphone Jack |
| Ergonomics | Height Adjustment, Tilt Adjustment |
| VESA Mounting | 100x100mm |
| Item Weight | 24.9 pounds |
| Product Dimensions (LxWxH) | 7.5 x 33.4 x 21.8 inches |

Figure 12: Monitor dimensions.
Warranty Information
GIGABYTE products are covered by a limited warranty. The specific terms and duration of the warranty may vary by region and product type. Please refer to the official GIGABYTE website or your product's warranty card for detailed information regarding warranty coverage, terms, and conditions.
Keep your proof of purchase (receipt or invoice) as it will be required for any warranty claims.
Support
For technical support, driver downloads, FAQs, or further assistance with your GIGABYTE G32QC Advanced monitor, please visit the official GIGABYTE support website:
You may also find helpful resources and community forums on the GIGABYTE website.


