
1. Introduction
This manual provides essential information for the proper installation, operation, and maintenance of your Pro Chaser 951-12785 Carburetor. Please read these instructions carefully before proceeding with installation or use to ensure optimal performance and longevity of your equipment.
2. Product Overview
The Pro Chaser 951-12785 Carburetor is a replacement component designed to deliver the correct fuel-air mixture to your engine, ensuring efficient combustion and reliable operation. It is a critical part of your tiller's fuel system.

Image 2.1: Front view of the Pro Chaser 951-12785 Carburetor, showing key dimensions for reference, including a 40mm (1.58") mounting distance and 6.1mm (0.24") intake diameter.

Image 2.2: Side view of the carburetor, illustrating the fuel inlet and the manual choke lever.
3. Compatibility
This carburetor is a direct replacement for the following Yard Machines tiller models:
- Yard Machines RT45
- Yard Machines 21AA40M1000
- Yard Machines 21AA40M1052
- Yard Machines 24A-45M3000 (18" 208cc 4-Cycle Garden Tiller)
Note: Always compare the appearance and dimensions of your existing carburetor with the images provided in this manual to confirm compatibility before installation. Minor design differences can affect fitment.
4. Package Contents
Upon opening the package, verify that all components are present and undamaged:
- 1 x Pro Chaser 951-12785 Carburetor
- 3 x Mounting Gaskets
- 1 x Plastic Choke Lever (if not pre-installed)
- 1 x Fuel Filter

Image 4.1: Top-down view of the carburetor, illustrating the float bowl and internal jet area.
5. Setup and Installation
Safety First: Before beginning any work, ensure the engine is cool, the spark plug wire is disconnected, and the fuel valve is turned off to prevent accidental starting or fuel spills.
- Prepare the Work Area: Work in a well-ventilated area. Have appropriate tools ready, including wrenches, screwdrivers, and a container for draining old fuel.
- Remove Air Filter Assembly: Carefully detach the air filter housing and air filter to gain access to the carburetor.
- Disconnect Fuel Line: Pinch off the fuel line or drain the fuel tank. Disconnect the fuel line from the old carburetor. Be prepared for residual fuel to spill.
- Disconnect Linkages: Detach the throttle and choke linkages from the old carburetor. Note their positions for reassembly.
- Remove Old Carburetor: Unbolt the old carburetor from the engine intake manifold. Remove any old gaskets.
- Install New Gaskets: Place the new mounting gaskets provided with your Pro Chaser carburetor onto the engine and carburetor mounting surfaces. Ensure they are correctly aligned.
- Mount New Carburetor: Position the new Pro Chaser 951-12785 Carburetor onto the mounting studs and secure it with the bolts. Do not overtighten.
- Reconnect Linkages: Reattach the throttle and choke linkages to the new carburetor in their original positions. Test for smooth operation.
- Reconnect Fuel Line and Install New Fuel Filter: If replacing the fuel filter, install the new one in the fuel line. Reconnect the fuel line to the carburetor. Ensure all connections are secure to prevent leaks. A clamp may be needed for a tight fit on the fuel line.
- Reinstall Air Filter Assembly: Reattach the air filter and housing.
- Refill Fuel Tank: Add fresh, clean fuel to the tank.
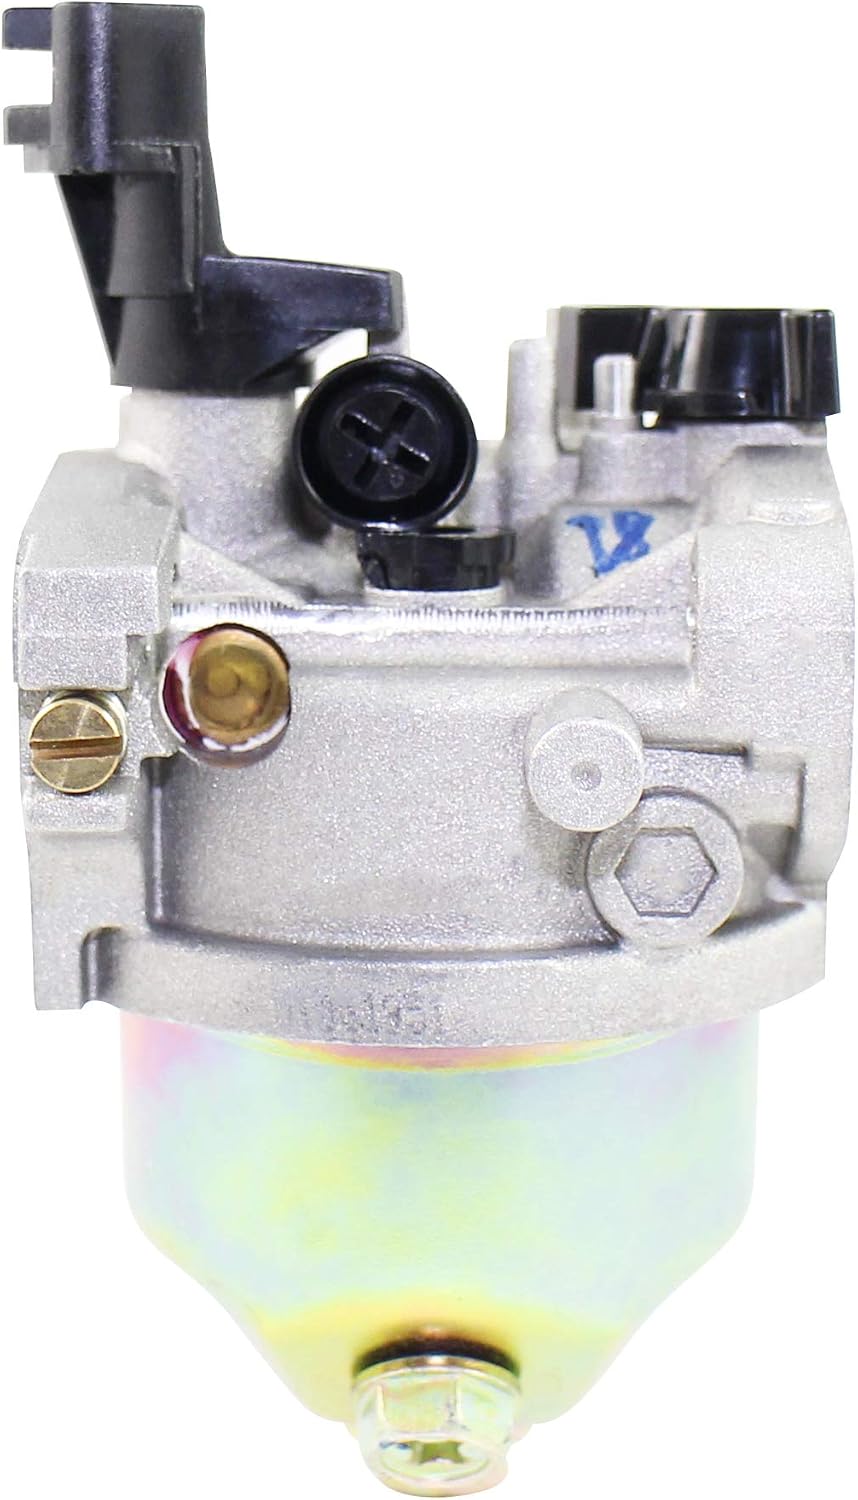
Image 5.1: Rear view of the carburetor, highlighting the mounting points and potential adjustment screws.
6. Operating and Adjustment
After installation, the carburetor may require minor adjustments for optimal engine performance. Start the engine and allow it to warm up.
- Idle Speed Adjustment: Locate the idle speed screw (typically a larger screw with a spring). Turn it clockwise to increase idle speed or counter-clockwise to decrease it until the engine runs smoothly without stalling.
- Mixture Adjustment (if applicable): Some carburetors have a mixture screw. If your engine runs rough or smokes, a slight adjustment may be needed. Turn the screw slowly in small increments (e.g., 1/8 turn) and observe the engine's response. Turning it in typically leans the mixture, out richens it. Consult your tiller's engine manual for specific adjustment procedures if available.
- Testing: Operate the tiller under various loads to ensure smooth acceleration and consistent power. Further fine-tuning may be necessary.
Caution: Improper carburetor adjustments can lead to engine damage or poor performance. If you are unsure, consult a qualified technician.

Image 6.1: Side view of the carburetor, showing the throttle and choke linkages, and the fuel line connection point.
7. Maintenance
Regular maintenance ensures the longevity and reliable operation of your carburetor.
- Fuel Quality: Always use fresh, clean, and high-quality fuel. Stale or contaminated fuel is a primary cause of carburetor issues. Consider using a fuel stabilizer, especially during storage.
- Fuel Filter: Replace the fuel filter annually or more frequently if operating in dusty conditions. A clogged fuel filter restricts fuel flow to the carburetor.
- Cleaning: If the carburetor becomes clogged or dirty, it may require cleaning. This typically involves disassembling the carburetor, cleaning jets and passages with carburetor cleaner, and replacing gaskets. This procedure should only be performed by individuals with mechanical experience.
- Storage: Before long-term storage, either run the engine until it runs out of fuel or drain the fuel tank and carburetor bowl to prevent fuel degradation and gumming.
8. Troubleshooting
If you encounter issues after installing the new carburetor, consider the following common problems and solutions:
| Problem | Possible Cause | Solution |
|---|---|---|
| Engine won't start | No fuel, clogged fuel filter, incorrect choke position, spark issue | Check fuel level, replace fuel filter, ensure choke is set correctly, check spark plug. |
| Engine runs rough/stalls | Incorrect idle speed, mixture out of adjustment, air leak, dirty carburetor | Adjust idle speed/mixture, check for air leaks around gaskets, clean carburetor. |
| Fuel leaks | Loose fuel line, damaged gasket, float bowl issue | Tighten fuel line connections (add clamp if needed), replace gaskets, inspect float bowl. |
| Lack of power | Clogged fuel filter, incorrect mixture, restricted air intake | Replace fuel filter, adjust mixture, check air filter for clogs. |
If problems persist after attempting these solutions, it is recommended to seek assistance from a qualified service technician.
9. Specifications
- Model: 951-12785
- Brand: Pro Chaser
- Compatibility: Yard Machines RT45, 21AA40M1000, 21AA40M1052, 24A-45M3000 (18" 208cc 4-Cycle Garden Tiller)
- Mounting Hole Distance: Approximately 40mm (1.58 inches)
- Intake Diameter: Approximately 6.1mm (0.24 inches)
- UPC: 717664177305
- ASIN: B0923N3N9X
10. Warranty Information
The Pro Chaser 951-12785 Carburetor comes with a manufacturer warranty for 90 days from the date of purchase. This warranty covers defects in materials and workmanship under normal use. Please retain your proof of purchase for warranty claims.
For specific warranty terms and conditions, or to initiate a warranty claim, please contact Pro Chaser customer support.
11. Support
If you have any questions regarding the installation, operation, or maintenance of your Pro Chaser 951-12785 Carburetor, or if you require technical assistance, please contact Pro Chaser customer support. When contacting support, please have your product model number (951-12785) and purchase information readily available.
For further assistance, you may also refer to the original equipment manufacturer's (Yard Machines) service manual for your specific tiller model.