Introduction
Thank you for choosing the Motorola AmphisoundX 5.1 Channel Home Theatre System. This manual provides essential information for the safe and efficient setup, operation, and maintenance of your new audio system. Please read these instructions thoroughly before use and retain them for future reference.
Safety Information
- Electrical Safety: Ensure the power supply voltage matches the rating indicated on the unit. Do not expose the unit to rain or moisture to prevent fire or electric shock.
- Ventilation: Maintain adequate space around the unit for proper ventilation. Do not block any ventilation openings.
- Placement: Place the system on a stable, flat surface. Avoid direct sunlight, heat sources, or areas with excessive dust or vibration.
- Cleaning: Disconnect the power cord before cleaning. Use a soft, dry cloth. Do not use liquid cleaners or aerosol cleaners.
- Servicing: Do not attempt to service this product yourself. Refer all servicing to qualified service personnel.
Package Contents
Verify that all items listed below are included in your package:
- 1 x Subwoofer Unit
- 5 x Satellite Speakers
- 1 x Remote Control
- 1 x Power Cable
- 1 x Audio Cable (e.g., RCA to 3.5mm or HDMI cable, depending on model variant)
- 1 x User Manual (this document)
Product Overview
The Motorola AmphisoundX 5.1 Channel Home Theatre System consists of a central subwoofer unit, five satellite speakers, and a remote control for convenient operation. The subwoofer houses the main amplifier and connectivity ports, while the satellite speakers provide immersive surround sound.
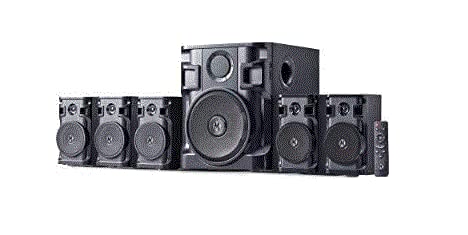
Image of the Motorola AmphisoundX 5.1 Channel Home Theatre System, showing the central subwoofer unit flanked by five satellite speakers and a remote control. This illustration helps identify the main components of the system.
Setup
1. Speaker Placement
- Front Speakers (Left, Right): Place these on either side of your television, equidistant from the viewing position.
- Center Speaker: Position directly above or below your television, centered with the screen.
- Surround Speakers (Left, Right): Place these to the sides or slightly behind your main listening position, at ear level or slightly above.
- Subwoofer: Can be placed anywhere in the room, typically near a wall or corner for enhanced bass response. Experiment with placement for optimal sound.
2. Connecting Speakers
- Identify the speaker output terminals on the rear of the subwoofer unit. These are typically color-coded or labeled for each channel (Front L/R, Center, Surround L/R).
- Connect each satellite speaker to its corresponding output terminal on the subwoofer using the provided speaker wires. Ensure correct polarity (positive to positive, negative to negative).
3. Connecting Audio Sources
Connect your audio sources to the subwoofer unit using the appropriate cables.
- HDMI ARC: Connect an HDMI cable from the HDMI ARC port on your television to the HDMI ARC input on the subwoofer. This allows audio from your TV to be sent to the home theatre system.
- Bluetooth: For wireless audio streaming from a smartphone, tablet, or computer.
- AUX Input: Use a 3.5mm or RCA audio cable to connect devices with an analog audio output.
- USB Input: Insert a USB drive containing audio files for direct playback.
4. Power Connection
Connect the power cable to the subwoofer unit and then plug it into a standard AC power outlet.
Operating Instructions
1. Power On/Off
Press the POWER button on the remote control or the main unit to turn the system on or off.
2. Input Selection
Press the INPUT or SOURCE button on the remote control or main unit to cycle through available audio sources (HDMI ARC, Bluetooth, AUX, USB).
3. Volume Control
Use the VOLUME + and VOLUME - buttons on the remote control or main unit to adjust the master volume. Press the MUTE button to temporarily silence the audio.
4. Bluetooth Pairing
- Switch the system to Bluetooth input mode. The display will indicate 'BT' or 'PAIRING'.
- Enable Bluetooth on your mobile device and search for available devices.
- Select "Motorola AmphisoundX" from the list. Once paired, the system will confirm the connection.
5. Remote Control Functions
The remote control provides full functionality for your home theatre system. Refer to the diagram on the remote for specific button layouts and functions, including playback controls for USB mode, bass/treble adjustments, and individual channel level controls (if available).
Maintenance
Cleaning
Wipe the surfaces of the subwoofer and satellite speakers with a soft, dry, lint-free cloth. Do not use abrasive cleaners, waxes, or solvents as they may damage the finish.
Storage
If storing the system for an extended period, disconnect it from the power outlet and store it in a cool, dry place, away from direct sunlight and extreme temperatures.
Troubleshooting
| Problem | Possible Cause | Solution |
|---|---|---|
| No power | Power cable not connected; Power outlet faulty | Ensure power cable is securely connected; Try a different power outlet. |
| No sound | Incorrect input selected; Volume too low; Speaker wires loose | Select the correct input source; Increase volume; Check all speaker connections. |
| Bluetooth not connecting | Device not in pairing mode; Out of range; Previously paired device connected | Ensure system is in Bluetooth pairing mode; Move device closer; Disconnect from other Bluetooth devices. |
| Distorted sound | Volume too high; Poor audio source quality; Loose connections | Reduce volume; Try a different audio source; Check all cable connections. |
Specifications
- Model: MT150-HT51-cr
- Power Output (RMS): 150 W
- Channels: 5.1 Channel
- Bluetooth Version: 5.0
- Wireless Range: 10 meters
- Connectivity: HDMI ARC, Bluetooth, AUX, USB
- Power Source: AC Adapter
- Product Dimensions (L x W x H): Approximately 50 x 52.8 x 49 cm
- Item Weight: Approximately 7.52 kg
- Color: Black
Warranty and Support
This Motorola AmphisoundX Home Theatre System comes with a minimum six-month supplier-backed warranty. Please retain your purchase receipt as proof of purchase for warranty claims.
For technical support, service, or warranty inquiries, please contact your retailer or the authorized service center. Do not attempt to repair the unit yourself, as this may void your warranty.


