
1. Important Safety Instructions
Always read and understand all safety warnings, instructions, illustrations, and specifications provided with this power tool. Failure to follow all instructions listed below may result in electric shock, fire, and/or serious injury.
Work Area Safety
- Keep the work area clean and well-lit. Cluttered or dark areas invite accidents.
- Do not operate power tools in explosive atmospheres, such as in the presence of flammable liquids, gases, or dust. Power tools create sparks which may ignite the dust or fumes.
- Keep children and bystanders away while operating a power tool. Distractions can cause you to lose control.
Electrical Safety
- Power tool plugs must match the outlet. Never modify the plug in any way.
- Avoid body contact with earthed or grounded surfaces, such as pipes, radiators, ranges, and refrigerators. There is an increased risk of electric shock if your body is earthed or grounded.
- Do not expose power tools to rain or wet conditions. Water entering a power tool will increase the risk of electric shock.
Personal Safety
- Stay alert, watch what you are doing, and use common sense when operating a power tool.
- Use personal protective equipment. Always wear eye protection. Protective equipment such as dust masks, non-skid safety shoes, hard hats, or hearing protection used for appropriate conditions will reduce personal injuries.
- Prevent unintentional starting. Ensure the switch is in the off-position before connecting to a power source, picking up, or carrying the tool.
2. Product Overview
The Ingco CDLI1221 is a versatile 12V cordless drill designed for various drilling and fastening tasks. It features a compact design, two mechanical speed settings, and an integrated LED light for improved visibility.

Figure 2.1: Full view of the Ingco CDLI1221 12V Cordless Drill, showcasing its ergonomic handle and battery pack.
Key Components:
- Chuck: Holds drill bits and screwdriver bits.
- Torque Adjustment Ring: Sets the clutch for driving screws.
- Speed Selector Switch: Changes between high and low mechanical speeds.
- Trigger Switch: Activates the drill and controls variable speed.
- Forward/Reverse Selector: Changes rotation direction.
- Battery Pack: Provides power to the drill.
- LED Work Light: Illuminates the work area.
3. Setup
3.1 Charging the Battery
- Ensure the battery charger is connected to a standard power outlet.
- Slide the battery pack into the charger until it clicks into place.
- The charger indicator light will show the charging status. A full charge typically takes approximately 3 hours.
- Once fully charged, remove the battery from the charger.
Note: For optimal battery life, avoid overcharging and allow the battery to cool before charging if it has been recently used.
3.2 Installing/Removing Drill Bits
- Ensure the drill is switched off and the forward/reverse selector is in the center (locked) position to prevent accidental starting.
- Rotate the chuck counter-clockwise to open the jaws.
- Insert the desired drill bit or screwdriver bit into the chuck, ensuring it is centered.
- Rotate the chuck clockwise to tighten the jaws securely around the bit. Hand-tighten firmly.
- To remove a bit, rotate the chuck counter-clockwise until the jaws open, then pull the bit out.
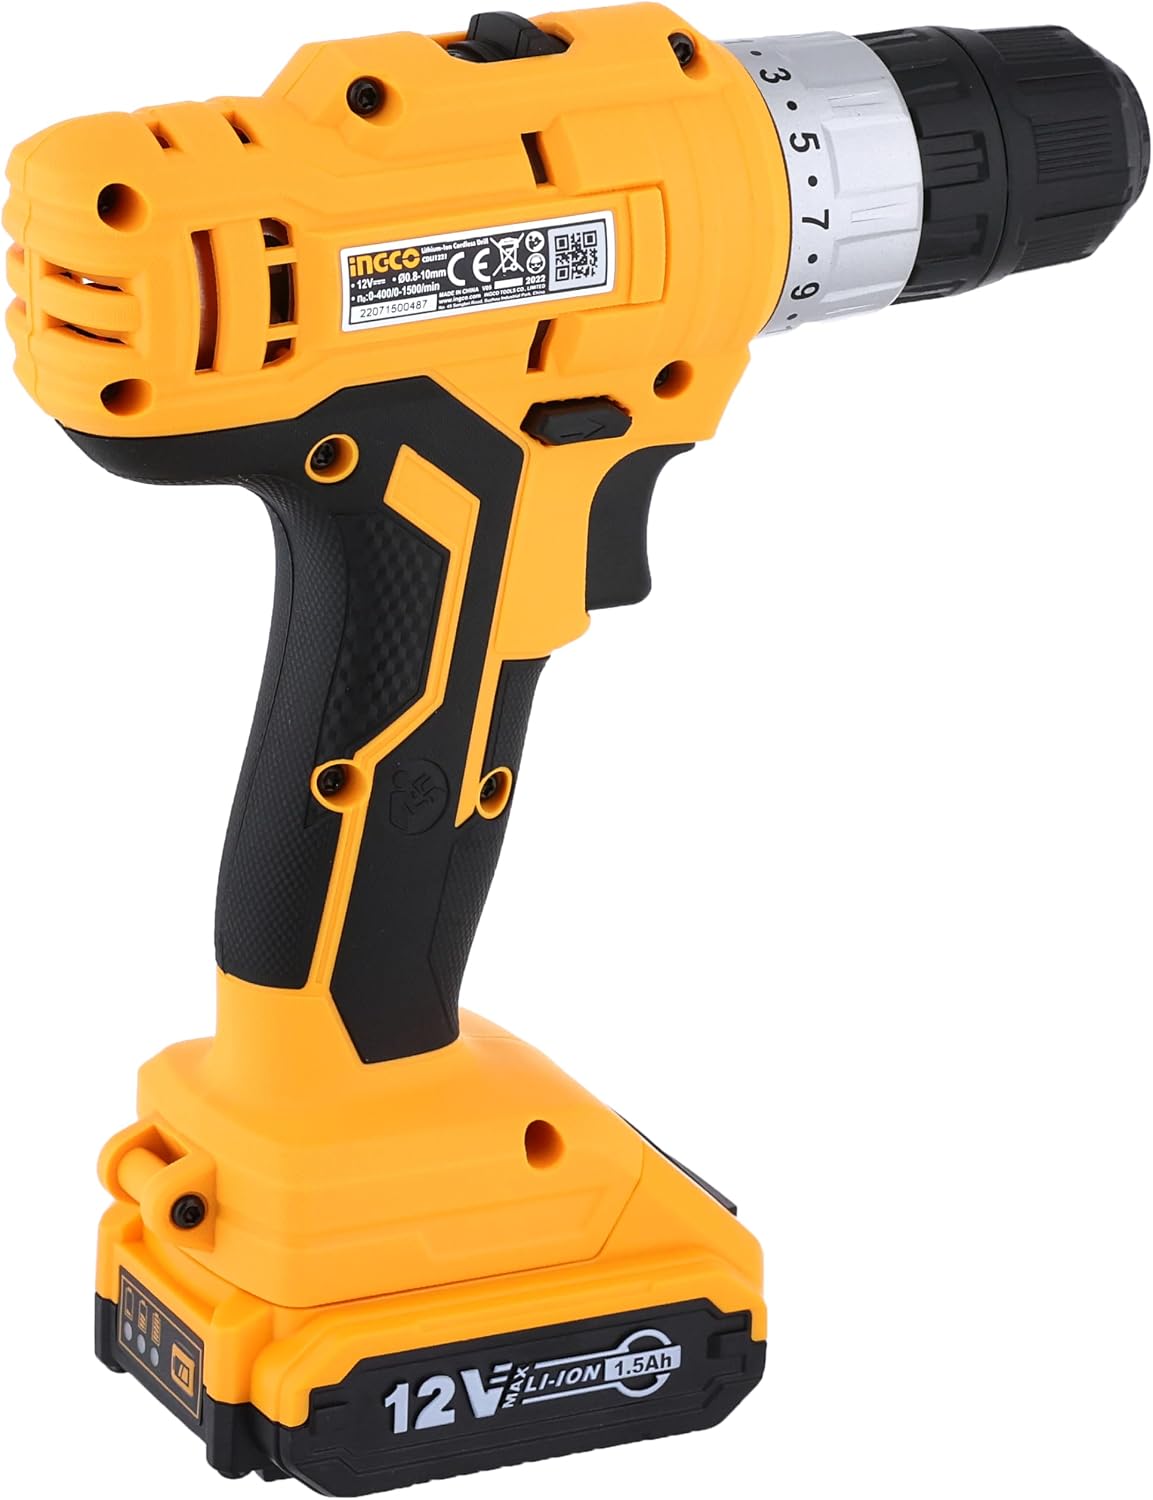
Figure 3.1: Close-up view of the drill's chuck and torque adjustment ring, illustrating where bits are inserted and torque is set.
4. Operating Instructions
4.1 Selecting Speed
- The drill has two mechanical speed settings:
- Speed 1 (Low): 0-350 RPM. Use for high torque applications like driving screws or drilling large holes in soft materials.
- Speed 2 (High): 0-1350 RPM. Use for fast drilling in wood, plastic, or metal with smaller bits.
- To change speed, slide the speed selector switch located on top of the drill. Ensure the drill is stopped before changing speeds.
4.2 Adjusting Torque
- The torque adjustment ring has 15+1 settings. The numbered settings (1-15) are for driving screws, with higher numbers providing more torque before the clutch engages.
- The drill symbol setting is for drilling, providing maximum torque without clutch engagement.
- Rotate the torque adjustment ring to select the desired setting. Start with a lower setting for softer materials or smaller screws and increase as needed.
4.3 Drilling and Driving
- Select the appropriate speed and torque setting for your task.
- Set the forward/reverse selector to the desired rotation (forward for drilling/driving, reverse for removing screws).
- Position the drill bit or screwdriver bit on the workpiece.
- Press the trigger switch to start the drill. The variable speed allows for precise control; press lightly for slower speed and harder for faster speed.
- Apply steady, even pressure. Do not force the drill.
- The integrated LED light will illuminate the work area when the trigger is pressed.
5. Maintenance
5.1 Cleaning
- Always disconnect the battery pack before performing any cleaning or maintenance.
- Use a soft, damp cloth to clean the exterior of the drill. Do not use harsh chemicals or abrasive cleaners.
- Keep the ventilation openings clear of dust and debris to prevent overheating. Use compressed air if necessary.
- Clean the chuck jaws regularly to ensure proper grip on bits.
5.2 Storage
- Store the drill and battery pack in a cool, dry place, away from direct sunlight and moisture.
- Ensure the battery is partially charged (around 50%) before long-term storage.
- Keep out of reach of children.
6. Troubleshooting
| Problem | Possible Cause | Solution |
|---|---|---|
| Drill does not start | Battery not charged or improperly inserted; Forward/Reverse selector in center position. | Charge battery and ensure it is fully inserted; Move selector to forward or reverse position. |
| Loss of power during operation | Battery charge is low. | Recharge the battery pack. |
| Bit slips in chuck | Chuck not tightened sufficiently; Bit shank is dirty or damaged. | Tighten chuck firmly; Clean or replace the bit. |
| Drill overheats | Blocked ventilation slots; Excessive continuous use. | Clear ventilation slots; Allow drill to cool down. |
7. Specifications
Detailed technical specifications for the Ingco CDLI1221 Cordless Drill.

Figure 7.1: Product dimensions of the Ingco CDLI1221 drill, showing its compact size.
| Feature | Detail |
|---|---|
| Brand | Ingco |
| Model Number | CDLI1221 |
| Voltage | 12 Volts |
| Battery Type | Lithium-Ion |
| Battery Capacity | 1.5 Ampere Hours |
| No-Load Speed (Low) | 0-350 RPM |
| No-Load Speed (High) | 0-1350 RPM |
| Maximum Torque | 25 Newton Meters |
| Torque Settings | 15+1 |
| Chuck Capacity | 0.8-10 mm |
| Wood Drilling Capacity | 30 mm |
| Metal Drilling Capacity | 10 mm |
| Special Features | Variable Speed, Integrated LED Work Light |
| Materials | Plastic |
| Product Dimensions | 10 x 20 x 37 cm |
| Item Weight | 209 grams |
8. Warranty and Support
8.1 Warranty Information
This Ingco CDLI1221 product carries a manufacturer's warranty for 6 months from the date of purchase. This warranty covers defects in materials and workmanship under normal use.
The warranty does not cover damage caused by misuse, abuse, normal wear and tear, unauthorized repairs, or failure to follow operating instructions.
8.2 Customer Support
For warranty claims, technical assistance, or service inquiries, please contact the manufacturer or their authorized service agent. You may also contact the retailer where the product was purchased for further details and support.
Please have your product model number (CDLI1221) and proof of purchase available when contacting support.


