1. Overview
The Bodyguard 1200Mbps Dual Band WiFi Extender is designed to expand the coverage and enhance the signal strength of your existing wireless network. It helps eliminate Wi-Fi 'dead zones' in your home or office, providing a more stable and faster internet connection across a wider area. This device supports both 2.4GHz and 5GHz wireless bands, offering flexible connectivity options and high-speed data transfer.

Image 1.1: Front view of the Bodyguard WiFi Extender, showing its compact design and signal indicators.
2. Key Features
- Dual-band AC1200 High-Speed Transmission: Provides up to 300Mbps on 2.4GHz and 867Mbps on 5GHz, minimizing data loss and supporting high-definition video streaming and online gaming.
- 360° WiFi Coverage: Equipped with 4 high-gain external antennas, offering extended coverage up to 1200 square feet and improved signal penetration through walls.
- Multiple Operating Modes: Supports Repeater Mode to extend existing Wi-Fi coverage and AP (Access Point) Mode to convert a wired network into a wireless one.
- Ethernet Ports: Includes two Ethernet ports for connecting wired devices such as smart TVs, desktop computers, or gaming consoles.
- Universal Compatibility: Works with any 802.11b/g/n/a/ac wireless internet router and can connect up to 20 devices simultaneously.
- Simple Installation: Features a WPS button for quick setup and a smart Wi-Fi signal indicator to help find the optimal placement.
- Enhanced Security: Maximizes network security to protect your data and prevent unauthorized access.

Image 2.1: Visual representation of the dual-band capabilities and high-speed data transfer rates of the extender.

Image 2.2: The extender's 4 high-gain antennas provide strong penetration and wider coverage for multiple users.
3. Package Contents
Please verify that all items are present in your package:
- 1 x Bodyguard 1200Mbps Wireless Range Extender / WiFi Signal Booster (with 4 antennas)
- 1 x User Manual
4. Product Diagram
Familiarize yourself with the physical components of your WiFi Extender:

Image 4.1: Detailed view of the extender's features, including adjustable antennas, ventilation for heat dissipation, Ethernet ports, and the WPS button for quick setup.
- 4 Antennas: For enhanced signal transmission and reception.
- Ventilation Design: Ensures proper heat dissipation for stable operation.
- Adjustable Antennas: Allows for optimal positioning to maximize signal coverage.
- Ethernet Port (x2): For wired connections to devices.
- WPS Button: For quick and secure connection to your router.
- LED Indicators: Display power, Wi-Fi status, and signal strength.
5. Setup Guide
This section provides instructions for setting up your WiFi Extender in different operating modes.
5.1. Repeater Mode Setup (Extending Existing Wi-Fi)
Repeater mode extends the coverage of your existing wireless network.
- Power On: Plug the WiFi Extender into an electrical outlet near your main router. Wait for the power indicator light to stabilize.
- Connect to Extender: On your mobile phone or computer, search for available Wi-Fi networks. Connect to either WiFi 2.4G pro_xxxxxx or WiFi 5G pro_xxxxxx (where 'xxxxxx' are the last 6 digits of the extender's MAC address).
- Access Setup Page: Open a web browser and enter the default IP address (usually 192.168.1.1 or 192.168.0.1, refer to the manual for exact address) or the default domain name (e.g., repeater.net). Follow the on-screen prompts to log in (default username/password is often 'admin'/'admin').
- Select Repeater Mode: On the setup page, click on 'Repeater Mode' to initiate the network search.
- Choose Network: Select the wireless signal you wish to extend from the list. If your network is hidden, you will need to add it manually.
- Enter Password: Input the password for your main router's Wi-Fi network. You may also choose to set a new name for the extended Wi-Fi network if desired.
- Complete Configuration: Click the 'Finish' or 'Apply' button to complete the repeater mode configuration. The extended Wi-Fi's password will be the same as your router's by default unless you changed it.
- Relocate Extender: Once configured, unplug the extender and move it to a location between your router and the Wi-Fi 'dead zone'. Ensure the signal indicator shows a good connection to your main router.

Image 5.1: Illustration of the Repeater Mode, extending the wireless signal from your existing router.
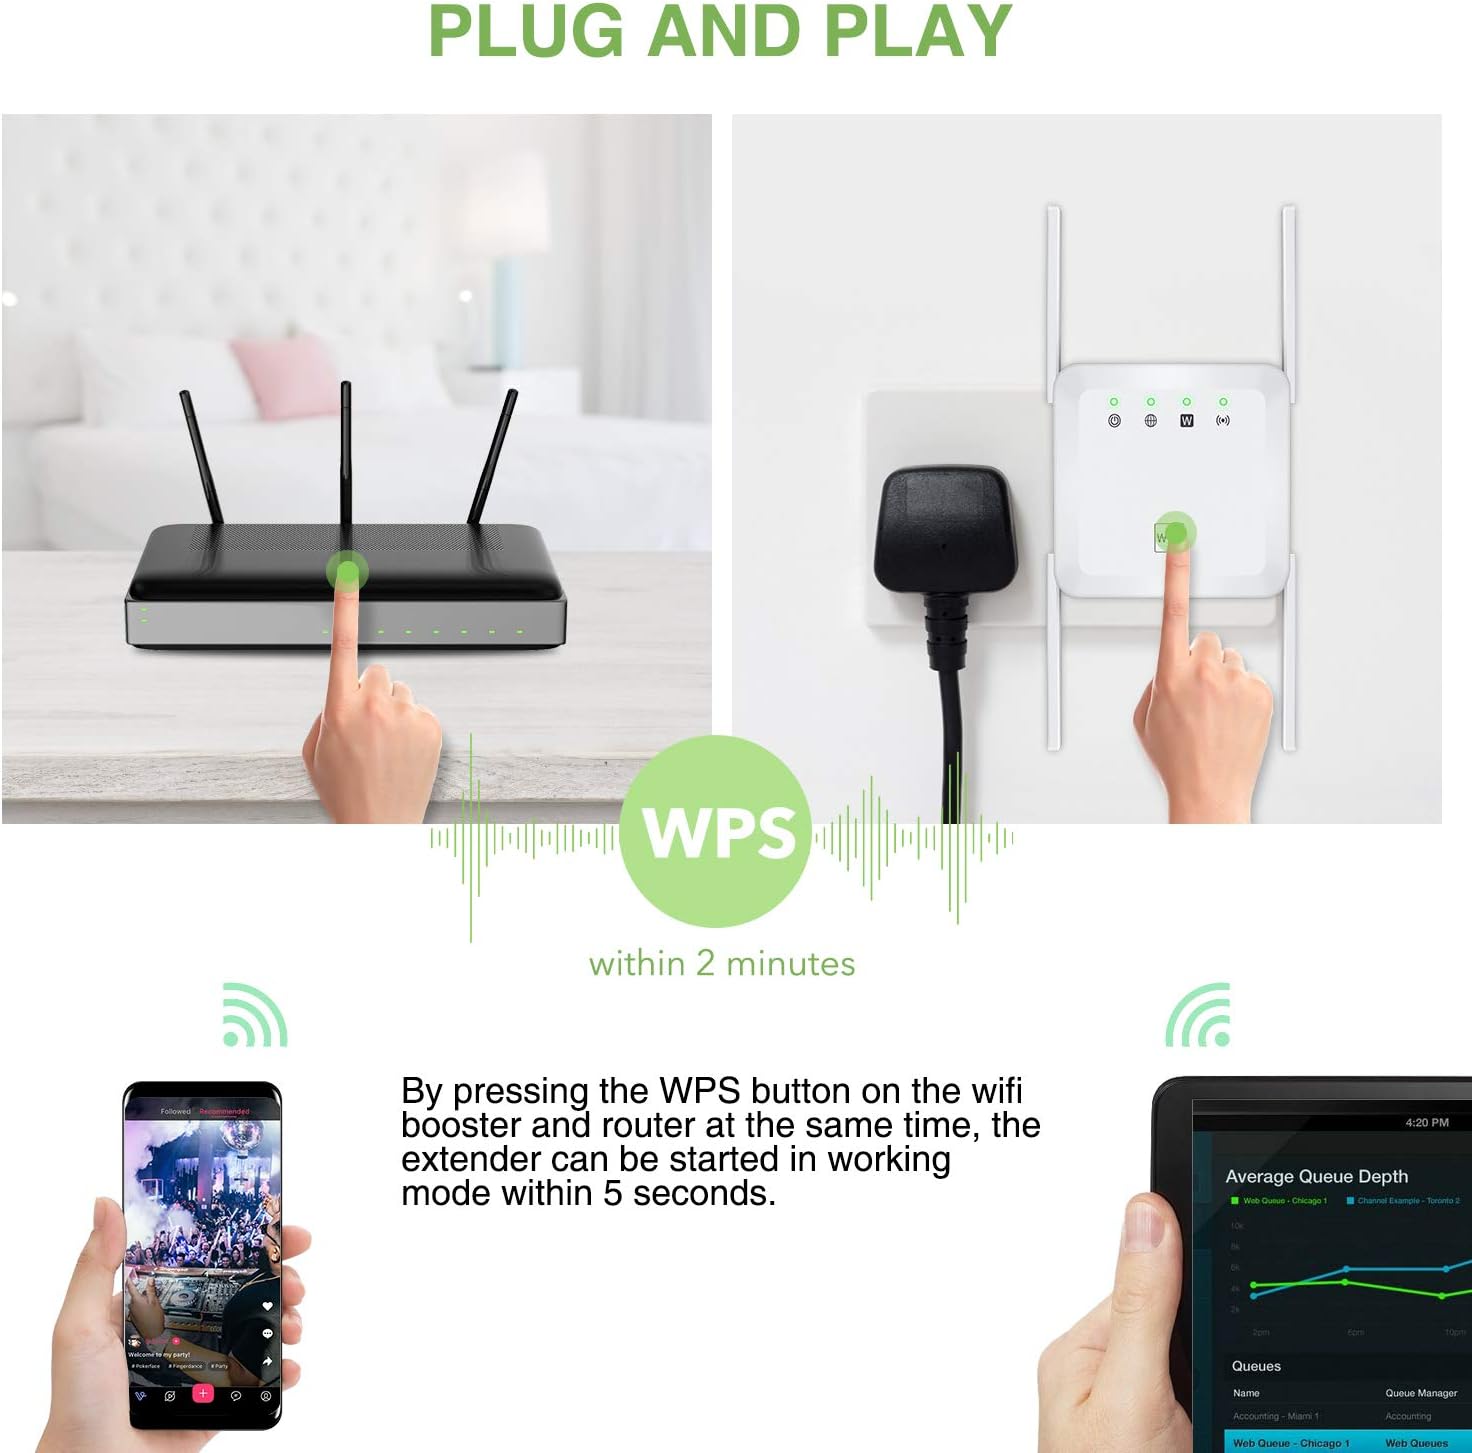
Image 5.2: Using the WPS button for a quick and easy setup of the extender.
5.2. AP Mode Setup (Access Point)
AP mode converts a wired network connection into a wireless access point, ideal for areas with only Ethernet access.
- Power On: Plug the WiFi Extender into an electrical outlet.
- Connect Ethernet: Connect an Ethernet cable from your wired router or network port to one of the Ethernet ports on the WiFi Extender.
- Connect to Extender: On your mobile phone or computer, search for available Wi-Fi networks. Connect to either WiFi 2.4G pro_xxxxxx or WiFi 5G pro_xxxxxx.
- Access Setup Page: Open a web browser and enter the default IP address or domain name. Log in to the setup interface.
- Select AP Mode: On the setup page, select 'AP Mode'.
- Configure Wireless Settings: Set a new Wi-Fi network name (SSID) and password for your new wireless access point.
- Complete Configuration: Click 'Finish' or 'Apply'. The extender will restart and broadcast your new wireless network.
Image 5.3: Illustration of the AP Mode, converting a wired connection into a wireless access point.
6. Operating Modes
The Bodyguard WiFi Extender supports two primary operating modes:
- Repeater Mode: This mode is used to extend the wireless coverage of an existing Wi-Fi network. The extender receives the wireless signal from your main router and re-broadcasts it, effectively expanding the range and eliminating signal dead zones.
- AP (Access Point) Mode: In this mode, the extender connects to a wired network (e.g., via an Ethernet cable from your router or a wall port) and transforms it into a wireless network. This is useful for providing Wi-Fi connectivity in areas where only wired internet access is available.
7. Universal Compatibility
The Bodyguard WiFi Extender is designed for broad compatibility, working seamlessly with a wide range of devices and network standards.
- Router Compatibility: Compatible with any 802.11b/g/n/a/ac wireless internet router.
- Device Connectivity: Can connect up to 20 devices simultaneously, including laptops, smartphones, speakers, IP cameras, tablets, and other IoT devices.
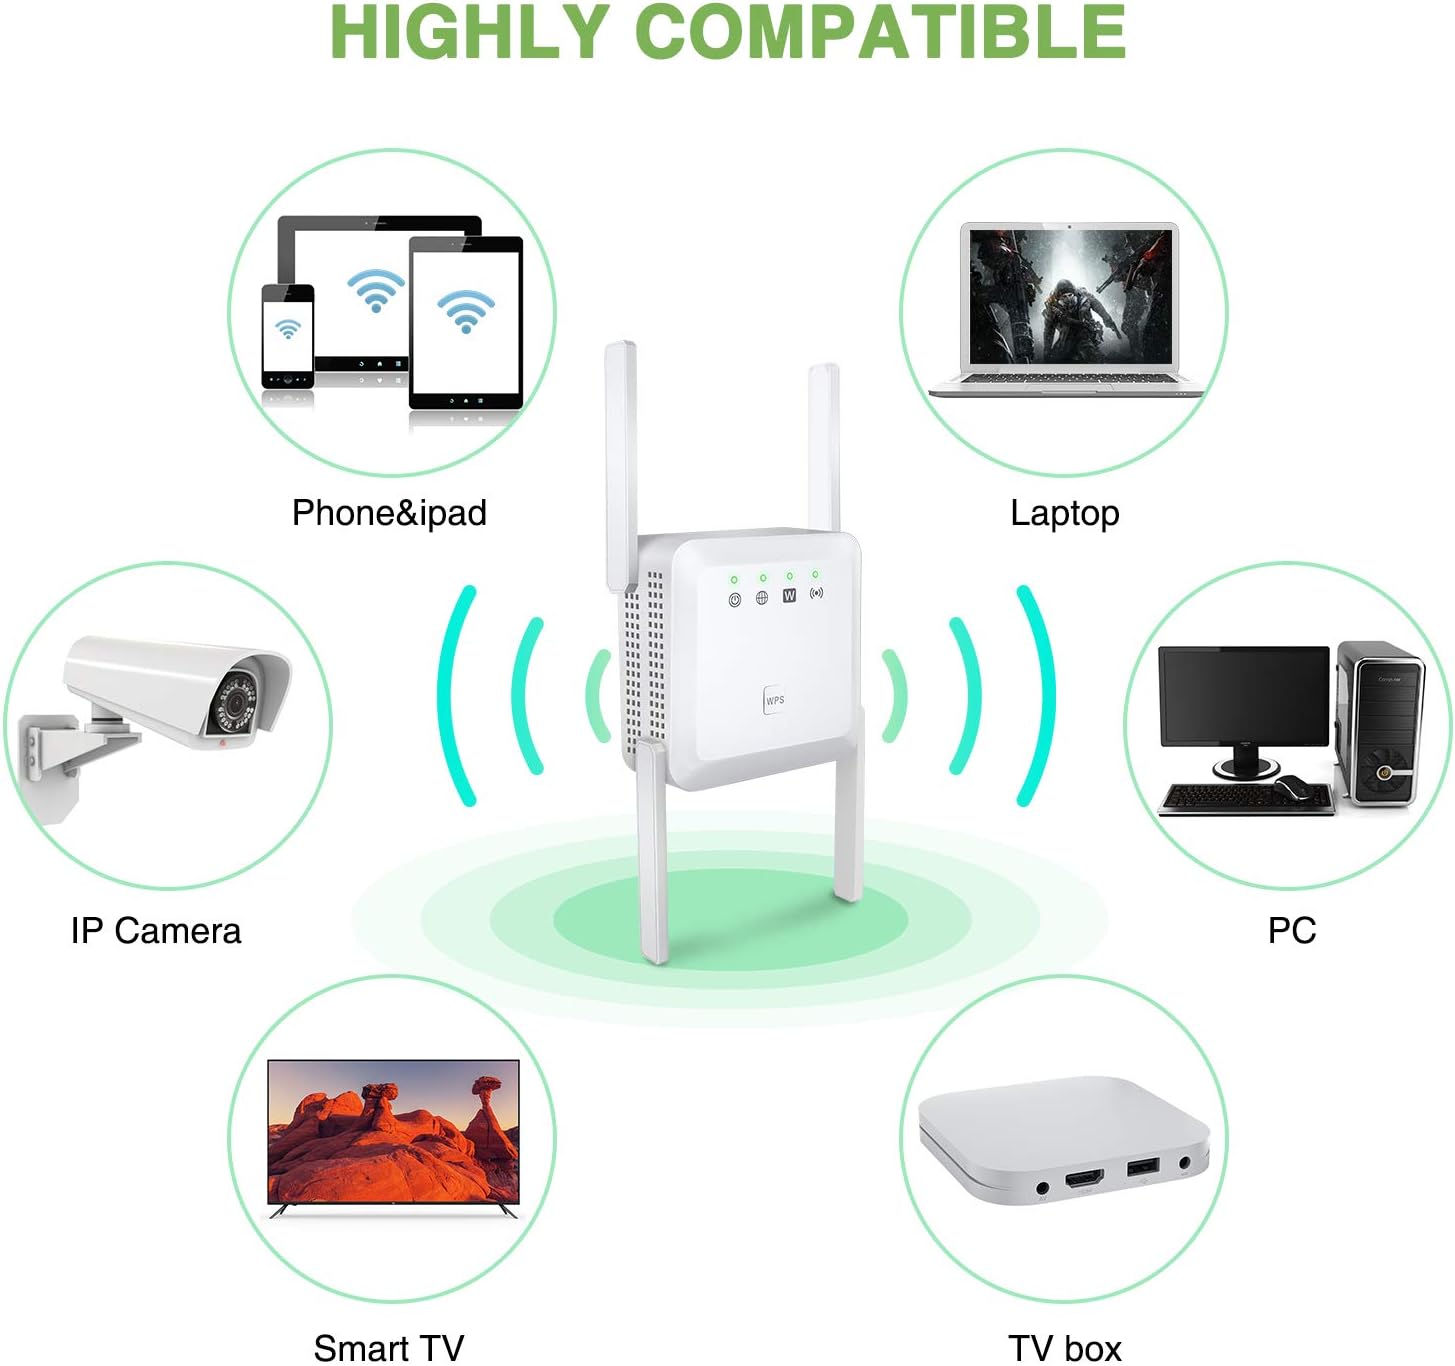
Image 7.1: The extender provides wireless connectivity to a diverse range of electronic devices.
8. Maintenance
To ensure optimal performance and longevity of your WiFi Extender, consider the following maintenance tips:
- Placement: Position the extender in an open area, away from obstructions like large metal objects, concrete walls, or other electronic devices that may cause interference.
- Firmware Updates: Periodically check the manufacturer's website for firmware updates. Keeping the firmware updated can improve performance, security, and add new features.
- Cleaning: Gently clean the exterior of the device with a soft, dry cloth. Avoid using liquid cleaners or abrasive materials. Ensure ventilation holes are free from dust.
- Restart: If you experience performance issues, try restarting the extender by unplugging it from the power outlet for 10 seconds and then plugging it back in.
- Environmental Conditions: Operate the device within recommended temperature and humidity ranges to prevent damage.
9. Troubleshooting
If you encounter issues with your WiFi Extender, refer to the following common problems and solutions:
- No Power Indicator Light:
- Ensure the extender is securely plugged into a working electrical outlet.
- Test the outlet with another device to confirm it has power.
- Cannot Connect to Extender's Wi-Fi:
- Verify you are selecting the correct network name (SSID) for the extender.
- Ensure you are entering the correct Wi-Fi password. If you forgot it, you may need to reset the extender and reconfigure.
- Move closer to the extender to ensure you are within its signal range during initial setup.
- Poor Signal or Slow Speed After Setup:
- Relocate the extender to a position roughly halfway between your main router and the desired coverage area.
- Check the extender's signal indicator lights; they should show a strong connection to your main router.
- Minimize physical obstructions (walls, large furniture) between the extender and your devices, and between the extender and the main router.
- Ensure there are no other devices causing interference (e.g., microwaves, cordless phones).
- Cannot Access Setup Page:
- Ensure your device is connected to the extender's Wi-Fi network (not your main router's).
- Double-check the IP address or domain name entered in the browser.
- Try a different web browser.
- Temporarily disable any VPN or firewall software on your computer.
- Factory Reset:
- If all else fails, locate the reset button (often a small pinhole) on the extender. With the extender powered on, use a paperclip to press and hold the reset button for 5-10 seconds until the lights flash. This will restore the device to its factory default settings, and you will need to reconfigure it.
10. Specifications
| Brand | Bodyguard |
| Model Number | B091JZD8DB |
| Wireless Type | 802.11a/b/g/n/ac |
| Data Transfer Rate | Up to 1200 Mbps (300Mbps 2.4GHz + 867Mbps 5GHz) |
| Frequency Bands | 2.4 GHz and 5 GHz |
| Antennas | 4 External High-Gain Antennas |
| Ports | 2 x Ethernet Ports |
| Operating Modes | Repeater Mode, AP Mode |
| Coverage Area | Up to 1200 sq ft (approx.) |
| Color | White |
| Package Dimensions | 27.2 x 20.3 x 5.2 cm |
| Item Weight | 157 g |
11. Warranty and Support
For warranty information and technical support, please refer to the documentation included with your product or visit the official Bodyguard website. Keep your purchase receipt as proof of purchase for warranty claims.
If you require further assistance, please contact Bodyguard customer support through the channels provided on their official website.


