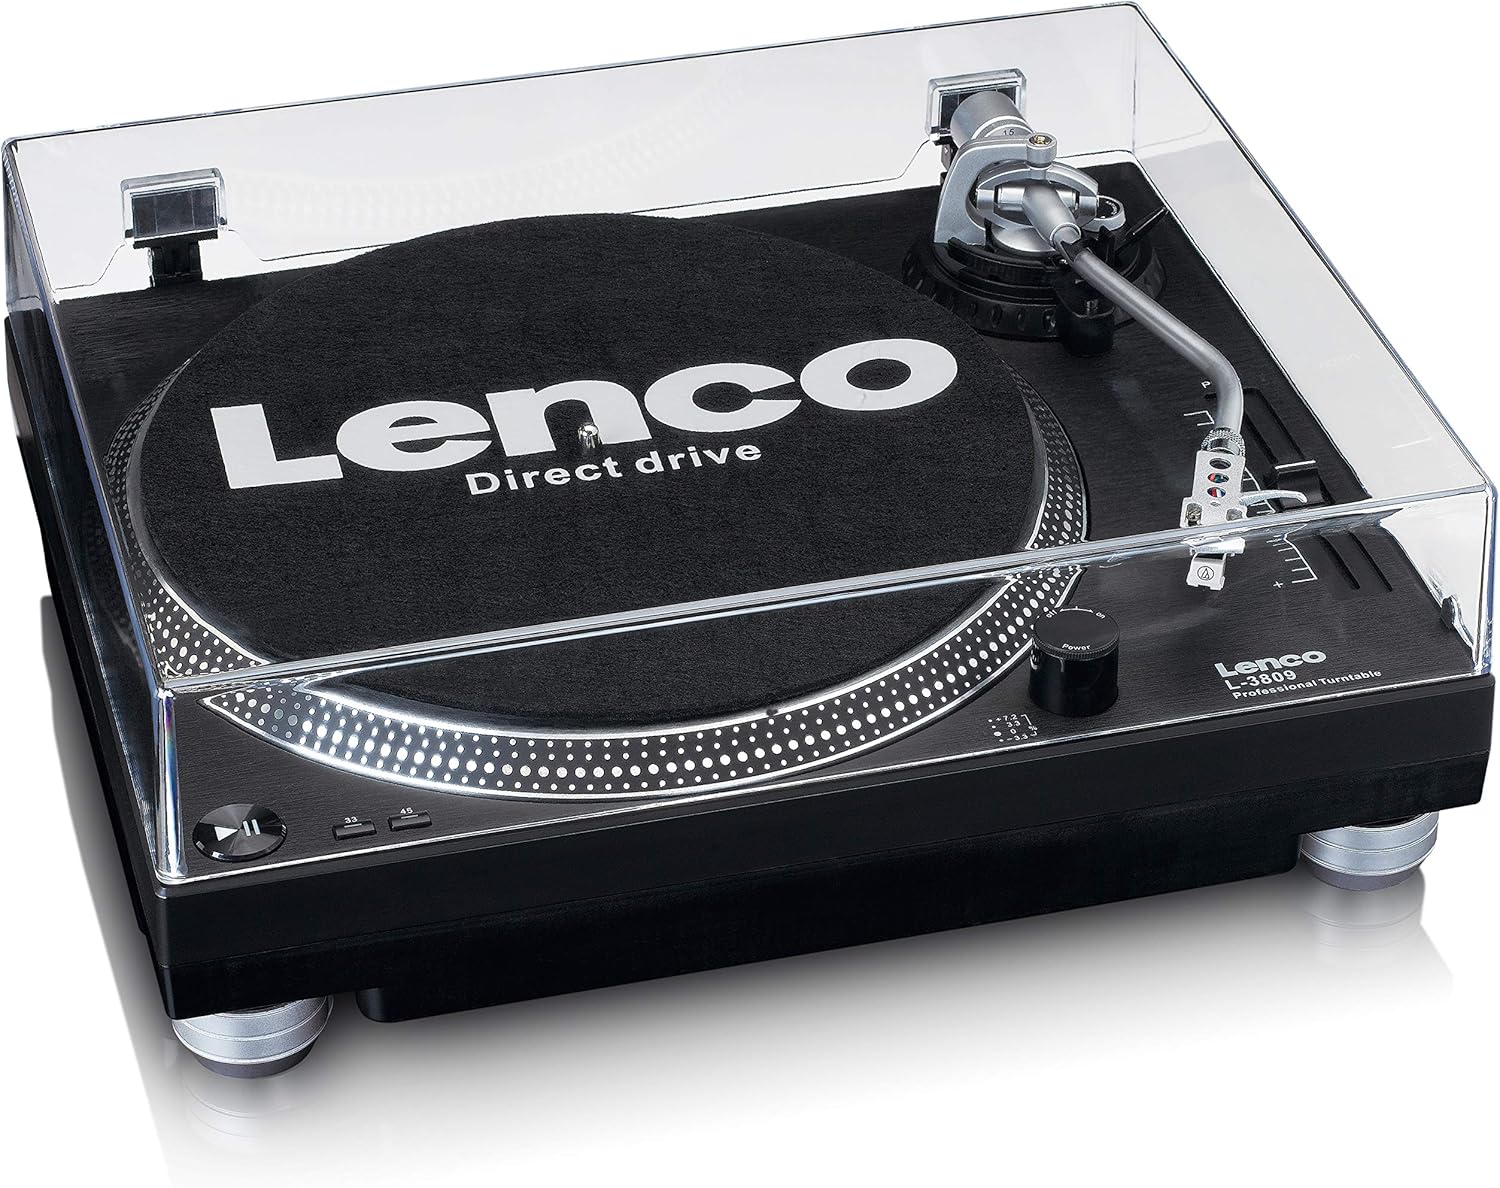
1. Introduction and Overview
The Lenco L-3809 is a versatile direct drive turntable designed for both home audio enthusiasts and DJs. It offers precise playback of vinyl records at 33 and 45 RPM, an integrated preamplifier for flexible connectivity, and a USB port for digitizing your vinyl collection. The unit features a robust direct drive motor, a magnetic cartridge system, a protective dust cover, and anti-vibration feet for stable performance.

2. Setup Guide
2.1 Unpacking and Component Check
Carefully remove all components from the packaging. Ensure the following items are present:
- Lenco L-3809 Turntable Unit
- Dust Cover
- Platter
- Slipmat
- Counterweight
- Headshell with Cartridge and Stylus
- USB Cable
- RCA Cable
- Power Cable
- User Manual (this document)
2.2 Assembly
- Place the Platter: Carefully place the platter onto the center spindle of the turntable unit. Ensure it sits securely.
- Install the Slipmat: Place the felt slipmat on top of the platter.
- Attach the Dust Cover: Insert the hinges of the dust cover into the corresponding slots at the rear of the turntable unit.
- Install Counterweight: Slide the counterweight onto the rear of the tonearm. Rotate it to adjust the tracking force later.
- Install Headshell: Insert the headshell (with cartridge and stylus pre-installed) into the front end of the tonearm. Secure it by rotating the locking ring clockwise.
- Balance the Tonearm:
- Lower the cueing lever.
- Adjust the counterweight by rotating it until the tonearm is perfectly balanced and floats horizontally.
- Once balanced, hold the counterweight steady and rotate only the numbered ring to '0'.
- Rotate the entire counterweight (including the numbered ring) counter-clockwise to the recommended tracking force (refer to cartridge specifications, typically 2-4 grams for standard cartridges).
- Set Anti-Skate: Adjust the anti-skate dial to match the tracking force you set. This prevents the stylus from skipping inwards.
2.3 Connections
Before making any connections, ensure the turntable and all connected audio equipment are powered off.

- Audio Output (RCA): Connect the supplied RCA cable from the 'LINE OUT' jacks on the turntable to an available audio input on your amplifier, receiver, or powered speakers. If your amplifier has a dedicated 'PHONO' input, ensure the turntable's built-in preamplifier is switched off (if applicable, usually a switch near the RCA outputs). If connecting to a 'LINE IN' or 'AUX' input, ensure the turntable's preamplifier is switched on.
- USB Connection: Connect the USB cable from the 'USB TO PC' port on the turntable to an available USB port on your computer. This allows for digitizing your vinyl records using appropriate software (not included).
- Power Connection: Connect the power cable to the 'AC IN' port on the turntable and then plug it into a standard wall outlet.
3. Operating Instructions
3.1 Powering On/Off
Locate the power switch at the rear of the turntable. Flip it to the 'ON' position to power on the unit. Flip it to 'OFF' when not in use.
3.2 Playing a Record
- Place the Record: Carefully place your vinyl record on the platter.
- Select Speed: Choose the correct playback speed (33 or 45 RPM) using the speed selector buttons on the turntable.
- Adjust Pitch (Optional): Use the pitch control slider to fine-tune the playback speed if needed.
- Lift the Tonearm: Gently lift the tonearm using the cueing lever.
- Position the Stylus: Carefully move the tonearm over the desired starting groove of the record.
- Lower the Tonearm: Slowly lower the cueing lever to gently place the stylus onto the record. The music will begin to play.
- Stopping Playback: At the end of the record, or when you wish to stop, lift the tonearm using the cueing lever, return it to the tonearm rest, and lower the cueing lever.

3.3 USB Recording
To digitize your vinyl collection, connect the turntable to your computer via the USB cable. You will need third-party audio recording software (e.g., Audacity, available online) to capture the audio. Follow the instructions provided with your chosen software for recording and saving your vinyl tracks.
4. Maintenance
4.1 Cleaning the Stylus
A clean stylus is crucial for optimal sound quality and to prevent damage to your records. Use a soft brush designed for stylus cleaning, brushing gently from back to front (never side to side or front to back). Clean the stylus regularly, especially before and after each listening session.
4.2 Cleaning the Turntable Unit and Dust Cover
Wipe the turntable unit and dust cover with a soft, dry, lint-free cloth. For stubborn marks, a slightly damp cloth can be used, followed by immediate drying. Avoid using abrasive cleaners, solvents, or chemical sprays, as these can damage the finish.
4.3 Replacing the Stylus/Cartridge
The stylus has a limited lifespan and should be replaced after approximately 300-500 hours of playback, or if you notice a degradation in sound quality. Refer to the cartridge manufacturer's instructions for specific stylus replacement procedures. If replacing the entire cartridge, ensure the new cartridge is compatible with your tonearm and follow the tonearm balancing and anti-skate adjustment steps in Section 2.2.
5. Troubleshooting
| Problem | Possible Cause | Solution |
|---|---|---|
| No sound or very low sound |
|
|
| Distorted or muffled sound |
|
|
| Record plays too fast or too slow |
|
|
| Skipping or jumping |
|
|
6. Specifications
| Feature | Specification |
|---|---|
| Model Name | L-3809 |
| Brand | Lenco |
| Color | Black |
| Connectivity Technology | USB |
| Special Features | Direct Drive, Magnetic Cartridge System, Dust Protection, Vibration Damping Feet |
| Compatible Devices | Personal Computer, Speakers, Headset |
| Maximum Rotation Speed | 45 RPM |
| Included Components | 1 USB cable |
| Material | Aluminum, Plastic, Vinyl |
| Item Weight | 5.56 Kilograms |
7. Warranty and Support
For warranty information and technical support, please refer to the official Lenco website or contact your local Lenco distributor. Keep your proof of purchase for warranty claims. Information regarding spare parts availability and software updates is not available in this document; please consult the manufacturer's official resources for the most current details.


