
TRANE RT-DS-8
Contents
TRANE Packaged Rooftop Air Conditioners User Manual
Model: RT-DS-8
Brand: TRANE
Product Overview
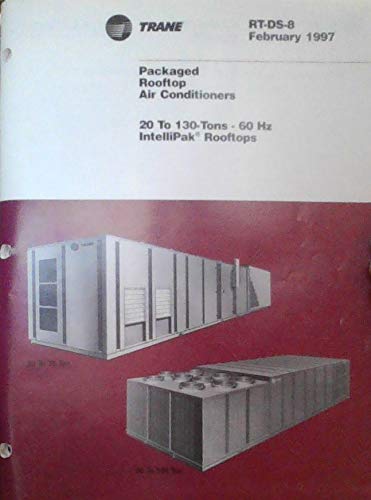
This image displays the front cover of the TRANE Packaged Rooftop Air Conditioners manual. It features the TRANE logo, the model designation RT-DS-8, and the publication date of February 1997. Below the title 'Packaged Rooftop Air Conditioners' and '20 To 130-Tons - 60 Hz IntelliPak Rooftops', there are two illustrations of large industrial rooftop air conditioning units, one appearing longer and more rectangular, and the other shorter and wider with multiple fan outlets on top.
This manual provides essential information for the installation, operation, maintenance, and troubleshooting of TRANE Packaged Rooftop Air Conditioners, specifically models ranging from 20 to 130 Tons with 60 Hz IntelliPak Rooftops, identified by the RT-DS-8 designation. These units are designed for commercial and industrial applications, offering robust climate control solutions.
1. Setup
Proper setup is crucial for the optimal performance and longevity of your TRANE rooftop unit. Ensure all local codes and regulations are followed during installation.
1.1 Pre-Installation Checks
- Site Preparation: Verify the rooftop structure can support the unit's weight. Ensure adequate clearance for service access and airflow.
- Unpacking: Carefully inspect the unit for any shipping damage. Report discrepancies immediately.
- Component Verification: Confirm all components and accessories listed in the packing list are present.
1.2 Unit Placement and Mounting
- Position the unit on a level, structurally sound surface.
- Secure the unit using appropriate mounting hardware to prevent movement due to wind or vibration.
1.3 Electrical Connections
- All electrical work must be performed by a qualified electrician in accordance with national and local electrical codes.
- Connect the main power supply to the unit's designated terminals. Verify voltage and phase match unit specifications.
- Install all necessary control wiring for thermostats, sensors, and building management systems.
1.4 Ductwork Connection
- Connect supply and return air ducts to the unit's flanges. Ensure airtight seals to prevent air leakage.
- Use flexible connectors to minimize vibration transmission to the ductwork.
1.5 Initial Startup Procedures
- Before applying power, perform a final visual inspection of all connections.
- Verify all safety devices are correctly installed and operational.
- Follow the detailed startup sequence provided in the complete technical manual for your specific unit configuration.
2. Operating
Understanding the basic operation of your TRANE IntelliPak rooftop unit will ensure efficient climate control and comfort.
2.1 Control Panel Overview
The unit's control panel provides access to various settings and operational modes. Refer to the specific control interface documentation for detailed button and display functions.
2.2 Basic Operation Modes
- Cooling Mode: Activates the refrigeration cycle to lower the indoor temperature.
- Heating Mode: Activates the heating elements or heat pump cycle to raise the indoor temperature.
- Fan Only Mode: Circulates air without heating or cooling, useful for ventilation.
- Auto Mode: Automatically switches between heating and cooling to maintain the set temperature.
2.3 Temperature Setting
Adjust the desired temperature using the thermostat or building management system interface. Allow time for the unit to reach the set point.
2.4 Scheduling Functions
Many IntelliPak units offer programmable scheduling to optimize energy usage by adjusting temperatures based on occupancy patterns. Consult your control system's manual for programming instructions.
2.5 Safety Precautions During Operation
- Do not block air intake or exhaust vents.
- Keep the area around the unit clear of debris and obstructions.
- Only qualified personnel should access internal components or perform adjustments.
3. Maintenance
Regular maintenance is essential to ensure the efficiency, reliability, and extended lifespan of your TRANE rooftop air conditioner. Adhere to the recommended maintenance schedule.
3.1 Filter Replacement/Cleaning
- Inspect air filters monthly, or more frequently in dusty environments.
- Clean or replace filters as needed to maintain proper airflow and indoor air quality.
3.2 Coil Cleaning
- Condenser Coils: Annually, or more often if exposed to significant debris, clean the outdoor condenser coils to ensure efficient heat rejection.
- Evaporator Coils: Periodically inspect and clean indoor evaporator coils to prevent mold growth and maintain cooling efficiency.
3.3 Fan and Motor Inspection
- Check fan blades for damage or accumulation of dirt.
- Inspect motor bearings and lubricate if necessary (for motors with grease fittings).
- Verify fan belts (if applicable) are in good condition and properly tensioned.
3.4 Refrigerant Charge Verification
This task should only be performed by a certified HVAC technician. Incorrect refrigerant levels can severely impact performance and damage the unit.
3.5 Electrical Component Checks
- Inspect electrical connections for tightness and signs of corrosion.
- Check contactors and relays for wear.
- Verify proper operation of safety switches and controls.
3.6 Drain Pan Cleaning
Regularly clean the condensate drain pan and ensure the drain line is clear to prevent overflow and water damage.
4. Troubleshooting
This section provides guidance for common issues. For complex problems or issues not listed, contact a qualified service technician.
| Problem | Possible Cause | Solution |
|---|---|---|
| Unit Not Starting | No power; tripped breaker; thermostat setting; safety lockout. | Check power supply and breaker. Verify thermostat is set to desired mode and temperature. Reset unit if safety lockout is active. |
| No Cooling/Heating | Dirty air filter; blocked coils; low refrigerant (cooling); faulty heating element (heating). | Clean/replace air filter. Inspect and clean coils. Contact technician for refrigerant or heating element issues. |
| Unusual Noises | Loose fan blades; worn motor bearings; debris in fan. | Inspect fan and motor. Remove any debris. Contact technician for bearing replacement. |
| Water Leaking | Clogged condensate drain line; cracked drain pan. | Clear drain line. Inspect drain pan for damage. |
4.1 Error Codes
IntelliPak units may display error codes on the control panel. Refer to the comprehensive technical manual for a complete list of error codes and their corresponding diagnostic procedures.
4.2 When to Call Professional Service
Contact a certified TRANE service technician if:
- The unit fails to operate after basic troubleshooting.
- You suspect a refrigerant leak.
- Electrical components show signs of damage or overheating.
- Any repair requires specialized tools or knowledge.
5. Specifications
The TRANE RT-DS-8 IntelliPak Rooftop Air Conditioners are designed for robust performance in commercial and industrial settings.
- Capacity Range: 20 to 130 Tons
- Frequency: 60 Hz
- Unit Type: Packaged Rooftop Air Conditioner
- Model Series: IntelliPak Rooftops (RT-DS-8)
- Power Requirements: Varies by tonnage; refer to unit nameplate for specific voltage, phase, and amperage.
- Refrigerant Type: Consult unit nameplate for specific refrigerant type (e.g., R-410A, R-22).
- Dimensions & Weight: Varies significantly by tonnage and configuration. Refer to the detailed product data sheets for specific models.
6. Warranty and Support
For detailed warranty information, please refer to the warranty certificate provided with your unit or contact your authorized TRANE dealer. Warranty terms and conditions may vary based on region and installation.
For technical support, service, or to locate an authorized TRANE service provider, please visit the official TRANE website or contact their customer service line. Always provide your unit's model and serial number when seeking support.
Ask a question about this manual
Ask about setup, troubleshooting, compatibility, parts, safety, or missing instructions. Manuals+ will review the question and use this page’s manual context to help answer it.