
BAOFENG UV-5R+ Plus (Model 28-020-116)
Contents
BAOFENG UV-5R+ Plus Two Way Radio User Manual
Model: UV-5R+ Plus (28-020-116)
1. Introduction
This user manual provides comprehensive instructions for the safe and effective operation of your BAOFENG UV-5R+ Plus Two Way Radio. Please read this manual thoroughly before using the device to ensure proper functionality and to prevent damage.
The BAOFENG UV-5R+ Plus is a versatile dual-band amateur radio transceiver designed for reliable communication. It features a durable metallic shell, a tri-color backlit LCD display, and supports a wide range of frequencies, making it suitable for various outdoor and professional applications.
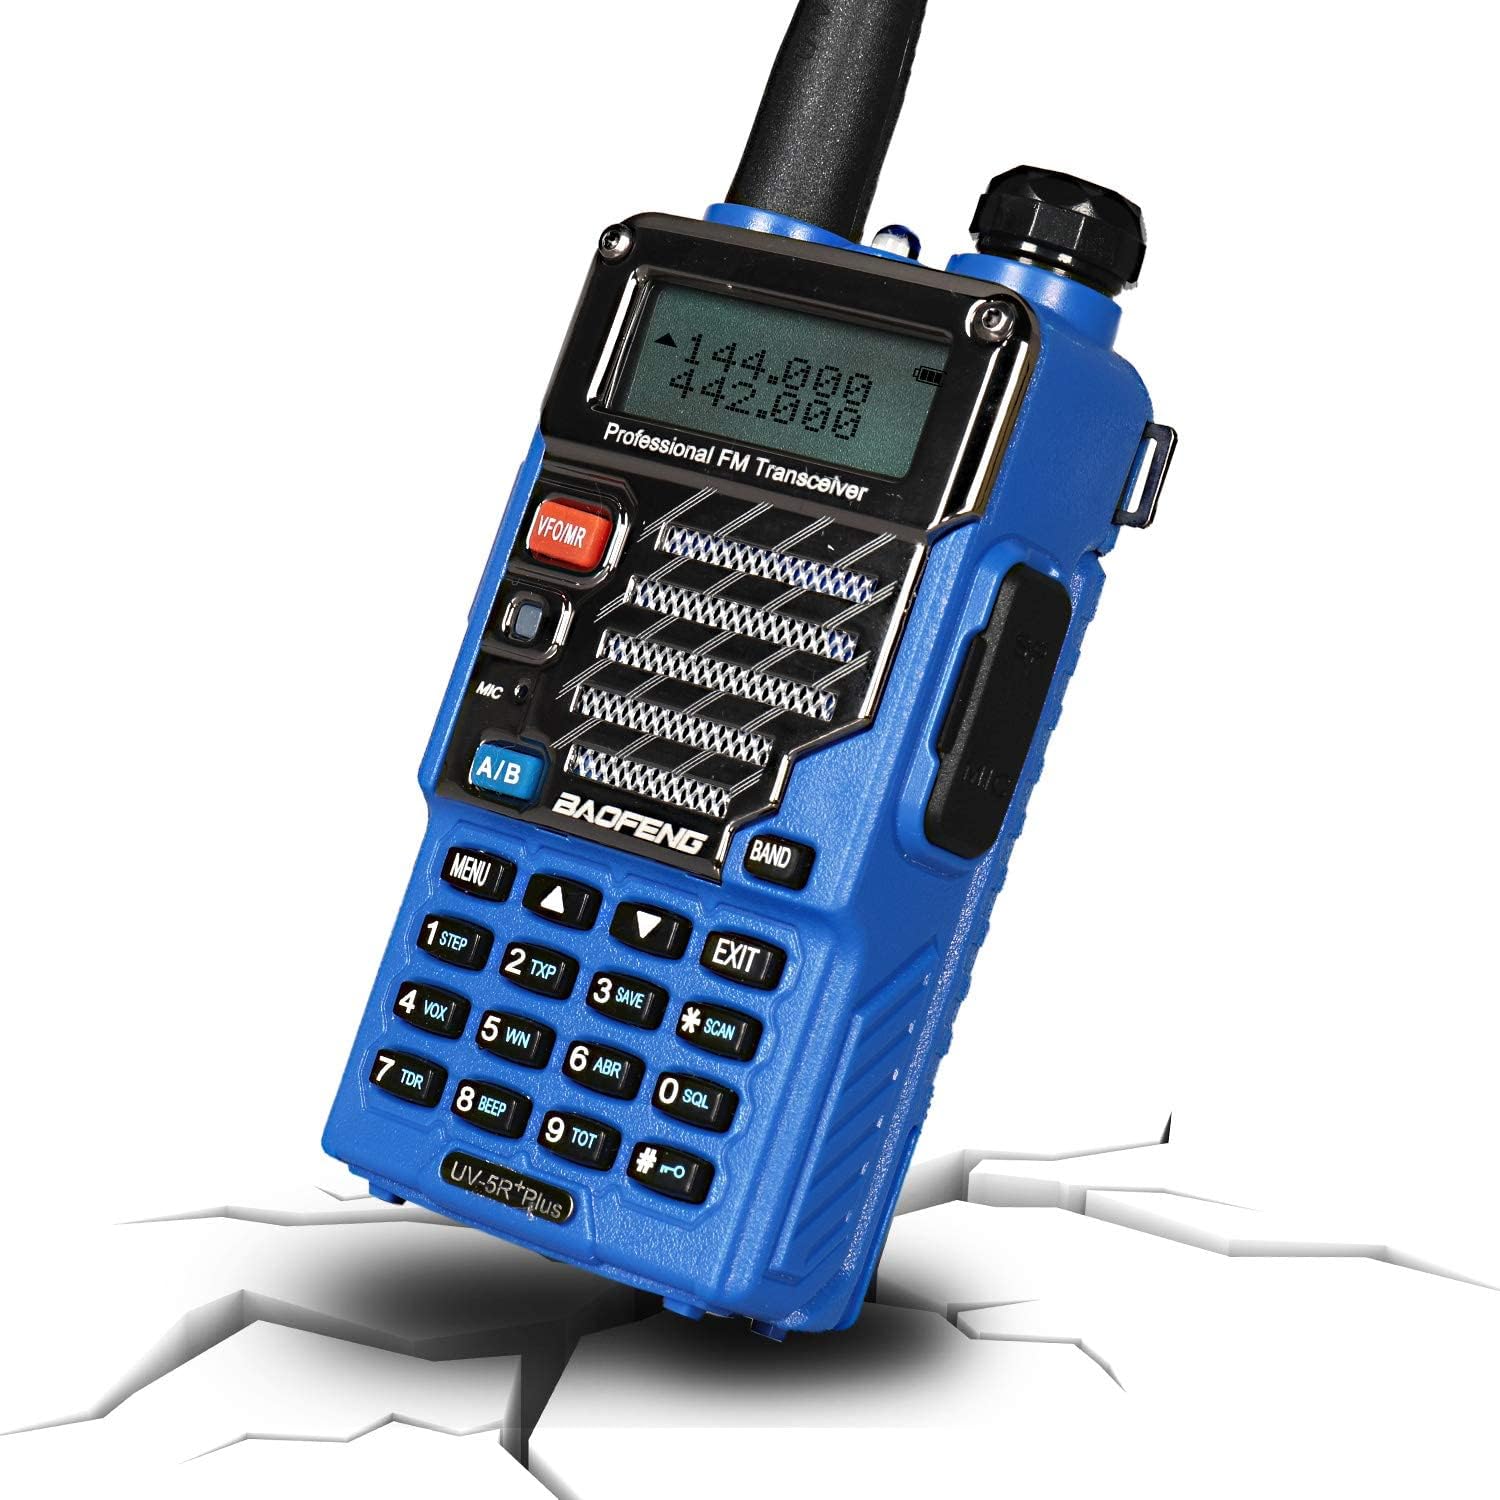
Figure 1.1: BAOFENG UV-5R+ Plus Two Way Radio, Royal Blue model.
2. Product Features
- Power Output: 4 / 1 watts, providing flexible power options for various communication needs.
- CTCSS/DCS: Equipped with 50 CTCSS (Continuous Tone-Coded Squelch System) and 104 DCS (Digitally Coded Squelch) codes for enhanced privacy and interference reduction.
- Durable Design: Features a metallic rugged shell, offering increased durability for outdoor and demanding environments.
- Channel Capacity: Supports 128 channels for extensive communication options.
- BCLO Function: Busy Channel Lock-Out prevents transmission on an occupied frequency.
- VOX Function: Voice Operated Transmission allows for hands-free operation.
- OFFSET Function: Frequency offset for repeater access.
- Battery Compatibility: Compatible with Baofeng 7.4V 3800mAh BL-5L battery.
- Display: Tri-color backlit LCD display for clear visibility in various lighting conditions.
- Integrated Tools: Embedded LED torch and emergency alarm for added utility and safety.
- Portability: High strength and dustproof shell, portable and easy to carry.
- Programming: Supports CHIRP software for easy programming and customization. Compatible with K-plug programming cables.

Figure 2.1: The BAOFENG UV-5R+ Plus is suitable for a variety of applications, including industrial, hospitality, recreational, and security uses.
3. Package Contents
Upon opening the package, please verify that all the following items are included and in good condition:
- BAOFENG UV-5R+ Plus Two Way Radio Unit
- Li-ion Battery (7.4V 1800mAh)
- SMA-F Antenna
- Desktop Charger with AC Adapter
- Earpiece
- Belt Clip
- Hand Strap
- User Manual (this document)

Figure 3.1: Standard package contents for the BAOFENG UV-5R+ Plus radio.
4. Parts Identification
Familiarize yourself with the various parts and controls of your BAOFENG UV-5R+ Plus radio:

Figure 4.1: Front, side, and top views of the radio with numbered components.
- SMA-F Antenna: Connects to the radio for signal transmission and reception.
- Flashlight: Integrated LED light for illumination.
- Knob (ON/OFF, Volume): Rotates to power on/off the radio and adjust audio volume.
- LCD: Liquid Crystal Display showing frequency, channel, battery status, and other indicators.
- SK-side key1 / CALL (radio, alarm): Programmable side key, often used for Call or Alarm functions.
- SK-side key2 / MONI (flashlight, monitor): Programmable side key, often used for Flashlight or Monitor functions.
- PTT key (Push-to-Talk): Press and hold to transmit, release to receive.
- VFO/MR (frequency mode / channel mode): Toggles between Frequency (VFO) mode and Channel (Memory) mode.
- LED indicator: Illuminates to indicate transmission (red) or reception (green).
- Strap buckle: Attachment point for the hand strap.
- Accessory jack: Port for connecting external accessories like earpieces or programming cables.
- A/B key (frequency display switches): Switches between the upper (A) and lower (B) frequency displays.
- BAND key (band switches): Toggles between frequency bands (e.g., VHF/UHF).
- Keypad: Numeric and function keys for inputting frequencies, channels, and accessing menu options.
- SP. & MIC.: Speaker and Microphone.
- Battery pack: Removable battery unit.
- Battery contacts: Connects the battery to the radio's power circuitry.
- Battery remove button: Releases the battery pack from the radio.

Figure 4.2: Detailed views of key components including the top knob, PTT button, keypad, and battery connection points.
5. Setup
5.1. Battery Installation and Charging
The BAOFENG UV-5R+ Plus uses a 7.4V 1800mAh Li-ion battery. Ensure the battery is fully charged before first use.
- Install Battery: Align the battery pack with the grooves on the back of the radio. Slide the battery upwards until it clicks into place.
- Remove Battery: Press the battery release button located at the bottom of the battery pack and slide the battery downwards to remove.
- Charge Battery:
- Connect the AC adapter to the desktop charger.
- Plug the AC adapter into a standard wall outlet.
- Place the radio with the battery installed, or just the battery pack, into the charging slot of the desktop charger.
- The charger's LED indicator will typically show red during charging and green when fully charged.

Figure 5.1: The 1800mAh Li-ion battery features over-charge, over-discharge, over-heat, over-current, and short-circuit protection.
5.2. Antenna Installation
Screw the SMA-F antenna clockwise onto the antenna connector at the top of the radio until it is finger-tight. Do not overtighten.
5.3. Attaching Accessories
Belt Clip: Attach the belt clip to the back of the radio using the provided screws.
Earpiece: Insert the earpiece plug into the accessory jack on the side of the radio. Ensure it is fully inserted for proper audio and microphone function.
6. Operating Instructions
6.1. Power On/Off and Volume Adjustment
To power on the radio, rotate the top knob clockwise. Continue rotating to increase the volume. Rotate counter-clockwise to decrease volume and power off.
6.2. Frequency and Channel Mode
Press the VFO/MR button to switch between Frequency (VFO) mode and Channel (Memory) mode.
- VFO Mode: Allows direct frequency input using the keypad.
- Channel Mode: Operates on pre-programmed channels. Use the UP/DOWN arrow keys to navigate through channels.
6.3. Transmitting and Receiving
To transmit, press and hold the PTT (Push-to-Talk) button on the left side of the radio. Speak clearly into the microphone. Release the PTT button to return to receive mode.
The LED indicator will glow red during transmission and green during reception.
6.4. Menu Navigation and Settings
Press the MENU button to enter the main menu. Use the UP/DOWN arrow keys to scroll through menu options. Press MENU again to select an option. Use UP/DOWN arrow keys to change settings, then press MENU to confirm or EXIT to cancel.

Figure 6.1: The tri-color backlit LCD display provides clear information on frequencies and operational status.
6.5. Programming Channels (via CHIRP)
For advanced programming and channel management, it is recommended to use CHIRP software with a compatible K-plug programming cable (not included). Detailed instructions for CHIRP programming can be found online or in dedicated programming guides.
- Install CHIRP software on your computer.
- Connect the programming cable to your radio's accessory jack and your computer's USB port.
- In CHIRP, select your radio model and the correct COM port.
- Download data from the radio, make desired changes, and then upload data back to the radio.
7. Maintenance
- Cleaning: Use a soft, damp cloth to clean the radio's exterior. Do not use harsh chemicals or abrasive cleaners.
- Battery Care:
- Avoid overcharging or completely discharging the battery.
- Store the battery in a cool, dry place when not in use.
- If the radio will not be used for an extended period, remove the battery.
- Antenna: Ensure the antenna is securely attached. Avoid bending or stressing the antenna.
- Storage: Store the radio in a dry, dust-free environment, away from direct sunlight and extreme temperatures.
- Water Resistance: This product is Not Water Resistant. Avoid exposure to water or high humidity.
8. Troubleshooting
| Problem | Possible Cause | Solution |
|---|---|---|
| Radio does not power on. | Battery is not installed correctly or is discharged. | Ensure battery is properly seated. Charge the battery fully. |
| Cannot transmit or receive. | Incorrect frequency/channel, antenna not connected, or low battery. | Verify frequency/channel settings. Check antenna connection. Charge battery. Ensure you are within range. |
| Poor audio quality or no sound. | Volume too low, squelch level too high, or faulty earpiece/speaker. | Adjust volume. Lower squelch level (SQL setting in menu). Test with/without earpiece. |
| Battery does not charge. | Charger/adapter faulty, or battery not seated correctly in charger. | Check charger and adapter connections. Ensure battery is properly placed in the charging cradle. |
| Keypad unresponsive. | Keypad lock is active. | Press and hold the '#' key to toggle keypad lock. |
9. Specifications
| Feature | Detail |
|---|---|
| Brand | BAOFENG |
| Model Number | 28-020-116 |
| Item Weight | 1.15 pounds |
| Product Dimensions | 7.28 x 5.71 x 3.94 inches |
| Batteries | 1 Lithium Ion battery required (included) |
| Color | Royal Blue (as per current product variant) |
| Number of Channels | 128 |
| Frequency Range | 144-148MHz, 420-450MHz |
| Talking Range Maximum | 8 Mile (approximate, varies with terrain and conditions) |
| Tuner Technology | UHF |
| Voltage | 4 Volts (operating voltage) |
| Water Resistance Level | Not Water Resistant |
10. Warranty and Support
For warranty information and technical support, please refer to the official BAOFENG website or contact the retailer from whom you purchased the product. Keep your purchase receipt as proof of purchase for warranty claims.
While specific warranty terms may vary by region and retailer, BAOFENG products typically come with a limited manufacturer's warranty covering defects in materials and workmanship under normal use.
For programming assistance and community support, many online resources and forums are available for BAOFENG UV-5R series radios, including guides for CHIRP software.
Documents and downloads
Ask a question about this manual
Ask about setup, troubleshooting, compatibility, parts, safety, or missing instructions. Manuals+ will review the question and use this page’s manual context to help answer it.