
Introduction
Thank you for choosing the Simple Houseware Adjustable Closet Hanging Rod. This product is designed to enhance your closet's storage capacity by providing an additional hanging level. Its adjustable features allow for customization to fit various closet dimensions and garment lengths. Please read this manual thoroughly before assembly and use to ensure proper installation and safe operation.
Safety Information
- Weight Limit: Do not exceed the maximum recommended weight of 22 pounds (0.98 kg) on the hanging rod. Overloading can cause damage to the product or your existing closet rod.
- Secure Installation: Ensure the product is securely hooked onto a stable, existing closet rod. Verify that the existing rod can support the additional weight.
- Children and Pets: Keep children and pets away from the product during assembly to prevent injury.
- Regular Checks: Periodically check all connections and adjustments to ensure they remain secure.
- Intended Use: This product is designed for hanging garments and lightweight items. Do not use it for climbing or supporting heavy objects.
Package Contents
Please verify that all components are present before beginning assembly:
- 2 x Vertical Rods (with top hooks)
- 1 x Horizontal Adjustable Rod
- 4 x Plastic Clips (plus 1 extra set for spares)
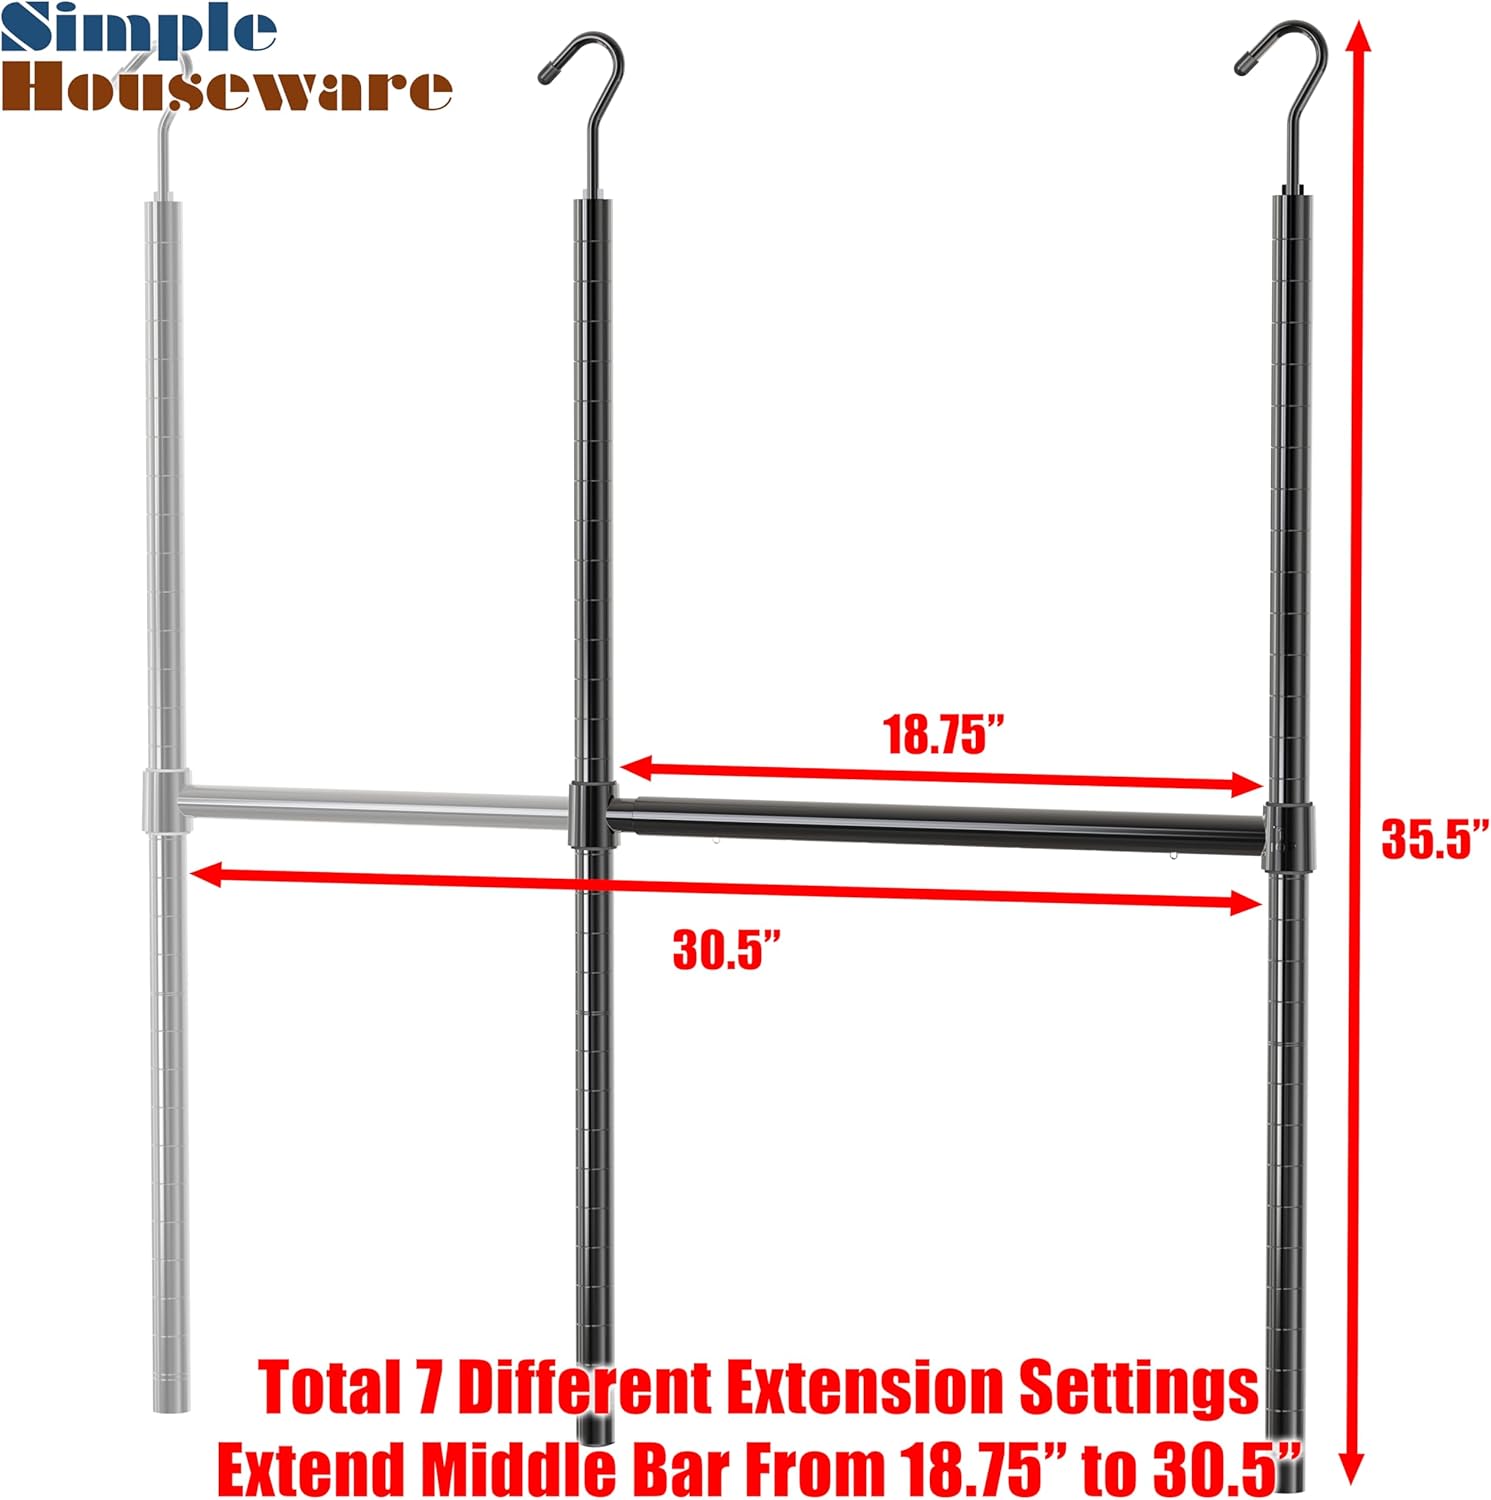
Image: Overview of the adjustable closet rod components and dimensions.
Setup and Assembly Instructions
- Prepare Vertical Rods: Each vertical rod consists of multiple segments. Screw the segments together firmly to form two complete vertical rods. Ensure the top hook is securely attached to the uppermost segment.
- Attach Plastic Clips: Locate the desired height for your lower hanging rod. The vertical rods have grooved indicators for precise placement. Snap two plastic clips onto each vertical rod at the same height, ensuring the arrows on the clips point upwards. These clips will support the horizontal rod.
- Insert Horizontal Rod: Slide the adjustable horizontal rod through the plastic clips on both vertical rods.
- Adjust Width: The horizontal rod can be adjusted in width from 18 inches to 30 inches. Extend or retract the rod to your desired width. There are 7 spring positions in 2-inch increments for precise adjustment.
- Hang the Unit: Carefully hang the assembled unit onto your existing closet rod using the top hooks of the vertical rods. Ensure both hooks are securely seated.

Image: Detail of the top hook for hanging the vertical rods.

Image: The horizontal rod in its compact position.

Image: The horizontal rod in its fully extended position.

Image: The adjustable closet rod installed, providing additional hanging space.
Operating Instructions
The Simple Houseware Adjustable Closet Hanging Rod offers two main adjustments:
- Adjusting Width: To change the width of the horizontal rod, gently pull or push the inner rod to extend or retract it. The rod will click into one of the 7 preset spring positions, ranging from 18 inches to 30 inches.
- Adjusting Height: To adjust the height of the lower horizontal rod, unhook the unit from your main closet rod. Carefully remove the plastic clips from the vertical rods and reposition them to a different grooved indicator. Ensure both clips are at the same height before re-inserting the horizontal rod and re-hanging the unit. The vertical rod is adjustable in 1-inch increments.

Image: Detail of the height adjustable middle bar.
Maintenance
To ensure the longevity and appearance of your adjustable closet rod:
- Cleaning: Wipe the metal surfaces with a soft, damp cloth. Avoid abrasive cleaners or harsh chemicals, as these can damage the finish.
- Inspection: Periodically inspect the rods and connections for any signs of wear or damage. Ensure all parts are securely fastened.
Troubleshooting
| Problem | Possible Cause | Solution |
|---|---|---|
| Rod feels unstable or wobbly. |
|
|
| Difficulty adjusting height. |
|
|
| Plastic clips do not snap together or hold firmly. |
|
|
Specifications
- Brand: Simple Houseware
- Model Number: BO-10A-K
- Color: Black
- Material: Alloy Steel
- Product Dimensions (Fully Extended): 35 inches (Length/Height) x 30 inches (Width)
- Adjustable Width: 18 inches to 30 inches (7 spring positions in 2-inch increments)
- Adjustable Height: Vertical rod adjustable in 1-inch increments
- Item Weight: 0.98 kg (approximately 2.16 lbs)
- Maximum Weight Recommendation: 22 pounds
- Mounting Type: Hanging (from existing closet rod)
Warranty and Support
For warranty information or product support, please contact Simple Houseware customer service directly. Refer to your purchase documentation or the Simple Houseware official website for contact details.