
1. Safety Instructions
Please read these safety instructions carefully before installing or operating the Arcchio Ronka ceiling light. Failure to follow these instructions may result in electric shock, fire, or personal injury.
- Electrical Safety: Installation must be performed by a qualified electrician in accordance with all local and national electrical codes. Always disconnect power at the main circuit breaker before installation, maintenance, or bulb replacement.
- Voltage: Ensure the supply voltage matches the fixture's rated voltage (230 Volt).
- Indoor Use Only: This fixture has an IP20 rating, meaning it is protected against solid objects larger than 12.5mm but has no protection against water. Do not install in bathrooms or other areas where it may be exposed to moisture.
- Bulb Type: Use only the specified bulb type and wattage (GU10, 11.5W per lamp). Exceeding the maximum wattage can cause overheating and damage to the fixture.
- Handling: Handle the light fixture with care. Avoid dropping or subjecting it to strong impacts.
2. Product Overview
The Arcchio Ronka is a modern ceiling light designed for indoor use, featuring a sleek white aluminum housing and four adjustable light sources. It is suitable for various rooms such as living rooms and dining rooms.

Figure 2.1: Front view of the Arcchio Ronka ceiling light.

Figure 2.2: Arcchio Ronka ceiling light in a room setting.
Product Dimensions:

Figure 2.3: Dimensions of the Arcchio Ronka ceiling light.
- Length: 65 cm
- Width: 18.5 cm
- Height: 9 cm
- Weight: 2.67 kg
3. Setup and Installation
Installation of this ceiling light requires electrical wiring knowledge. It is strongly recommended that installation be carried out by a certified electrician.
Installation Steps:
- Disconnect Power: Before starting any electrical work, ensure the power supply to the installation area is completely disconnected at the main circuit breaker.
- Prepare Mounting Surface: Identify a suitable location on the ceiling for mounting. Ensure the ceiling can support the weight of the fixture.
- Attach Mounting Bracket: Secure the mounting bracket (Figure 3.1) to the ceiling using appropriate screws and anchors. Ensure it is firmly attached.
- Wire Connections: Connect the household electrical wires to the fixture's terminals. Typically, this involves connecting live (L), neutral (N), and ground (earth) wires. Ensure all connections are secure and properly insulated.
- Mount Fixture: Carefully attach the light fixture body to the mounting bracket, ensuring all wires are tucked safely inside the canopy. Secure the fixture with the provided screws.
- Install Bulbs: Insert four GU10 bulbs (not included) into the lamp holders. Ensure they are securely twisted into place.
- Restore Power: Once installation is complete and all connections are checked, restore power at the main circuit breaker.

Figure 3.1: Internal view with mounting bracket.
4. Operating Instructions
The Arcchio Ronka ceiling light is operated via a standard wall switch connected to your household electrical circuit.
- Turning On/Off: Flip the wall switch to turn the light fixture on or off.
- Adjusting Light Direction: The individual light sources can be adjusted to direct light as desired. Gently pivot each lamp holder to change the beam angle.

Figure 4.1: Top-down view of the light sources.
5. Maintenance
Regular maintenance ensures the longevity and optimal performance of your Arcchio Ronka ceiling light.
Cleaning:
- Always disconnect power before cleaning.
- Wipe the fixture with a soft, dry, lint-free cloth.
- Do not use abrasive cleaners, solvents, or polishes as these can damage the finish.
Bulb Replacement:
- Disconnect power at the circuit breaker.
- Allow bulbs to cool completely before touching.
- Gently twist and pull out the old GU10 bulb.
- Insert a new GU10 bulb (max 11.5W) by aligning the pins and twisting it into place.
- Restore power.
Video 5.1: This video demonstrates the installation and replacement of a GU10 LED spot bulb, which is the type used in the Arcchio Ronka ceiling light. The video is provided by Amazon NL and is 27 seconds long.
6. Troubleshooting
If you encounter issues with your Arcchio Ronka ceiling light, refer to the following common troubleshooting steps:
- Light Does Not Turn On:
- Check if the wall switch is in the 'ON' position.
- Verify that the circuit breaker for the light fixture is not tripped.
- Ensure bulbs are correctly installed and not faulty. Replace with new bulbs if necessary (after disconnecting power).
- Check electrical connections at the fixture and wall switch (only by a qualified electrician).
- Flickering Light:
- Ensure bulbs are fully screwed in or properly seated.
- Check for loose wiring connections (only by a qualified electrician).
- Ensure the bulbs are compatible with the fixture and any dimmer switches (if applicable).
- Overheating:
- Ensure the correct wattage bulbs are used (max 11.5W GU10).
- Ensure there is adequate ventilation around the fixture.
If problems persist after attempting these steps, contact a qualified electrician or Arcchio customer support for assistance.
7. Specifications
| Feature | Specification |
|---|---|
| Brand | Arcchio |
| Model Number | 9624452 |
| Product Dimensions | 65 x 18.5 x 9 cm |
| Weight | 2.67 Kilogram |
| Style | Modern |
| Color | White |
| Number of Lights | 4 |
| Voltage | 230 Volt |
| Lamp Shade Material | Aluminum |
| Power Source | Corded Electric |
| Switch Installation Type | Ceiling Mount |
| Batteries Required | No |
| Wattage (per bulb) | 11.5 watt |
| IP Rating | IP20 |
| First Available Date | 25 March 2021 |
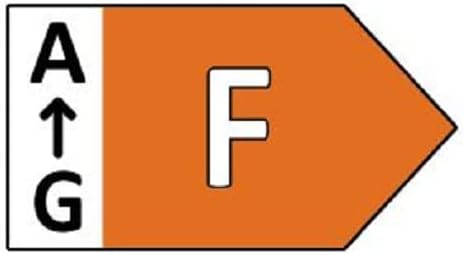
Figure 7.1: Energy efficiency label.
8. Warranty and Support
Arcchio products are manufactured to high-quality standards. For information regarding warranty coverage, please refer to the documentation provided with your purchase or visit the official Arcchio website.
If you require technical support or have questions not covered in this manual, please contact Arcchio customer service through their official channels. When contacting support, please have your model number (9624452) and purchase details ready.