
SuperATV LK-CA-COM-02
SuperATV Front & Rear 2.5 Inch Lift Kit User Manual
Model: LK-CA-COM-02 | Brand: SuperATV
1. Introduction
This manual provides detailed instructions for the installation, operation, and maintenance of your SuperATV Front & Rear 2.5 Inch Lift Kit. This easy, bolt-on system is designed to increase the ground clearance of your Can-Am Commander by approximately 2.5 inches, enhancing its off-road capabilities and aesthetic appeal. The precision-machined components ensure proper angles are maintained for enhanced handling and stability. Please read this manual thoroughly before beginning installation to ensure proper procedure and safety.
2. Safety Information
- Always wear appropriate personal protective equipment (PPE) including safety glasses and gloves during installation.
- Ensure the vehicle is securely supported on a flat, level surface using jack stands before beginning any work. Never rely solely on a jack.
- Disconnect the vehicle's battery before starting installation to prevent accidental electrical discharge.
- Exercise caution when working with springs and suspension components, as they can be under tension.
- After installation, perform a thorough inspection of all fasteners to ensure they are properly tightened.
- Test drive the vehicle in a safe, controlled environment to verify proper function and handling before regular use.
- This product may contain a chemical known to the State of California to cause cancer or birth defects or other reproductive harm.
3. Compatibility
This SuperATV 2.5 Inch Lift Kit is compatible with the following Can-Am Commander models:
- Can-Am Commander 800 (2011-2020)
- Can-Am Commander 1000 (2011-2020)
- Can-Am Commander X (2011-2020)
- Can-Am Commander Max (2012-2020)
Note: This kit is not compatible with models equipped with factory air shocks.
4. Package Contents
Verify that all components are present before beginning installation:
- Front Lift Brackets (2, zinc-plated alloy steel)
- Rear Lift Brackets (2, zinc-plated alloy steel)
- All necessary installation hardware (bolts, nuts, washers)
- Installation Instructions (this manual)

Image: The four black metal lift brackets included in the SuperATV 2.5 Inch Lift Kit. These zinc-plated alloy steel brackets are designed to be installed on the front and rear suspension of compatible Can-Am Commander models to achieve the specified lift.
5. Tools Required
The following tools are recommended for installation:
- Socket Wrench Set
- Open-End Wrench Set
- Torque Wrench
- Jack and Jack Stands
- Wheel Chocks
- Pry Bar (optional, for leverage)
- Measuring Tape
- Safety Glasses
- Gloves
6. Setup and Installation
Important: Read all instructions before proceeding. Installation should be performed by individuals with mechanical experience. If you are unsure about any step, consult a qualified mechanic.
6.1 Pre-Installation Steps
- Park the vehicle on a flat, level surface.
- Engage the parking brake.
- Place wheel chocks behind the rear wheels (when working on the front) or in front of the front wheels (when working on the rear).
- Loosen the lug nuts on the wheels you will be removing.
- Using a jack, lift the vehicle until the tires are off the ground.
- Place jack stands securely under the vehicle frame and lower the vehicle onto the stands. Ensure the vehicle is stable.
- Remove the wheels.
6.2 Front Lift Bracket Installation
- Locate the upper shock mounting bolts on the front suspension.
- Remove the upper shock mounting bolts. Keep all original hardware.
- Position the front lift bracket over the existing upper shock mount. The precision-machined bracket should align perfectly with the original mounting holes.
- Secure the lift bracket using the provided new hardware, or re-use original hardware as specified in the kit's specific instructions (if any were provided). Do not fully tighten at this stage.
- Reattach the upper shock to the new mounting point on the lift bracket using the appropriate hardware.
- Repeat for the other front shock.
- Once both front brackets and shocks are in place, tighten all bolts to the manufacturer's recommended torque specifications.
6.3 Rear Lift Bracket Installation
- Locate the upper shock mounting bolts on the rear suspension.
- Remove the upper shock mounting bolts.
- Position the rear lift bracket over the existing upper shock mount, ensuring proper alignment.
- Secure the lift bracket using the provided new hardware, or re-use original hardware as specified. Do not fully tighten.
- Reattach the upper shock to the new mounting point on the lift bracket.
- Repeat for the other rear shock.
- Once both rear brackets and shocks are in place, tighten all bolts to the manufacturer's recommended torque specifications.
6.4 Post-Installation Steps
- Reinstall the wheels and tighten lug nuts to factory specifications.
- Lift the vehicle off the jack stands and remove the stands.
- Lower the vehicle completely to the ground.
- Remove wheel chocks.
- Measure the new ground clearance to confirm the 2.5-inch lift.

Image: A yellow Can-Am Commander UTV showcasing the increased ground clearance and aggressive stance after the SuperATV 2.5 Inch Lift Kit has been installed. The vehicle appears ready for off-road use.
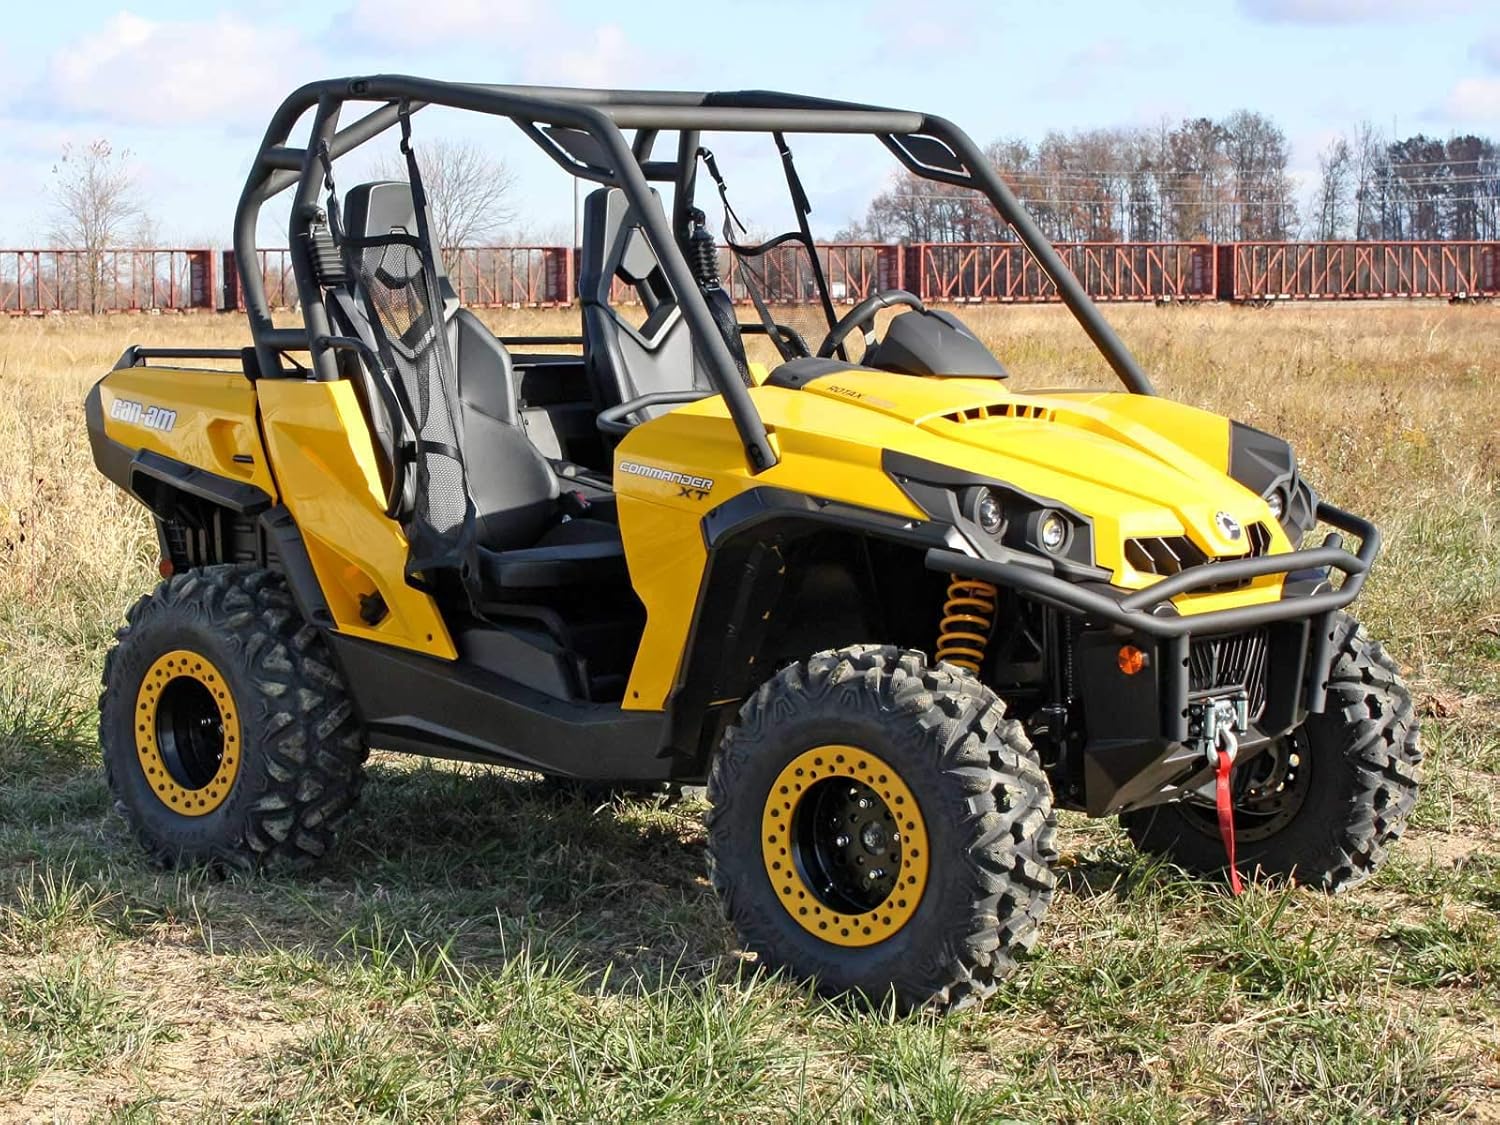
Image: A side view of the yellow Can-Am Commander UTV in a natural setting, demonstrating the enhanced ride height provided by the SuperATV 2.5 Inch Lift Kit. The vehicle's suspension components are visible, indicating the lift's effect.
7. Operating Considerations After Lift Kit Installation
After installing the SuperATV 2.5 Inch Lift Kit, your vehicle's handling characteristics will change. Be aware of the following:
- Increased Center of Gravity: The vehicle's center of gravity will be higher, which can affect stability, especially during sharp turns or on uneven terrain. Drive cautiously until you are accustomed to the new handling.
- Ground Clearance: Enjoy the increased ground clearance, allowing you to navigate over larger obstacles.
- Tire Clearance: The lift kit provides additional clearance for larger tires, if you choose to install them. Ensure any new tires do not rub against suspension or body components.
- Suspension Travel: The lift kit is precision-machined to maintain proper suspension angles for enhanced stability and handling.
8. Maintenance
Regular inspection and maintenance are crucial for the longevity and safe operation of your lift kit:
- Initial Check: After the first 50-100 miles of driving, re-check all installation hardware (bolts, nuts) for proper tightness. Re-torque as necessary.
- Periodic Checks: Inspect all lift kit components and mounting hardware every 500 miles or before extended off-road trips. Look for any signs of wear, damage, or loosening.
- Cleaning: Keep the lift kit components clean from mud, dirt, and debris to prevent corrosion and wear.
- Corrosion Protection: The brackets are UV and corrosion resistant zinc-plated steel. However, in harsh environments, additional rust preventative sprays may be beneficial to extend their lifespan.
9. Troubleshooting
| Problem | Possible Cause | Solution |
|---|---|---|
| Insufficient Lift | Incorrect installation of brackets; original suspension components are worn. | Review installation steps carefully. Ensure brackets are oriented correctly. Inspect original shocks/springs for wear. |
| Unusual Noises (clunking, squeaking) | Loose hardware; components rubbing; improper shock re-installation. | Check all bolts and nuts for proper torque. Inspect for contact points between components. Ensure shocks are seated correctly. |
| Vehicle Pulls to One Side | Uneven installation; alignment issues. | Verify that both sides of the vehicle are lifted equally. An alignment may be necessary after lift kit installation. |
If you encounter issues not listed here or cannot resolve a problem, contact SuperATV customer support.
10. Specifications
- Product Name: SuperATV Front & Rear 2.5 Inch Lift Kit
- Model Number: LK-CA-COM-02
- Brand: SuperATV
- Lift Height: Approximately 2.5 inches (front and rear with stock tires/wheels)
- Material: Alloy Steel (Zinc Plated)
- Auto Part Position: Front and Rear
- Item Weight: Approximately 10 pounds
- Package Dimensions: 12.5 x 12.5 x 5 inches
- Compatibility: 2011-2020 Can-Am Commander 800/1000/X/Max (Not compatible with models with factory air shocks)
11. Warranty and Support
This SuperATV product is backed by a Lifetime Warranty to the original purchaser. For warranty claims, technical support, or any questions regarding your lift kit, please contact SuperATV directly.
SuperATV Contact Information:
- Website: www.superatv.com
- Customer Service: Refer to the SuperATV website for current contact methods (phone, email, chat).
When contacting support, please have your product model number (LK-CA-COM-02) and purchase information readily available.
Related documentsLK-CA-COM-02


Ask a question about this manual
Ask about setup, troubleshooting, compatibility, parts, safety, or missing instructions. Manuals+ will review the question and use this page’s manual context to help answer it.