1. Introduction
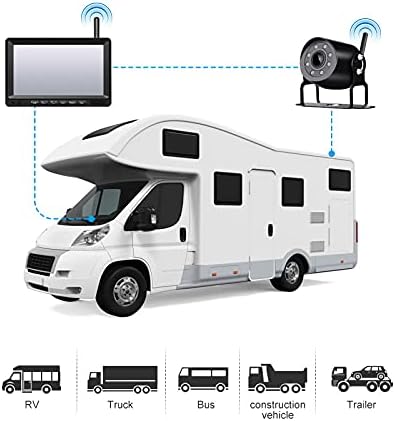
This manual provides detailed instructions for the installation, operation, and maintenance of your OBEST Wireless Reversing Camera System. This system is designed to enhance safety and convenience when maneuvering large vehicles such as trucks, trailers, RVs, and buses. It features a 7-inch IPS high-definition monitor and a waterproof infrared night vision camera, operating on a 12V-36V power supply.
Please read this manual thoroughly before using the product to ensure correct operation and to prevent damage.
2. Package Contents
Verify that all items listed below are included in your package:
- 7-inch IPS Monitor
- Backup Camera
- U-shaped Display Stand
- Monitor Mount Bracket
- Car Charger
- Sunshade for Monitor
- User Manual (this document)
- Power Cords
- Antennas (for monitor and camera)
- Installation Kit (screws, tools)

3. Specifications
| Feature | Specification |
|---|---|
| Power Supply | DC 12V to 36V |
| Wireless Frequency | 2.4 GHz (2403-2480MHz) |
| Wireless Range | Up to 300 meters (open area) |
| Video Delay | <200 ms |
| Operating Temperature | -20 ℃ to 80 ℃ |
| Camera Image Sensor | 1/3 inch CMOS |
| Camera Waterproof Rating | IP69K |
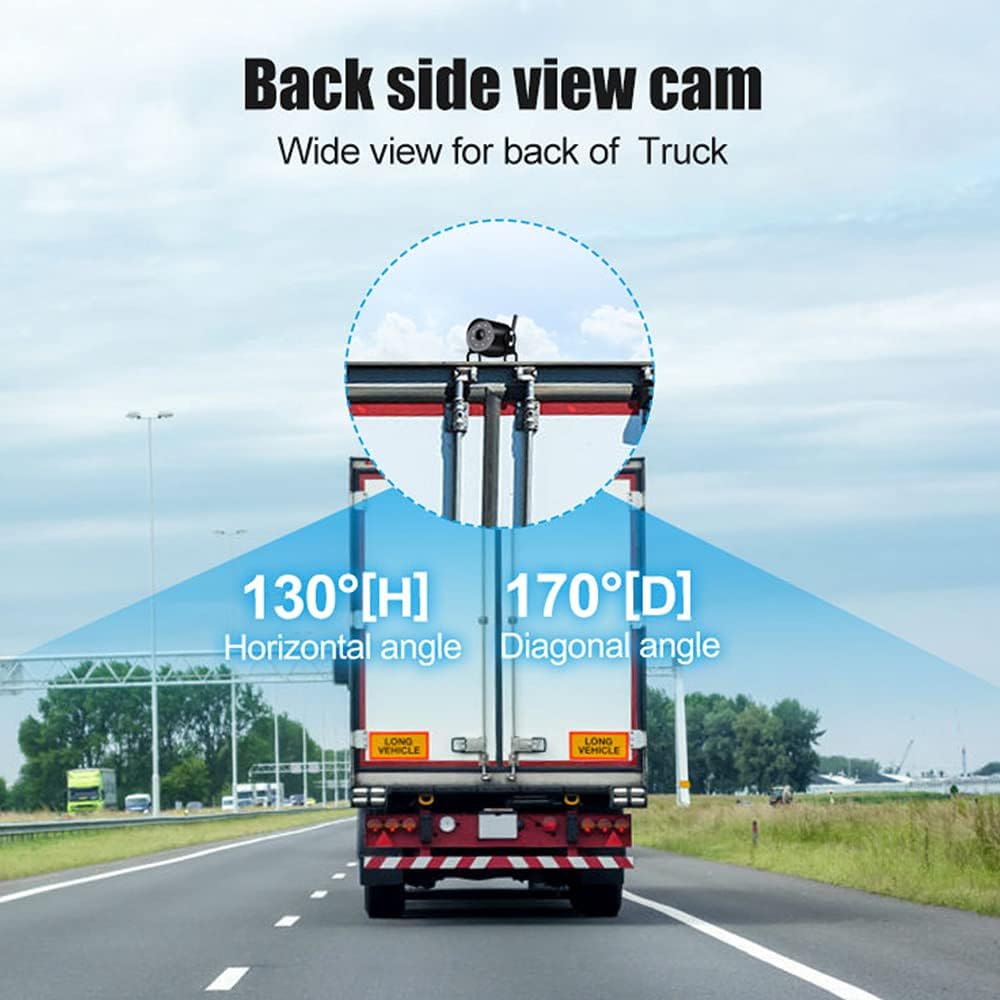
| Camera View Angle | 127° (Horizontal) * 170° (Diagonal) |
| Camera Pixels | 1000TVL |
| LCD Screen Size | 7 inches |
| Monitor Resolution | 1024 (H) * 600 (V) |
| Contrast Ratio | 500:1 |
| Brightness | 500 cd/m² |
| Response Time | 25 ms |
| Monitor Power Consumption | <500mA |
| Installation Type | Wireless |
| UPC | 769771167564 |
4. Setup and Installation
The OBEST Wireless Reversing Camera System is designed for straightforward installation without the need for complex wiring between the camera and the monitor.
4.1 Camera Installation
- Mount the Camera: Choose a suitable location at the rear of your vehicle, typically near the license plate or on the bumper, ensuring a clear view. Use the provided screws and brackets to securely mount the camera.
- Connect Power: Connect the camera's power cable to your vehicle's taillight circuit. This allows the camera to receive power when the vehicle is in reverse or when the lights are on, depending on your wiring choice. Ensure the connection is secure and waterproof. The camera supports 12V-36V power input.
- Attach Antenna: Screw the antenna onto the camera's designated port.
4.2 Monitor Installation
- Mount the Monitor: The monitor comes with two different mounting options: a U-shaped display stand and a monitor mount bracket. Choose the one that best suits your vehicle's dashboard or windshield. Securely attach the chosen mount to the monitor and then to your desired location in the vehicle, ensuring it does not obstruct your view while driving.
- Attach Antenna: Screw the antenna onto the monitor's designated port.
- Connect Power: Plug the monitor's car charger into your vehicle's cigarette lighter socket.

4.3 Pairing (If Necessary)
The camera and monitor are typically pre-paired at the factory. If no signal is received, you may need to re-pair them:
- Ensure both the camera and monitor are powered on.
- On the monitor, press and hold the 'Pairing Button' (often labeled 'SEL' or with a pairing icon) for a few seconds until the pairing indicator appears.
- The monitor will search for the camera. Once connected, the camera's video feed will appear on the screen.
5. Operating Instructions
Familiarize yourself with the monitor's controls for optimal use.
5.1 Monitor Controls
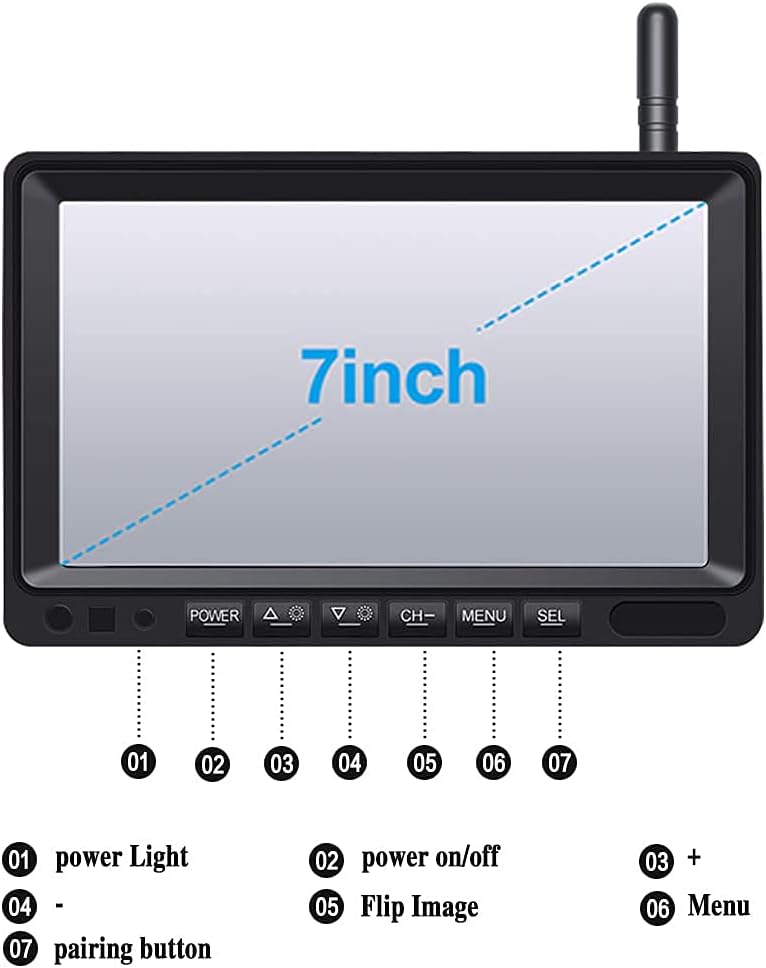
- 1. Power Light: Indicates power status.
- 2. Power On/Off: Press to turn the monitor on or off.
- 3. + (Plus) Button: Used for increasing values or navigating menus.
- 4. - (Minus) Button: Used for decreasing values or navigating menus.
- 5. Flip Image: Press to rotate or mirror the camera image (e.g., normal view, mirror view).
- 6. Menu Button: Accesses the monitor's settings menu.
- 7. SEL (Select/Pairing) Button: Used to confirm selections in the menu or initiate pairing mode.
5.2 Adjusting Parking Guidelines
The monitor displays adjustable parking guidelines to assist with reversing.
- While the camera feed is active, press and hold the SEL button.
- When the guidelines begin to flash, use the + or - buttons to adjust their position or width.
- Press SEL again to save the adjustments and exit the adjustment mode.

5.3 Night Vision and Wide Angle
The camera features infrared LEDs for clear night vision up to 15 meters in low-light conditions. Its wide 170° diagonal viewing angle helps eliminate blind spots.
6. Maintenance
Proper maintenance ensures the longevity and optimal performance of your reversing camera system.
- Cleaning: Regularly clean the camera lens and monitor screen with a soft, damp cloth. Avoid abrasive cleaners that could scratch surfaces.
- Waterproof Camera: The camera has an IP69K waterproof rating, designed to withstand harsh weather conditions. However, avoid directing high-pressure water jets directly at the camera for extended periods.
- Cable Connections: Periodically check all cable connections for tightness and signs of wear or corrosion.
- Antennas: Ensure antennas are securely attached and not damaged to maintain optimal wireless signal strength.

7. Troubleshooting
If you encounter issues with your OBEST Wireless Reversing Camera System, refer to the following common problems and solutions:
| Problem | Possible Cause | Solution |
|---|---|---|
| No signal on monitor |
|
|
| Image is unclear or distorted |
|
|
| Monitor not turning on |
|
|
8. Safety Information
- Always ensure the monitor is mounted in a location that does not obstruct your view of the road or interfere with vehicle controls.
- The reversing camera system is an aid and should not replace careful observation and traditional mirror checks. Always check your surroundings manually before reversing.
- Ensure all wiring is correctly installed and insulated to prevent short circuits or electrical hazards.
- Do not attempt to disassemble or modify the product. This may void the warranty and cause damage.
- Operate the system within the specified voltage range (DC 12V-36V) to prevent damage.
9. Warranty and Support
OBEST products are designed for reliability and performance. If you have any questions or require assistance with your product, please contact OBEST customer support.
We are committed to providing a satisfactory response within 24 hours for any product-related inquiries.


