1. Introduction
This manual provides essential information for the safe and proper installation and operation of your Apevia ATX-ES700W Essence 700W ATX Semi-Modular Gaming Power Supply. Please read this manual thoroughly before installation and retain it for future reference.
2. Safety Information
- Ensure the power supply is disconnected from the AC power outlet before installation or maintenance.
- Do not open the power supply unit. High voltages are present inside, and opening it will void the warranty.
- Install the power supply in a well-ventilated area, away from heat sources and moisture.
- Use only the cables provided with the power supply. Using incompatible cables may cause damage.
- Ensure all connectors are securely attached to prevent loose connections and potential damage.
- This power supply is designed for use in personal computers only. Do not use it for any other purpose.
- The power supply features heavy-duty protections including Short-Circuit, Over-Current, Over-Voltage, Over-Power, Under-Voltage, and Over-Temperature Protections.
3. Package Contents
Verify that all items are present in the package:
- Apevia ATX-ES700W Essence 700W Power Supply Unit
- AC Power Cord
- Modular Cables (PCI-E, SATA, Peripheral)
- User Manual (this document)

Image: Apevia ATX-ES700W Power Supply with included cables and manual. This image displays the power supply unit, its detachable modular cables, and the user manual, all neatly arranged.
4. Product Overview
The Apevia ATX-ES700W is a semi-modular power supply designed for gaming and high-performance PC builds. It features a black sandblasted casing and an auto-thermally controlled 120mm black fan for efficient cooling.
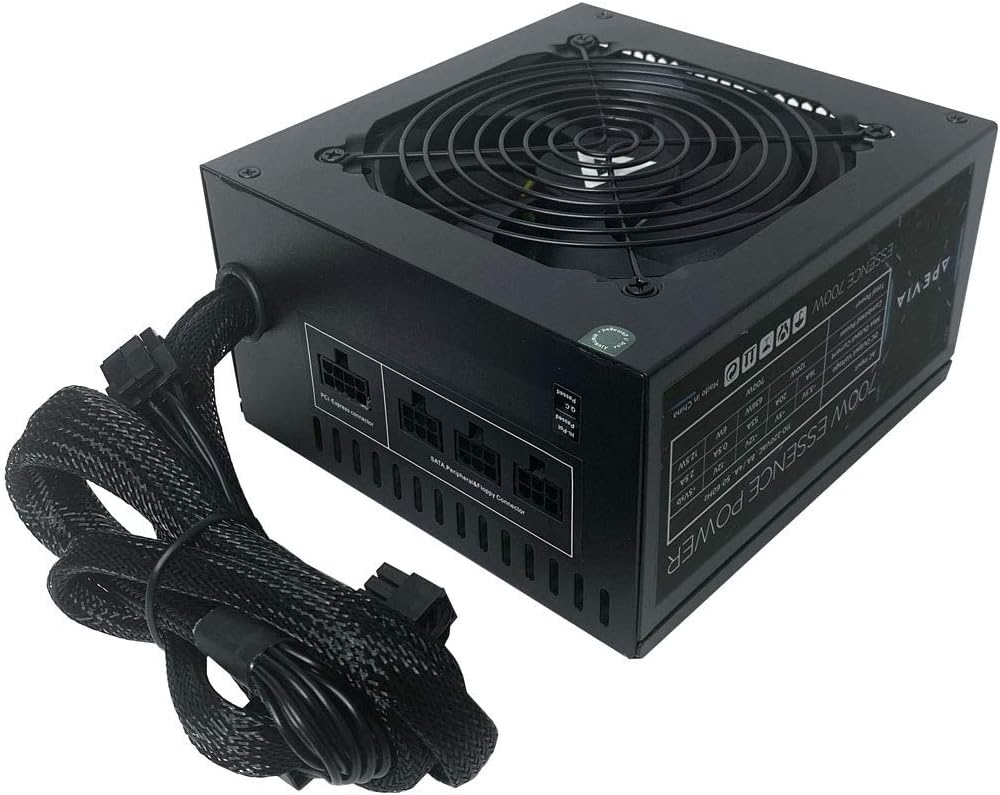
Image: Top-down view of the Apevia ATX-ES700W Power Supply. This image shows the top of the power supply unit, highlighting the fan grill and the semi-modular cable connections on the side.

Image: Side view of the Apevia ATX-ES700W Power Supply with specifications label. This image displays the product's electrical specifications and certifications printed on a label on the side of the unit.

Image: Rear view of the Apevia ATX-ES700W Power Supply. This image shows the AC power input, the main power switch, and the 115/230V voltage selector switch.
5. Installation and Setup
Follow these steps to properly install your power supply:
- Mounting the Power Supply: Secure the power supply unit into the designated PSU bay of your PC case using the provided screws. Ensure the fan is oriented correctly for optimal airflow (typically facing downwards or towards the interior of the case, depending on case design).
- Connecting Main Power (Motherboard): Connect the 20/24-pin Main Power connector to your motherboard.
- Important: The 24-pin motherboard connector can be split into a 20+4 connector for motherboards requiring a 20-pin power connector.
- Connecting CPU Power: Connect the 4+4-pin 12V CPU power connector to your motherboard.
- Important: The 8-pin CPU connector can be split into a 4+4 connector for motherboards that require a 4-pin power connector.
- Connecting PCI-E Power (Graphics Card): Attach the 6+2-pin PCI-E connectors to your graphics card(s). This power supply includes 2 x PCI 6+2pin connectors.
- Important: The 8-pin PCI-E GPU connector can be split into a 6+2 connector for graphics cards that require a 6-pin power connector.
- Connecting SATA and Peripheral Devices: Use the modular cables to connect your SATA drives (HDDs, SSDs) and other peripheral devices (fans, optical drives) that require peripheral (Molex) power. This power supply includes 4 x SATA and 4 x Peripheral connectors.
- Cable Management: Route all cables neatly to ensure proper airflow within your PC case.
- AC Voltage Selection: Ensure the 115/230V switch on the back of the power supply is set to the correct voltage for your region. Incorrect voltage selection can damage the unit.
- Final Power Connection: Connect the AC power cord to the power supply and then to a wall outlet.
- Important: The power supply will not power on simply by connecting the power cord to both the power supply and wall outlet. Ensure that all the power supply cables are properly connected to the PC for it to power on.

Image: Modular cable ports on the Apevia ATX-ES700W Power Supply. This image highlights the PCI-Express and SATA/Peripheral/Floppy connector ports for modular cables.

Image: Diagram of Apevia ATX-ES700W Power Supply cable types and lengths. This diagram illustrates the various power connectors (ATX Main, EPS 12V, PCI Express, SATA, Peripheral, Floppy) and their approximate lengths.
6. Operating Instructions
Once installed and all connections are secure:
- Flip the main power switch on the back of the PSU to the "ON" position.
- Power on your computer using the case's power button.
- The 120mm fan is auto-thermally controlled, meaning its speed will adjust automatically based on the power supply's temperature to maintain optimal cooling and noise levels.
7. Specifications
| Feature | Detail |
|---|---|
| Model Number | ATX-ES700W |
| Output Wattage | 700 Watts |
| Form Factor | ATX |
| Cooling Method | Air (Auto-thermally controlled 120mm black fan) |
| Dimensions (L x W x H) | 5.9 x 6.3 x 3.4 inches |
| Item Weight | 4.25 pounds (1.93 Kilograms) |
| Connectors | 1 x 20/24pin Main Power, 1 x 4+4pin 12V, 2 x PCI 6+2pin, 4 x SATA, 4 x Peripheral |
| Output | +3.3V@16A, +5V@20A, +12V@53A, -12V@0.5A, +5VSB@2.5A |
| Protections | Short-Circuit, Over-Current, Over-Voltage, Over-Power, Under-Voltage, Over-Temperature |
8. Maintenance
- Keep the power supply and its fan free from dust accumulation. Use compressed air to gently clean the fan and vents periodically.
- Ensure adequate airflow around the power supply within the PC case.
- Regularly check all cable connections to ensure they remain secure.
9. Troubleshooting
- No Power:
- Check if the AC power cord is securely connected to both the power supply and the wall outlet.
- Ensure the main power switch on the back of the PSU is in the "ON" position.
- Verify that the 115/230V switch is set correctly for your region.
- Confirm all internal power cables (20/24-pin, 4+4-pin CPU, PCI-E) are firmly connected to the motherboard and components.
- System Instability/Crashes:
- Ensure your system's power requirements do not exceed the 700W capacity of the PSU.
- Check for proper ventilation and ensure the power supply fan is operating. Overheating can cause instability.
- Verify all power connections are secure and not loose.
- Unusual Noises:
- Check if the fan is obstructed by cables or dust.
- If unusual noises persist, contact customer support.
10. Warranty and Support
For warranty information and technical support, please refer to the official Apevia website or contact their customer service directly. Keep your proof of purchase for warranty claims.


