1. Introduction
This manual provides essential information for the proper installation, operation, and maintenance of your DollaTek 15kg Metal Digital Gear Servo. Designed for high-performance applications such as 1:8 and 1:10 high-speed RC cars, fixed-wing aircraft, model boats, IoT home devices, and intelligent robots, this servo offers precision and durability. Please read this manual thoroughly before use to ensure safe and optimal performance.
2. Features
- High-Quality Construction: Made from durable, corrosion-resistant plastic material for extended service life.
- Metal Gearbox: Equipped with metal gears to withstand higher loads and ensure reliable, consistent operation.
- Efficient Performance: Operates with high efficiency, low noise, and minimal power consumption.
- High Accuracy: Provides precise control and is designed for stable, reliable movement.
- Easy Installation: Designed for straightforward installation and disassembly.
- Versatile Accessories: Includes 5 different servo arms to suit various application requirements.
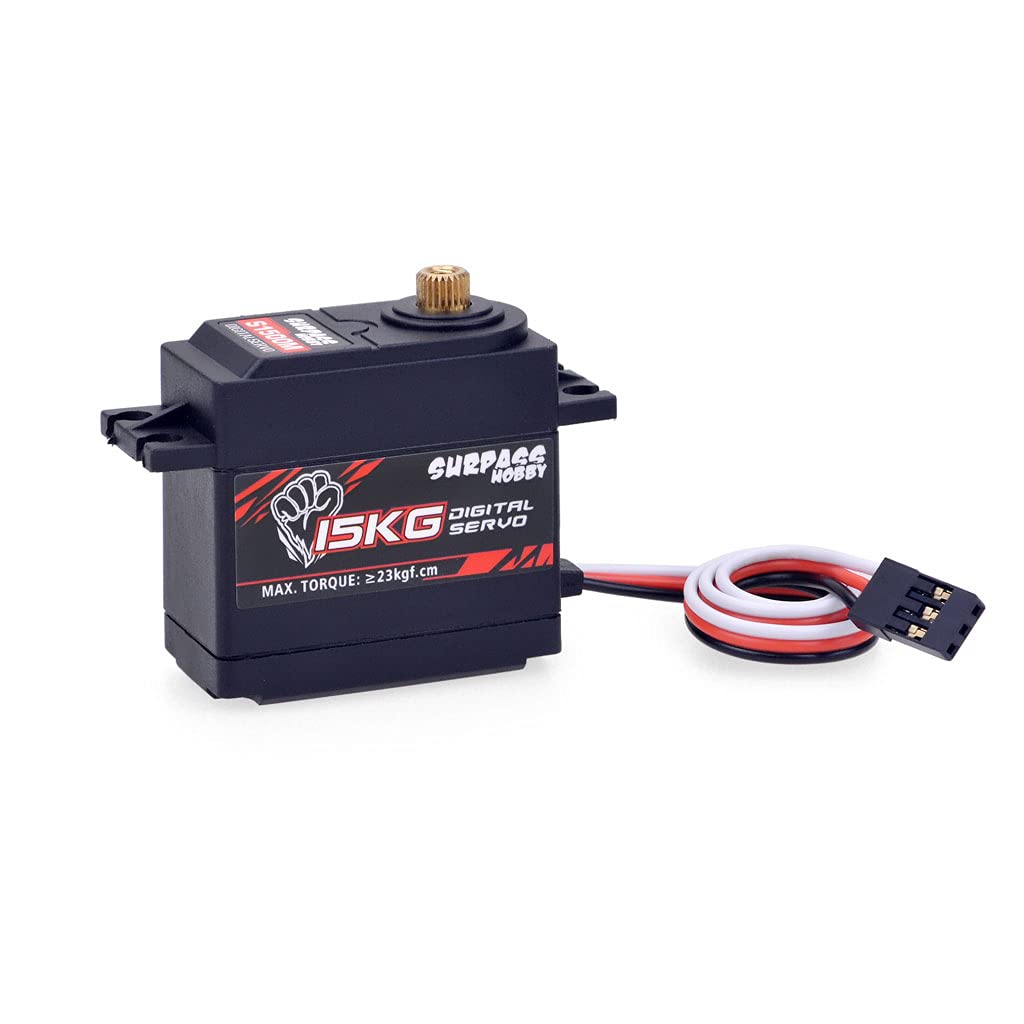
3. Specifications

Detailed diagram illustrating the servo's specifications, dimensions, and included accessories.
| Parameter | Value |
|---|---|
| Model | ELA15131 (S1500M) |
| Rated Torque | ≥15 kgf/cm |
| Max. Torque | ≥23 kgf/cm |
| Working Voltage | 6.0V - 7.4V DC |
| No Load Speed (6.0V) | 0.20 s/60° |
| No Load Speed (7.4V) | 0.18 s/60° |
| Outer Dimension | 40.5 x 20 x 38.6 mm (1.59 x 0.79 x 1.51 inch) |
| Weight | 58g (2.11oz) |
| Working Frequency | 1520µs/333Hz |
| Motor Type | DC Motor |
| Gear Type | Metal Gear |
| Bearing Type | 2BB |
| Horn Gear Spline | 25T |
4. Package Contents
The package includes the following items:
- 1 x DollaTek 15kg Metal Digital Gear Servo (Model ELA15131)
- 5 x Different Servo Arms (Horns)
- Mounting Screws
- Rubber Grommets and Brass Eyelets

Image showing the various servo arms, mounting screws, and rubber grommets included in the package.
5. Setup
- Mounting the Servo: Securely mount the servo into your model using the provided screws and rubber grommets. Ensure the servo is firmly fixed to prevent movement during operation.
- Connecting the Servo: Connect the servo's 3-wire cable to the appropriate channel on your receiver or control board. The wires are typically arranged as Signal (white/yellow), Power (red), and Ground (black/brown). Ensure correct polarity to avoid damage to the servo or control system.
- Attaching the Servo Arm: Select the most suitable servo arm (horn) for your specific application. Carefully align the arm with the servo's output spline (25T) and secure it with the small screw provided. Ensure the arm is centered or in the desired neutral position before tightening.

Images showing the front and side views of the servo, illustrating its physical form for mounting and connection.
6. Operating Instructions
- Power On: After completing the setup, power on your RC system or control device. The servo should initialize and move to its neutral position.
- Function Test: Carefully test the servo's movement by providing control inputs from your transmitter or controller. Observe for smooth and consistent motion.
- Adjustments: If necessary, adjust the endpoints, sub-trim, and travel limits on your transmitter or control software to match the requirements of your application. Ensure the servo arm does not bind or hit any mechanical stops at its full travel.
- Voltage Range: Operate the servo within its specified working voltage range of 6.0V to 7.4V DC to prevent damage and ensure optimal performance.
7. Maintenance
- Cleanliness: Regularly clean the servo casing to prevent the accumulation of dust, dirt, or debris, which can impede movement or cause overheating.
- Gear Inspection: Periodically inspect the metal gears for any signs of wear, damage, or foreign objects. If significant wear is observed, consider replacing the gears or the servo.
- Connection Check: Ensure all electrical connections (servo cable to receiver/controller) remain secure and free from corrosion.
- Environmental Conditions: Avoid exposing the servo to extreme temperatures, excessive moisture, or corrosive environments.
8. Troubleshooting
- Servo Not Responding:
- Check the power supply to the receiver/controller and the servo. Ensure batteries are charged and connections are secure.
- Verify that the servo cable is correctly plugged into the appropriate channel on the receiver/controller with correct polarity.
- Confirm that the transmitter/controller is powered on and properly bound to the receiver. - Erratic or Unstable Movement:
- Check for potential radio interference. Try operating the model in a different location.
- Ensure the power supply is stable and sufficient for the servo's demands. A weak battery can cause erratic behavior.
- Inspect the servo arm and linkages for any binding or obstruction. - Grinding Noise or Stuttering:
- This often indicates an issue with the gears. Disassemble the servo (if comfortable) and inspect the metal gears for damage, stripped teeth, or foreign objects.
- Ensure the servo arm is not being forced beyond its mechanical limits, causing the gears to bind. - Weak Performance or Lack of Torque:
- Verify that the input voltage is within the specified range (6.0V-7.4V). Lower voltage will result in reduced torque and speed.
- Ensure the servo is not overloaded. The application's demands should not exceed the servo's maximum torque rating.
9. Warranty and Support
For technical support, warranty inquiries, or further assistance with your DollaTek 15kg Metal Digital Gear Servo, please contact DollaTek customer service through your retailer or visit the manufacturer's official websites:
Please retain your proof of purchase for any warranty claims.
