

1. Important Safety Information
Please read all instructions carefully before using this treadmill. Retain this manual for future reference. Failure to follow these instructions may result in injury or damage to the product.
- Always place the treadmill on a flat, stable surface.
- Keep children and pets away from the treadmill during operation.
- Ensure the safety key is properly attached to your clothing before starting the treadmill. In case of emergency, the safety key will stop the machine.
- Do not operate the treadmill if it has a damaged cord or plug, or if it is not working properly.
- Wear appropriate athletic footwear and clothing during use.
- Consult a physician before starting any exercise program.
2. Product Overview
The Sandinrayli Folding Electric Treadmill is designed for home use, offering a compact solution for walking, jogging, and light running. It features a powerful motor, adjustable incline, and a clear LCD display to track your workout progress.

Detailed view of the treadmill highlighting its key dimensions and specifications, including speed range (0.6-6.2 MPH), load capacity (220 LBS), working voltage (AC 110V), and LCD display size (3 inches).
3. Setup and Assembly
The treadmill comes mostly pre-assembled. Follow these steps to complete the setup:
- Unpacking: Carefully remove all components from the packaging. Ensure all parts listed in the 'Included Components' section are present.
- Unfolding: Gently lower the running deck from its folded position until it rests flat on the floor. Ensure the locking mechanism engages securely.
- Handlebar Assembly: Attach the handlebars to the main frame using the provided screws and hex wrench. Ensure all connections are tight and secure.
- Console Connection: Connect any pre-wired cables from the console to the main frame as indicated in the assembly diagram.
- Power Connection: Plug the power cord into a grounded electrical outlet.

The treadmill in its folded position, demonstrating its space-saving design for easy storage against a wall.
A user demonstrating the ease of moving the folded treadmill using its integrated transport wheels.
Video: Treadmill Setup and Folding Demonstration
This video provides a visual guide on how to set up the treadmill, attach the safety key, operate the console, adjust the manual incline, and fold/move the unit for storage.
4. Operating Instructions
Familiarize yourself with the control panel before beginning your workout.

A detailed view of the treadmill's control panel, showing the LCD display and various buttons for speed, programs, and mode selection.

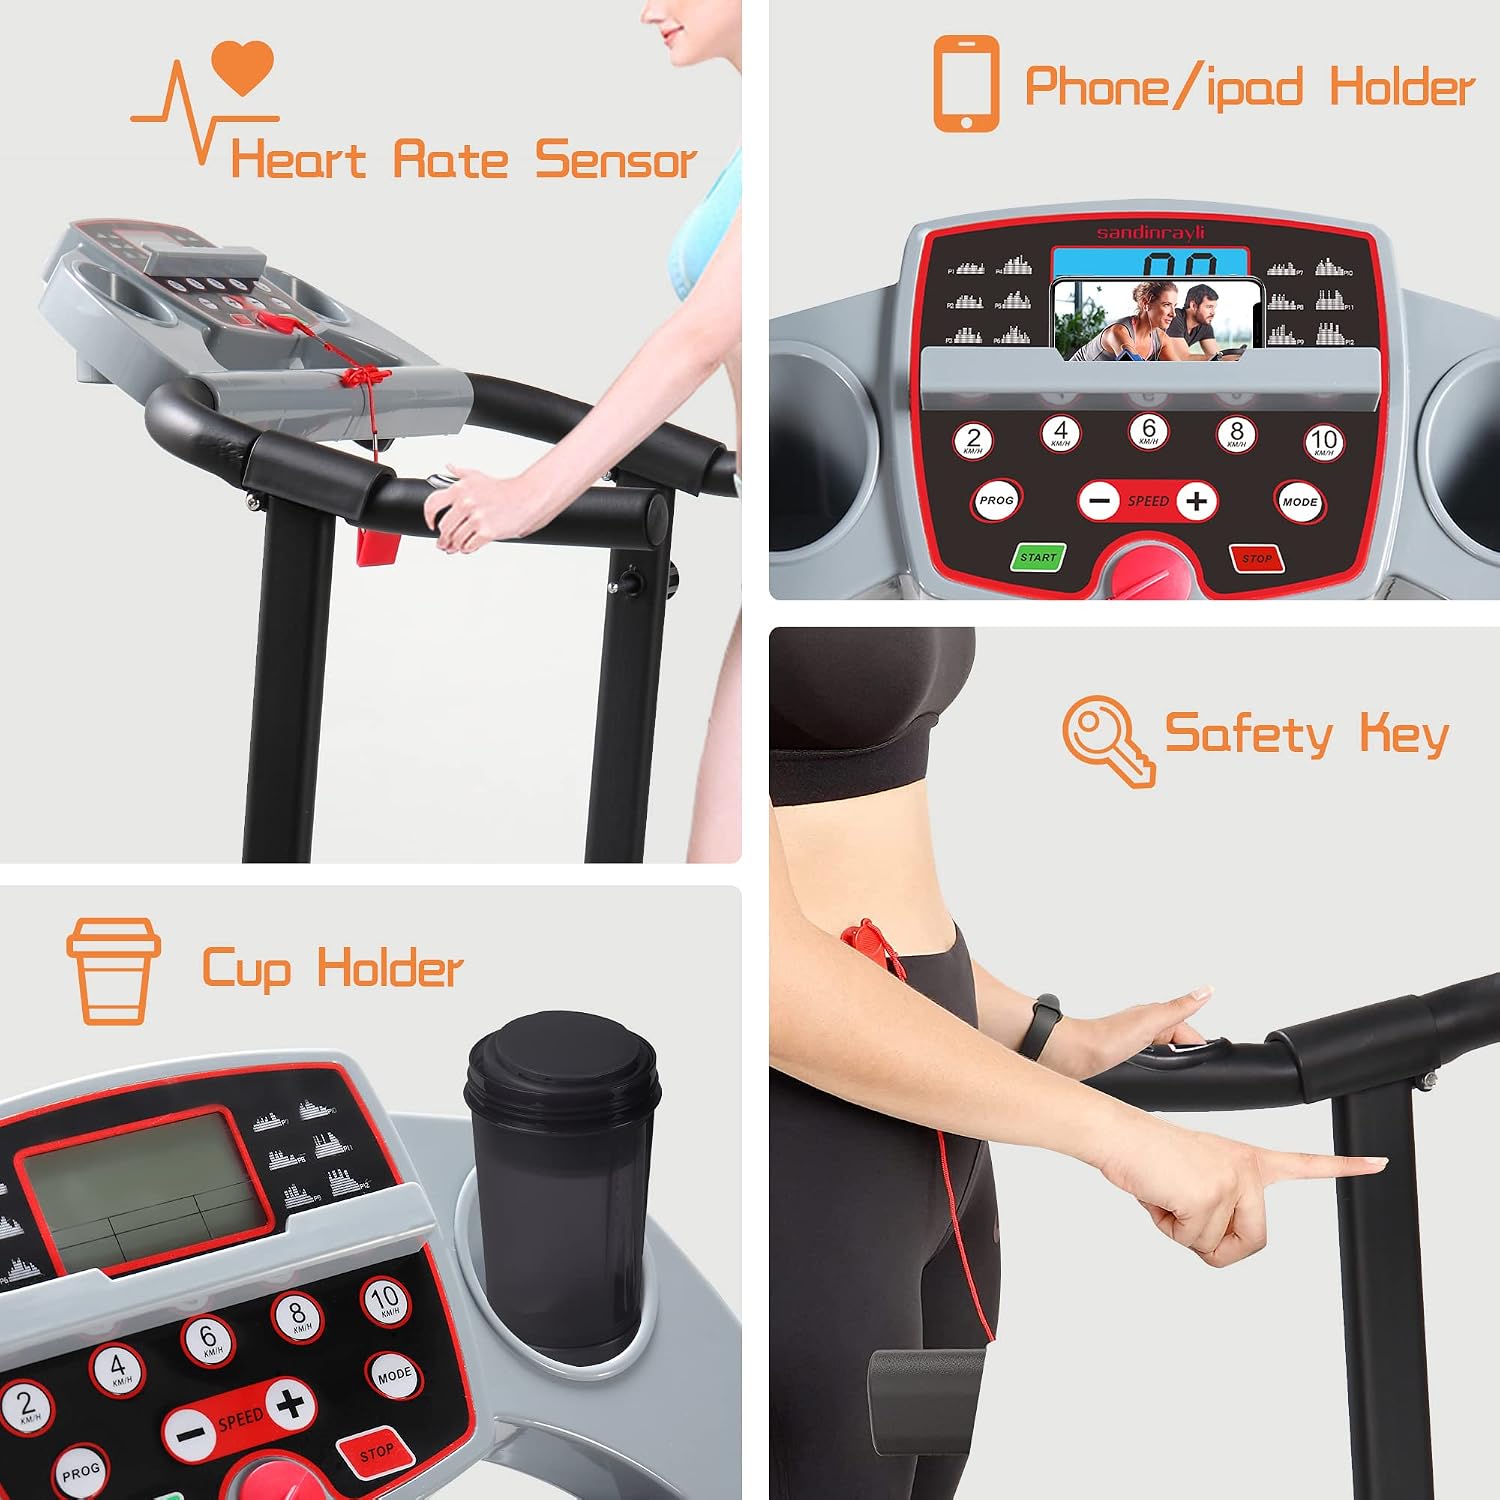
Illustrations of the treadmill's integrated features: heart rate sensors on the handrails, a phone/iPad holder on the console, the magnetic safety key, and convenient cup holders.
4.1. Starting the Treadmill
- Ensure the power cord is securely plugged in.
- Attach the safety key to the designated slot on the console and clip the other end to your clothing. The treadmill will not start without the safety key in place.
- Step onto the side rails of the treadmill.
- Press the 'START' button on the console. The treadmill will begin at a low speed.
4.2. Adjusting Speed
- Use the '+' and '-' buttons on the console to increase or decrease the running belt speed.
- Quick speed buttons (e.g., 2, 4, 6, 8, 10 km/h) are available for instant speed changes.
4.3. Adjusting Incline
This treadmill features 3 manual incline levels. To adjust the incline:
- Stop the treadmill and unplug it for safety.
- Locate the incline adjustment pins at the rear of the treadmill deck.
- Lift the rear of the treadmill deck slightly and adjust the pins to the desired incline level (1, 2, or 3 degrees).
- Ensure both sides are set to the same incline level before resuming use.

Visual representation of the 3 adjustable manual incline levels and how they affect the angle of the running belt, allowing for varied workout intensity.
4.4. Using Preset Programs
The treadmill includes 12 preset programs. Press the 'PROG' button to cycle through the available programs. Each program has a predefined speed and time profile. Press 'START' to begin the selected program.
4.5. Monitoring Your Workout
The 3-inch LCD display shows real-time information:
- Speed: Current running belt speed.
- Time: Duration of your workout.
- Distance: Total distance covered.
- Calories: Estimated calories burned.
- Pulse: Your heart rate, measured by gripping the heart rate sensors on the handrails.
5. Maintenance
Regular maintenance ensures the longevity and safe operation of your treadmill.
5.1. Cleaning
- Wipe down the console and exterior surfaces with a damp cloth after each use. Avoid abrasive cleaners.
- Vacuum underneath the treadmill regularly to prevent dust and debris buildup.
5.2. Running Belt Lubrication
The running belt requires periodic lubrication to reduce friction and extend its lifespan. Use the included silicone oil.
- Turn off and unplug the treadmill.
- Loosen the rear roller bolts to slightly lift the running belt.
- Apply a small amount of silicone oil evenly under the center of the running belt.
- Tighten the rear roller bolts.
- Run the treadmill at a low speed for a few minutes to distribute the lubricant.
5.3. Running Belt Adjustment
If the running belt shifts to one side or slips, it may need adjustment.
- Centering the Belt: If the belt drifts to the left, turn the left rear roller bolt clockwise a quarter turn. If it drifts to the right, turn the right rear roller bolt clockwise a quarter turn. Run the treadmill for a few minutes and re-check. Repeat if necessary.
- Tightening the Belt: If the belt slips during use, turn both rear roller bolts clockwise a quarter turn simultaneously. Test the belt and repeat if necessary. Do not overtighten.
6. Troubleshooting
This section addresses common issues you might encounter.
| Problem | Possible Cause | Solution |
|---|---|---|
| Treadmill does not start. | Power cord unplugged, safety key not in place, circuit breaker tripped. | Check power connection, ensure safety key is fully inserted, reset circuit breaker. |
| Running belt slips. | Belt too loose, insufficient lubrication. | Tighten the running belt (see Section 5.3), lubricate the running belt (see Section 5.2). |
| Running belt drifts to one side. | Belt not centered. | Adjust the running belt (see Section 5.3). |
| Treadmill makes unusual noise. | Loose parts, motor issue, belt friction. | Check all bolts and screws for tightness. Lubricate belt. If noise persists, contact customer support. |
| Treadmill does not lock securely in folded position. | Locking knob not fully engaged, misalignment. | Ensure the folding knob is pulled out and fully inserted into the locking hole. If misalignment prevents full engagement, gently adjust the frame until the knob can secure the position. Do not force the mechanism. If the issue persists, contact customer support. |
7. Specifications
| Feature | Specification |
|---|---|
| Brand | Sandinrayli |
| Model Name | T-35 |
| Overall Dimensions (L x W x H) | 47.5" x 20" x 45" |
| Folding Dimensions (L x W x H) | 23" x 20" x 48" |
| Running Belt Dimensions (L x W) | 39.4" x 14.2" |
| Item Weight | 55 Pounds |
| Maximum Load Capacity | 220 LBS |
| Motor Horsepower | 2.0 HP |
| Speed Range | 0.6 - 6.2 MPH (1-10 km/h) |
| Incline Levels | 3 Manual Levels |
| Display Type | LCD (3 inches) |
| Number of Programs | 12 Preset Programs |
| Material | ABS + Steel |
| Power Source | Corded Electric (AC 110V) |
| Included Components | Safety Key, Silicone Oil, Hex Wrench, Instruction Manual |
8. Warranty and Support
Sandinrayli products are manufactured to high-quality standards. For specific warranty details, please refer to the warranty card included with your purchase or contact Sandinrayli customer support directly.
If you encounter any issues or have questions not covered in this manual, please contact our customer support team for assistance. Provide your product model number (T-35) and purchase details when contacting support to ensure efficient service.
For the latest support information and contact methods, please visit the official Sandinrayli website or refer to your purchase documentation.