
1. Introduction
The KGUSS Topping A30 Pro is a high-performance desktop headphone amplifier designed to process and amplify audio signals from various sources, improving audio quality and power. It features both unbalanced and balanced inputs and outputs, gain settings, a ground lift switch, and multiple headphone jack types for broad compatibility.

Figure 1: Front view of the KGUSS Topping A30 Pro Headphone Amplifier.
2. Package Contents
Verify that all items are present in the package:
- A30Pro Headphone Amplifier
- AC power cable
- 6.35mm to 3.5mm adapter
- User manual (this document)
- Warranty card
3. Setup Instructions
3.1 Connecting to Power
Connect the provided AC power cable to the power input on the rear panel of the A30 Pro and then to a suitable power outlet. Ensure the power switch is in the OFF position before connecting.
3.2 Audio Input Connections
The A30 Pro supports both balanced XLR and unbalanced RCA inputs. Choose the appropriate input based on your audio source (e.g., DAC, audio player).
- XLR Input: Connect your balanced audio source to the XLR (L+R) input ports on the rear panel.
- RCA Input: Connect your unbalanced audio source to the RCA (L+R) input ports on the rear panel.
Use the input selector switch on the front panel to choose between RCA or XLR input. When the unit is powered off, the input signal is directly passed through to the RCA or TRS outputs without amplification, which is suitable for active speakers or monitor speakers if your DAC has pre-amplifier functions.

Figure 2: Rear panel connections including XLR and RCA inputs, and pass-through outputs.
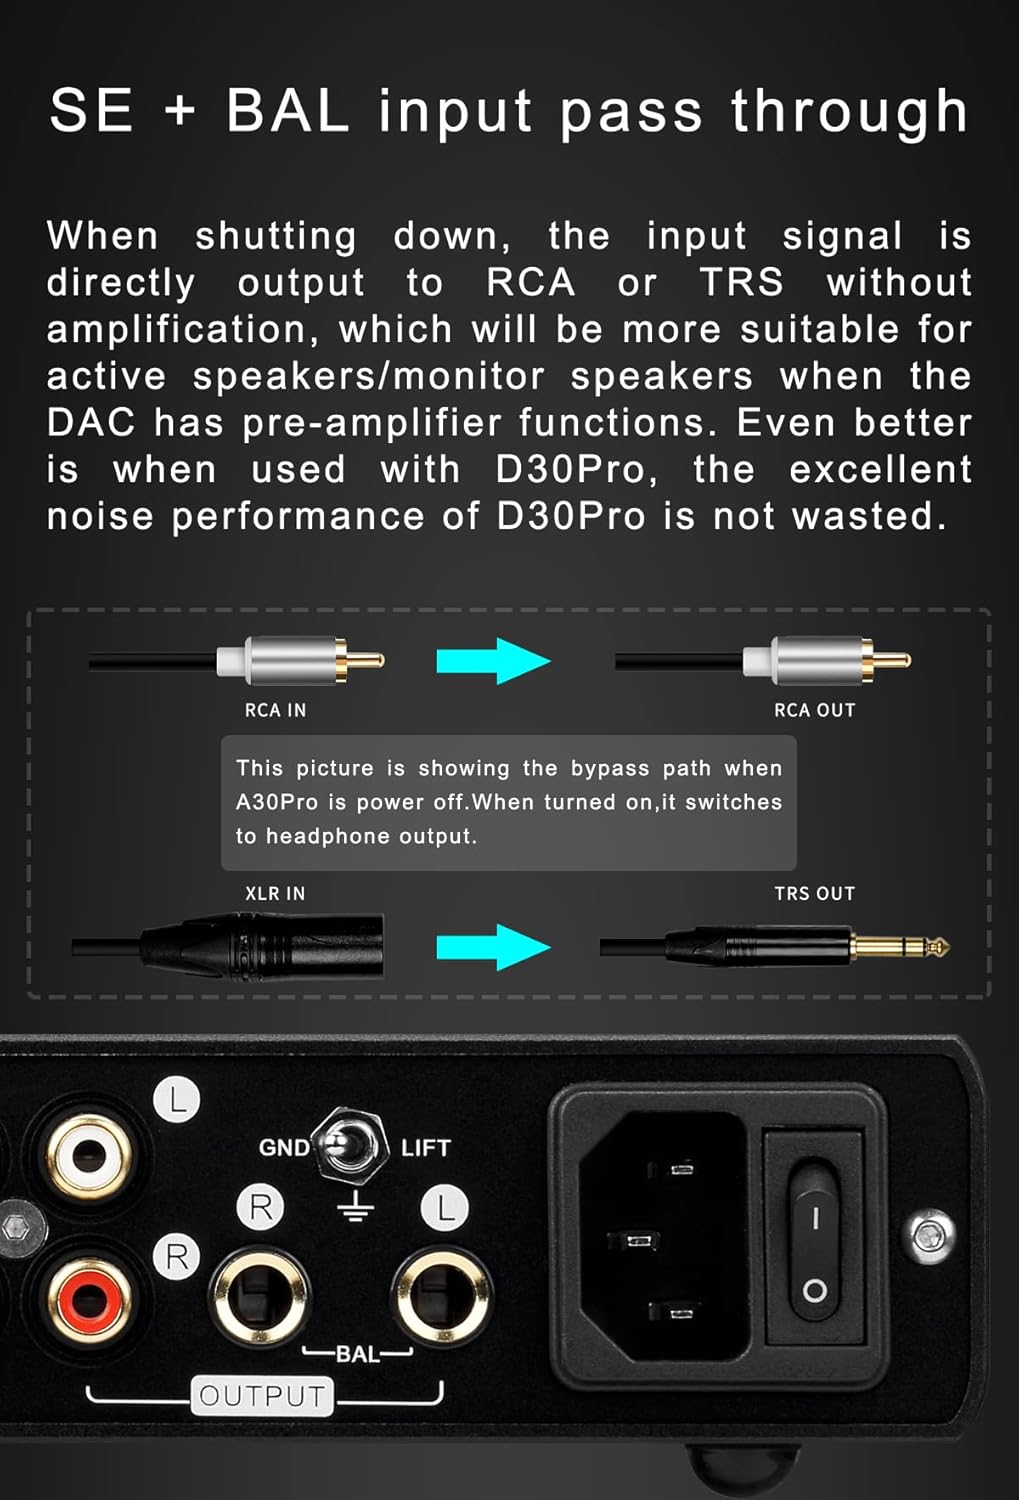
Figure 3: Illustration of input signal bypass when the A30 Pro is powered off. When powered on, it switches to headphone output.
3.3 Headphone Output Connections
The A30 Pro offers multiple headphone output options for wide compatibility:
- 4-PIN XLR Output: For balanced headphones.
- 4.4mm Output: For balanced headphones.
- 6.35mm Output: For single-ended headphones. Use the included 6.35mm to 3.5mm adapter for headphones with a 3.5mm plug.
Figure 4: Front panel with 4-PIN XLR, 4.4mm, and 6.35mm headphone output jacks.

Figure 5: Various headphone cable types compatible with the A30 Pro's output jacks.
4. Operation
4.1 Powering On/Off
Flip the power switch on the rear panel to the 'ON' position to power on the amplifier. Flip it to 'OFF' to power down the unit.
4.2 Input Selection
Use the 'INPUT' switch on the front panel to select between RCA or XLR audio input sources. Ensure the correct input is selected for your connected device.
4.3 Gain Settings
The A30 Pro features a 3-step gain setting (L/M/H) to adapt to various headphone sensitivities, from highly sensitive In-Ear Monitors (IEMs) to high-impedance, full-size over-ear headphones. Adjust the 'GAIN' switch on the front panel to match your headphones and desired volume level.

Figure 6: Front panel controls for input selection and gain settings.
4.4 Volume Control
Adjust the large knob on the right side of the front panel to control the headphone output volume. Start with a low volume and gradually increase it to a comfortable listening level.
4.5 Ground Lift Switch
The A30 Pro includes a GND/LIFT switch on the rear panel to address ground loop noise that may occur when multiple pieces of equipment are connected via RCA. In normal use, set the switch to 'GND'. If you experience ground loop noise, switch to 'LIFT' to change the ground point of the A30 Pro, potentially eliminating the noise.
4.6 Class A Operation
When headphones with an impedance greater than or equal to 250 ohms are connected, the A30 Pro will automatically operate in Class A mode, optimizing performance for high-impedance headphones.
Video 1: An overview of the Topping A30 Pro NFCA Headphone Amplifier, highlighting its features such as pass-through, Hi-Res Audio support, 3-step gain settings, low THD+N, multiple output options (4-PIN XLR, 4.4mm, 6.35mm), balanced input, low noise, and maximum output power. It also demonstrates the Class A operation for high-impedance headphones and suggests pairing with the D30 Pro DAC.
5. Maintenance
5.1 Cleaning and Care
To maintain the appearance and functionality of your A30 Pro, follow these guidelines:
- Wipe the exterior with a soft, dry cloth.
- Avoid using abrasive cleaners, solvents, or strong chemicals, as these can damage the finish.
- Do not expose the unit to excessive moisture or liquids.
- Ensure proper ventilation around the unit to prevent overheating.
6. Troubleshooting
If you encounter issues with your A30 Pro, refer to the following common problems and solutions:
- No Sound:
- Ensure the power cable is securely connected and the unit is powered on.
- Verify that the correct input (RCA or XLR) is selected on the front panel.
- Check all audio cables for secure connections.
- Confirm that your audio source is playing and its volume is not muted or too low.
- Adjust the volume knob on the A30 Pro.
- Ensure headphones are properly plugged into one of the output jacks.
- Distorted Sound:
- Reduce the volume level on both the A30 Pro and your audio source.
- Check the gain setting; a lower gain might be appropriate for sensitive headphones.
- Ensure audio cables are not damaged and are securely connected.
- Test with a different audio source or headphones to isolate the problem.
- Humming or Buzzing Noise (Ground Loop):
- Switch the GND/LIFT switch on the rear panel to 'LIFT'.
- Ensure all audio components are plugged into the same power strip or wall outlet.
- Try disconnecting other devices connected to your audio system one by one to identify the source of the noise.
- Unit Not Powering On:
- Check the power cable connection.
- Verify the power outlet is functional by plugging in another device.
- Ensure the power switch on the rear panel is in the 'ON' position.
If the issue persists after trying these steps, please contact customer support.
7. Specifications
Below are the key specifications for the KGUSS Topping A30 Pro Headphone Amplifier:
| Feature | Detail |
|---|---|
| Model Name | A30 Pro |
| Brand | KGUSS |
| Dimensions | 17.4cm x 13.8cm x 4.5cm |
| Weight | 870g |
| Power Input | 100-240VAC 50Hz/60Hz |
| Power Consumption | <9.0W |
| Gain Settings | L/M/H (+14dB, 0dB, -14dB) |
| Amplifier Inputs | 1 x XLR (L+R), 1 x RCA (L+R) |
| Headphone Outputs | 1 x 6.35mm, 1 x XLR, 1 x 4.4mm |
| Pass-through Outputs | 1 x 6.35mm TRS (L+R), 1 x RCA (L+R) |
| THD+N | <0.00006% |
| Noise | <0.3uVrms |
| Max Output Power (16Ω) | 6000mW x 2 |
| Max Output Power (32Ω) | 5500mW x 2 |
| Max Output Power (300Ω) | 840mW x 2 |
| Max Output Power (600Ω) | 420mW x 2 |
| Output Impedance | <0.1Ω |
| Enclosure Material | Aluminum |

Figure 7: Comparison of A30 Pro specifications with other Topping amplifier models.
8. Warranty and Support
8.1 Warranty Information
The KGUSS Topping A30 Pro comes with a warranty as specified on the included warranty card. Please refer to the warranty card for details regarding coverage, terms, and conditions. Keep your purchase receipt as proof of purchase for warranty claims.
8.2 Customer Support
For technical assistance, troubleshooting not covered in this manual, or warranty inquiries, please contact KGUSS customer support. You can find contact information on the warranty card or through the official KGUSS website. For additional resources and product information, visit the KGUSS Store on Amazon.


