
1. Introduction
This instruction manual provides essential information for the safe and correct installation, operation, and maintenance of your DL-pro Heating Pump, model 755078 (also known as 1BS3610-6AA). This component is designed as a replacement part for various dishwashers from brands such as Bosch, Siemens, Neff, Balay, and Constructa. Please read this manual thoroughly before attempting any installation or repair work.
2. Safety Information
WARNING: Risk of electric shock and injury.
- Always disconnect the dishwasher from the main power supply before beginning any installation, maintenance, or repair work.
- Ensure the water supply to the dishwasher is turned off.
- Appliance repair should only be performed by qualified personnel or individuals with sufficient technical knowledge and experience. Incorrect installation can lead to damage to the appliance or personal injury.
- Wear appropriate personal protective equipment, such as gloves and eye protection.
- Handle the pump carefully to avoid damage to its components or connections.
3. Product Overview
The DL-pro Heating Pump is a critical component in your dishwasher, responsible for heating the water to the required temperature for effective cleaning. This replacement pump is engineered to meet the specifications of original equipment manufacturer (OEM) parts, ensuring compatibility and reliable performance.
3.1. Key Features and Compatibility
- Part Number: 755078 (replaces 12014090), also compatible with Bosch Siemens 00755078 and Küppersbusch 441850.
- Internal Model Number: 1BS3610-6AA.
- Compatible Brands: Bosch, Siemens, Balay, Blaupunkt, Constructa, Gaggenau, Junker & Ruh, Koenic, Küppersbusch, Neff, Pitsos, Profilo, Viva.
- Included Components: Heating pump, hose clamp.
3.2. Visual Identification

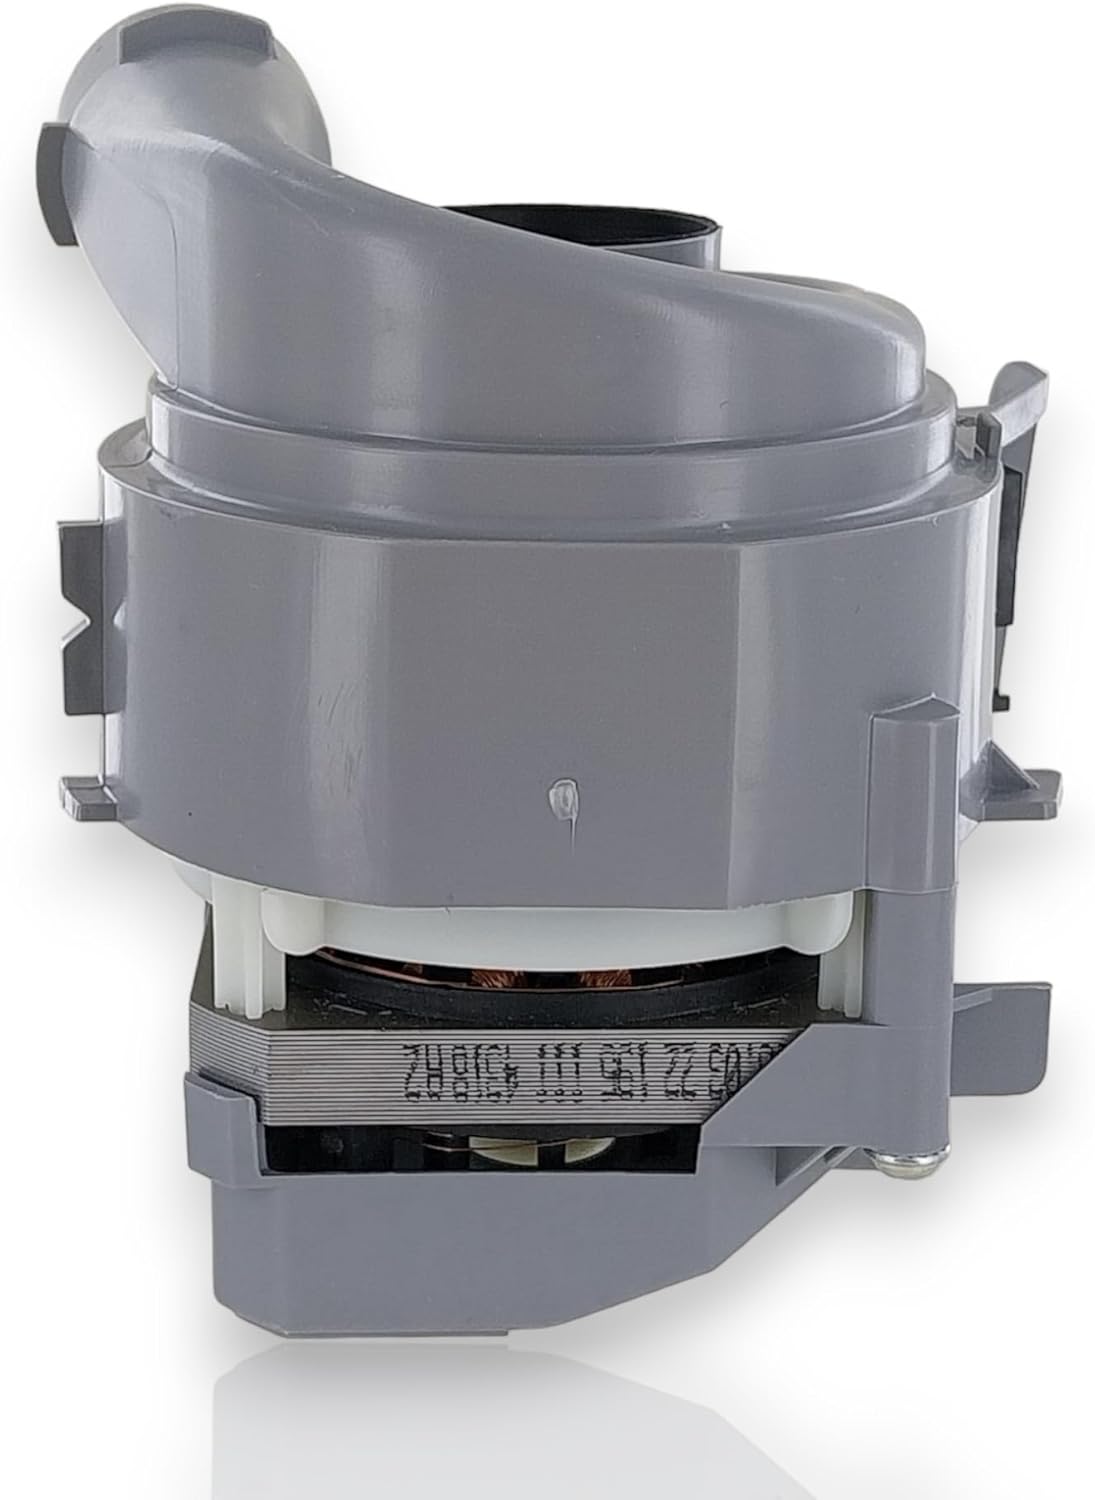

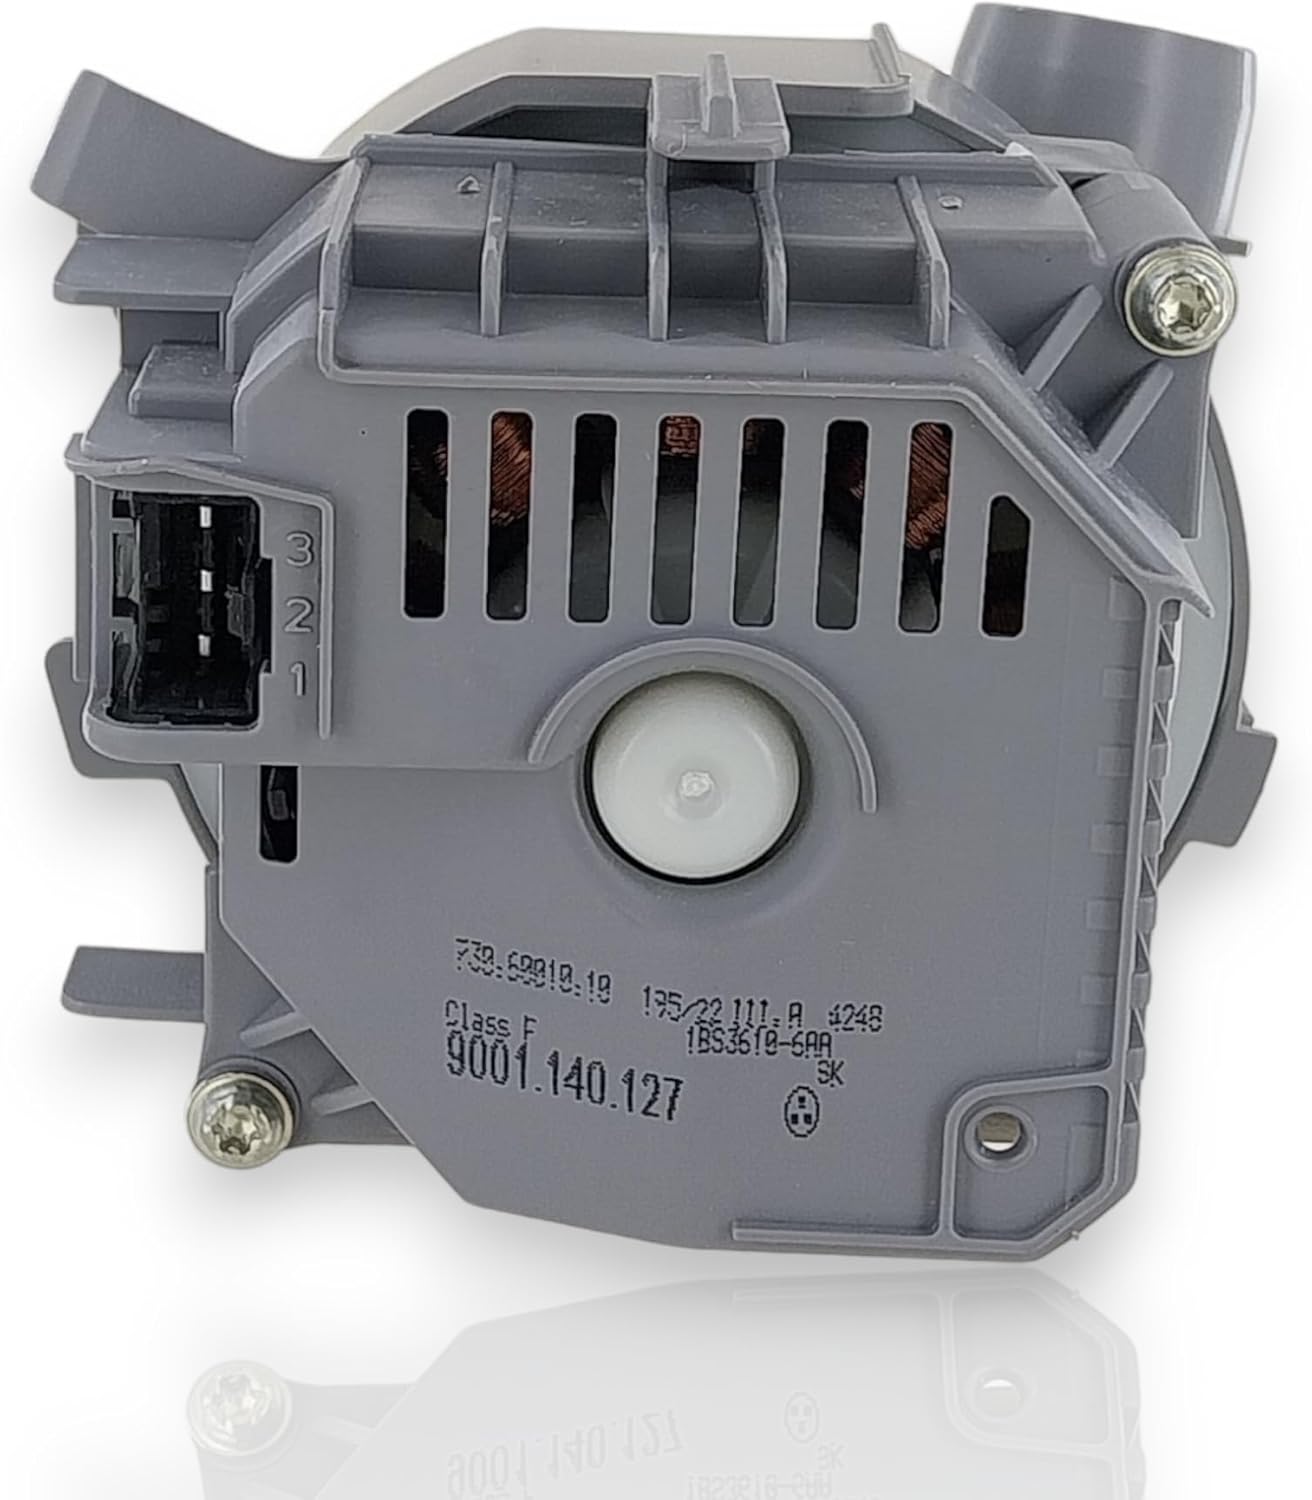
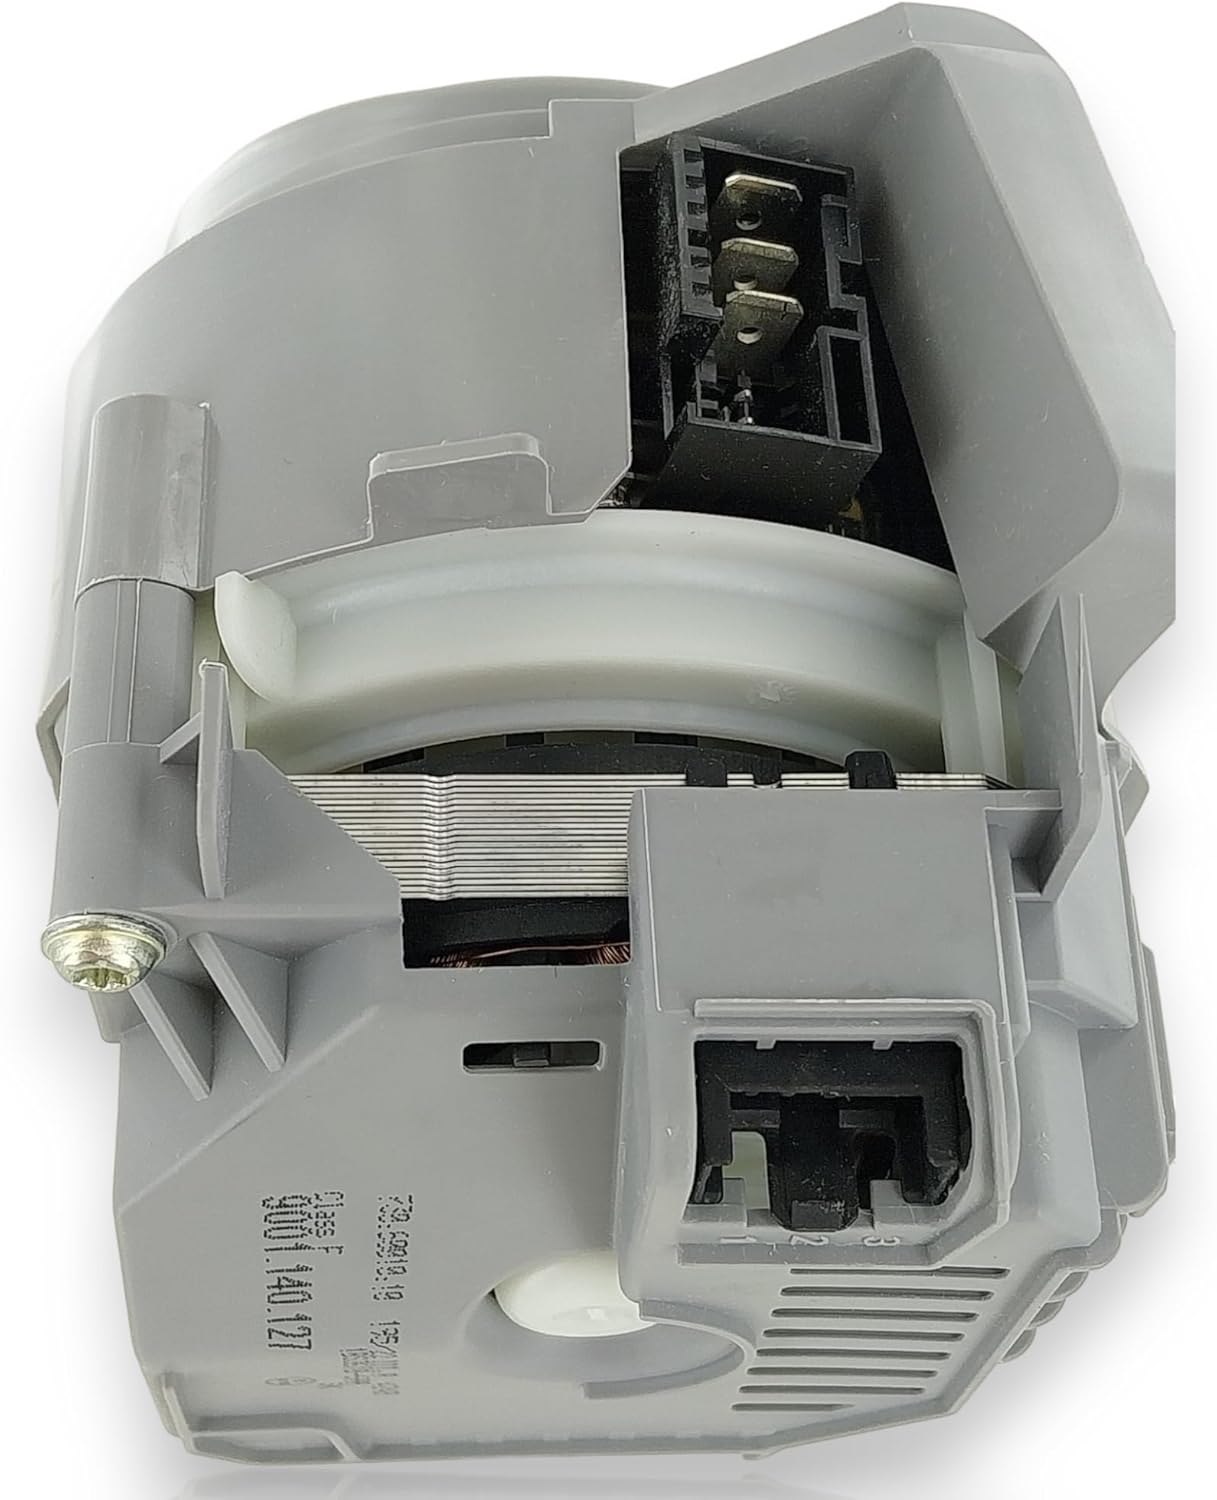


4. Setup and Installation
Replacing a dishwasher heating pump requires careful attention to detail. If you are unsure about any step, it is recommended to consult a professional appliance technician.
4.1. Preparation
- Disconnect Power: Unplug the dishwasher from the electrical outlet or turn off the circuit breaker supplying power to the appliance.
- Turn Off Water Supply: Close the water inlet valve to the dishwasher.
- Access the Pump: Depending on your dishwasher model, you may need to pull the appliance out from its cabinet, remove the lower access panel, or tilt the dishwasher to access the pump assembly from underneath. Refer to your dishwasher's specific service manual for detailed access instructions.
- Drain Water: Ensure any residual water in the dishwasher's sump or hoses is drained to prevent spills during pump removal.
4.2. Removal of Old Pump
- Disconnect Hoses: Carefully detach the water hoses connected to the heating pump. Be prepared for minor water leakage. Use the provided hose clamp if the original is damaged or unsuitable for reuse.
- Disconnect Electrical Connections: Unplug the electrical wiring harness from the old pump. Note the orientation of the connectors if they are not keyed.
- Remove Mounting Hardware: Unscrew or unclip any mounting brackets or clamps securing the pump to the dishwasher chassis.
- Extract Old Pump: Carefully remove the old heating pump from its position.
4.3. Installation of New Pump
- Position New Pump: Place the new DL-pro heating pump into the correct mounting location.
- Secure Mounting Hardware: Reattach any mounting brackets or clamps to secure the new pump firmly.
- Connect Electrical Connections: Reconnect the electrical wiring harness to the new pump. Ensure connections are snug and correct.
- Connect Hoses: Reattach the water hoses to the new pump. Use the new hose clamp provided to ensure a watertight seal.
4.4. Post-Installation
- Restore Access Panels: Reinstall any access panels or covers that were removed.
- Restore Water Supply: Slowly open the water inlet valve to the dishwasher and check for any leaks around the pump connections.
- Restore Power: Plug the dishwasher back into the electrical outlet or turn on the circuit breaker.
- Test Operation: Run a short wash cycle to verify the pump is functioning correctly and there are no leaks.
5. Operating Instructions
The DL-pro Heating Pump operates automatically as an integral part of your dishwasher's washing cycle. Once correctly installed, no direct user interaction is required for the pump itself. The dishwasher's control system will manage the pump's operation to heat the wash water according to the selected program.
Ensure your dishwasher is loaded correctly and detergent is added as per your dishwasher's user manual. The heating pump will activate during the wash and rinse phases that require heated water.
6. Maintenance
The DL-pro Heating Pump is a sealed unit and does not require specific user maintenance. Its longevity is primarily influenced by the overall condition and maintenance of the dishwasher itself.
6.1. General Dishwasher Maintenance Tips
- Clean Filters Regularly: Clogged filters can strain the pump and other components. Clean your dishwasher's filters as recommended by its manufacturer.
- Use Appropriate Detergent: Use only dishwasher-specific detergents and rinse aids to prevent residue buildup.
- Check for Leaks: Periodically inspect the area around the dishwasher for any signs of water leakage, which could indicate issues with hoses or seals.
- Prevent Limescale Buildup: In hard water areas, consider using dishwasher cleaner or descaler periodically to prevent limescale accumulation, which can affect heating elements and pump efficiency.
7. Troubleshooting
If your dishwasher is experiencing issues after installing the new heating pump, or if you suspect a problem with the pump, refer to the following common troubleshooting scenarios.
7.1. Common Issues and Solutions
| Symptom | Possible Cause | Solution |
|---|---|---|
| Dishes are not getting hot/water is cold | Faulty heating pump (unlikely if newly installed), electrical connection issue, dishwasher control board issue. | Check electrical connections to the pump. Verify the dishwasher's heating element is receiving power. If the pump is new, ensure it was installed correctly. Consult a technician if the issue persists. |
| Dishwasher not starting or displaying error code related to heating | Incorrect wiring, faulty sensor, or control board. | Double-check all electrical connections. Refer to your dishwasher's user manual for specific error code meanings and troubleshooting steps. |
| Water leakage around the pump area | Loose hose clamp, damaged seal, or improper hose connection. | Ensure hose clamps are tightened securely. Inspect seals for damage and ensure hoses are properly seated. |
| Unusual noise from the dishwasher | Debris in the pump, loose mounting, or a faulty pump (less likely if new). | Disconnect power and water. Inspect the pump area for any foreign objects. Ensure the pump is securely mounted. |
If troubleshooting steps do not resolve the issue, it is recommended to contact a qualified appliance repair technician.
8. Specifications
| Feature | Detail |
|---|---|
| Brand | DL-pro |
| Model Number (Item) | 1BS3610-6AA |
| Style / Part Number | 755078 (replaces 12014090) |
| Type | Heating Pump for Dishwasher |
| Installation Type | Built-in |
| Color | Grey |
| Material | Stainless Steel (internal components), Plastic (housing) |
| Product Dimensions (L x W x H) | 13.1D x 13.1W x 13.1H centimeters |
| Weight | Approximately 800 g (product only) |
| Included Components | Heating pump, hose clamp |
| Compatible OEM Part Numbers | Bosch Siemens 00755078, Küppersbusch 441850 |
9. Warranty and Support
For warranty information or technical support regarding your DL-pro Heating Pump, please refer to the documentation provided with your purchase or contact the retailer or manufacturer directly. Ensure you have your purchase details and the product's model number (755078 or 1BS3610-6AA) available when seeking support.