
1. Product Overview
This manual provides essential information for the safe and efficient operation of your Whirlpool 5 Star Whitemagic Premier 7kg GenX Fully Automatic Top Load Washing Machine. This appliance is designed to deliver superior cleaning performance with features like Hard Water Wash, Spa Wash System, and Spiro Wash Action.
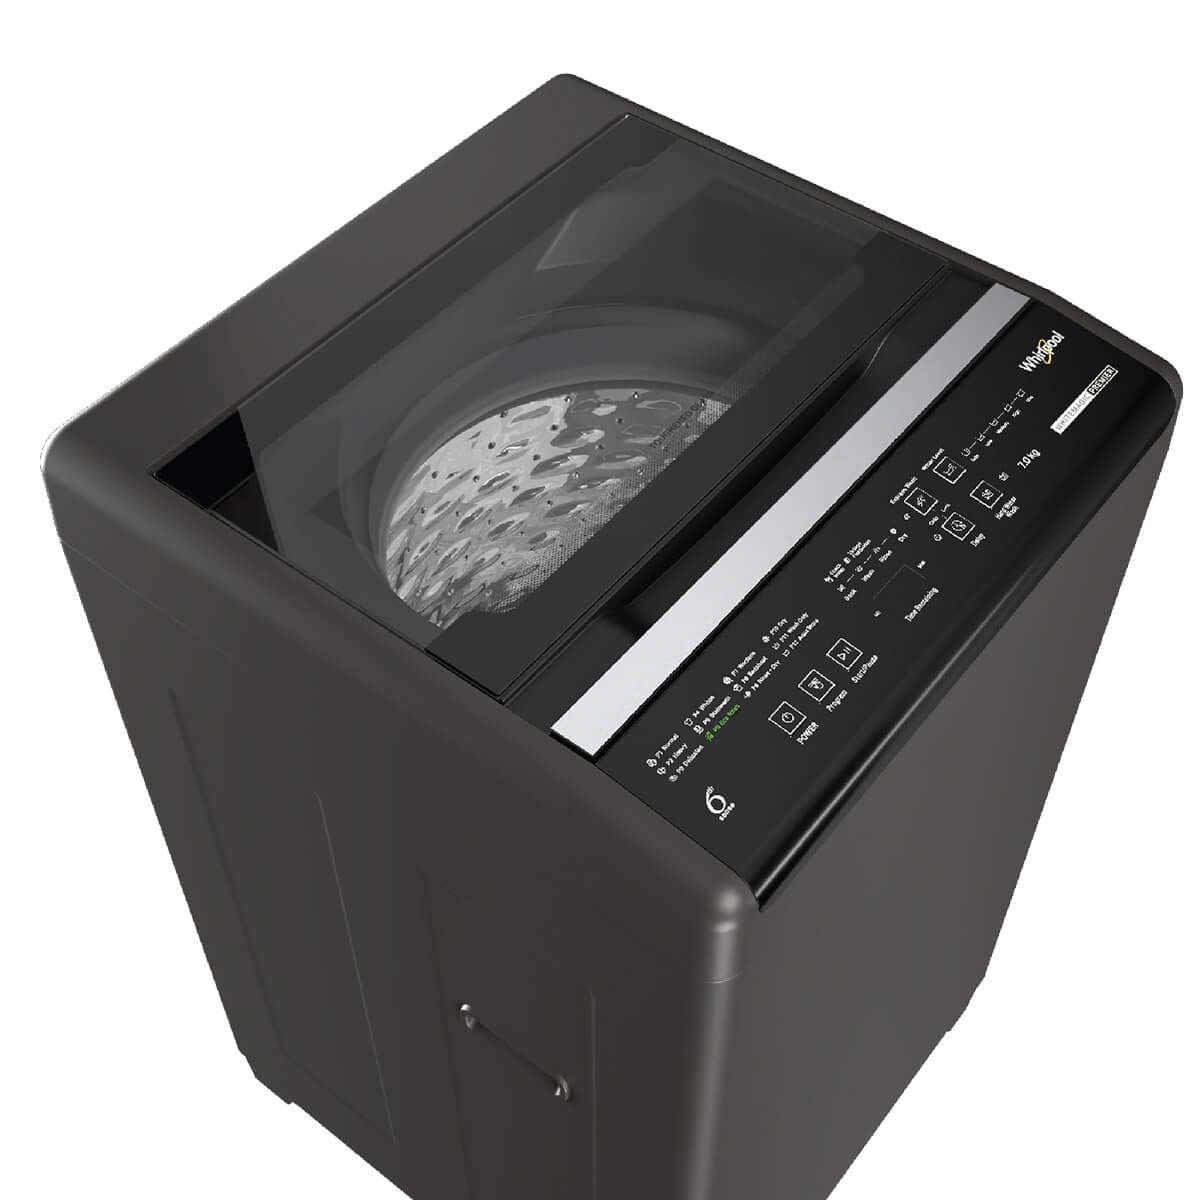
Figure 1.1: Overall view of the Whirlpool 7kg GenX Fully Automatic Top Load Washing Machine.
2. Important Safety Instructions
Read all instructions before using the appliance to reduce the risk of fire, electric shock, or injury to persons.
- Ensure the washing machine is properly grounded.
- Do not install or store the appliance where it will be exposed to the weather or to freezing temperatures.
- Do not allow children to play on or in the appliance. Close supervision is necessary when the appliance is used near children.
- Do not reach into the appliance if the tub or agitator is moving.
- Do not wash articles that have been previously cleaned in, washed in, soaked in, or spotted with gasoline, dry-cleaning solvents, or other flammable or explosive substances.
- Keep flammable materials and vapors away from the appliance.
- Always disconnect the appliance from the power supply before cleaning, servicing, or attempting any repairs.
- Do not operate any appliance with a damaged cord or plug, or if it has been dropped or damaged.
3. Installation and Setup
3.1 Unpacking
Carefully remove all packaging materials. Ensure that the included components, such as the 7 Kg GenX Fully Automatic Top Load Washing Machine unit, are present and undamaged.
3.2 Placement
Place the washing machine on a firm, level floor. Ensure there is adequate ventilation around the machine. Avoid direct sunlight or exposure to rain. The dimensions of the machine are approximately 45.5 cm (L) x 47.2 cm (W) x 97.2 cm (H).

Figure 3.1: Approximate dimensions of the washing machine for proper placement.
3.3 Water Connection
Connect the water inlet hoses to the hot and cold water faucets. Ensure connections are tight to prevent leaks. The machine requires a water pressure between 0.03 MPa and 1 MPa.
3.4 Drainage
Install the drain hose properly to ensure efficient water discharge. The drain hose should be positioned at a height between 60 cm and 90 cm from the floor.
3.5 Power Connection
Plug the power cord into a grounded 220-240V, 50Hz electrical outlet. Do not use extension cords or adapters.
3.6 Initial Use
Before the first wash with clothes, run a complete wash cycle without laundry to clean the inner tub and check for proper installation.
4. Operating Instructions
4.1 Control Panel Overview
The washing machine features a user-friendly touch control panel with a digital display. Familiarize yourself with the buttons for Power, Program selection, Start/Pause, and various options.

Figure 4.1: Top view of the washing machine, showing the control panel and drum.

Figure 4.2: Detailed view of the Spa Drum and the touch control panel.
4.2 Loading Laundry
Open the lid and load clothes loosely into the drum. Do not overload the machine; the maximum capacity is 7 kg. Distribute laundry evenly to prevent imbalance during the spin cycle.
4.3 Adding Detergent and Softener
Add the appropriate amount of detergent to the detergent dispenser. If using fabric softener, add it to the designated compartment. Refer to detergent packaging for recommended quantities.
4.4 Selecting a Wash Program
Press the 'Power' button to turn on the machine. Use the 'Program' button to cycle through the 12 available wash programs:
- Daily: For everyday laundry.
- Heavy: For heavily soiled items.
- Delicates: For fragile garments.
- Whites: Optimized for white fabrics.
- Hard Water Wash: Adapts operations for effective cleaning in hard water conditions.
- Woollens: Gentle wash for wool items.
- Bedsheets: Specific program for bed linen.
- Sari: Gentle care for traditional Indian garments.
- Rinse+Spin: For rinsing and spinning only.
- Spin Only: For draining water and spinning clothes.
- Wash Only: For washing without rinsing or spinning.
- Aqua Store: For storing water for later use.
4.5 Special Functions
This machine features 6TH SENSE 123 Technology which intelligently senses the load and optimizes water and detergent usage. The Spa Wash System with its unique prime mover and drum combination ensures less tangling and a smoother wash.
4.6 Starting a Cycle
After selecting the desired program, press the 'Start/Pause' button to begin the wash cycle. The digital display will show the remaining time.
4.7 End of Cycle
The machine will signal when the wash cycle is complete. Unload clothes promptly to prevent wrinkles.
5. Care and Maintenance
Regular maintenance ensures optimal performance and longevity of your washing machine.
5.1 Cleaning the Exterior
Wipe the exterior surfaces with a soft, damp cloth. Do not use abrasive cleaners or solvents.
5.2 Cleaning the Drum
The Spa Drum is designed to minimize lint. Periodically run a 'Tub Clean' cycle (if available) or a hot wash cycle with an empty drum and a washing machine cleaner to remove detergent residue and odors.
5.3 Cleaning the Detergent Dispenser
Remove the detergent dispenser drawer and rinse it under running water to clear any accumulated detergent or softener residue. Dry thoroughly before reinserting.
5.4 Water Inlet Filter Cleaning
Periodically check and clean the mesh filters at the water inlet hose connections to prevent blockages caused by sediment in the water supply.
6. Troubleshooting Guide
Before contacting customer service, refer to this section for solutions to common issues.
- Machine does not start: Ensure the power cord is securely plugged in, the water supply is on, and the lid is closed properly. Check if a program is selected and the 'Start/Pause' button is pressed.
- No water filling: Check if water faucets are fully open and water inlet hoses are not kinked. Clean the water inlet filters if they appear blocked.
- Water not draining: Ensure the drain hose is not kinked or blocked. Check if the drain pump filter (if accessible) is clean.
- Excessive vibration/noise: Ensure the machine is on a level surface and all transit bolts (if any) have been removed during installation. Redistribute the laundry inside the drum if it's unbalanced.
- Error codes on display: Refer to the specific error code in your full product manual or contact customer support for guidance.
7. Product Specifications
| Brand | Whirlpool |
| Model Number | EAN8905191007697 |
| Capacity | 7 kg |
| Energy Efficiency | 5 Star Rating |
| Maximum Rotational Speed | 740 RPM |
| Voltage | 220-240V, 50Hz |
| Control Console | Touch Control |
| Access Location | Top Load |
| Number of Wash Programs | 12 |
| Drum Type | Steel Spa Drum |
| Item Weight | 39 kg |
| Item Dimensions (LxWxH) | 45.5 x 47.2 x 97.2 Centimeters |
| Included Components | 7 Kg GenX Fully Automatic Top Load Washing Machine |
8. Warranty Information
Your Whirlpool 5 Star Whitemagic Premier 7kg GenX Fully Automatic Top Load Washing Machine comes with a comprehensive warranty:
- 2 Years Comprehensive Warranty on the entire appliance.
- 10 Years Motor Warranty on the washing machine motor.
Please retain your purchase receipt for warranty claims. The warranty covers manufacturing defects under normal use. For detailed terms and conditions, refer to the warranty card provided with your product or contact Whirlpool customer service.
9. Customer Support
For any queries, service requests, or technical assistance, please contact Whirlpool customer service. You can find contact details on the official Whirlpool website or in the documentation included with your washing machine.
You may also visit the official Whirlpool store for more product information and support: Whirlpool Store on Amazon.in

