Introduction and Overview
Thank you for choosing the Yaheetech 10FT Patio Offset Umbrella. This cantilever umbrella is designed to provide extensive shade and comfort for your outdoor living spaces such as patios, gardens, lawns, decks, backyards, and pools. Featuring a sturdy metal frame, high-intensity fabric with UV protection, and a convenient cranking system, this umbrella is built for durability and ease of use.

Image: The Yaheetech 10FT Patio Offset Umbrella in a tan color, providing shade over lounge chairs next to a swimming pool.
Product Features
- Solid Metal Frame: Constructed with a sturdy iron structure, this cantilever patio umbrella is heavy-duty yet lightweight, ideal for long-term outdoor use.
- High-Intensity Fabric: The canopy is made from waterproof, fade-resistant, and sunblock polyester fabrics, ensuring high intensity and durability against wear and tear.
- Handy Cranking System: Features a robust metal frame with an easy-to-use crank system for effortless lifting, opening, and closing. The cranking mechanism allows for angle adjustments to optimize shade.
- Extra-Wide Canopy: With a diameter of 114 inches (approximately 10 feet), the canopy provides a large shading area, perfect for outdoor gatherings and relaxation.
- Easy Assembly: Designed for simple assembly with a crank system, requiring minimal techniques. All necessary hardware is included.
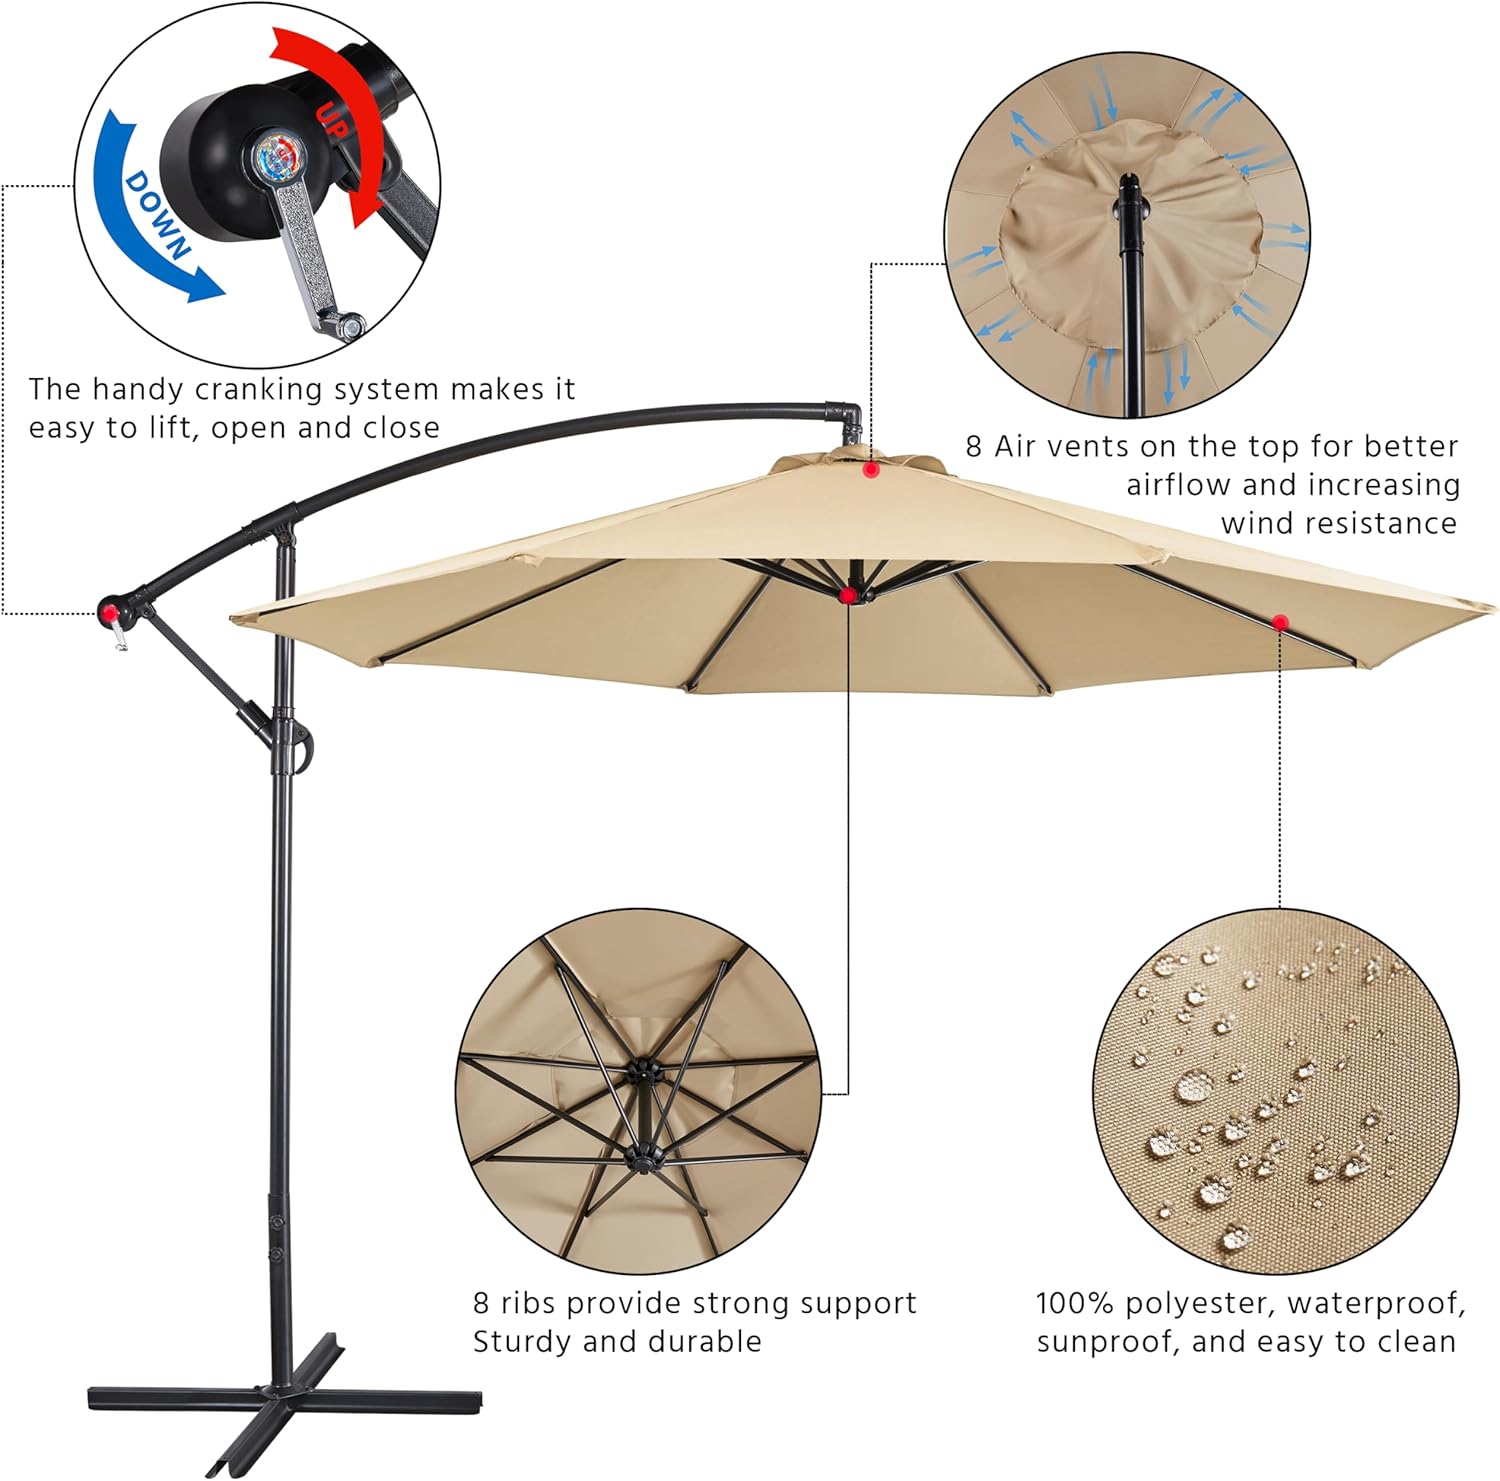
Image: A detailed diagram highlighting the key features of the umbrella, including the crank system, air vents, rib structure, and fabric properties.

Image: A split image showing the umbrella canopy repelling water on one side and blocking sunlight on the other, illustrating its waterproof and sunproof capabilities.
Package Contents
Please ensure all parts are present before beginning assembly. Refer to the included instruction manual for a detailed parts list.
- Umbrella Canopy Assembly
- Main Pole Sections
- Cross Base Components (2 pieces)
- Solar Panel (for LED lights)
- Hardware Packet (screws, washers, wrench)
- Instruction Manual
Note: Base weights are sold separately and are highly recommended for stability, especially in windy conditions. The cross base alone may not provide sufficient stability for the cantilever design.
Setup and Assembly Instructions
Follow these steps to assemble your Yaheetech Patio Offset Umbrella. It is recommended to have two people for easier assembly.
- Assemble the Cross Base: Connect the two cross base components by sliding the notched sections together. Secure them using the provided bolts and washers.
- Attach the Main Pole: Insert the main pole section into the center of the assembled cross base. Secure it with the provided hardware, ensuring it is tightened for stability.
- Connect Solar Panel: Locate the solar panel and its corresponding plug from the umbrella canopy. Connect the plug to the solar panel, ensuring a secure fit. The solar panel will then attach to the top of the umbrella frame.
- Attach Umbrella Canopy Assembly: Carefully lift the umbrella canopy assembly and insert its lower pole into the main pole attached to the base. Align the buttons on the lower pole with the holes on the main pole and secure them.
- Secure Connections: Tighten all screws and bolts using the provided wrench to ensure the umbrella is stable and securely assembled.
- Add Base Weights (Recommended): For optimal stability, especially with the cantilever design, place appropriate base weights (sold separately, e.g., sandbags or water-filled plates) onto the cross base.

Image: A close-up view of the heavy-duty metal cross base, highlighting the two knobs for increased support and stability, and four supporting feet for better wind resistance.
Video: An official Yaheetech video demonstrating the assembly process of the 10FT Patio Offset Umbrella, including attaching the base and main pole.
Operating Instructions
- Opening the Umbrella: Turn the crank handle clockwise to extend the umbrella arm and open the canopy. Continue cranking until the canopy is fully extended and taut.
- Adjusting Tilt/Angle: The cranking mechanism on the core pole allows you to lock and change angles. Loosen the fixing sleeve, adjust the canopy to your desired position, and then clamp it into the fixed position.
- Closing the Umbrella: Turn the crank handle counter-clockwise to retract the umbrella arm and close the canopy. Once closed, secure the canopy with the attached strap.
- Using LED Lights: The umbrella features solar-powered LED lights. Ensure the solar panel is exposed to sunlight during the day for charging. Locate the power switch (usually on the underside of the umbrella arm or near the solar panel) to turn the lights on/off at night.
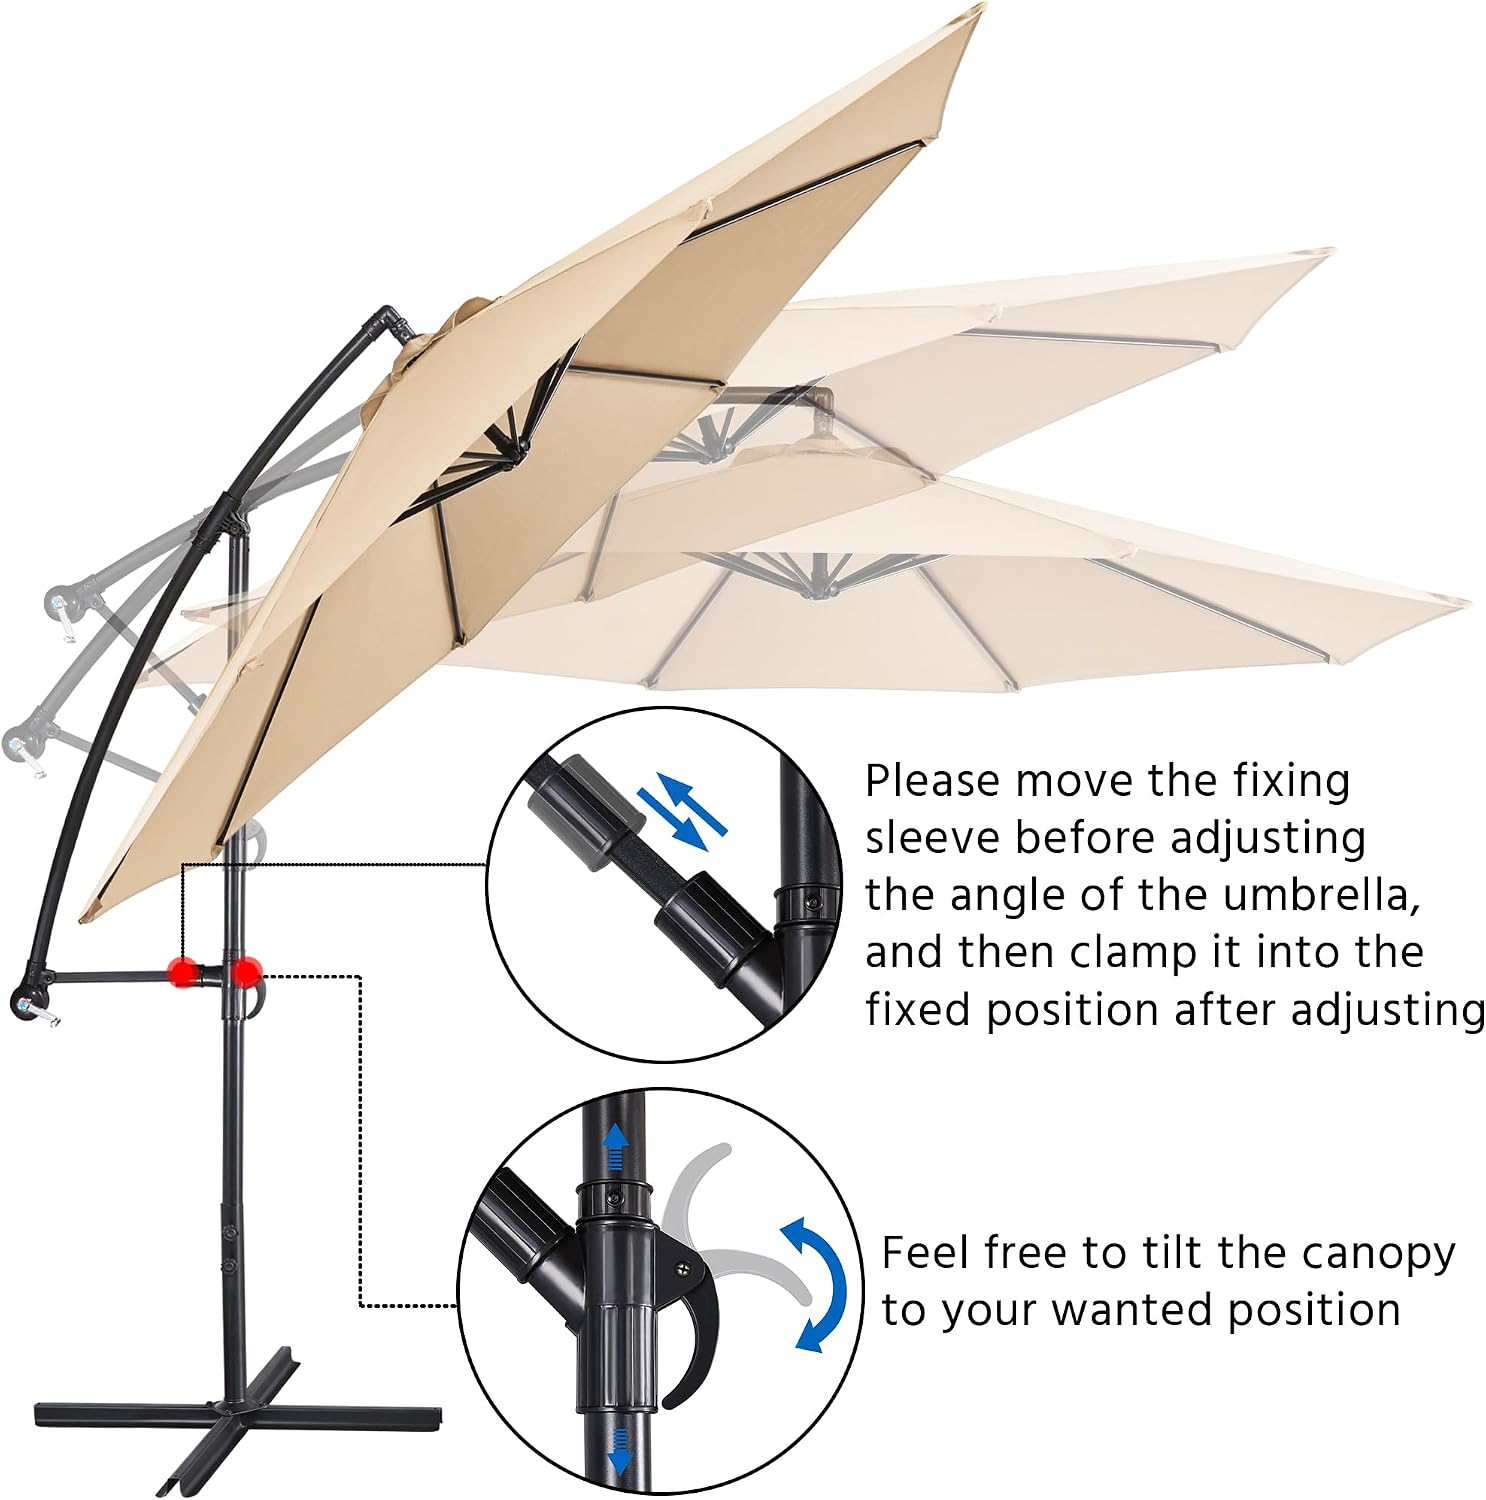
Image: A diagram illustrating the process of adjusting the umbrella's tilt by moving the fixing sleeve and clamping it into the desired position.
Video: An official Yaheetech video demonstrating the usage of the offset umbrella, including opening, closing, and adjusting its position.
Maintenance
- Cleaning the Canopy: The polyester fabric is easy to clean. Use a mild soap and water solution with a soft brush or cloth to remove dirt and stains. Rinse thoroughly and allow to air dry completely before closing or storing.
- Frame Care: The iron frame is powder-coated for rust resistance. Periodically inspect the frame for any signs of wear or damage. Clean with a damp cloth as needed.
- Winter Storage: In colder climates, it is recommended to drain any water from water-filled base weights to prevent freezing and cracking. Store the umbrella in a dry, protected area during off-season to prolong its lifespan.
- Wind Conditions: Always close the umbrella during strong winds or severe weather conditions to prevent damage to the umbrella and potential injury.
Troubleshooting
- Umbrella Tipping Over: This is a common issue if sufficient base weights are not used. Ensure your cross base is adequately weighted with sand or water-filled plates (sold separately) to prevent tipping, especially when the canopy is fully extended or in windy conditions.
- LED Lights Not Working: Check if the solar panel is receiving direct sunlight for charging. Ensure the power switch for the LED lights is in the