1. Introduction
Thank you for choosing the Kiprim LV1D Green Self-Leveling Cross Line Laser Level. This device is designed for precise leveling tasks, projecting bright horizontal and vertical green laser lines. It features automatic self-leveling within a certain range and a manual mode for projecting angled lines. Please read this manual thoroughly before use to ensure safe and proper operation.
2. Safety Information
WARNING: LASER RADIATION. DO NOT STARE INTO BEAM. CLASS II LASER PRODUCT.
- Avoid direct eye exposure to the laser beam.
- Do not disassemble the laser level. Repairs should only be performed by authorized service personnel.
- Keep the device out of reach of children.
- Operate the device in a well-lit environment to reduce the risk of accidental eye exposure.
- The device is rated IP54, providing protection against dust and splashing water. Do not immerse in water.
3. Package Contents
Verify that all items are present and in good condition upon opening the package:
- 1 x Kiprim LV1D Green Cross Line Laser Level
- 2 x AA Batteries
- 1 x User Manual
- 1 x Small Nylon Fabric Pouch

Image: Contents of the Kiprim LV1D Laser Level package, showing the device, two AA batteries, the user manual, and a small nylon carrying pouch.
4. Product Features and Components
The Kiprim LV1D laser level is designed for ease of use and durability. Key features include:
- High Precision: Wavelength 520 nm, power <1 mW, accuracy ±2.5 mm / 5 m.
- Green Cross Line: Projects bright horizontal and vertical green laser lines.
- Self-Leveling: Automatically levels within ±4°. Laser beam flashes if out of range.
- Flexible Installation: Features a 1/4"-20 tripod thread for mounting.
- Durable Design: Rubber-covered edge, IP54 waterproof, dustproof, and anti-fall.
- Locking Function: Allows for projecting inclined lines in manual mode.
Familiarize yourself with the main components:

Image: Detailed view of the Kiprim LV1D Laser Level, highlighting its key components: the On/Off Button, Status Light, Locking Compensator, 1/4"-20 Tripod Thread, and the Battery Compartment Cover.
- On/Off Button: Located on top, used for mode selection and manual mode activation/deactivation.
- Status Light: Indicates operational status.
- Locking Compensator (Slide Switch): Located on the side, controls power and locks the pendulum.
- 1/4"-20 Tripod Thread: Located at the bottom for mounting on a tripod.
- Battery Compartment Cover: Located at the back for battery access.
5. Setup
5.1 Battery Installation
- Locate the battery compartment cover on the back of the device.
- Open the cover.
- Insert two AA batteries, ensuring correct polarity (+/-).
- Close the battery compartment cover securely.
5.2 Mounting the Device
The Kiprim LV1D can be used freestanding or mounted:
- Freestanding: Place the device on a stable, level surface.
- Tripod Mounting: The 1/4"-20 thread at the bottom allows attachment to a standard camera or laser level tripod for adjustable height and rotation.
6. Operating Instructions
6.1 Self-Leveling Mode
This mode is ideal for applications requiring perfectly horizontal or vertical lines.
- Slide the locking compensator switch to the ON position. The pendulum will unlock, and the laser lines will activate.
- The device will automatically self-level within a ±4° range.
- If the device is placed on a surface inclined by more than 4°, the laser lines will flash continuously to indicate it is out of its self-leveling range. Adjust the position of the device until the laser lines stop flashing and become steady.
- Press the top On/Off button briefly to switch between horizontal line only, vertical line only, or both horizontal and vertical lines.
- To turn off the device, slide the locking compensator switch back to the OFF position. This also locks the pendulum for safe transport.

Image: The Kiprim LV1D Laser Level automatically self-levels when placed on a surface with an incline of 4 degrees or less, projecting steady horizontal and vertical laser lines.

Image: A comparison illustrating the benefits of dual module laser levels, such as the Kiprim LV1D, over single module designs, emphasizing higher precision, increased brightness, and faster self-leveling capabilities.
6.2 Manual Slash Mode (Locked Mode)
This mode allows you to project laser lines at any desired angle, useful for tasks like installing handrails or decorative patterns.
- Ensure the locking compensator switch is in the OFF (locked) position.
- Press and hold the top On/Off button for approximately 3 seconds. The laser lines will activate in a fixed position, allowing you to angle the device as needed. The status light may turn red to indicate locked mode.
- The laser lines will not self-level in this mode.
- To turn off the laser lines in manual mode, press and hold the top On/Off button again for approximately 3 seconds.
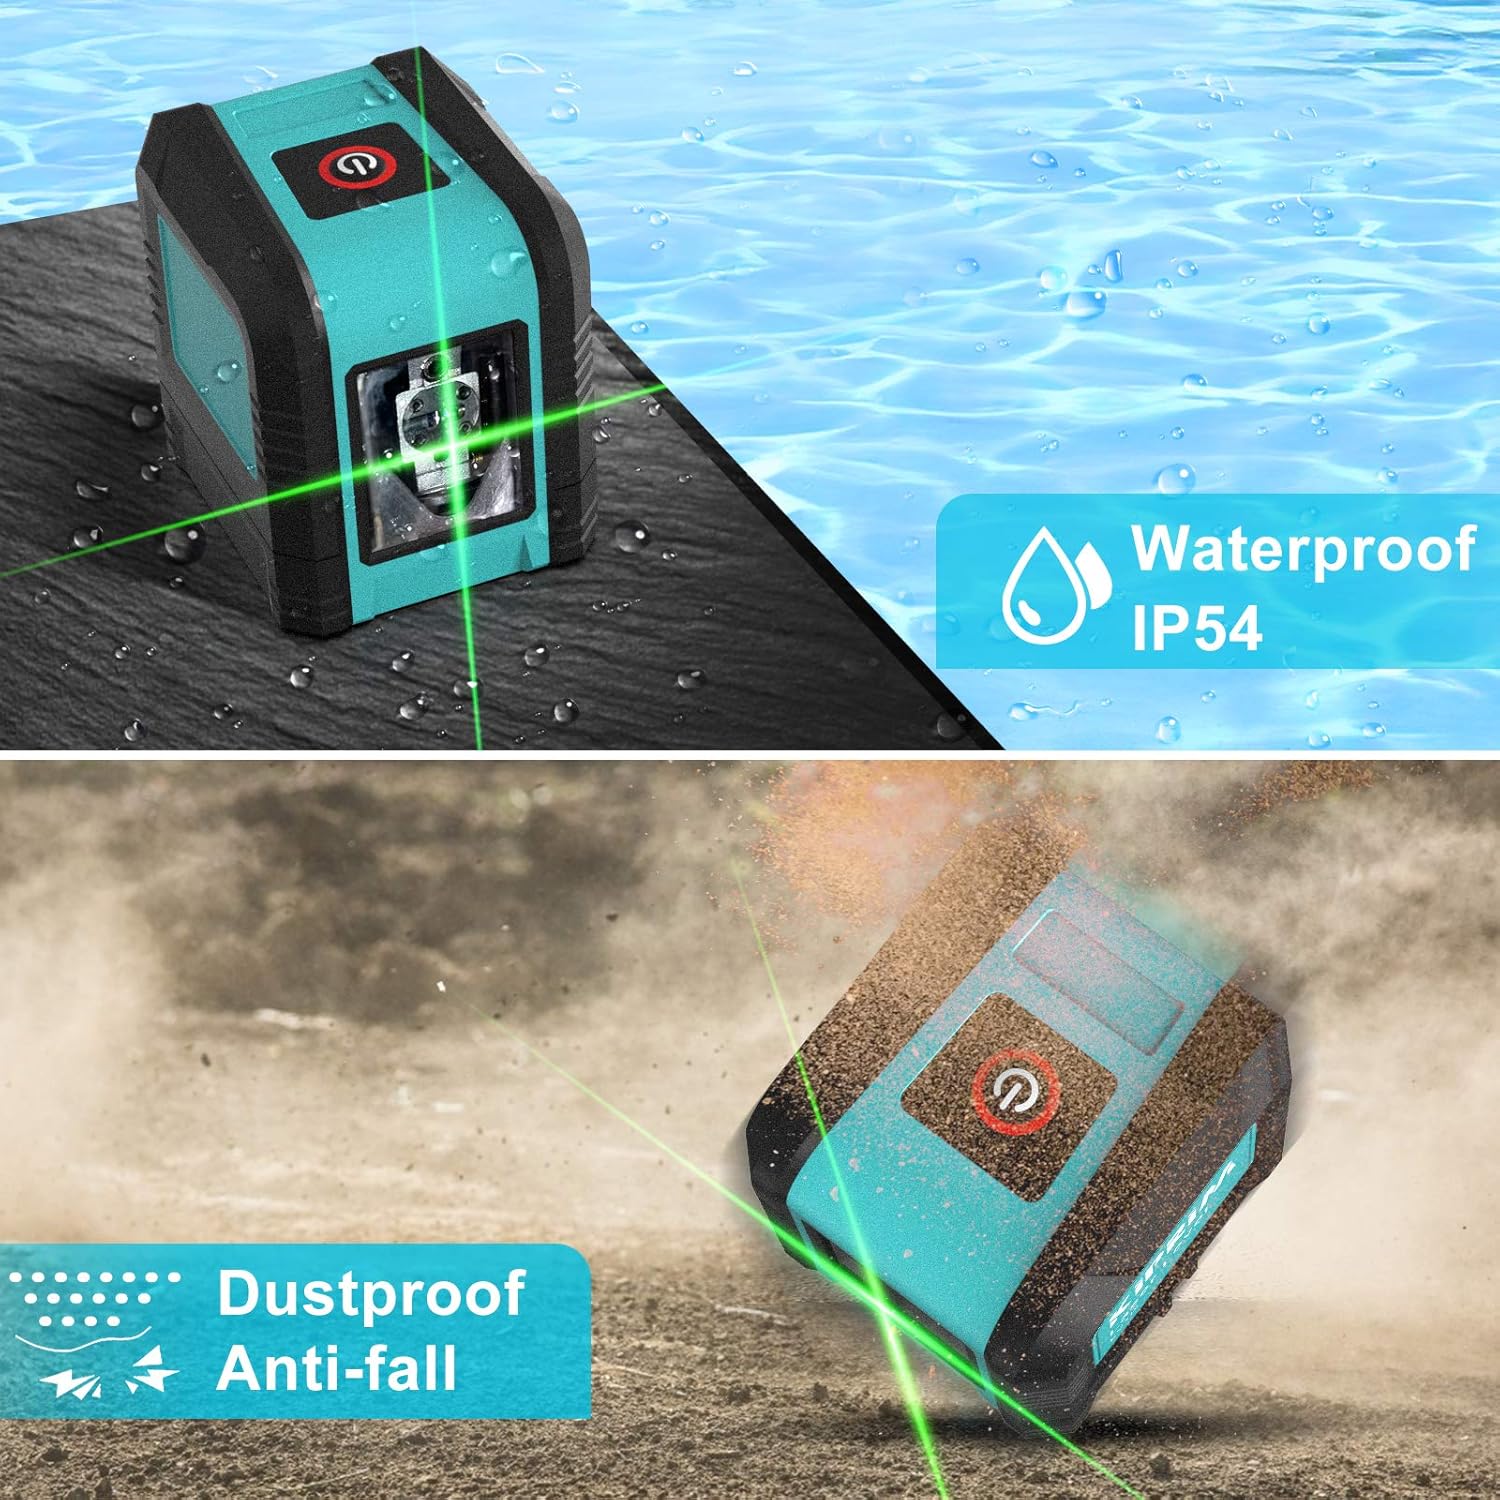
Image: The Kiprim LV1D Laser Level operating in Manual Slash Mode, projecting green laser lines at an incline, demonstrating its use for tasks such as aligning objects along a staircase.
7. Maintenance
- Cleaning: Use a soft, damp cloth to clean the device. Do not use abrasive cleaners or solvents. Keep the laser output window clean for optimal performance.
- Storage: When not in use, store the device in its nylon pouch in a cool, dry place. Ensure the pendulum is locked (slide switch in OFF position) to prevent damage during transport or storage.
- Battery Care: Remove batteries if the device will not be used for an extended period to prevent leakage.
Image: The Kiprim LV1D Laser Level highlighting its IP54 rating, indicating its resistance to water splashes and dust, ensuring durability in various working conditions.
8. Troubleshooting
| Problem | Possible Cause | Solution |
|---|---|---|
| Laser lines are flashing continuously. | Device is out of self-leveling range (> ±4°). | Adjust the device's position to a more level surface until the lines become steady. |
| Laser lines do not turn on. | 1. Batteries are low or incorrectly installed. 2. Device is in locked (OFF) position and top button not pressed for 3 seconds. | 1. Replace batteries or check polarity. 2. Slide the locking compensator to ON for self-leveling mode, or press and hold the top button for 3 seconds for manual mode. |
| Laser lines are dim. | 1. Batteries are low. 2. Operating in very bright conditions. | 1. Replace batteries. 2. Use in a less brightly lit environment or use a laser target plate (not included) to enhance visibility. |
9. Specifications
| Feature | Specification |
|---|---|
| Laser Wavelength | 520 nm |
| Laser Power | <1 mW |
| Laser Class | Class II |
| Accuracy | ±2.5 mm / 5 m |
| Self-Leveling Range | ±4° |
| IP Rating | IP54 (Waterproof, Dustproof) |
| Power Source | 2 x AA Batteries |
| Material | Rubber (housing) |
| Dimensions (L x W x H) | 7.5 x 7 x 0.1 cm (approximate, based on product dimensions) |
| Weight | 350 Grams |
| Tripod Thread | 1/4"-20 |
10. Warranty and Support
Kiprim products come with a 24-month warranty from the date of purchase. Additionally, we offer free lifetime after-sales consulting services. For any questions, issues, or support needs, please refer to the contact information provided with your purchase or visit the official Kiprim website.