
Introduction
This electric nail drill simplifies daily tasks, allowing for easier and quicker nail filing. It is a reliable tool for achieving salon-style nails at home. This manual provides detailed instructions for the safe and effective use of your JIASHENG Professional Nail Drill.
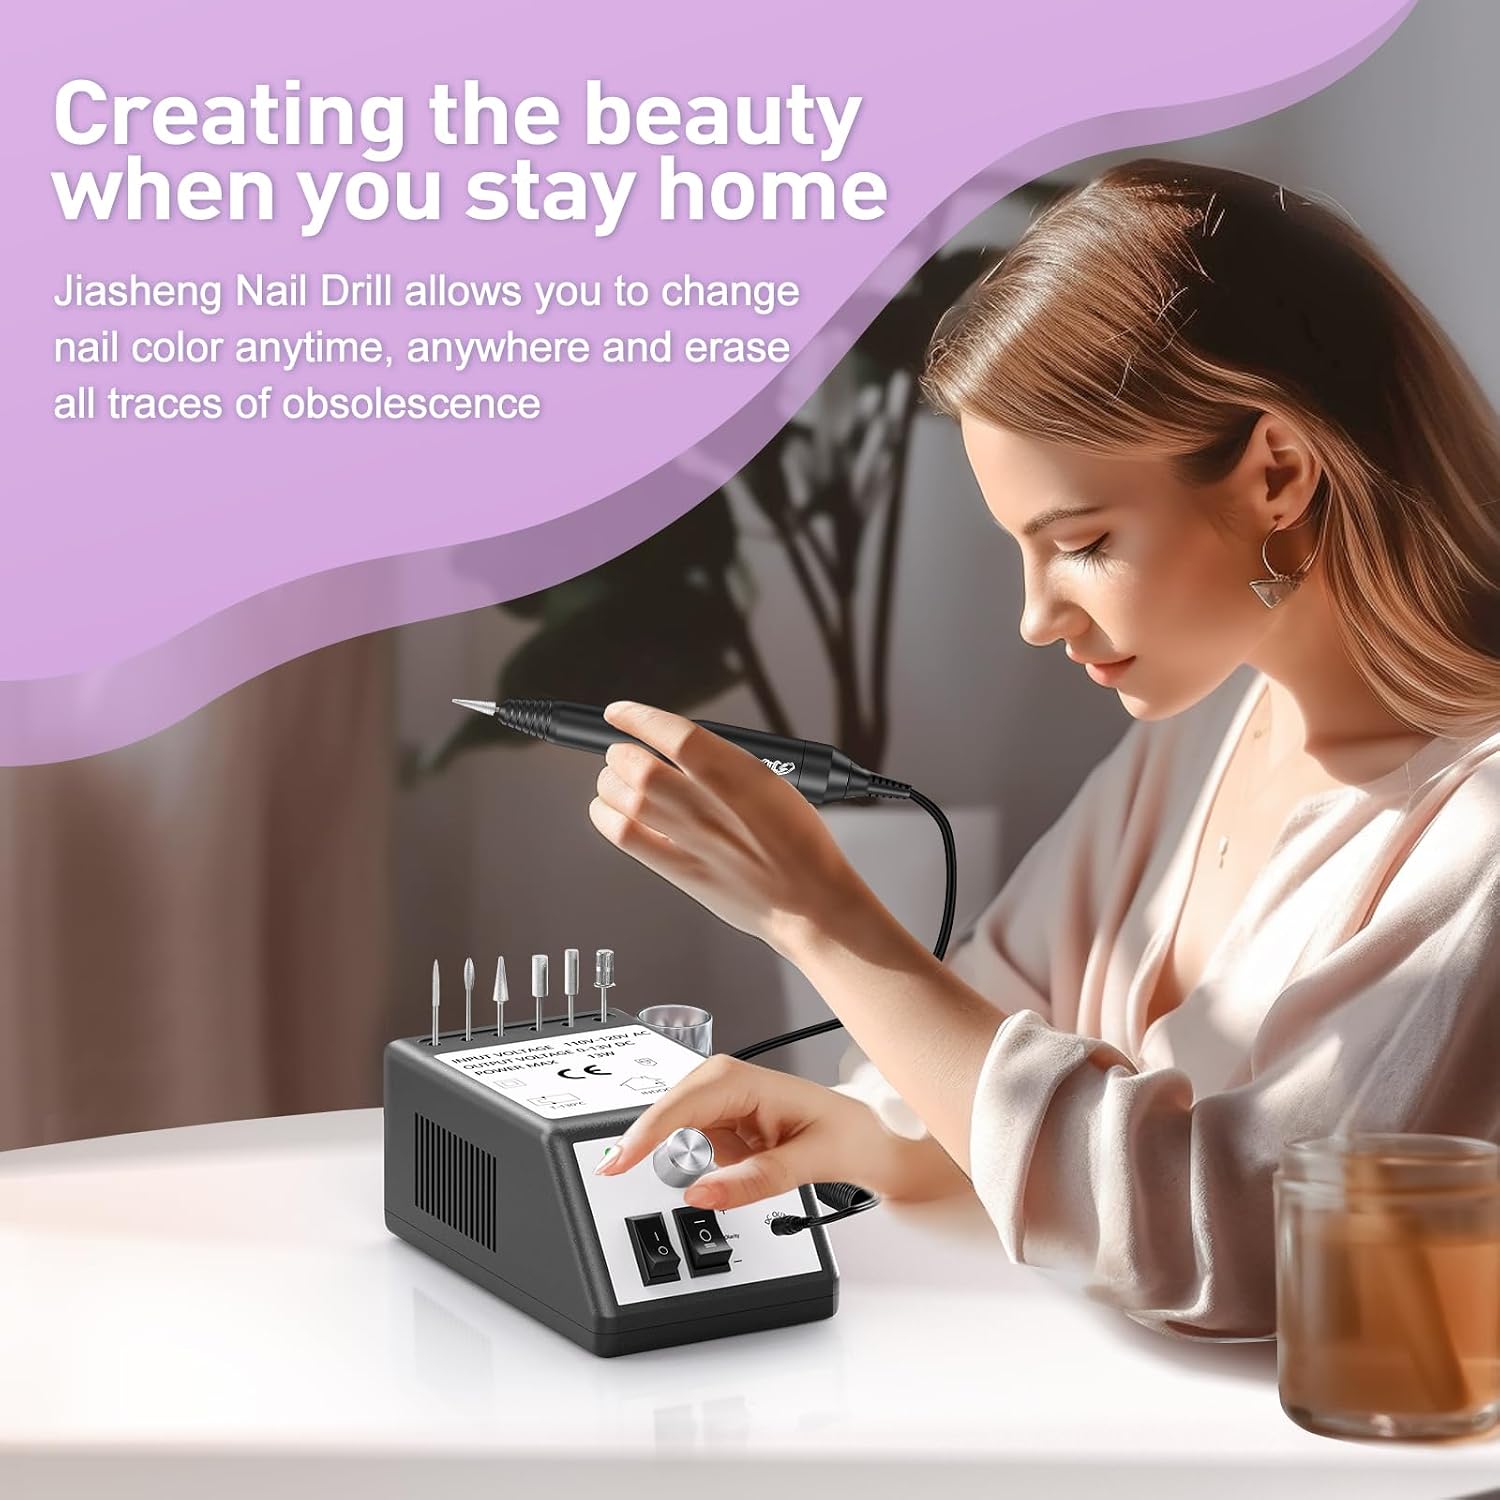
Image: A user performing nail care with the JIASHENG Electric Nail Drill, demonstrating its ergonomic design and ease of use.
Safety Warnings
- Use protective eyewear to prevent eye injury from flying debris or dust.
- To prevent burns, avoid touching the rotating bit or motor during operation.
- Use the device in a well-ventilated area to avoid inhaling dust.
- Unplug the device when not in use to prevent accidental startup.
- Ensure the power is off before changing bits.
- Use intermittently to prevent overheating.
- Store the drill stand and device in a dry place.
- Pause for 2 seconds before changing rotation direction to protect the motor.
Package Contents
The JIASHENG Professional Nail Drill package includes the following items:
- Main Machine (Control Unit) x1
- Handpiece x1
- Nail Drill Bits x6
- Sanding Bands (100x80#) x100
- User Manual x1
- Table Stand for Handpiece x1
Product Overview
The JIASHENG Electric Nail Drill is designed for efficient and comfortable nail care. Key features include:
- Powerful Performance: Up to 20,000 RPM for effective grinding, shaping, and removal of acrylic, gel, and dip powder nails.
- Low Noise & Vibration: Engineered for quiet operation and minimal vibration, enhancing user comfort.
- Low Heat: Aluminum alloy handpiece with heat dissipation holes ensures the device remains cool during extended use.
- Ergonomic Handpiece: Lightweight and compact, designed to fit comfortably in hand, reducing fatigue.
- Adjustable Speed & Direction: Features a speed control knob and a forward/reverse switch for versatile use by both left and right-handed individuals.
- Integrated Storage: Includes 6 nail drill bit holders and a handpiece holder for convenient organization.

Image: Overview of the JIASHENG Electric Nail Drill highlighting its low noise, low heat, low vibration, and aluminum alloy handpiece.

Image: A comparison showing the JIASHENG nail drill's integrated bit collector and handpiece holder, contrasting with other models that lack these organizational features.
Components and Controls
Familiarize yourself with the main components of the nail drill:
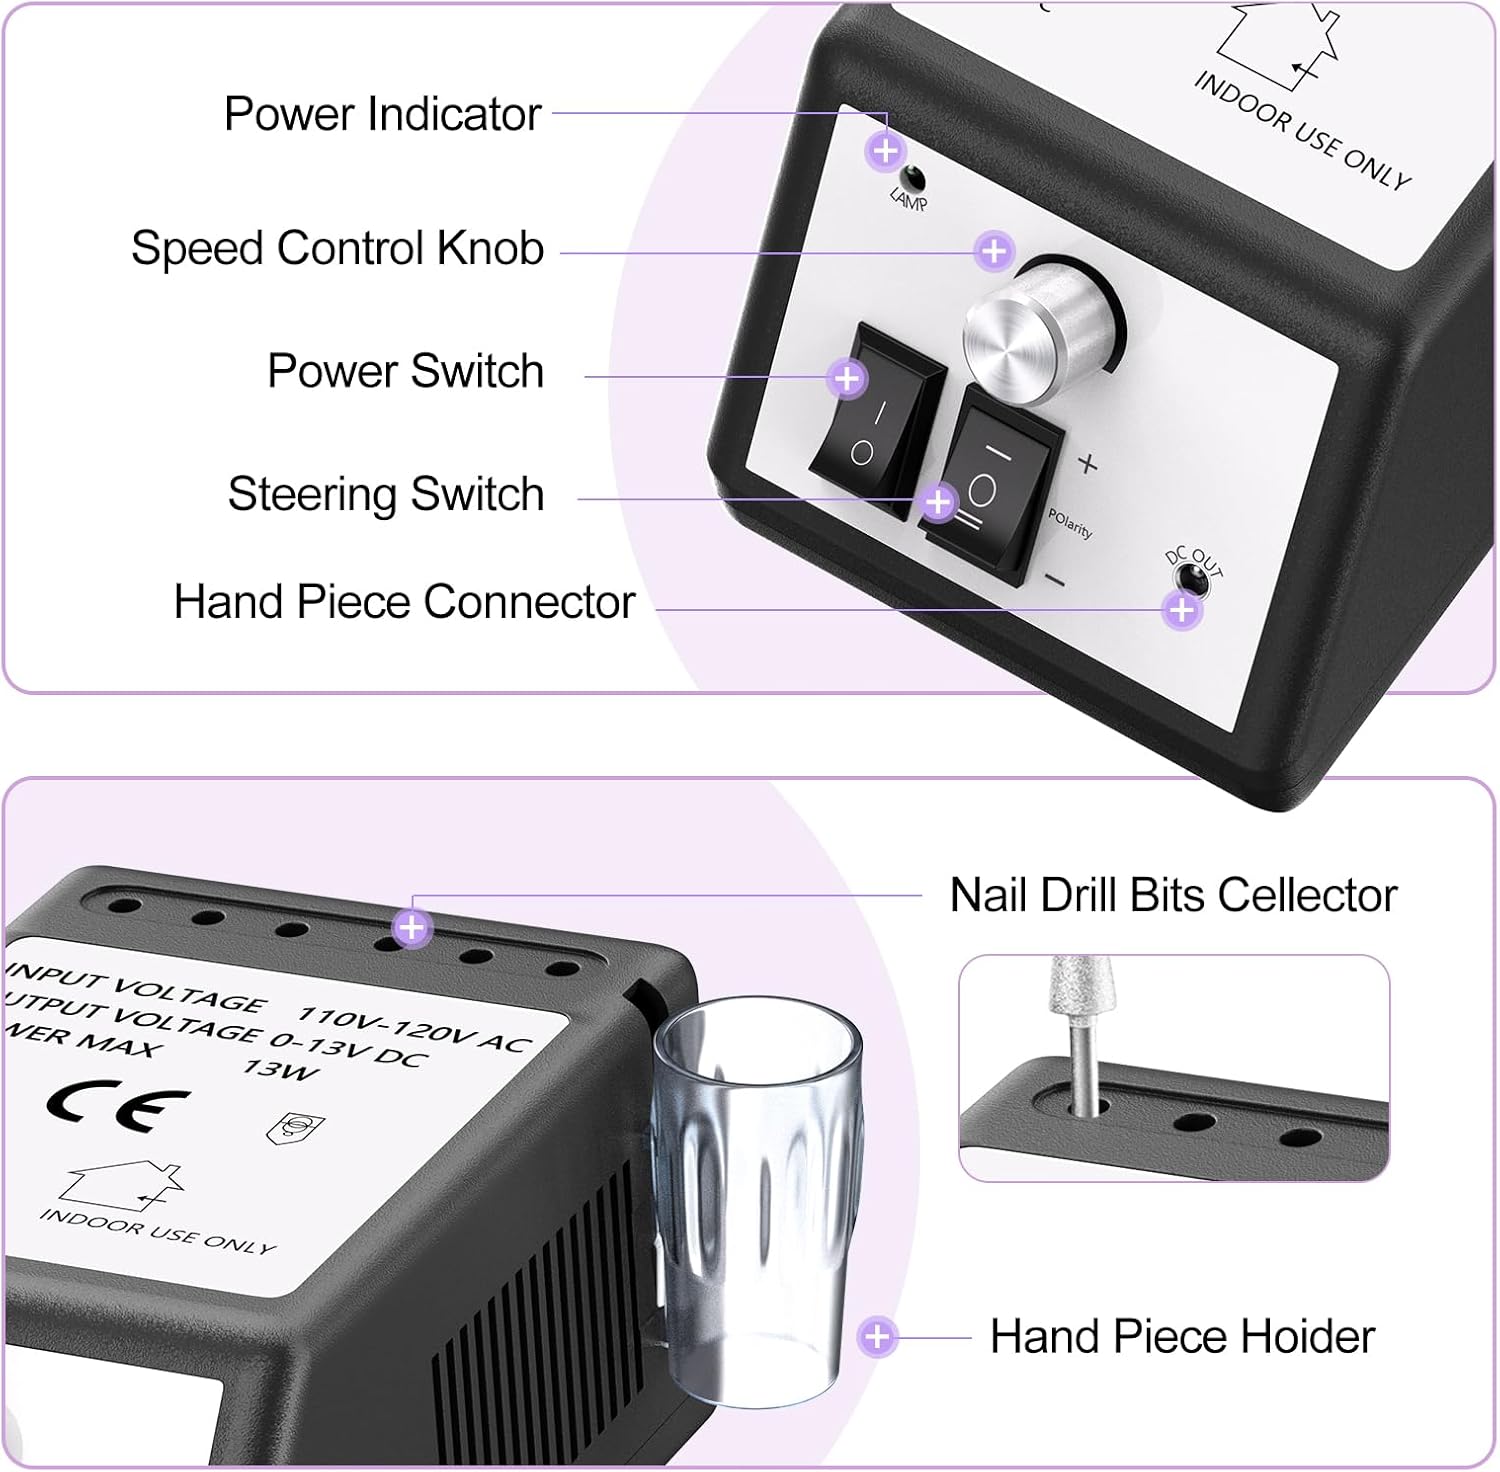
Image: Detailed view of the control unit, labeling the Power Indicator, Speed Control Knob, Power Switch, Steering Switch (Forward/Reverse), Handpiece Connector, Nail Drill Bits Collector, and Handpiece Holder.
- Power Indicator: Lights up when the device is powered on.
- Speed Control Knob: Adjusts the rotation speed of the handpiece.
- Power Switch: Turns the device ON or OFF.
- Steering Switch (F/R): Changes the rotation direction (Forward/Reverse).
- Handpiece Connector: Port for connecting the handpiece.
- Nail Drill Bits Collector: Integrated slots for storing drill bits.
- Handpiece Holder: A plastic holder to rest the handpiece when not in use.
Accessories: Nail Drill Bits
The kit includes 6 types of nail drill bits and sanding bands for various applications:

Image: Illustration of the six different nail drill bits and sanding bands, detailing their specific uses.
- Cone Bit: Used to remove beige parts on the nail surface.
- Small Barrel: Ideal for buffing the nail surface and removing nail polish.
- Large Barrel: Suitable for buffing the nail surface and removing acrylic nails.
- Needle Head Bit: For polishing the nail edge.
- Safety Bit: Also used for polishing the nail edge.
- Mandrel Sanding Band: Use with sanding bands to polish hard and rough nails.
Setup
- Unpack all components and ensure they are intact.
- Place the main machine on a stable, dry surface.
- Connect the handpiece to the Handpiece Connector port on the main machine.
- Insert the desired nail drill bit firmly into the handpiece. Ensure it is securely locked in place.
- Plug the power cord into a suitable electrical outlet (100V-120V AC).
Operating Instructions
Follow these steps for safe and effective operation:

Image: Visual step-by-step guide demonstrating how to use the nail drill, from inserting the bit to finishing the nail care.
- Insert the Nail Drill Bit: Ensure the main machine is OFF and unplugged. Gently insert the chosen nail drill bit into the handpiece until it clicks into place. (Refer to step 01 in the image).
- Turn the Power ON: Plug in the power cord. Flip the Power Switch to the 'ON' position. The Power Indicator light will illuminate. (Refer to step 02 in the image).
- Choose Rotation Direction: Select the desired rotation direction (Forward or Reverse) using the Steering Switch. Pause for 2 seconds before changing direction to protect the motor. (Refer to step 03 in the image).
- Adjust the Speed: Slowly turn the Speed Control Knob to increase or decrease the rotation speed to your preference. Start with a lower speed and gradually increase as needed. (Refer to step 04 in the image).
- Begin Use: Hold the lightweight handpiece firmly and comfortably. Apply gentle pressure to the nail surface, moving the bit smoothly. (Refer to step 05 in the image).
- Finish: Once nail care is complete, turn the Speed Control Knob to the minimum, then flip the Power Switch to 'OFF'. Unplug the device and carefully remove the drill bit. (Refer to step 06 in the image).
The lightweight handpiece operates with low noise and low vibration, fitting comfortably in your hand and reducing fatigue during operation.
Maintenance
- Always unplug the device before cleaning or performing any maintenance.
- Clean the handpiece and drill bits after each use to remove dust and debris. Use a soft cloth, brush, or alcohol wipe.
- Do not immerse the main machine or handpiece in water or any other liquid.
- Store the device and accessories in a dry, cool place, away from direct sunlight and moisture.
- Regularly check the power cord for any signs of damage. If damaged, discontinue use and contact support.
Troubleshooting
| Problem | Possible Cause | Solution |
|---|---|---|
| Device does not turn on. | Power cord not properly plugged in; Power switch is OFF; No power from outlet. | Ensure power cord is securely plugged in. Flip Power switch to ON. Check outlet with another device. |
| Handpiece not rotating. | Handpiece not connected properly; Speed control knob is at minimum; Internal connection issue. | Ensure handpiece is fully inserted into the connector. Increase speed using the control knob. If problem persists, contact support. |
| Excessive vibration or noise. | Drill bit not inserted correctly or damaged; Handpiece issue. | Ensure drill bit is fully and correctly inserted. Replace damaged drill bit. If problem persists, contact support. |
| Handpiece gets hot quickly. | Continuous use without breaks; Blocked ventilation holes. | Allow the device to cool down during prolonged use. Ensure ventilation holes are clear of dust. |
Specifications
| Feature | Detail |
|---|---|
| Input Voltage | 100V-120V AC |
| Output Voltage | 0-13V DC |
| Max Power | 13W |
| Max Speed | 20,000 RPM |
| Handpiece Material | Aluminum Alloy |
| Product Weight | 0.81 kg (approx. 1.79 lbs) |
| Model Number | JS01BM |
| Brand | JIASHENG |
Warranty Information
Specific warranty details are not provided in the product information. Please refer to the retailer's return policy or contact the manufacturer directly for warranty inquiries.
Support
For technical assistance, troubleshooting beyond this manual, or general inquiries, please contact JIASHENG customer support through the retailer where the product was purchased. Keep your purchase receipt handy for faster service.