1. Introduction
This manual provides essential instructions for the proper setup, operation, and maintenance of your Easytry123 Replacement Remote Control. This remote is designed to function with various Pioneer car audio systems. Please read this manual thoroughly before use.
2. Setup
2.1 Battery Installation
The remote control requires two (2) AAA batteries (not included). Follow these steps to install the batteries:
- Locate the battery compartment cover on the back of the remote control.
- Press down on the tab and slide the cover off in the direction indicated by the arrow.
- Insert two AAA batteries, ensuring the positive (+) and negative (-) terminals align correctly with the markings inside the compartment.
- Slide the battery compartment cover back into place until it clicks securely.

Image 1: Back of the remote control with the battery cover removed, revealing the AAA battery slots.
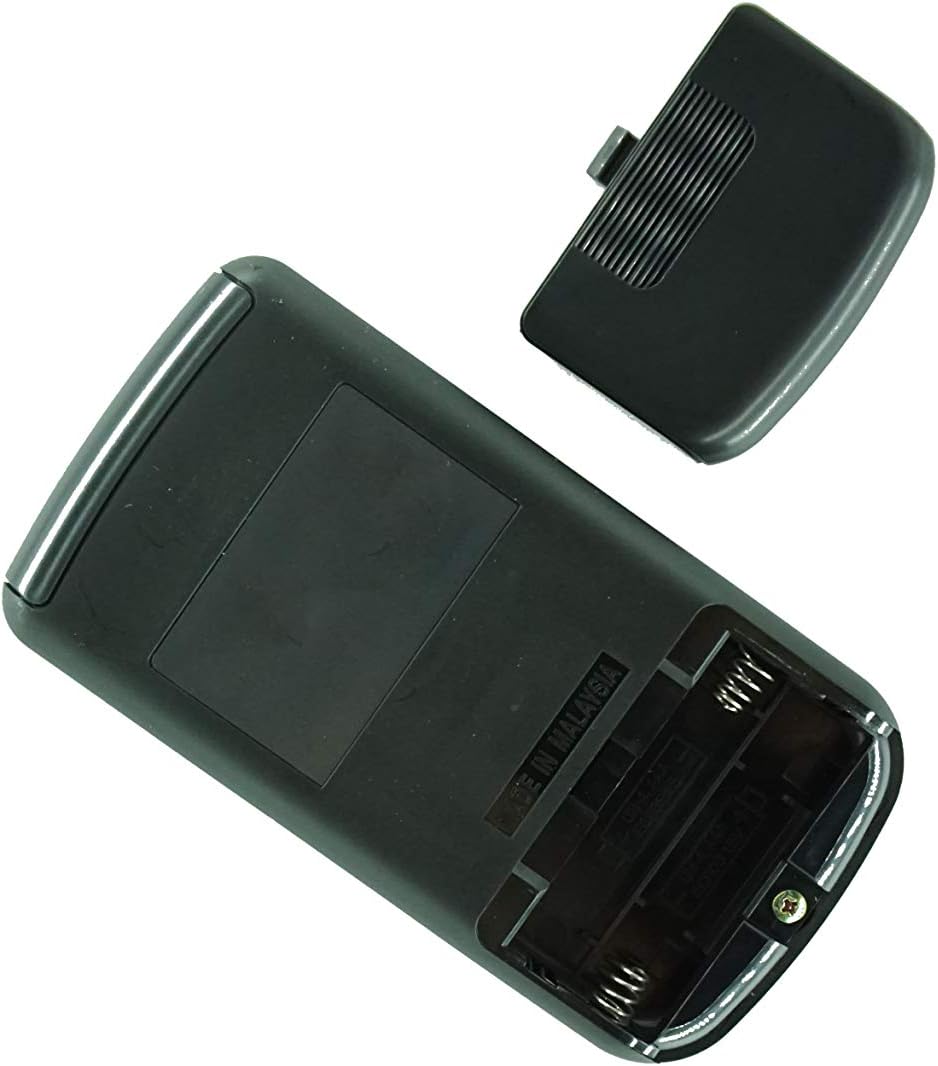
Image 2: Angled view of the remote control's back, showing the battery compartment and manufacturing origin.
Important: Ensure batteries are inserted with correct polarity. Incorrect installation can damage the remote control.
3. Operating Instructions
This remote control operates via infrared (IR) technology. For optimal performance, ensure a clear line of sight between the remote's IR emitter and the IR receiver on your Pioneer car audio system.
3.1 Basic Functions
- Power On/Off: Press the POWER button to turn your audio system on or off.
- Volume Control: Use the VOL + and VOL - buttons to adjust the sound level.
- Source Selection: Press the SOURCE or MODE button to cycle through available audio sources (e.g., Radio, CD, USB, AUX).
- Track/Station Navigation: Use the SKIP or TUNE buttons to change tracks, skip chapters, or tune radio stations.
- Mute: Press the MUTE button to temporarily silence the audio. Press again to restore sound.
Note: The exact functionality of each button may vary slightly depending on your specific Pioneer car audio system model. Refer to your Pioneer system's original manual for detailed function descriptions.
4. Maintenance
4.1 Battery Replacement
Replace the batteries when the remote control's response becomes sluggish or stops working. Always replace both batteries at the same time with new AAA batteries. Do not mix old and new batteries, or different types of batteries.
4.2 Cleaning
To clean the remote control, wipe it with a soft, dry cloth. Do not use abrasive cleaners, waxes, or solvents, as these may damage the finish or internal components.
5. Troubleshooting
- Remote not responding:
- Check if the batteries are installed correctly with the correct polarity.
- Replace the batteries with fresh ones.
- Ensure there is a clear line of sight between the remote and the car audio system's IR receiver. Obstructions can block the signal.
- Make sure you are within the effective operating range (typically 15-20 feet).
- Some functions do not work:
- This replacement remote may not offer all the exact same functions as your original remote. Refer to the product listing for compatibility details.
- Ensure your Pioneer audio system is powered on and in the correct mode for the function you are trying to use.
6. Specifications
- Brand: Easytry123
- Connectivity Technology: Infrared (IR)
- Batteries Required: 2 x AAA (Alkaline recommended)
- Max Number of Supported Devices: 1
- Special Feature: Ergonomic, Replacement remote
- Compatible Pioneer Models: CXA6155, CXA5961, CXA6606, CXA5856, KEH-P770, CXC2668, DEH-P1Y, CXA8336, DEH-503, CXA4026, FH-M70, KEH-M8300, DEX-M88RDS, DEH-P703
7. Support
If you encounter any issues not covered in this manual or have questions regarding the compatibility or functionality of your Easytry123 Replacement Remote Control, please contact the seller directly for assistance. It is recommended to verify your specific Pioneer model number before contacting support.


