
1. Introduction
The Cricut Explore Air 2 is a versatile electronic cutting machine designed for a wide range of DIY projects and crafting. It offers precision cutting for over 100 different types of materials, including premium vinyl, iron-on, cardstock, and faux leather. This machine integrates seamlessly with the Cricut Design Space software, allowing users to create, customize, and bring their creative visions to life through cutting, writing, and scoring functions.

Figure 1: Cricut Explore Air 2 Machine (Mint)
2. Setup
2.1 Unboxing and Placement
Carefully remove the Cricut Explore Air 2 machine and all accessories from its packaging. Place the machine on a stable, flat surface. Ensure there is adequate space behind the machine to allow materials to pass through freely during the cutting process.
2.2 Power and Connectivity
Connect the power adapter to the machine and plug it into a wall outlet. The Cricut Explore Air 2 supports both Bluetooth wireless connectivity and a direct USB connection to your computer. For wireless operation, ensure Bluetooth is enabled on your computer, tablet, or smartphone.

Figure 2: Power and USB ports on the back of the machine
2.3 Software Installation
Download and install the Cricut Design Space software on your computer, tablet, or smartphone. Follow the on-screen prompts to create a Cricut ID and register your machine. Design Space is essential for creating, editing, and sending designs to your machine.
2.4 Initial Calibration
Upon first use, the machine may require calibration. Follow the instructions provided in Design Space to ensure accurate cutting and writing. This typically involves loading a mat and allowing the machine to perform a test cut.
Video 1: Overview of Cricut Explore Air 2 features, including loading a mat and initial setup.
3. Machine Components
- Open Button: Located on the left side, this button opens the machine's lid and front tray.
- Tool Holders (Clamp A & B): Clamp A holds accessories like pens and scoring styluses. Clamp B holds the cutting blade.
- Smart Set Dial: This dial allows you to quickly select common material settings (Paper, Vinyl, Iron-On, Light Cardstock, Cardstock, Bonded Fabric, Poster Board) or 'Custom' for more options in Design Space.
- Load/Unload Button (Arrows): Used to feed the cutting mat into and out of the machine.
- Go Button (Cricut Logo): Initiates the cutting or writing process once the design is sent from Design Space.
- Pause Button: Temporarily stops the cutting or writing process.
- Storage Compartments: A cup on the left side holds tools like scissors and weeding tools. A tray below the front panel provides additional storage for blades and accessories.

Figure 3: Cricut Explore Air 2 with cutting mat and pen, showing tool storage.
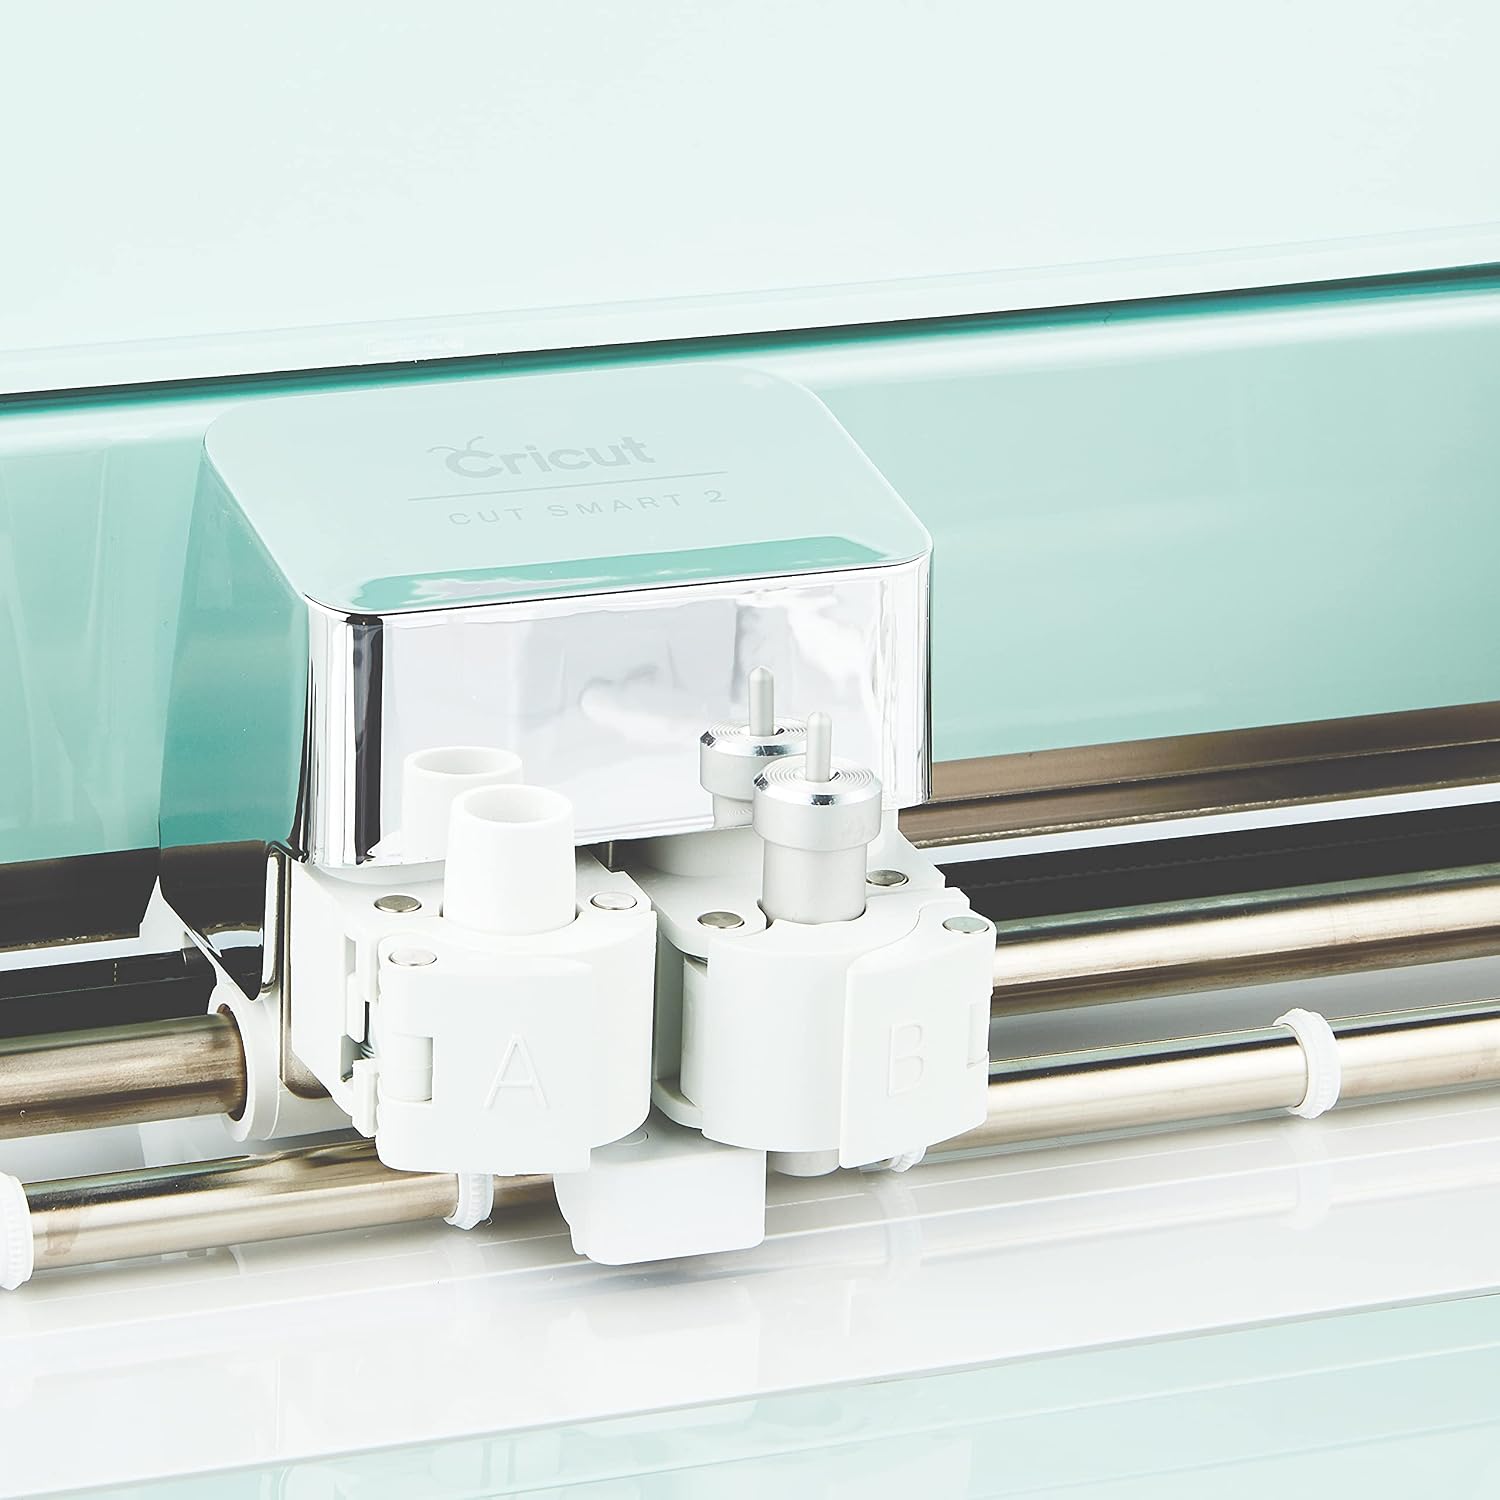
Figure 4: Close-up of the tool holders.
4. Operating the Machine
4.1 Design Space Workflow
- Create or Select Design: Open Cricut Design Space. You can upload your own images, choose from thousands of ready-to-make projects, or create a new design from scratch.
- Prepare Canvas: Arrange your design on the virtual canvas, adjusting size, position, and colors as needed.
- Select Material: In Design Space, select the type of material you will be cutting. This will guide the machine's settings.
- Mirror Image (for Iron-On): If using iron-on material, remember to mirror your image in Design Space before cutting.
- Send to Machine: Click 'Make It' and follow the prompts to send your design to the Cricut Explore Air 2.
4.2 Material Loading and Cutting
- Prepare Mat: Place your chosen material onto the appropriate Cricut cutting mat (e.g., LightGrip for paper, StandardGrip for vinyl). Ensure the material is smooth and securely adhered to the mat.
- Set Smart Set Dial: Turn the Smart Set Dial on your machine to match the material you selected in Design Space, or to 'Custom' if using a custom setting.
- Load Mat: Align the mat with the guides on the machine and press the flashing Load/Unload button (arrows). The machine will feed the mat into position.
- Start Cutting: Once the mat is loaded and the machine is ready, the Go button (Cricut logo) will flash. Press it to begin the cutting process.
- Unload Mat: After the cut is complete, press the Load/Unload button again to release the mat. Carefully remove your cut material from the mat.
5. Supported Materials
The Cricut Explore Air 2 is capable of cutting over 100 different materials. The Smart Set Dial provides quick access to settings for common materials, while Design Space offers an expanded library for specialized options. Some of the widely supported materials include:
- Premium Vinyl
- Iron-On and HTV (Heat Transfer Vinyl)
- Cardstock (Light and Standard)
- Faux Leather
- Adhesive Foils
- Specialty Paper
- Poster Board
- Bonded Fabric

Figure 5: Example project demonstrating material versatility.
6. Maintenance
6.1 Cleaning the Machine
Regularly clean your Cricut Explore Air 2 to ensure optimal performance. Use a soft, dry cloth to wipe down the exterior. For the cutting area, gently remove any small material scraps or dust. Avoid using harsh chemicals or abrasive cleaners.
6.2 Blade Replacement
The cutting blade will dull over time, affecting cut quality. To replace the blade, open Clamp B, carefully remove the old blade housing, and insert a new one. Ensure the new blade is securely seated before closing the clamp.
6.3 Mat Care
To prolong the life of your cutting mats, always replace the clear protective sheet after use. If a mat loses its stickiness, it can often be cleaned with warm water and mild soap, then air-dried. Replace mats when they are no longer sticky enough to hold material securely.
7. Troubleshooting
- Machine Not Connecting: Ensure Bluetooth is enabled on your device and the machine is powered on. If using USB, check the cable connection. Restart both the machine and your device.
- Poor Cut Quality: Check if the correct material setting is selected on the Smart Set Dial and in Design Space. Ensure the blade is clean and sharp; replace if dull. Verify the material is firmly adhered to the mat.
- Mat Not Loading: Ensure the mat is aligned correctly with the guides. Check for any obstructions in the machine's feed path.
- Design Space Issues: Ensure your Design Space software is up to date. Try restarting the application or your device.
8. Specifications
| Brand | Cricut |
| Model | Explore Air 2 |
| Item Model Number | 2009233 |
| Material | Plastic |
| Color | Mint |
| Active Surface Area | 12 inches by 12 inches |
| Operation Mode | Automatic |
| Item Weight | 15.62 pounds (7.1 Kilograms) |
| Connectivity | Bluetooth, USB |
9. Warranty and Support
For detailed warranty information, product registration, and customer support, please visit the official Cricut website or refer to the documentation included with your machine. Online resources, including FAQs, tutorials, and community forums, are also available to assist with your crafting journey.


