
Eduard EDK2134
Eduard EDK2134 Model Kit Instruction Manual
Brand: Eduard | Model: EDK2134
Introduction
This instruction manual provides detailed guidance for the assembly of the Eduard EDK2134 1:72 Scale "Stribrne Sipy" (Silver Arrows) MiG-21PF/PFM limited edition plastic model kit. This kit allows for the construction of a highly detailed replica of the Soviet Cold War jet fighter as operated by the Czechoslovak Air Force. Please read all instructions carefully before beginning assembly.

Figure 1: Product Box Art - Eduard EDK2134 "Stribrne Sipy" MiG-21PF/PFM 1:72 Scale Model Kit.
Safety Information
Warning! This product is a scale model kit and contains small parts. It is not suitable for young children due to potential choking hazards. Recommended for ages 14 and up. Always use appropriate safety measures when handling sharp tools, glues, and paints (not included). Ensure adequate ventilation when working with adhesives and paints.
Package Contents
The Eduard EDK2134 kit is a limited edition dual combo set. Please verify that all components listed below are present in your package before starting assembly.
- Plastic sprues for two MiG-21PF/PFM aircraft models.
- Photo-etched (PE) parts, pre-painted where applicable, for enhanced detail.
- Resin parts, including seats and wheels, for superior detail.
- Decal sheets with markings for 15 different aircraft options.
- Painting masks for precise camouflage and marking application.
- Pictorial book (96 pages) detailing MiG-21PF and PFM service in Czechoslovakia, including 237 photos and color profiles.
- Instruction sheet for assembly.

Figure 2: Overview of Kit Contents.
Assembly Instructions
This section outlines the general steps for assembling your Eduard MiG-21PF/PFM model kit. Refer to the detailed instruction sheet and pictorial book included in the kit for specific part numbers, assembly sequences, and painting guides.
1. Preparation
- Review Instructions: Carefully read through the entire instruction sheet and pictorial book before starting. Familiarize yourself with all parts and steps.
- Gather Tools: Ensure you have all necessary modeling tools, such as plastic cement, hobby knife, side cutters, tweezers, sanding sticks, and paints (not included).
- Workspace: Prepare a clean, well-lit, and well-ventilated workspace.

Figure 3: Assortment of Plastic Sprues.
2. Part Removal and Cleaning
- Carefully remove parts from the sprues using side cutters to avoid damage.
- Clean any flash or mold lines from the parts using a hobby knife or sanding stick.
- For resin and photo-etched parts, follow specific instructions for cleaning and attachment. Resin parts may require washing to remove mold release agents.

Figure 4: Detailed Resin Parts (Seats and Wheels).
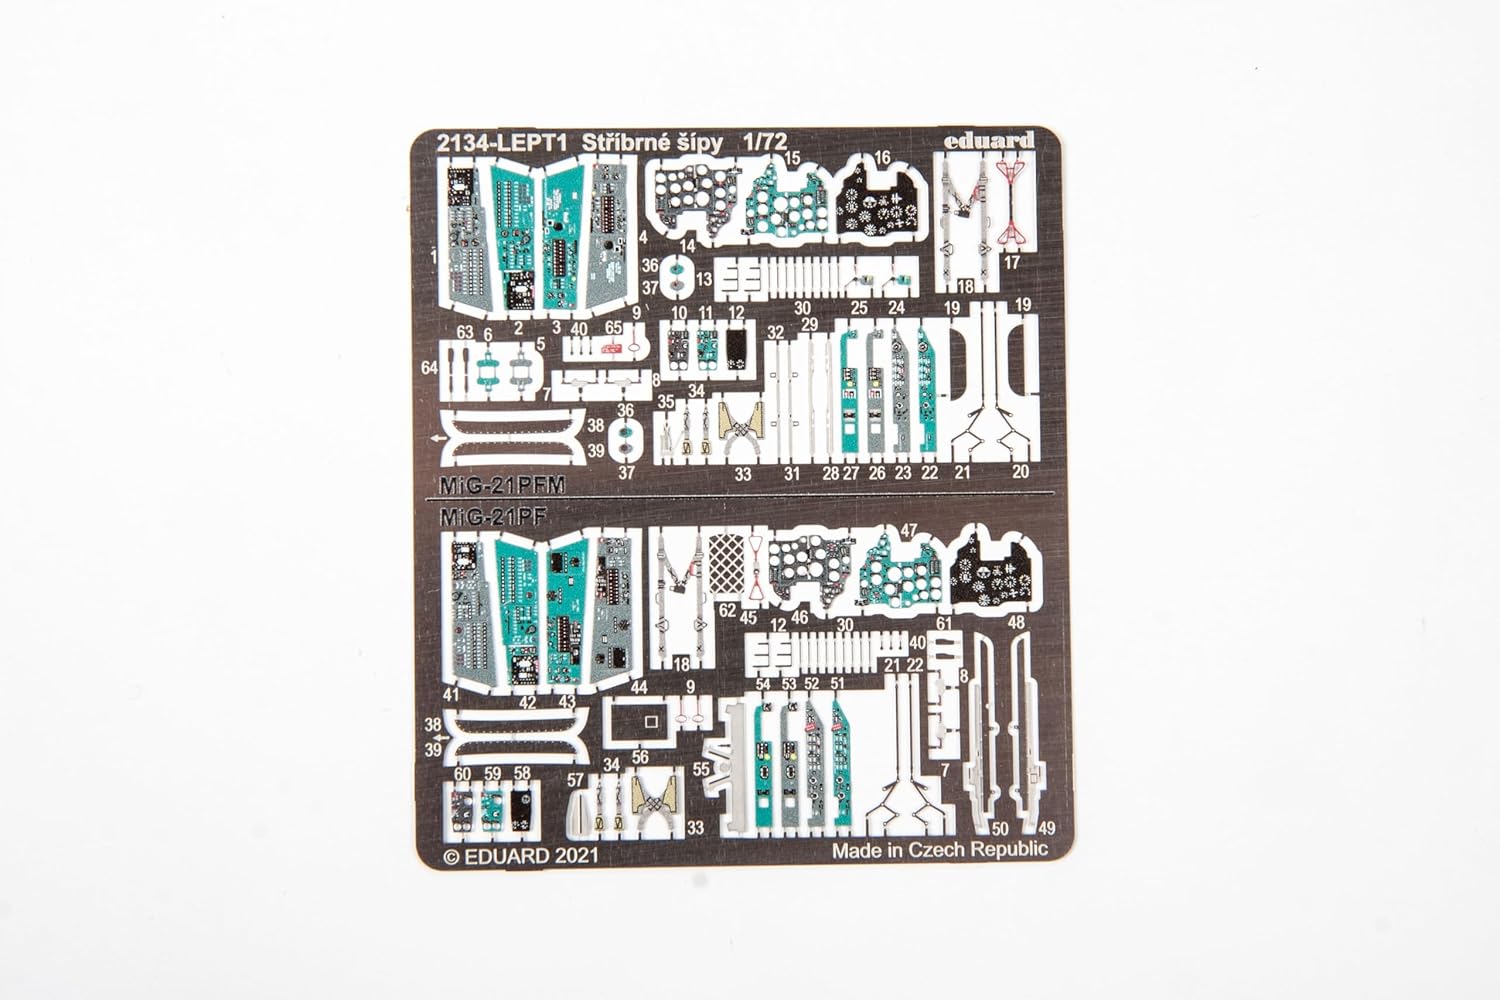
Figure 5: Pre-painted Photo-Etched Parts.
3. Assembly Steps
Follow the numbered steps in the instruction sheet. Typically, assembly proceeds as follows:
- Cockpit Assembly: Assemble and paint the cockpit components, including the resin seat and photo-etched details.
- Fuselage Assembly: Join the fuselage halves, ensuring proper alignment. Integrate the cockpit and landing gear bays.
- Wing Assembly: Assemble the wings and attach them to the fuselage.
- Landing Gear: Assemble and attach the landing gear, including the resin wheels.
- External Stores: Assemble and attach external fuel tanks, missiles, or bombs as per your chosen variant.
- Final Details: Add smaller details such as antennas, pitot tubes, and clear canopy parts.
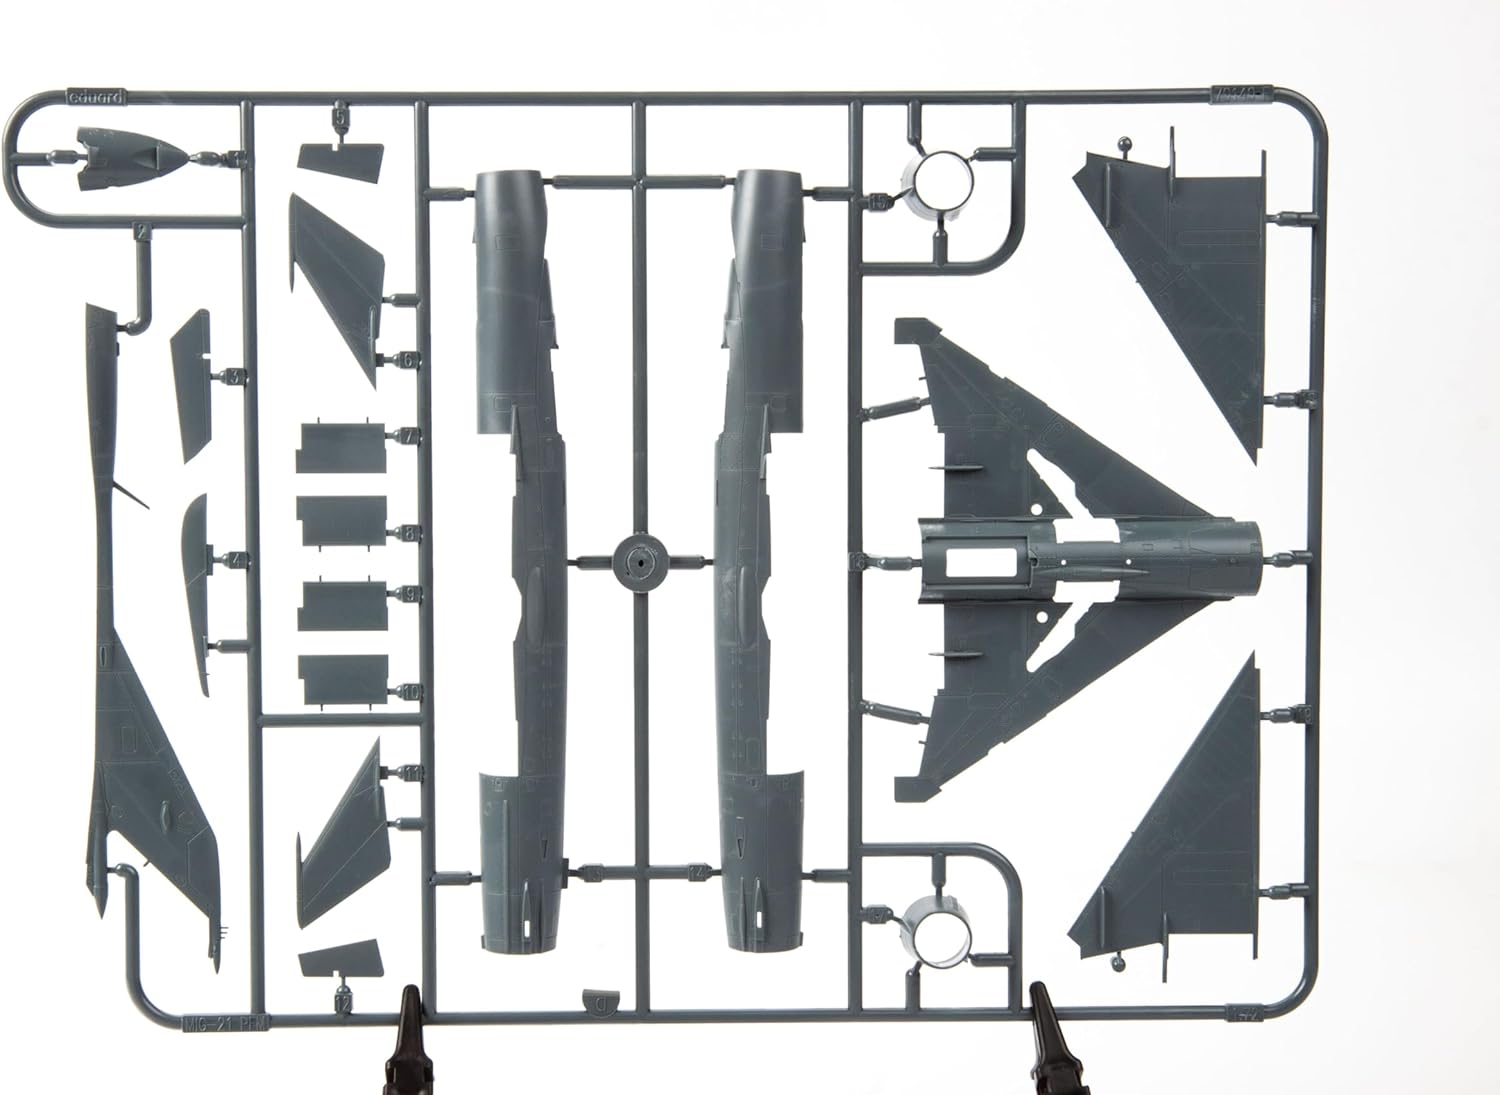
Figure 6: Main Fuselage and Wing Sprue.

Figure 7: External Stores Sprue.
4. Painting and Decals
- Refer to the pictorial book and instruction sheet for detailed painting schemes and decal placement for the 15 marking options.
- Use the provided painting masks for sharp lines and accurate camouflage patterns.
- Apply decals carefully using water and decal setting solutions as needed.
Maintenance and Display
Once assembled, your model requires minimal maintenance. To preserve its appearance:
- Cleaning: Dust your model regularly with a soft brush or compressed air. Avoid harsh chemicals or abrasive materials.
- Display: Display your model in a cool, dry place away from direct sunlight to prevent fading of paint and decals.
- Handling: Handle the model by its sturdy parts (e.g., fuselage, wings) to avoid damaging delicate components like antennas or landing gear.
Troubleshooting Common Assembly Issues
While Eduard kits are known for their quality, minor issues can sometimes arise during assembly. Here are some common challenges and solutions:
- Parts Not Fitting:
Ensure all sprue gates and flash are completely removed. Dry-fit parts before applying glue. If a part is slightly too large, gently sand it down. If too small, consider shimming with thin plastic card or applying a small amount of filler.
- Decal Silvering:
This occurs when air is trapped under the decal, making it look silvery. Apply decals over a glossy surface. Use decal setting solutions (e.g., Micro Sol, Micro Set) to help the decal conform to surface details and eliminate air bubbles.
- Paint Adhesion Issues:
Ensure plastic surfaces are clean and free of oils or mold release agents. Wash parts with mild soap and water before priming. Apply paint in thin coats.
- Photo-Etch Parts Bending/Breaking:
Handle photo-etch parts with fine tweezers. Use a dedicated photo-etch bending tool for precise folds. Attach with super glue (CA glue) sparingly.
Specifications
| Feature | Detail |
|---|---|
| Brand | Eduard |
| Model Number | EDK2134 |
| Scale | 1:72 |
| Material Type | Plastic |
| Colour | Unpainted |
| Assembly Required | Yes |
| Number of Pieces | 1 (refers to one kit, not individual parts) |
| Recommended Age | 14 years and up |
| Batteries Required | No |
Warranty and Support
Specific warranty information for the Eduard EDK2134 model kit is not provided in the product details. For any inquiries regarding missing parts, manufacturing defects, or assembly assistance, please contact Eduard directly through their official website or authorized distributors. Keep your proof of purchase for any potential claims.
Eduard Model Accessories was founded in 1989 and is known for producing high-quality plastic model kits and accessories. For more information about Eduard and their products, please visit their official website.
Related documentsEDK2134


Ask a question about this manual
Ask about setup, troubleshooting, compatibility, parts, safety, or missing instructions. Manuals+ will review the question and use this page’s manual context to help answer it.