Trust Wireless Mouse User Manual
Model: 24115
Brand: Trust
1. Introduction
Thank you for purchasing the Trust Wireless Mouse. This manual provides detailed instructions for setting up, operating, maintaining, and troubleshooting your new wireless mouse. Please read this manual thoroughly before using the product to ensure optimal performance and longevity.

Image 1.1: Top view of the Trust Wireless Mouse, showcasing its ergonomic design and button layout.
2. Safety Information
Please observe the following safety guidelines to prevent damage to the device or injury to yourself:
- Do not expose the mouse to water or excessive moisture.
- Avoid dropping or subjecting the mouse to strong impacts.
- Do not attempt to disassemble or repair the mouse yourself. Refer to qualified service personnel.
- Dispose of batteries according to local regulations.
3. Package Contents
Verify that all items are present in the package:
- 1x Trust Wireless Comfort Mouse
- 1x USB Micro Receiver
- 1x AA Battery
- 1x User Manual (this document)

Image 3.1: The retail packaging of the Trust Wireless Mouse, showing the mouse and included accessories.
4. Setup
4.1. Installing the Battery
- Locate the battery compartment on the underside of the mouse.
- Slide the battery compartment cover open.
- Insert the provided AA battery, ensuring the positive (+) and negative (-) terminals align correctly with the markings inside the compartment.
- Close the battery compartment cover securely.

Image 4.1: Underside of the mouse with the battery compartment open, showing the insertion of an AA battery.

Image 4.2: Bottom view of the Trust Wireless Mouse, illustrating the battery compartment and the storage slot for the USB micro receiver.
4.2. Connecting the USB Micro Receiver
- Locate the USB micro receiver, which is typically stored inside the mouse's battery compartment for transport.
- Remove the USB micro receiver from its storage slot.
- Plug the USB micro receiver into an available USB port on your computer (laptop or PC).
- The mouse should automatically connect to your computer. No additional drivers are typically required for Windows 10, 8, 7, or Mac OS X 10.15 (Catalina) or higher.
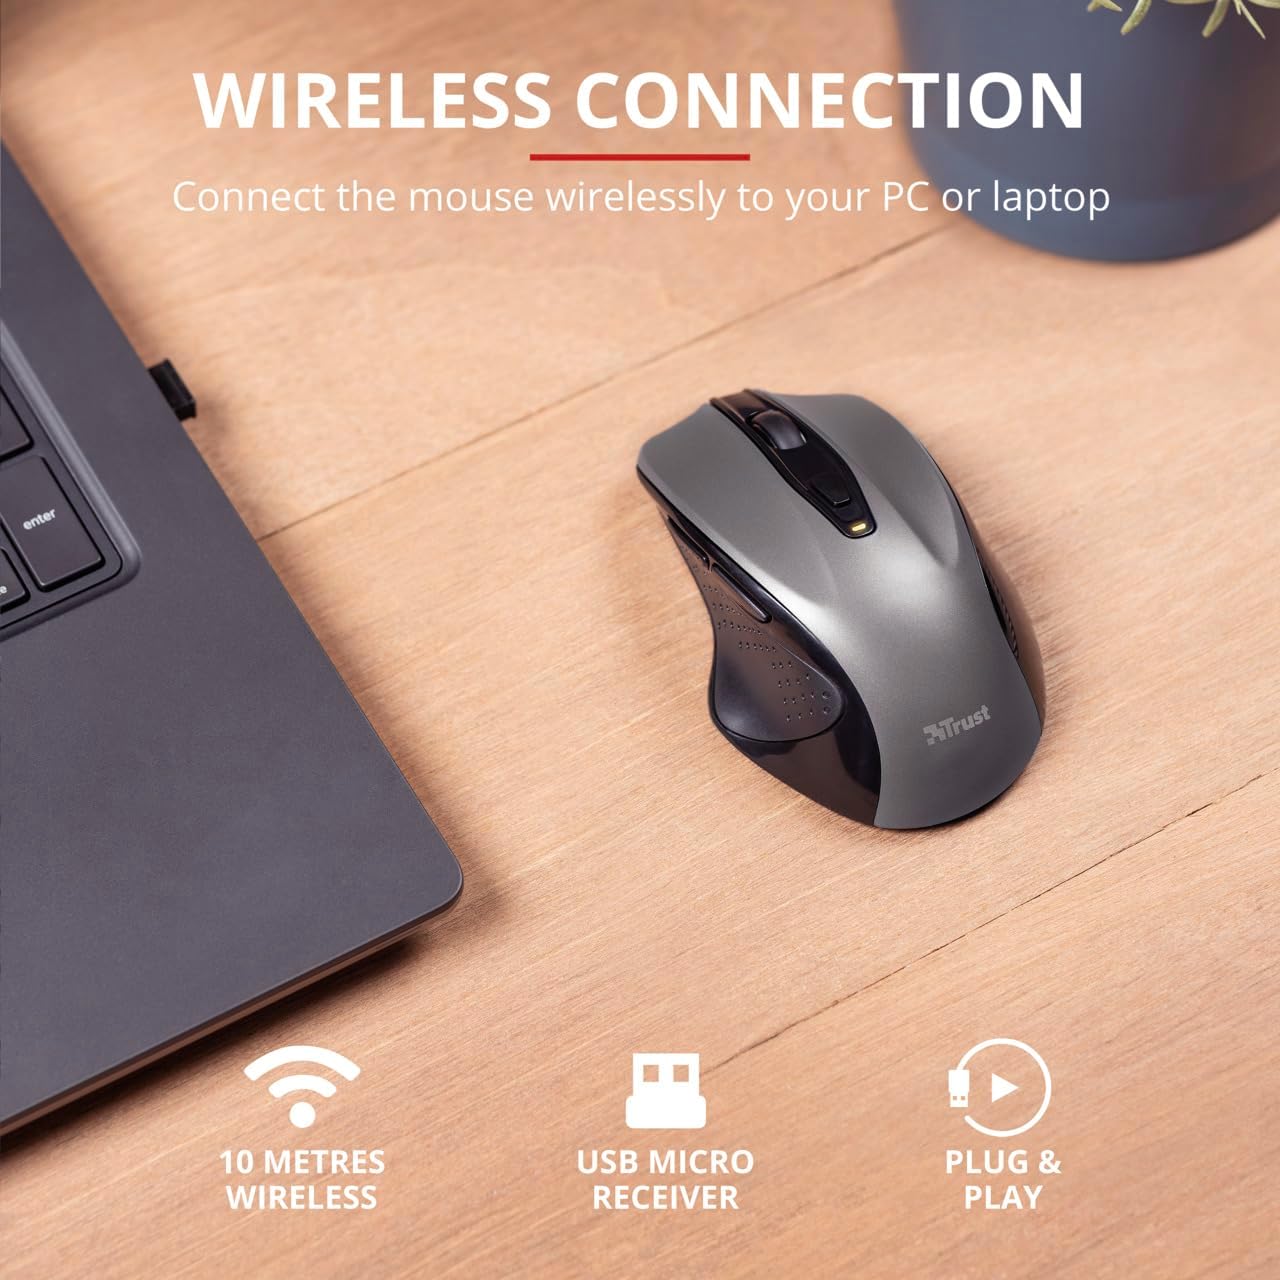
Image 4.3: The Trust Wireless Mouse positioned next to a laptop, demonstrating the wireless connection via the USB micro receiver plugged into the laptop's USB port.
5. Operating the Mouse
5.1. Basic Functions
- Left Click: Primary button for selecting items and interacting with software.
- Right Click: Secondary button for context menus and additional options.
- Scroll Wheel: Roll up or down to scroll through documents and web pages. Press the scroll wheel for middle-click functionality.
5.2. DPI Adjustment
The Trust Wireless Mouse features an adjustable DPI (Dots Per Inch) setting, allowing you to control the cursor speed. There are 5 different speeds available: 800, 1200, 1600, 1800, and 2200 DPI.
- Locate the DPI button, usually positioned behind the scroll wheel.
- Press the DPI button to cycle through the available DPI settings.
- An LED indicator on the mouse will briefly show the current DPI setting.

Image 5.1: Side view of the Trust Wireless Mouse highlighting its comfortable shape, thumb rest with extra grip, and the adjustable speed (DPI) feature.
5.3. Thumb Buttons
The mouse is equipped with two conveniently placed thumb buttons (forward and backward) on the left side. These buttons facilitate easy navigation, such as browsing through files or web pages.
- Press the Forward button to move to the next page or item.
- Press the Backward button to return to the previous page or item.
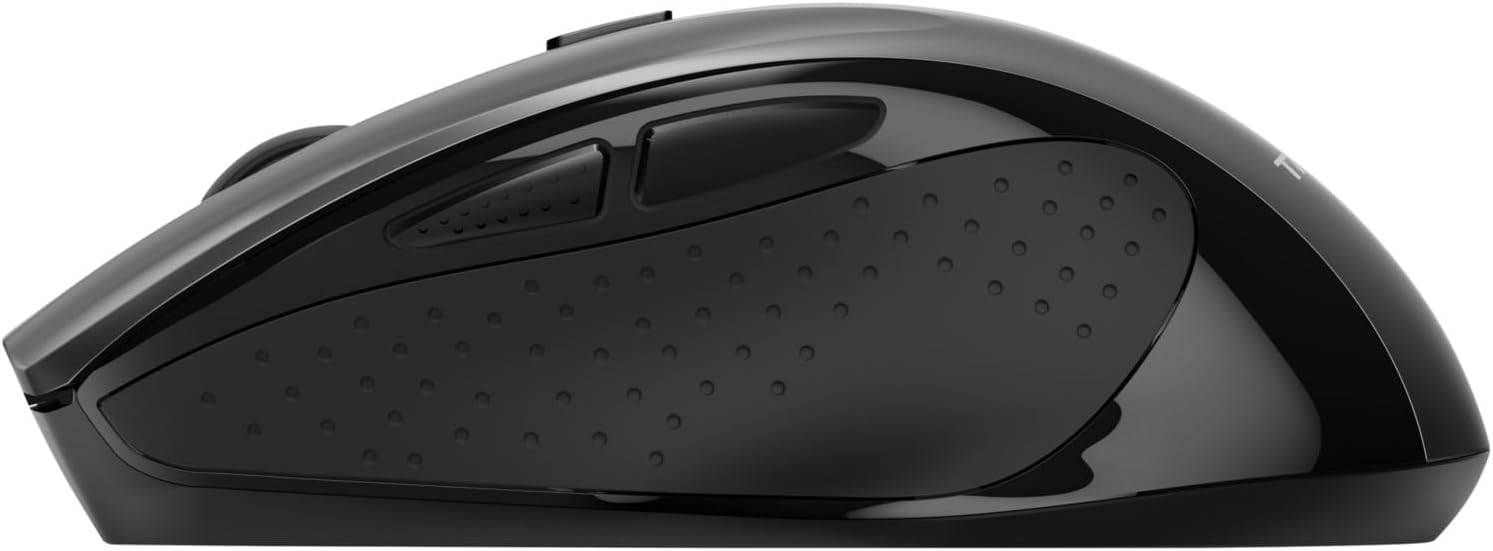
Image 5.2: Side view of the Trust Wireless Mouse, clearly showing the placement of the two thumb buttons for forward and backward navigation.
Note: Functionality of side buttons may vary between operating systems.
5.4. Power Saving Features
To conserve battery life, the mouse includes a power-saving mode and an on/off switch.
- On/Off Switch: Located on the underside of the mouse. Turn the mouse off when not in use for extended periods to maximize battery life.
- Battery LED Indicator: An LED indicator will light up when the battery level is low, signaling that it's time to replace the AA battery.
6. Maintenance
6.1. Cleaning
To maintain optimal performance, clean your mouse regularly:
- Use a soft, dry cloth to wipe the surface of the mouse.
- For stubborn dirt, slightly dampen the cloth with water or a mild cleaning solution. Avoid harsh chemicals.
- Do not allow liquids to enter the mouse's internal components.
6.2. Battery Replacement
When the battery indicator lights up, replace the AA battery promptly to ensure uninterrupted use. Refer to section 4.1 for battery installation instructions.
7. Troubleshooting
| Problem |
Possible Cause |
Solution |
| Mouse not responding. |
Low or dead battery. |
Replace the AA battery. |
| Mouse not responding. |
USB receiver not properly connected. |
Ensure the USB receiver is firmly plugged into a working USB port. Try a different USB port. |
| Mouse not responding. |
Mouse is turned off. |
Turn on the mouse using the on/off switch on the underside. |
| Cursor movement is erratic or slow. |
Low DPI setting. |
Press the DPI button to increase cursor speed. |
| Cursor movement is erratic or slow. |
Dirty sensor or unsuitable surface. |
Clean the optical sensor on the underside of the mouse. Use the mouse on a clean, non-reflective surface. |
| Wireless connection issues. |
Interference or distance from receiver. |
Ensure the mouse is within 10 meters of the receiver. Remove any large metal objects between the mouse and receiver. |
8. Specifications
| Feature |
Detail |
| Model Number |
24115 |
| Connectivity |
Wireless (RF 2.4GHz) |
| Wireless Range |
10 meters |
| DPI Settings |
800, 1200, 1600, 1800, 2200 DPI (adjustable) |
| Number of Buttons |
6 (Left, Right, Mid, Forward, Backward, DPI loop) |
| Sensor Type |
Optical |
| Ergonomics |
Ergonomic design with thumb rest and rubber inlay |
| Power Source |
1x AA Battery (included) |
| Dimensions (L x W x H) |
113 mm x 74 mm x 41 mm (4.45 x 2.91 x 0.04 inches) |
| Weight |
100 g (2.65 ounces) |
| Compatible Operating Systems |
Windows 10, 8, 7; Mac OS X 10.15 (Catalina) or higher |
9. Warranty and Support
The Trust Wireless Mouse comes with a 1-year warranty from the date of purchase. This warranty covers defects in materials and workmanship under normal use.
The warranty does not cover:
- Damage caused by accident, abuse, misuse, flood, fire, earthquake, or other external causes.
- Damage caused by operating the product outside the permitted or intended uses described by Trust.
- Damage caused by service (including upgrades and expansions) performed by anyone who is not a representative of Trust or a Trust Authorized Service Provider.
For technical support or warranty claims, please visit the official Trust website or contact their customer service department. Refer to the product packaging or Trust's official website for the most up-to-date contact information.
Online Resources: www.trust.com


